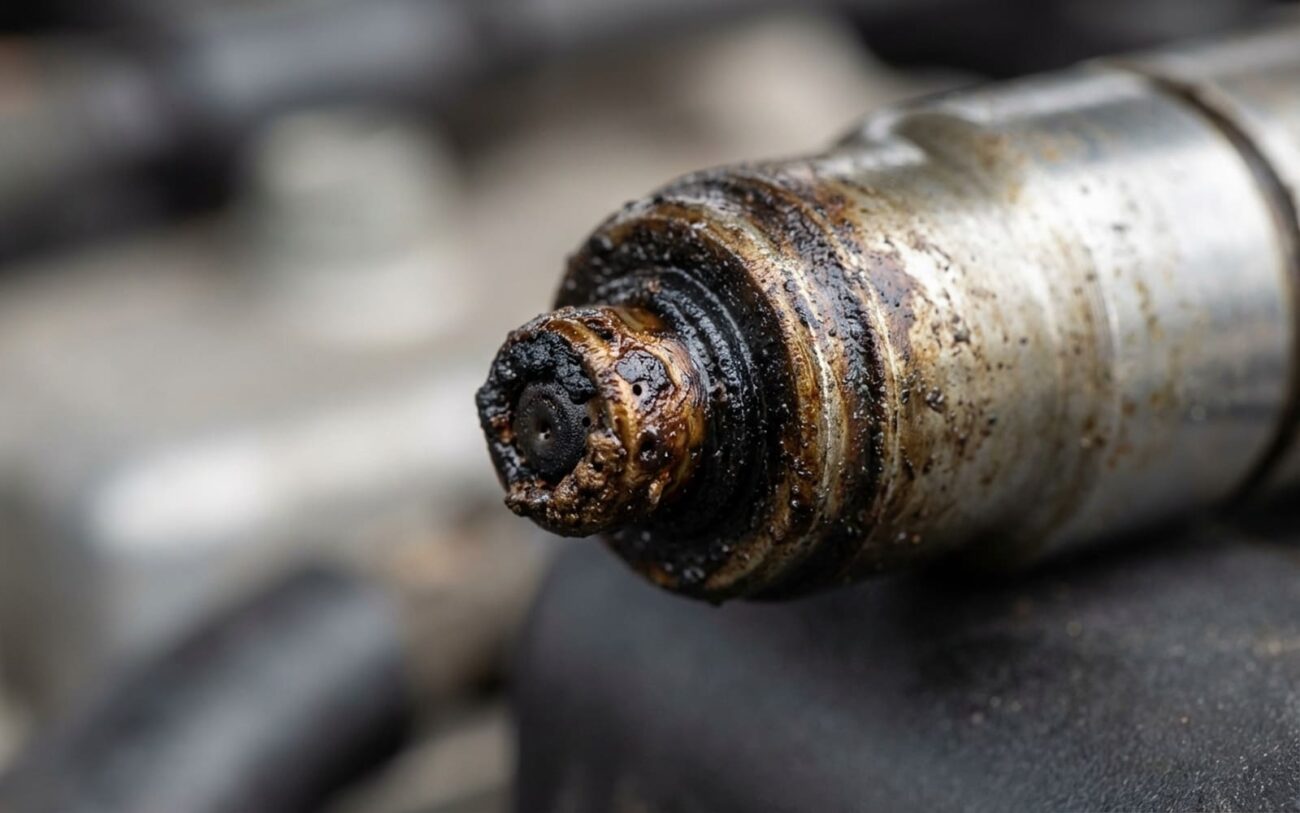
Alright, let’s talk GDI injectors. If you’re dealing with a modern engine, especially a turbo, these things are often the root of your problems, but they’re sneaky. I’ve been turning wrenches for over 25 years, and I’ve seen countless misdiagnoses that cost people a fortune. It’s easy to blame spark plugs or coils, but with direct injection, the fuel delivery is often the real culprit. Here’s how I approach it in my shop.
What You’ll See & How I Track It Down
When a GDI injector starts to go, the signs can be pretty subtle at first. I’ve had cars come in where a customer says, “It just doesn’t feel right,” or “It’s hard to start when it’s cold.” And sure enough, it often points back to an injector. I’ve seen guys replace plugs and coils two or three times before they finally bring it to me, and we find a bad injector. So, what am I looking for?
-
Hard Cold Starts: This is a big one. If the engine cranks over a few extra times before it catches, especially after sitting overnight, I immediately suspect a leaking injector. It’s basically losing fuel pressure overnight.
-
Rough Idle/Misfires: Once it’s running, if you feel a rhythmic shake or a consistent misfire, that’s often tied to one specific cylinder. A clogged injector can cause a lean misfire, while a leaky one can cause a rich misfire.
-
Tailpipe Soot: If you see black, sooty deposits on the tailpipe, that tells me we’re running rich, probably from an injector that’s leaking or not closing properly.
-
Check Engine Light & Codes: Eventually, the computer will catch on. You’ll usually see codes like P0201 (injector circuit malfunction for cylinder 1, the last digit changes for other cylinders) or P0171/P0174 (system too lean). If your fuel trims are consistently off by more than ±10%, especially on one bank, that’s a huge red flag for me.
Fuel dilution in the engine oil
is one of the most serious things I see. If the oil on the dipstick smells strongly of gasoline, or if an oil analysis confirms high fuel content, you’ve got a serious problem. This means an injector is leaking fuel past its seals or through internal wear, and that raw fuel is washing down the cylinder walls into the crankcase. This thins the oil, and you lose lubrication. I’ve seen severely leaking injectors hydro-lock an engine during cranking, bending a connecting rod. And on the flip side, a clogged injector can cause such a lean burn that it melts a piston crown. Neither of those is a cheap fix, which is why catching injector issues early is so critical.
Don’t Guess, Test! My Diagnostic Approach
A lot of things can mimic a bad GDI injector. A weak ignition coil, a fouled spark plug, carbon buildup on intake valves—they all cause misfires. Even a failing high-pressure fuel pump or a faulty fuel rail pressure sensor can throw lean codes that look exactly like an injector problem. So, you can’t just jump to conclusions and start replacing injectors; that’s an expensive mistake I’ve seen too many times.
My approach is always to isolate the issue with data, not guesses. I grab my professional-grade scan tool and dive into live data. I’m looking at fuel trims, misfire counters, and injector pulse widths. If one injector is consistently commanding a longer pulse width than the others, it’s probably clogged. If fuel trims are rich on one cylinder, I’m thinking a leaking injector. I’ll also do a cylinder contribution test if the scanner supports it.
A quick trick: if you suspect an ignition component, swap the coil and plug from the misfiring cylinder to another one. If the misfire follows the components, it’s ignition. If it stays put, then you’re looking at a fuel or mechanical issue. For definitive proof, especially if I suspect internal leakage or a bad spray pattern, that injector needs to come out and go on a bench tester. That’s the only way to truly verify flow rate, atomization, and back-leakage.
Here’s a breakdown of the common symptoms and how I figure out what’s really going on:
| What You’ll Notice | Likely Injector Problem | Common Impostors | How I Confirm It |
|---|---|---|---|
| Hard cold start, misfire on one cylinder | Internal leakage or clogged nozzle | Weak ignition coil, low fuel rail pressure (HPFP or regulator), carboned intake valve |
Use an OEM scan tool for injector leak-down and flow rate tests. If it points to an injector, remove it for bench flow and back-leakage testing. |
| Rough idle with consistent cylinder-specific misfire | Nozzle wear causing poor spray pattern, partial clog | Intake valve carbon deposits, faulty spark plug, vacuum leak |
Injector cut-out and cylinder balance tests with the scan tool. The ultimate verification is a visual inspection of the spray pattern on a test bench. |
| Excessive fuel in engine oil (dilution) | Injector tip seal failure, internal leakage, or stuck open | Excessive idling/short trips, piston ring or cylinder wall wear, PCV system issue |
Get a used oil analysis for fuel percentage. Perform a cylinder leak-down test to rule out rings. Then, pressure-test the fuel rail with all injectors de-energized and monitor for pressure drop. |
Why GDI Injectors Fail (The Nitty-Gritty)
These GDI injectors live a hard life. They’re operating under extreme conditions—fuel pressures often exceed 2,000 psi, and they’re cycling thousands of times a minute. That kind of stress takes its toll. Here are the most common ways I see them fail:
-
Nozzle Coking and Erosion: This is probably the most common. Carbon buildup, often from lower-quality fuel or lots of short trips, can partially block the tiny holes in the injector tip. This messes up the spray pattern, leading to poor atomization and incomplete combustion. Sometimes, the high-velocity fuel stream can actually erode the nozzle over time, especially if there are contaminants in the fuel. I’ve seen certain engine families—like some turbocharged GM Ecotec and Ford EcoBoost engines—be particularly prone to early injector tip cracking because of carbon buildup creating hot spots.
-
Internal Control Valve Wear: Whether it’s a solenoid or piezoelectric injector, the little valve that controls fuel delivery can wear out or get sticky. This throws off the timing and duration of the injection, causing misfires or incorrect fueling. A valve that’s slow to close can lead to post-injection leakage, which is a big contributor to that fuel dilution we talked about.
-
Inlet Filter Clogging: Every injector has a tiny mesh filter at its base. If your fuel system has any debris—maybe from a failing fuel pump or a dirty tank—this screen can get clogged, restricting fuel flow. This is often missed during diagnostics unless you pull the injector and inspect it.
-
Electrical Failure: The solenoid coil itself can degrade over time, developing high resistance or an open circuit. This usually shows up as a P020X code (where X is the cylinder number) and can be confirmed with a simple resistance test using a multimeter.
The takeaway here is that injector failure isn’t always random. It’s often accelerated by preventable factors like fuel quality and driving habits. So, don’t just replace it; understand why it failed.
Fixing It: Cleaning vs. Replacement
Once you’ve definitively diagnosed an injector issue, how you fix it depends on what’s actually wrong. Not every problem means a new injector, but many do. Here’s how I decide:
Professional Ultrasonic Cleaning (for Clogs)
Component Replacement (for Wear or Electrical Issues)
As for fuel additives: a high-quality polyetheramine (PEA)-based cleaner might help with mild carbon deposits, but it won’t fix mechanical wear, internal leaks, or electrical faults. I’ve even seen cases where aggressive cleaners dislodge large chunks of carbon, only to completely plug the injector tip. So, while not useless, I treat them more as a diagnostic aid. Run a cleaner and monitor fuel trims. If they improve, you might have a carbon-related issue. If not, you’re almost certainly looking at a hardware failure.
Post-Repair Validation: Don’t Skip This!
Replacing or cleaning injectors isn’t done until you’ve verified the repair. This is where a lot of DIYers and even some less experienced techs go wrong. First, you must perform the manufacturer’s injector coding or adaptation procedure using a capable scan tool. This tells the ECM about the new injector’s flow characteristics, compensating for minor differences. Then, clear all diagnostic trouble codes (DTCs) and monitor your fuel trims over several drive cycles. A successful repair should bring your long-term fuel trims within ±5% at both idle and under load.
Before you even start the engine, pressurize the fuel system (key on, engine off) and meticulously inspect every injector—top and bottom—for leaks. Even a small seepage at the fuel rail or cylinder head interface can lead to a fire hazard. Watch it for at least two minutes. For extra confidence, I sometimes use a UV dye in the fuel and then inspect with a black light; it really highlights any tiny leaks.
Finally, road test the vehicle under various conditions: cold start, idle, acceleration, and highway cruise. The engine should start quickly, idle smoothly, and show no misfire counters on your scan tool. If issues persist, double-check that adaptation process, verify fuel pressure, and make sure there’s no air trapped in the high-pressure fuel system. The tools you’ll absolutely need for this are a professional scan tool with OEM-level access, a fuel pressure gauge (if your live data isn’t reliable), and possibly a borescope to check for carbon if intake valves were a suspected contributor.
Cost, Risk & When to Walk Away
GDI injector service isn’t cheap, and the repair path you choose has real financial implications. Cleaning is less expensive, but it only works for clogging—not actual internal wear. Replacing just one injector is common, but if one has failed, the others are likely nearing the end of their life, especially on high-mileage engines. Replacing the full set is more predictable long-term but comes with a steep price tag. Here’s what I tell my customers:
| Repair Type | DIY Part Cost (Approx.) | Shop Cost (Approx.) | My Success Rate | Worst Case if It Fails |
|---|---|---|---|---|
| Clean/Flow Test Existing Injectors | $200 (bench service only) | $400–$600 | 60–80% (depends on severity) | You’ll still have poor performance, and you’ll pay for replacement labor again on top of this. |
| Replace One Injector | $300–$600 (part only) | $800–$1,500 | 95%+ (if diagnosed correctly) | Incorrect coding can cause driveability issues or even ECM damage; poor seal installation risks dangerous fuel leaks. |
| Replace Full Set (e.g., V6) | $1,500–$3,000 (parts only) | $2,500–$4,500 | 98%+ (if diagnosed correctly) | Major financial loss if the original diagnosis was wrong, or if other components fail soon after. |
My 40% Rule:
Here’s a rule I’ve used for years, and it’s saved a lot of people from throwing good money after bad: if the estimated repair cost exceeds about 40% of the vehicle’s private-party market value, it’s time to seriously reconsider. That doesn’t mean you should always walk away—but it does mean you need to evaluate the entire health of the car. High-mileage vehicles with aging timing components, risk of bent valves, or oil consumption issues may not be worth a major investment like a full set of GDI injectors. Sometimes, it’s just time to move on.
Prevention & Monitoring: Keep Your GDI Healthy
So, how do you keep from seeing me again for this problem? Prevention is key with GDI engines.
The Single Most Important Thing You Can Do:
Use Top Tier Detergent gasoline every single time you fill up. These fuels contain higher levels of detergents that are specifically designed to help prevent carbon buildup on injector tips and, critically for GDI engines, on the back of your intake valves. Remember, with GDI, fuel doesn’t wash over the intake valves like it does in port-injected engines, so those detergents are your first line of defense.
Beyond that, stick to regular oil changes with the correct viscosity and specification for your vehicle. GDI engines are prone to increased fuel dilution, especially if you do a lot of short trips. Fresh oil helps maintain proper lubrication and protects against wear. If you’re really serious, consider getting an oil analysis every 10,000–15,000 miles, particularly if you drive mostly short distances or notice that fuel smell.
