Your Timing Belt Snapped. Now What?
That sudden, dead silence when your engine just quits mid-drive? Yeah, that’s a gut punch. No warning, no drama, just a dead stop. When a timing belt lets go, the engine dies immediately because the camshafts lose their synchronized dance with the crankshaft. The real question isn’t if the belt broke—we usually know that pretty quick—it’s what kind of collateral damage happened inside the engine.
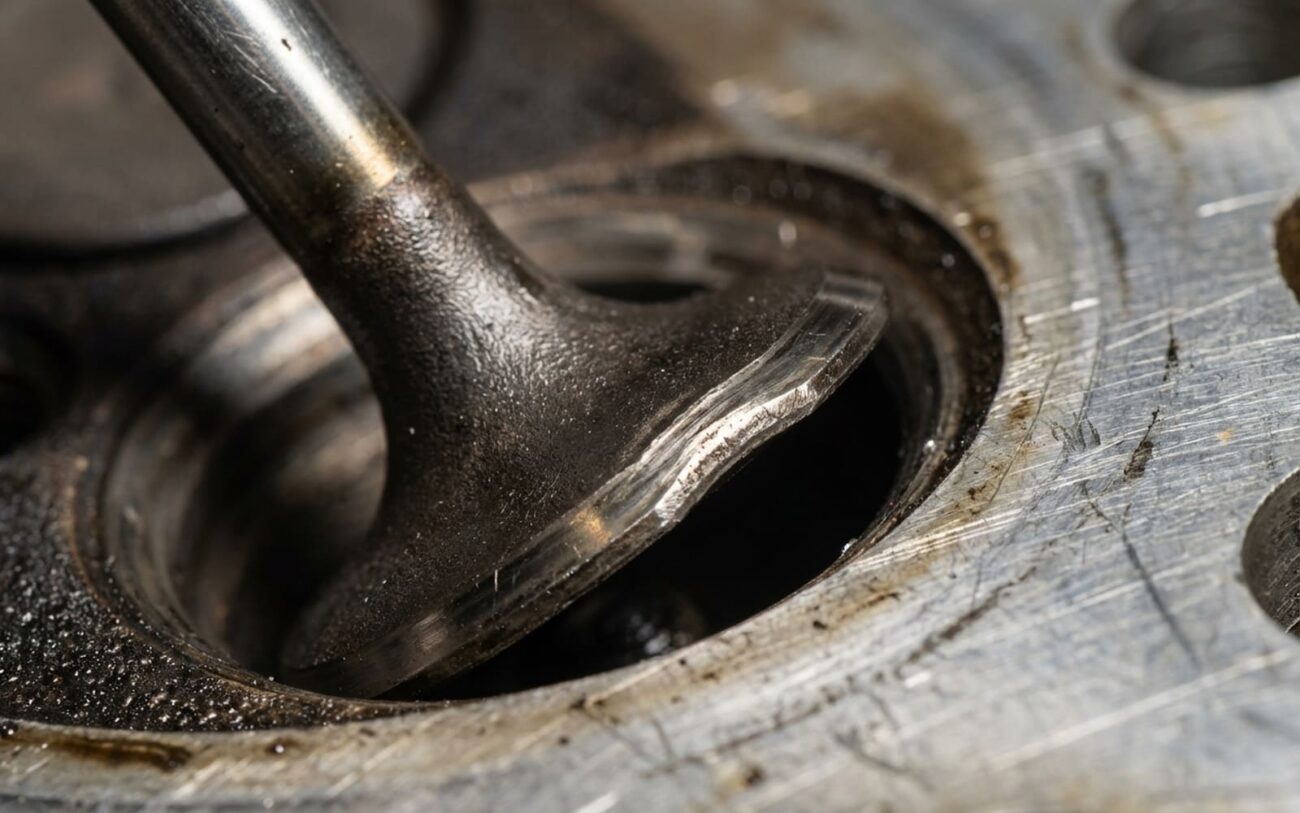
The critical factor here is whether your engine is an interference design. Most modern engines are built this way. What that means is the pistons and valves actually occupy overlapping space within the combustion chamber at different points in their cycle. If that belt snaps and the cam stops turning while the crank keeps spinning, those valves stay open, and the pistons come right up and smash into them. I’ve seen this lead to bent valves, damaged piston crowns, or even cracked cylinder heads. Not every engine is an interference design, thankfully, but knowing which type you have is the very first step in figuring out what comes next.
Recognizing the Symptoms & Why It’s So Bad
The failure is almost always immediate and unmistakable: the engine just dies while you’re driving, and then it won’t restart. When you turn the key, it’ll crank faster than normal, often with a hollow sound, like there’s no compression. Sometimes, just as it lets go, you might hear a brief metallic clatter or crunch from under the valve cover. If you scan for codes, you’ll likely pull a bunch of random misfire codes (P0300, P0301, etc.), or maybe camshaft position sensor codes like P0016 or P0017.
Now, here’s the catch, and I’ve seen this confuse plenty of folks: those same symptoms can show up with other issues. A dead fuel pump can cause a no-start with fast cranking. A broken valve spring or a collapsed lifter can make noise and cause misfires. So, while a broken timing belt is high on my list when I hear these symptoms, you can’t just assume. The repair path changes dramatically depending on what’s actually damaged.
The mechanical reality is pretty straightforward: the timing belt is what keeps the crankshaft and camshaft(s) in perfect sync. When it breaks, the camshaft stops instantly. But the pistons, still connected to the crankshaft, keep moving up and down through their strokes for a few more rotations. In an interference engine, this is where the trouble starts – piston meets valve. The valves get bent, sometimes severely. In the worst cases, that impact can crack pistons, damage valve guides, or even warp the cylinder head itself.
My Diagnostic Approach: What I Check First
Before I even think about tearing into an engine, I need to verify two things: first, that the belt actually failed, and second, if there’s internal damage. Skipping these targeted checks is a surefire way to misdiagnose and waste a lot of time and money. Here’s the sequence I follow:
1. Confirm the Belt Failure
This is usually the easiest part. I’ll grab my basic hand tools and pull the upper timing cover. On most vehicles, this only takes a few minutes. Once that cover’s off, I can see the camshaft sprocket and the belt (or what’s left of it). If the belt’s snapped, frayed, or missing teeth, then we know the primary cause. If it’s still intact, I’ll manually rotate the crankshaft with a wrench and watch the camshaft sprocket. If the crank turns but the cam doesn’t, or the belt just slips, then the belt or its associated components have failed.
2. Check for Internal Engine Damage
This is where we figure out if it’s a simple fix or a major overhaul. This step is non-negotiable for interference engines.
- Cranking Compression Test: This is my go-to. I’ll pull all the spark plugs and thread in a compression gauge. Then, I’ll crank the engine for a few seconds. If I get readings near 0 psi on any cylinder, that’s a pretty strong indicator of bent valves. No compression means the valves aren’t sealing.
- Cylinder Leak-Down Test: If I have a compression gauge, I usually have a leak-down tester too. This gives me more specific information. I’ll bring each cylinder to Top Dead Center (TDC) on its compression stroke and apply shop air. If I hear a significant hiss of air coming from the intake manifold (bad intake valve) or the exhaust pipe (bad exhaust valve), then I know those valves are bent. Anything over 80% leakage on a cylinder after a belt break tells me the valves are toast.
- Borescope Inspection: This is a fantastic tool for visual confirmation. I’ll snake a borescope (a small camera) through the spark plug hole. I can often see direct evidence of piston-to-valve contact—small dents or marks on the piston crown, or even the bent valves themselves. This confirms the damage without having to pull the cylinder head immediately.
You don’t need all these fancy tools, but a compression gauge and a visual inspection of the belt and cam movement will give you a very strong indication. Skip these steps, and you’re just gambling on a repair that could easily cost thousands.
Why Do These Belts Fail Anyway?
Timing belts aren’t supposed to just snap for no reason. They’re designed to last for tens of thousands of miles, but in my experience, three main issues lead to premature failure.
First, and most common, is simply normal wear and fatigue. Those internal fiberglass cords degrade over time from heat, constant tension, and flexing. Most manufacturers recommend replacing them between 60,000 and 100,000 miles. I always tell customers: going beyond that interval is like playing Russian roulette with your engine. The risk increases exponentially.
Second, contamination is a silent killer. Oil or coolant leaking onto the belt—often from a failing camshaft seal, crankshaft seal, or a water pump—will break down the rubber compound. The belt swells, gets sticky, and loses its tensile strength. I’ve pulled belts that looked perfectly fine from the outside, but when I touched them, they just crumbled under light pressure because they were saturated with oil. On some engines, like certain 4-cylinder Toyota and Honda models, I’ve seen cam seal leaks accelerate belt failure more often than not.
Third, accessory failure can take out the belt. A seized tensioner or idler pulley is a classic culprit. The tensioner is critical for maintaining proper belt tension; if its bearing fails, the belt can jump teeth or snap under the sudden shear load. A failing water pump bearing can also drag or lock up, leading to belt damage. Here’s a crucial point: if the water pump or tensioner fails and takes the belt with it, replacing just the belt is a temporary fix at best. It’ll just happen again. Always, always inspect and replace all associated components in the timing system.
Your Repair Paths: From Simple to “Time for a New Car”
Path A: Broken Belt, No Internal Damage (Non-Interference Engine) DIY-FEASIBLE
Path B: Broken Belt with Bent Valves (Interference Engine) Professional Only
Path C: Catastrophic Damage REPLACE
Making Sure the Repair Actually Worked (The Validation)
Once the repair is done, validation is critical. You can’t just start it up and assume everything’s fine; that’s how comebacks happen. Here’s how I confirm the job’s done right:
For Path A (simple belt replacement), I always hand-crank the engine two full revolutions and verify that all timing marks realign exactly. Then, I start it up. It should start smoothly and idle without any ticking, rattling, or hesitation. I’ll always use a scan tool to confirm no cam/crank correlation codes (P0016, P0017) return. If any do, something’s still off.
For Path B (head repair), the testing is more involved. Before the first start, I’ll perform a cylinder leak-down test again—I’m aiming for less than 10% leakage across all cylinders. Then, a compression test; all readings should be within 10% of each other. I also use a combustion leak tester (like a Block Tester) on the coolant reservoir to check for exhaust gases in the cooling system. This tells me if the head gasket sealed properly or if there’s a crack I missed. After the engine runs, I’ll monitor the oil and coolant closely for any signs of mixing. If everything checks out, then I’ll take it for a road test under load to ensure it runs strong and stable.
The Hard Numbers: Cost, Risk, and My “60% Rule”
Let’s talk brass tacks. These repairs can get expensive, fast. Here’s a general breakdown of what I see in my shop:
| Repair Type | DIY Cost (Parts Only) | Shop Cost | Success Rate | Secondary Risk |
|---|---|---|---|---|
| Belt replacement (non-interference) | $200 – $500 | $800 – $1,500 | 99% | Repeated failure if tensioner or idlers are reused, or if timing is off. |
| Head repair for bent valves | $800 – $2,000 | $2,500 – $4,000 | 90–95% | Persistent misfires, oil consumption, coolant in oil, or future head gasket issues if not done meticulously. |
| Engine replacement (used) | $1,500 – $4,000 | $5,000 – $9,000 | 98% | Unknown engine history; potential for hidden wear or issues from the donor vehicle. |
Here’s a rule I’ve developed over the years and always share with my customers: if the repair cost is going to exceed 60% of the vehicle’s private-party value (in “Good” condition, according to something like Kelley Blue Book), it’s often smarter to replace the engine or, frankly, just replace the entire vehicle. Pouring $4,000 into a $5,000 car ties up capital that could go toward something much more reliable. It’s a tough call, but it’s about making a smart financial decision.
How to Make Sure This Never Happens Again
This kind of catastrophic failure is almost always preventable with proper maintenance. The biggest thing? Replace the timing belt—and every component in the system (tensioner, idlers, water pump)—at the manufacturer’s recommended interval. Don’t rely on how the belt looks; that internal cord degradation isn’t visible from the outside. Stick to the mileage or the time limit, whichever comes first.
My Preventative Maintenance Checklist
-
Address any leaks near the timing cover immediately. Oil or coolant contamination is a silent killer of timing belts. I’ve seen good belts turn to mush from a slow cam seal leak.
-
Always use OEM-spec or high-quality aftermarket kits. I’ve learned that cheap tensioners and idlers have a significantly higher failure rate, and they’re just not worth the risk.
-
If you have access, inspect the belt for cracks, missing teeth, or glazing during routine maintenance. Even if it looks okay, remember that internal wear is the real danger.
-
Listen for warning noises. A chirping, squealing, or whining sound from the timing cover area often signals a failing tensioner or idler bearing. Don’t ignore it.
