Alright, let’s talk about something I see all too often: you walk up to your Tesla, pull the handle, and… nothing. Dead as a doornail. No display, no response, just a silent brick. You grab your multimeter, check the 12V battery, and it’s sitting around 10 volts. Now, that’s not just low, that’s critically discharged. And in my 25+ years wrenching on everything from carbureted classics to these electric marvels, that usually screams one thing: a parasitic drain. We call it ‘vampire drain’ sometimes, because something’s sucking the life out of your car while it’s supposed to be sleeping.
A lot of folks think, “It’s an EV, it’s got a huge battery, why does a tiny 12V matter?” Well, that little 12V battery—what Tesla calls the auxiliary or low-voltage (LV) battery—is the heart of all the control systems. It wakes up the car, powers the computers, the sensors, the communication networks. If it dies, the car can’t even activate the big high-voltage contactors. That means your main traction battery is locked out. You’re stranded, and no amount of plugging it in will help until that 12V system is back online.
And here’s the kicker: letting that 12V battery repeatedly drop below 10.5 volts? That’s a death sentence for it. Even if you fix the drain, a battery that’s been through that cycle multiple times is likely toast. It’ll never hold a proper charge again, and you’ll be chasing your tail with intermittent issues.
What I Look For: Symptoms of a Dying 12V
Before your Tesla goes completely silent, it often gives you hints. I’ve heard customers describe the coolant pump or HVAC fan kicking on randomly while the car’s parked, sometimes even in the middle of the night. Or the touchscreen might flicker to life for no apparent reason. You might hear faint clicking noises from the frunk. These aren’t ghosts; these are signs the car’s network is waking up and, more importantly, failing to go back to sleep.
When the 12V battery gets low, you’ll also see all sorts of weird fault codes after a jump — Battery Management System (BMS) faults, gateway timeouts, CAN bus communication errors. But here’s my rule of thumb: those codes are usually symptoms of low voltage, not the cause. Clear them out, fix the drain, and then see what comes back. If they reappear, then you’ve got a deeper issue to chase.
My Diagnostic Flow: Finding the Real Problem
Alright, so you’ve got a dead Tesla. How do we figure out why? This isn’t a guessing game; it’s a methodical process. My goal is always to separate the symptoms from the actual root cause. Is it the battery itself? Is a module refusing to sleep? Is the DC-DC converter not charging? Or is some aftermarket gadget causing trouble? Let’s break down how I approach it.
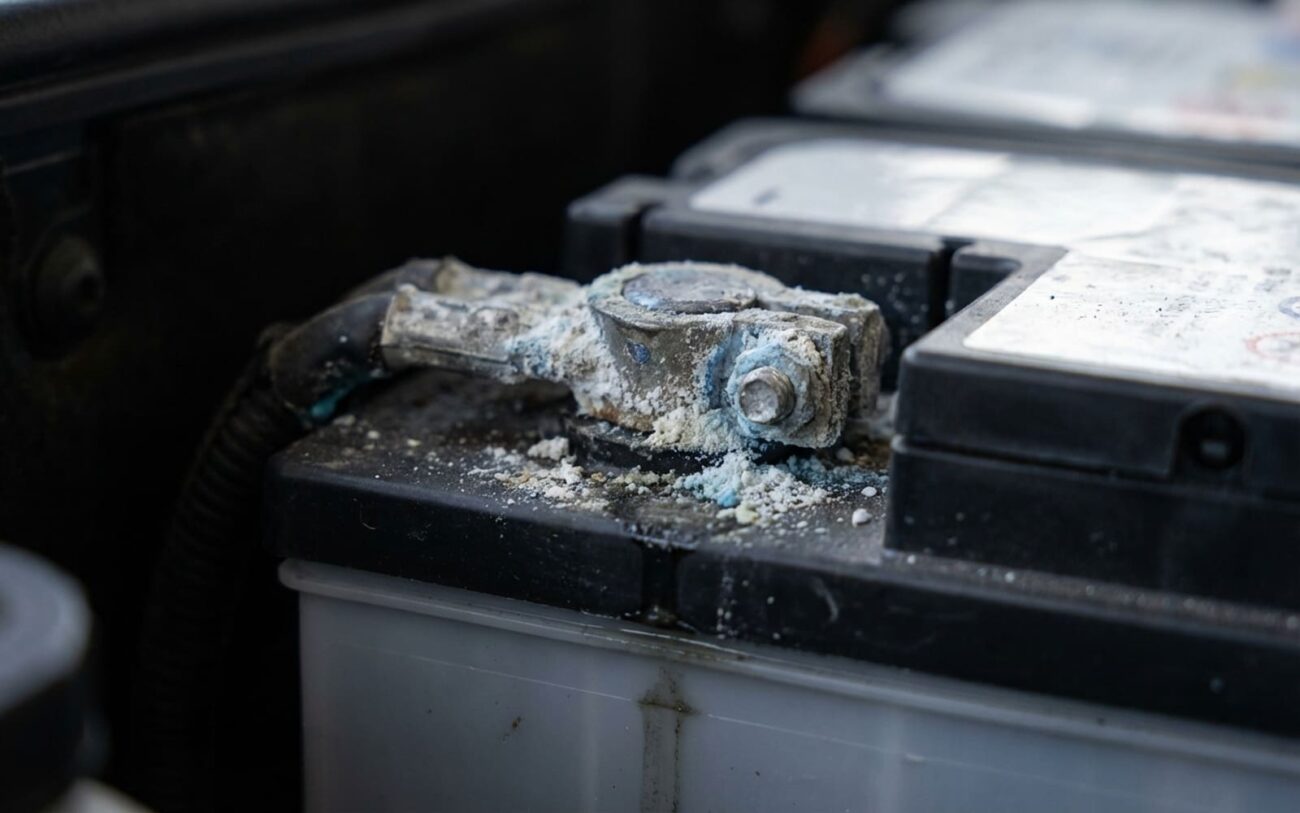
First things first, I always start with the basics. Check the battery terminals—are they clean and tight? Corrosion or a loose connection can cause all sorts of headaches. And before I even pull out my meter, I tell the owner to unplug everything aftermarket. Dashcams, OBD2 dongles, radar detectors, wireless chargers… I’ve seen them all mimic a parasitic drain. Get them out of the car, then we can get serious.
The Definitive Test: Static Current Draw
The absolute best way to confirm a parasitic drain is a static current draw test. You’ll need a good digital multimeter (DMM) that can read milliamps, or even better, a DC amp clamp. I prefer the clamp—it’s safer and faster because you don’t have to break the circuit. Here’s the procedure: park the car, lock it up, and then walk away for at least 30 to 60 minutes. You need to let the car enter its ‘deep sleep’ mode. Once it’s asleep, if you’re using a DMM, you’ll disconnect the negative battery terminal and put your meter in series to measure current. With an amp clamp, you just clamp it around the negative cable. A healthy Tesla in deep sleep should be pulling less than 50 milliamps (mA). If I see anything consistently over 100mA, I know we’ve got a problem.
Checking the Battery’s Health
While I’m doing that, I’m also testing the 12V battery itself. A load test or a conductance test (I prefer conductance for a quick, non-invasive check) will tell me if the battery is actually healthy. A weak battery can definitely mimic a drain because it just can’t hold a charge, but it won’t show that high current draw when the car’s asleep. It’s important to distinguish between a battery that’s being drained and a battery that’s just plain worn out.
This table breaks down the common scenarios I encounter. It helps me quickly narrow down the possibilities and decide on the next steps.
| What You’re Seeing | What I Suspect (Common Causes) | Things That Can Fool You | How I Confirm It |
|---|---|---|---|
| Battery drains to ~10V after sitting a day or two. | A module or system isn’t sleeping, causing excessive parasitic draw (>50mA). | A genuinely failing 12V battery with high internal self-discharge. |
First, a static current draw test with the car fully asleep. Then, a conductance and load test on the 12V battery itself. |
| Voltage drops while driving or shortly after parking. | The HV to 12V DC-DC Converter isn’t charging the 12V system. | A high-voltage system fault preventing the DC-DC converter from activating. |
Monitor 12V battery voltage with the car ON and in READY mode. It should be 13.8–14.7V. Use a scan tool to verify the DC-DC converter is commanding an output. |
| Random activations: screen, fans, pumps kicking on while parked. | A module or the entire network is failing to enter or stay in sleep mode. | An aftermarket accessory (dashcam, OBD2 device, etc.) is waking the car up. |
Unplug all aftermarket devices. Use an OEM-level scan tool to monitor CAN bus activity and see which modules are staying active when they shouldn’t be. |
| Intermittent communication errors, module timeouts, “Service Required” messages. | A faulty CAN bus node (like the Gateway or Telematics Control Unit) or a wiring issue. | Loose ground connections or a damaged wiring harness. |
Scan tool to check individual module status and CAN bus health. If a draw is present, use an amp clamp on individual fuses to isolate the circuit. |
| Voltage drop across battery terminals, erratic electrical behavior. | Corroded or loose 12V battery terminals, or bad ground connections. | A fault within the Power Conversion System (PCS) itself. |
Visually inspect terminals and major ground points (often under the rear seat or in the frunk). Perform a voltage drop test under load (should be less than 0.1V). |
The Right Tools for the Job
Now, you can’t fix what you can’t see, and that means having the right tools. A decent DMM is your starting point for voltage and continuity checks. A DC amp clamp, as I mentioned, is a game-changer for current draw tests – much safer than breaking the circuit. But for anything beyond a simple battery or obvious accessory drain, you’re going to need a proper scan tool. I’m talking about something that can talk to the car’s modules, read their sleep states, and monitor CAN bus activity. Tesla’s own Toolbox is ideal, but some aftermarket tools are getting pretty good. Without that kind of insight, you’re just throwing parts at it, and that gets expensive fast.
Common Culprits: What’s Actually Causing the Drain
After all that testing, when I finally pinpoint the actual problem, it almost always boils down to one of these few common culprits:
1. The 12V Battery Itself
Look, the battery is often the victim of a drain, but sometimes, it’s the actual cause. Internal shorts, sulfation (especially in the older AGM batteries), or just plain old cell degradation can make a battery self-discharge rapidly. If I’ve confirmed there’s zero external draw, and that battery still drops voltage overnight, it’s faulty. This was super common on the older Model S and X with their lead-acid batteries. But don’t think the newer lithium-ion 12V units in the Model 3 and Y are immune – they can fail too, just in different ways.
2. DC-DC Converter Failure
This component is critical. It lives within the Power Conversion System (PCS) and its job is to take the high-voltage DC from the big traction battery and step it down to around 14 volts to charge your 12V system. If this unit goes bad, your 12V battery won’t get recharged while you’re driving. You’ll see the voltage drop even after short trips, and you’ll definitely get that ’12V battery low voltage warning’ on startup. This isn’t a parasitic drain; it’s a charging system failure. The car might not even stay awake long enough for the onboard charger to help.
3. A Module Not Sleeping
This, in my experience, is the most frequent cause of a true parasitic or ‘vampire’ drain. You’ve got dozens of control modules in these cars. If just one of them—say, the Telematics Control Unit (TCU), the Gateway module, or even something as simple as a heater control valve—fails to enter its proper sleep mode, it can keep the entire CAN network awake. That means the car never goes into deep sleep. I’ve seen a faulty coolant valve solenoid keep a Model 3 awake, pulling over 300mA! Tesla’s even put out service bulletins for these kinds of issues, so it’s a known problem, especially on some Model 3 and Y vehicles.
4. Wiring Harness Issues
This one’s less common than a module fault, but it absolutely happens. Chafed or pinched wires, especially in areas that see a lot of movement like the frunk hinges or door jambs, can cause intermittent shorts. A wire rubbing against metal can create a direct path to ground, pulling a significant amount of current. I’ve seen it more often in cars that get a lot of frunk use or have had previous, less-than-stellar service work done.
The Fix: Getting Your Tesla Back on Track
Fixing the problem depends entirely on what we’ve diagnosed. Here’s how to approach each scenario:
Confirmed Faulty 12V Battery DIY-Friendly
Critical Tip:
If the battery is completely dead, you might not be able to open the frunk electronically. There’s a manual release cable hidden behind the front tow eye cover—it’s usually a tight squeeze, but it’s there. Once you’re in, always put the car into Service Mode through the touchscreen before you disconnect that battery. Skipping this step is a rookie mistake; it can trigger a whole cascade of false fault codes that you’ll then have to clear.
Confirmed Parasitic Draw from a Module or Circuit Professional Only
Confirmed Faulty DC-DC Converter Professional Only
Confirmed Wiring Harness Chafe or Short Varies
Post-Repair Validation: How I Confirm the Fix
Alright, you’ve done the work. But don’t pat yourself on the back just yet. In my shop, the job isn’t done until it’s verified. You never assume it’s fixed until you’ve confirmed it. Here’s how I validate each type of repair:
After a 12V battery replacement, I tell the customer to monitor the car for at least 24 hours. Once it’s entered sleep mode, I’ll do another current draw test to confirm it’s under 50mA. The voltage should hold steady above 12.5V after a full day of sitting. If I see it dip below 12.2V, that tells me the battery wasn’t the only problem, or something else is still waking up the car.
For a module repair or replacement, the scan tool is your best friend again. I’ll use it to confirm that all the ECUs are reaching their ‘Suspended’ or ‘Sleep’ state. I’ll also watch the CAN bus activity – it should drop to almost nothing after 15-30 minutes of the car being locked. If any module is still chattering away, you haven’t found the real culprit yet.
After a DC-DC converter replacement, I start the car and immediately check the voltage at the 12V battery terminals. With the car ‘READY’ (not just ON), it should be charging at a steady 13.8–14.7V. Then, I’ll put a load on the system—turn on the headlights, crank the HVAC fan, maybe even the heated seats. The voltage needs to stay stable. If it’s fluctuating wildly or consistently low, that new converter isn’t regulating properly, or there’s another issue in the charging circuit.
For a wiring repair, I’ll always do a continuity test to make sure the connection is solid. If it’s a critical circuit, I’ll use a megger to check the insulation resistance—I want to see over 10 MΩ. And importantly, I’ll do a voltage drop test across the repaired section under a load (say, 5 amps). If I see anything over 0.2V, that repair isn’t good enough; it’s going to cause problems down the road.
The same tools you used to find the problem are the ones you’ll use to confirm the fix: your DMM, DC amp clamp, a good scan tool, and if you’re serious about wiring, an insulation tester (megger).
My Take on Cost & Value
Let’s be real for a minute. Not every repair is worth the money, especially on an older vehicle. As a technician, part of my job is to help owners make smart economic decisions. You’ve got to weigh the cost of the repair against the risk, the labor involved, and the overall value of your car.
| The Repair | DIY Parts Cost (Approx.) | Shop Cost (My Estimate) | Likelihood of Success (If Done Right) | What Happens if it Fails (Risk) |
|---|---|---|---|---|
| 12V Battery Replacement | $100 – $300 | $400 – $600 | 100% (if the battery was the only problem) | Minimal, but you’ll be back to square one with a dead battery. |
| Module Diagnosis & Replacement | N/A (requires specialized tools & coding) | $500 – $2,000+ | 95% (if the correct module is identified) | Misdiagnosis means repeat drain, more battery damage, and wasted money. |
| DC-DC Converter Replacement | N/A (HV safety risk is too high) | $1,000 – $2,500 | 98% (if installed correctly and safely) | Improper high-voltage handling can lead to severe injury or catastrophic system damage. |
| Wiring Harness Repair | $50 (for quality materials) | $500 – $1,500 | 99% (if repaired to OEM standards) | A poor repair can cause intermittent issues, new faults, or even a fire hazard. |
I’ve seen too many owners throw good money after bad, chasing a drain on an older Model S with 150,000 miles, spending upwards of $2,000. At some point, you have to be realistic. If the repair cost starts creeping up towards 25-30% of the car’s current market value, you really need to ask yourself if it’s worth it. Sometimes, it’s just time to let go, or at least consider the long-term economics.
Prevention & Monitoring: Keeping Your Tesla Healthy
A lot of these 12V headaches can be avoided with some simple preventative habits. If you’ve got an older Tesla (generally pre-2018) with a lead-acid 12V battery, mark your calendar: plan on replacing it every 3 to 4 years. These batteries just don’t last as long with all the frequent wake/sleep cycles and shallow charging. A proactive replacement is always cheaper and less stressful than a tow and a dead car.
For early detection, I always recommend owners keep an eye on their 12V battery voltage. Apps like TeslaFi or Tesla Monitor, or even some OBD2 tools, can give you real-time readings. A healthy, sleeping car should be holding 12.4V or higher. If you consistently see it dropping below 12.2V after sitting for a while, that’s your cue to start investigating before you’re stranded.
Be smart about power-hungry features. Sentry Mode, for example, is a big one. It can significantly increase drain, especially in colder weather. If your car is going to sit for days, consider limiting its use. And always keep your car’s software updated. Tesla frequently pushes out updates that address sleep reliability and fix known drain bugs—sometimes that’s all it takes.
Finally, if you’re parking your Tesla for an extended period, a 12V battery maintainer is a good investment. It’s not a fix for a real parasitic drain, but it’ll keep that crucial 12V system topped up and ready to go when you return.
