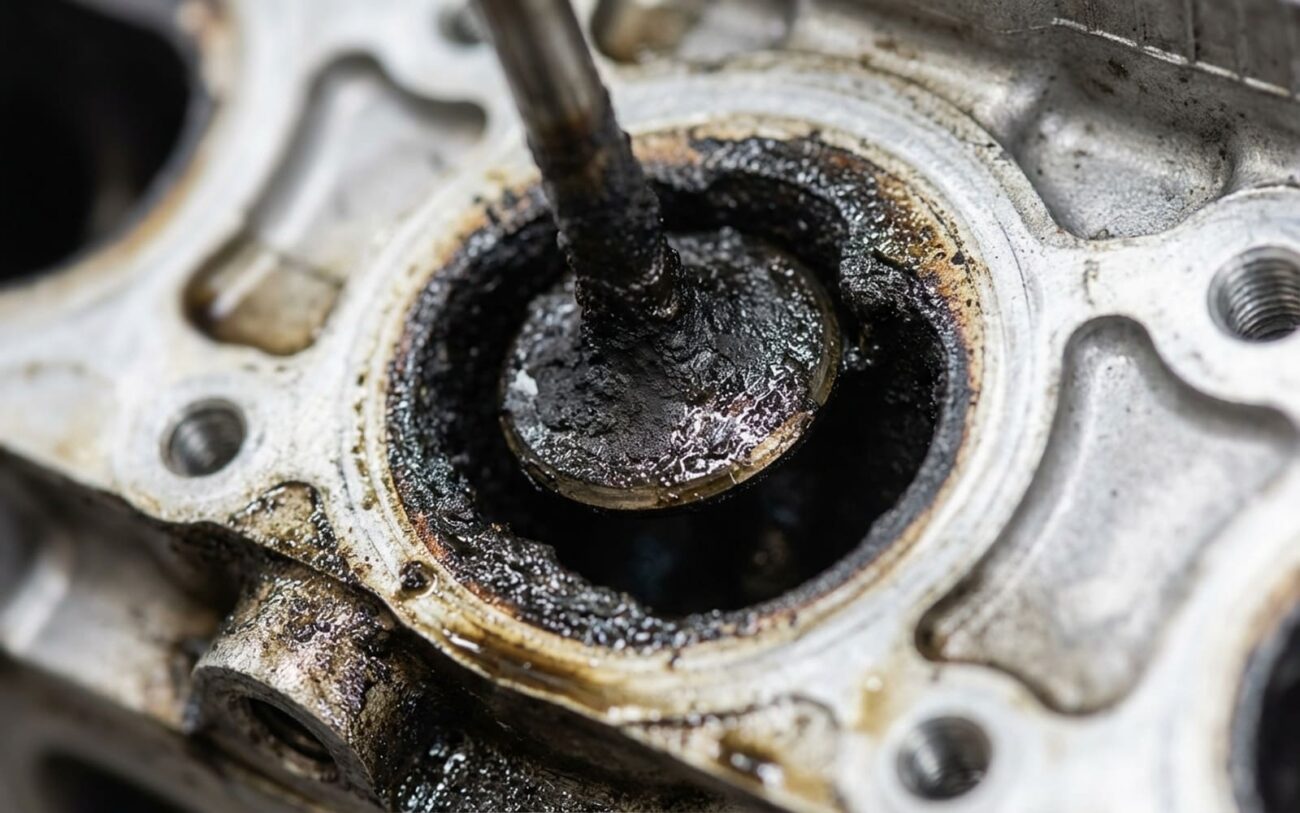
Alright, let’s talk about that blue smoke puffing out of your tailpipe. After 25 years under the hood, I can tell you one thing for sure: it’s never good news. Blue smoke means your engine is burning oil, plain and simple. It’s not just a little annoyance; it’s a clear signal that something inside your engine is worn out and letting oil get into the combustion chamber where it doesn’t belong.
Now, don’t confuse it with white smoke, which is usually steam from coolant leaking (think head gasket or a cracked head, that often smells sweet). And it’s definitely not black smoke, which is unburnt fuel. Pure blue smoke? That’s oil. Period. And the real trick to figuring out what’s going on isn’t just seeing the smoke, it’s paying close attention to when you see it. That timing tells me exactly where the oil is sneaking in.
Decoding the Smoke: When It Happens Matters
I’ve seen too many guys jump to the worst-case scenario without really observing the symptoms. Here’s what the timing of that blue smoke usually means:
The Cold Start Puff: Valve Stem Seals
If you get a puff of blue smoke right after a cold start, and it clears up within 30 to 60 seconds, you’re almost certainly looking at worn valve stem seals. These little rubber or fluoroelastomer seals sit at the top of the valve guides in the cylinder head. Over time, they harden up and lose their elasticity. What happens then? Oil seeps down the valve stems overnight and pools up. When you fire up the engine, that pooled oil gets sucked into the combustion chamber and burns off quickly. Once the engine warms up a bit, thermal expansion can temporarily improve the seal, and the smoke stops. Yes, worn piston rings can also cause some cold smoke, but it tends to linger longer and doesn’t clean up as completely as bad valve seals do.
Smoke on Deceleration: Worn Valve Guides
Now, if you notice blue smoke when you’re decelerating—say, coasting downhill or lifting off the throttle after a good run—that’s a classic sign of worn valve guides. Under those high-vacuum conditions, the engine’s intake stroke can literally suck oil past loose valve guides and right into the combustion chamber. This is pretty common in older overhead-cam engines, especially if they’ve got some miles on them. I’ve seen it a lot on certain Japanese imports from the 90s and early 2000s.
Smoke Under Load: Piston Rings or PCV
If the smoke really kicks in when you’re pushing the engine—like accelerating hard onto the highway, climbing a steep hill, or towing a trailer—the prime suspects are worn piston rings or cylinder wall damage. High cylinder pressure forces oil up past those compromised rings. But here’s a crucial point: a clogged PCV (Positive Crankcase Ventilation) system can mimic this perfectly. A restricted PCV system traps crankcase pressure, which then forces oil vapor into the intake manifold, burning it off. That’s why checking the PCV system—the valve, hoses, and any oil separator—is always a must before you even think about tearing into the engine for rings.
Constant Smoke: A Tired Engine
If you’ve got persistent blue smoke at idle, under acceleration, and pretty much all the time you’re driving? That’s a sign of advanced internal wear. Usually, both valve guides and piston rings are shot. This is what I call a “tired engine.” It’s been working hard for a long time, and its internal components are just worn out. And just to be clear again: this is not a head gasket issue. A blown head gasket leaks coolant, giving you thick white smoke with that distinctive sweet smell. Pure blue smoke means oil. No debate.
STOP! When to Shut Down IMMEDIATELY
Sudden, Massive Blue Smoke with Oil Pressure Loss
If your car suddenly starts dumping huge amounts of blue smoke and that oil pressure warning light flickers or stays on, you’re likely dealing with a broken or holed piston. Oil is being pumped directly into the cylinder at an alarming rate. This starves your connecting rod and main bearings of lubrication. The risk of hydraulic lock—where incompressible oil fills a cylinder—is very real, and that can destroy an engine in seconds. Shut it down. Do not restart. Get it towed to a qualified shop.
Blue Smoke with a Loud Knocking or Rapping
Blue smoke combined with a sharp knocking or metallic rapping sound from the engine block usually means connecting rod or main bearing failure. This can happen from oil dilution (fuel or coolant getting into the oil) or a complete loss of oil control, leading to the oil film breaking down. Bearings can spin, or a rod bolt can fail, and a “thrown rod” can literally punch a hole right through your engine block. Shut it down. Do not restart. Get it towed to a shop.
I’ve seen engines turned into scrap metal because someone ignored these signs. If you’re unsure, it’s always better to be safe than sorry. Call for a tow.
My Diagnostic Roadmap: No Guesswork
Guessing whether it’s valve seals, piston rings, or something else is a waste of your time and money. I’ve seen too many shops skip proper diagnostics, replace parts, and then the customer is back with the same problem after spending thousands. You need to test, not guess. Here’s the diagnostic roadmap I use every time to avoid misdiagnosis:
First, I always start with a visual inspection. Check the PCV valve and hoses (a common culprit that’s easy to overlook). Look for external oil leaks that might be dripping onto hot exhaust components, mimicking smoke. But for internal oil burning, we need to go deeper.
Essential Tools for Pinpointing the Problem
You’ll need a few key tools for this: a compression tester, a leak-down tester, a borescope (a small camera that goes into the cylinder), and a UV dye kit for oil. If you’re not confident doing these tests yourself, find a shop that specializes in engine diagnostics. A proper diagnosis might cost you $100–$200, but it can save you thousands in wrong repairs.
How I Pinpoint the Source:
-
Blue Smoke on Cold Startup:
If it’s that quick puff on a cold start, I’m thinking worn valve stem seals or guides. But to be sure, I’ll do a “wet” and “dry” compression test. First, I’ll test the compression dry. Then, I’ll squirt a small amount of oil (about a tablespoon) into the cylinder through the spark plug hole and re-test. If the compression significantly increases (we’re talking 15% or more) after adding the oil, that tells me the oil is temporarily sealing worn piston rings. If there’s no significant change, it points more strongly to valve stem seals or guides.
-
Blue Smoke Under Heavy Load or Acceleration:
When the smoke comes on under load, it’s usually worn piston rings or cylinder wall damage. But don’t forget that clogged PCV system or even a turbocharger oil seal leak if you have one. To confirm rings or cylinder walls, I go straight for a cylinder leak-down test. This test pressurizes each cylinder with compressed air and measures how much leaks out. If I see over 20% leakage, and I can hear air escaping through the oil filler cap, that definitively points to ring or cylinder wall failure. If the air is escaping through the exhaust, it’s an exhaust valve; through the intake, an intake valve. This test is gold for internal engine health.
-
High Oil Consumption with Little Visible Smoke:
This is a tricky one, but I see it often, especially with modern engines. The oil is burning, but maybe not enough to create a dense plume. It could still be internal wear (rings, guides, or both), but I also consider external oil leaks that might be getting burned off by the exhaust, or a turbocharger seal failure. My approach here is to thoroughly clean the engine, add UV dye to the oil, run the vehicle for a bit, and then inspect it with a black light. This will show any external leaks. For internal issues, I’ll use a borescope to look directly into the cylinders and at the valve stems. I’m checking for excessive carbon buildup on the piston tops, oil residue on the valve stems, or scoring on the cylinder walls. This helps confirm the internal wear even without heavy smoke.
A proper diagnosis may cost $100–$200, but it can save you thousands in wrong repairs. Trust me, I’ve seen it happen.
Why These Engine Parts Fail in the First Place
It’s not always just high mileage, though that’s a big factor. While normal wear over 150,000+ miles is common, many failures are accelerated by poor maintenance or sudden trauma. Here’s what I typically see:
Piston Rings and Cylinder Walls
Worn piston rings and cylinder walls usually stem from a combination of age, inadequate oil changes, and sometimes fuel dilution. Over time, the rings lose their tension and ability to seal against the cylinder wall, especially if sludge builds up and sticks the oil control rings. Using low-quality or incorrect viscosity oil can definitely contribute to this. But the real engine killer? Overheating. A single severe overheat can warp the cylinder head, distort the block deck surface, collapse piston ring lands, or cause the rings to scuff and seize. That’s why any cooling system issue—a failing thermostat, water pump, or radiator—needs immediate attention. I’ve seen too many engines get ruined because someone drove a few extra miles with the temp gauge pegged.
Some engines also have known design weaknesses. For example, certain aluminum-block engines without cast-iron cylinder liners—like some Nissan VQ-series V6s or early Honda K-series engines—have had known issues with cylinder wall porosity or premature scoring, especially if not properly honed during manufacturing. Detonation or pre-ignition (often from running low-octane fuel in an engine that needs premium, especially turbocharged ones) can also crack pistons or damage ring lands pretty quickly.
Valve Stem Seals and Guides
These wear out primarily due to heat cycling and lack of proper lubrication. In turbocharged engines, oil coking in the turbo’s center housing can degrade seals over time, too. They’re just rubber or similar material, and they eventually get hard and brittle. While head gasket failure is a sealing issue, it’s often the result of a warped head or block—problems that usually start with overheating or improper torque procedures during a previous repair.
Your Repair Options, From Easiest to Most Severe
Once you’ve got a definitive diagnosis, here are the paths you can take for repair, ranked by how complex and expensive they usually are.
Replacing Worn Valve Stem Seals Professional-Only for most
Addressing Worn Piston Rings & Cylinder Bore Wear Professional-Only
Repairing Worn Valve Guides Machine Shop Required
About those “quick fixes”: I see a lot of people turn to “high-mileage” oils, seal conditioners, or additives like STP. Some of these might help reduce seepage past worn valve seals by slightly softening the rubber. But I’ll be honest—this is a temporary, last-resort measure. These products can increase sludge buildup in engines with poor maintenance history, and some seal swellers can even cause external leaks if they over-soften seals that were otherwise fine. They do absolutely nothing for worn piston rings or damaged cylinder walls. Think of them as a short-term band-aid, not a repair. They might buy you a few months, but they won’t fix the underlying problem.
How to Know the Repair Actually Worked
You need more than just a quick visual check. A real validation means testing under real-world conditions, and sometimes, a follow-up diagnostic.
For Valve Stem Seal Replacement:
After the car sits overnight, start it cold. There should be zero blue smoke. Not a puff, not a wisp. I also recommend a follow-up leak-down test on all cylinders to ensure no other issues were masked or created during the repair. All cylinders should be consistent and show below 10% leakage.
For a Piston Ring Job:
The real test comes after the break-in period, which is typically 500 to 1,000 miles. During that time, use the recommended break-in oil (if specified) and avoid sustained high RPMs or heavy loads. Afterward, your oil consumption should be well under one quart per 1,000 miles—ideally, almost none. A second leak-down test should show all cylinders below 10% leakage, and consistent across the board. And most importantly, you need to road test the car under the exact conditions that caused the smoke before. If it used to smoke on hard acceleration, get on the highway and floor it a few times. If it passes those tests, you’re good. If not, something’s still wrong—maybe the bores weren’t prepped right, or the rings didn’t seat properly.
The Cost and the Tough Decision
Let’s talk numbers. These are estimates—actual costs vary by region, engine type, and shop rates. These are what I typically see in my area.
| Repair Type | DIY Cost (Parts) | Shop Cost (Est.) | Success Rate | Secondary Risk if Failed |
|---|---|---|---|---|
| Valve stem seals (head on) | $50 – $150 | $800 – $1,500 | High (>90%) | Valve drop during service if air pressure is lost, requiring full head removal. |
| Piston ring replacement (“re-ring”) | $300 – $600 | $2,500 – $4,000 | Moderate (70–80%) | Rapid re-failure if cylinder bores were out of spec and not properly addressed. |
| Engine long-block replacement | $2,000 – $4,000 | $5,000 – $8,000+ | High (>95%) | Failure of ancillary components during install; outcome depends on warranty. |
When properly diagnosed and executed.
My Rule of Thumb:
If the repair cost exceeds about 60% of your car’s current private-party value (check KBB or NADA for that), and it’s not a classic, rare, or emotionally valuable vehicle, it’s really hard to justify financially. In many cases, putting that money toward a more reliable car just makes better long-term sense. It’s a tough call, but sometimes it’s the smartest one.
How to Prevent This and Catch It Early
Prevention comes down to two things: routine maintenance and early detection. It’s not rocket science, but it takes consistency.
My Maintenance Checklist
-
Stick to your oil change intervals. Every 5,000 miles or as recommended by the manufacturer, using the correct viscosity and specification (like 5W-30 or 0W-20). Don’t cheap out on oil.
-
Use Top Tier gasoline. It contains detergents that help prevent carbon buildup, which can stick rings and degrade performance.
-
Fix any cooling system issue immediately. Overheating is one of the leading triggers for internal engine damage. Don’t put it off.
-
Check your oil level weekly. If you’re burning more than a quart every 1,000 miles, investigate. Don’t just keep topping off and ignoring it.
Every few months, have someone follow you or rev the engine while you watch the tailpipe. Look for that first hint of blue smoke on a cold start or under load. And if you’re buying a high-mileage vehicle—or your own is approaching 150,000 miles—consider a compression or leak-down test as part of a pre-purchase or major service inspection. It gives you a clear picture of engine health, so you’re not caught off guard later. It’s cheap insurance, really.
