AC Blowing Warm? First, Let’s Figure Out What’s Really Going On.
Alright, let’s cut to the chase. Your car’s AC is blowing air, but it’s not really cold — maybe just “barely cool.” I’ve seen this a thousand times. The fan’s running, airflow seems decent, and you’ve probably already swapped out the cabin air filter, right? Good. That rules out the easy stuff. Now, we’re usually looking at one of two main suspects: either you’re low on refrigerant, or that evaporator core tucked deep in your dash is giving up the ghost. Knowing the difference isn’t just academic; it saves you time, money, and can prevent you from grenading your compressor.
Quick Hands-On Check: Follow the Lines
Before you even think about grabbing tools, let’s do a quick check under the hood. Find the two aluminum AC lines that run from the system into the firewall, usually on the passenger side. You’ll have a larger-diameter line (that’s the high-pressure side, coming from the condenser) and a smaller, low-pressure line (that’s the suction side, heading back to the accumulator or drier). Get the engine up to operating temperature, crank the AC to max, and carefully feel both lines.
- If that inlet line feels cool, but the outlet line is ice-cold or even frosted, you’ve likely got a blockage. Something’s stopping the refrigerant flow downstream, probably in the evaporator core itself, or at the expansion valve/orifice tube right before it. That frost is a dead giveaway: refrigerant is trying to expand and cool, but it’s getting backed up and freezing inside.
- On the other hand, if both lines are only slightly cool, with not much temperature difference between them, your system is probably undercharged. There just isn’t enough refrigerant circulating to absorb heat effectively.
Either way, once you’ve confirmed these symptoms, turn the AC off immediately. Seriously. Running it like this can starve the compressor of lubrication or cause liquid refrigerant to slug it (which is like trying to compress water). Both scenarios will trash your compressor faster than you can say “new car payment.”
Heed this warning: Continuing to run the AC with these symptoms is a surefire way to destroy your compressor. That’s a much more expensive fix than an evaporator.
Real Diagnosis: Pressure Readings Don’t Lie
Those touch tests give you a good hunch, but they’re just clues. To really nail down what’s happening, you need a manifold gauge set, a digital thermometer, and ideally, a borescope. These are the tools that let you definitively tell the difference between a clogged evaporator, a low charge, a weak compressor, or even just an airflow problem.
The trick is knowing what those pressure readings are telling you. The low-side pressure reflects what’s happening on the suction side and how well the evaporator is doing its job. The high-side pressure gives you insight into the condenser’s efficiency and the overall refrigerant volume. Together, they paint a clear picture – a diagnostic fingerprint, if you will.
| Symptom / Measurement | Points to Evaporator Core? | Common External Mimics | My Go-To Test to Confirm |
|---|---|---|---|
| Both high-side and low-side pressures are abnormally low. | Not usually an evaporator clog. | Low refrigerant charge (most common), slow leak, weak compressor. |
Recover the refrigerant and weigh it. If it’s within 10% of the OEM spec, the charge isn’t your problem. Then I’d be looking for leaks with UV dye or an electronic sniffer.
|
| Low-side pressure abnormally low; high-side pressure normal or slightly low. | Yes, often an internal restriction in the evaporator. | Blocked orifice tube, kinked liquid line, restricted expansion valve (TXV). |
Measure the temperature and pressure drop right across the evaporator. If the air temperature drops more than 10°F or the refrigerant pressure drops over 20 psi from inlet to outlet, you’ve got an internal restriction.
|
| Low-side pressure very low, outlet line frosted; high-side pressure normal. | Severe internal restriction or external airflow blockage (clogged fins). | Stuck-closed TXV, overcharged system (rarely). |
Grab that borescope. Go through the evaporator drain tube or the blower motor opening. If you see visual blockage and you’ve got that pressure differential, it’s an evaporator clog. Internal if the fins look clean, external if they’re caked in crud.
|
| Poor cooling with normal pressures and good airflow from the blower. | External airflow blockage (fins clogged with dirt/mold). | Blend door malfunction, stuck actuator, faulty climate control module. |
Use thermocouple probes: one before the evaporator, one after. If you’re not seeing at least a 15–20°F drop in air temperature across the core, despite normal refrigerant pressures, those fins are fouled and can’t transfer heat.
|
I see this confusion all the time, especially with newer techs. They see low suction pressure and immediately think “leak” or “compressor’s weak.” But if your high-side pressure is stable and you’ve already verified the refrigerant volume is correct, then that restriction is almost certainly in the evaporator circuit. The real proof is measuring that temperature and pressure delta across the component itself. That’s how you avoid replacing parts that are perfectly fine.
Why Evaporators Fail: The Root Causes
When I talk about an evaporator core failure, I mean the problem started there. It’s not just collateral damage from something else. True evaporator-specific failures usually fall into one of three buckets: internal restriction, external airflow blockage, or internal corrosion.
- Internal restriction is almost always caused by debris in the system. Most often, it’s desiccant from a receiver-drier or accumulator that’s ruptured internally. That granular material gets carried by the refrigerant and, like sand in a narrow pipe, it gets trapped in the evaporator’s tiny passages. Once it’s lodged, flow is restricted, cooling drops, and it can even lead to oil starvation for the compressor over time.
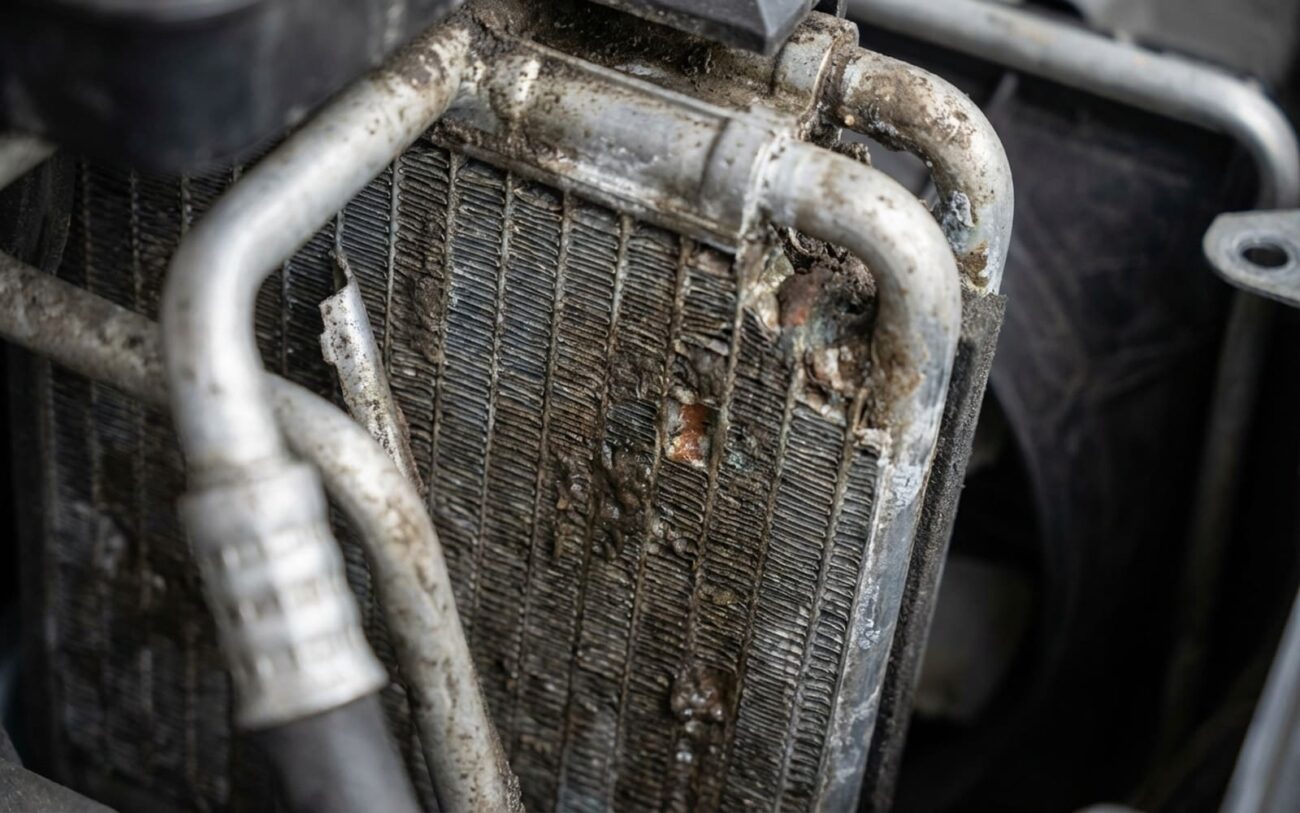
- External blockage is probably the most common issue I see, and it’s often preventable. Over time, dust, pollen, leaves, and other organic matter bypass a dirty or missing cabin air filter and stick to the damp evaporator fins. This buildup acts like an insulating blanket, severely reducing heat transfer. It also creates a perfect breeding ground for mold and bacteria – that’s where that nasty, musty smell comes from. This is an airflow issue, not a refrigerant issue, but it mimics a low charge because your cooling performance just tanks.
- Internal corrosion is less frequent, but it’s definitely real. In some vehicles, especially those with poor HVAC drainage or a leaking heater core, moisture and acidic condensate can get inside and literally eat away at the aluminum tubes from the inside out. I’ve worked on specific models where this became a known pattern, with manufacturers even issuing service bulletins for certain model years. It’s well-documented that some compact, high-efficiency evaporators are more prone to this because they use thinner-walled tubing.
Here’s a critical point I always tell my customers:
Not every evaporator problem means you need a new one. I’ve seen countless external clogs misdiagnosed as internal failures. Sometimes, a thorough cleaning and fixing a clogged drain tube is all it takes to get things working perfectly again, without tearing apart the dash.
That’s why skipping proper diagnostics is such a costly mistake. And just to be clear: a stuck expansion valve, a clogged orifice tube, or a failing compressor are not evaporator core failures. Those are separate components, and they need their own diagnosis. Don’t replace a $500 evaporator because you didn’t check a $30 orifice tube first.
Fixing It: DIY vs. Pro Shop
Some Jobs Are Just for the Pros.
Look, while you might tackle some AC issues yourself, anything involving internal restrictions or replacing the evaporator core itself is not a DIY job for most people. Working on AC systems requires specialized tools, proper safety training, and specific refrigerant handling procedures. There are no safe shortcuts for major component replacement.
External Clog Cleaning DIY Feasible (with caution)
Evaporator Core Replacement Professional Only
-
A new OEM-spec evaporator core. Don’t cheap out here.
-
Replacement of the accumulator or receiver-drier. This is non-negotiable to prevent repeat contamination.
-
The correct type and amount of PAG or POE oil. Check your service manual – usually 1–2 oz added to the new core.
-
A manifold gauge set and a vacuum pump. You must pull a vacuum to less than 500 microns for at least 30 minutes to ensure all moisture is gone.
-
A torque wrench. AC line fittings are delicate; typically 12–18 ft-lbs, but always verify the specific torque for your vehicle.
Temporary Aerosol Cleaning Temporary / Last-Resort
Don’t Skip This: Post-Repair Validation
A repair isn’t finished until you’ve verified it. Skipping this step is just asking for trouble – you might miss a small leak, a blend door fault, or some other hidden issue that’ll undo all your hard work.
For an external cleaning, you should see improved cooling within minutes. Test it on a day that’s at least 70°F, with the engine at about 1,500 RPM. Use a thermocouple to compare the intake air temperature to the center vent output. You want to see a drop of at least 20°F. Also, double-check that both high- and low-side pressures are now within the normal range for the ambient temperature. And that musty odor? It should be gone. If not, you’ve still got mold in there.
For a full evaporator replacement, validation is a bit more involved. First, the system must hold vacuum. After evacuation, close your manifold valves and watch the micron gauge. If it rises less than 100 microns over 5 minutes, you’re probably leak-free. Next, charge the system with the exact refrigerant weight specified by the manufacturer – no guessing. Then, verify your pressures against the OEM charts for the current ambient conditions.
Finally, measure that vent air temperature again. It should be within 10°F of the evaporator outlet pipe temperature. If the air is warmer, check for blend door issues or other airflow restrictions – that’s a common problem after dash work, as HVAC actuators can get bumped or misaligned. If everything checks out, tell the customer to monitor it for the next few days to ensure consistent performance.
The Bottom Line: Cost, Risk, and Making the Call
Let’s be honest: evaporator core replacement is one of the most labor-intensive AC repairs you can do. You’re paying mostly for labor, not parts. That changes how you approach the decision, especially on an older vehicle.
| Repair Type | DIY Cost (Parts + Tools) | Shop Cost (Typical) | My Success Rate Expectation | Secondary Risk if It Fails |
|---|---|---|---|---|
| Evaporator Foam Cleaning | $20–$50 | $150–$300 | 70% for mild external clogs | Water intrusion into blower motor, chemical residue, incomplete cleaning |
| Evaporator Core Replacement | $300–$600 | $1,200–$2,500+ | 95%+ when done right | Leak from improper sealing, contamination from incomplete flush, HVAC airflow issues, electrical damage |
That shop cost reflects 6–8 hours of labor in most vehicles. Some Japanese and European models? Even longer. Here’s how I counsel my customers: if the quoted repair bill is more than 50% of your car’s current market value, you really need to consider the long-term picture. Is the rest of the car solid? Are other major systems aging out? A professional chemical clean might buy you some time. But if reliability is a concern, it might make more sense to put that money towards a different vehicle.
Always consider the vehicle’s overall condition and market value before authorizing major AC repairs. Sometimes, it’s just not worth it.
And remember, recurring AC issues can point to deeper problems – maybe a failing condenser, or chronic moisture getting into the system. If you’ve replaced the drier and you’re still seeing contamination, you might need a full AC system flush and a thorough component inspection.
My Cost-Saving Tip: Find a Specialist
Independent AC specialists often offer evaporator cleaning or replacement services at a lower cost, sometimes 15–30% below dealership pricing on labor. But you absolutely need to verify their experience – this isn’t a job for just any general mechanic. If your car is out of warranty, a qualified independent shop can save you hundreds.
Prevention: Keep That Evaporator Happy
Most evaporator clogs are totally preventable. The best defense is simple: change your cabin air filter on schedule. I tell my customers every 15,000 to 25,000 miles, or more often if you drive in dusty or polluted areas. A clean filter stops most of that debris before it even gets close to the evaporator fins.
Also, make sure your AC drain tube is clear. If it clogs up, water pools in the HVAC case, creating a damp, nasty environment where mold and sludge just love to grow. A quick check under the car – look for a small rubber tube dripping condensate when the AC runs – takes seconds but can prevent a major headache down the road.
Catch It Early, Save Big
-
A faint musty smell when the AC first kicks on? That’s your early warning system. Don’t ignore it.
-
Notice slightly reduced cooling compared to last season? Time to investigate, not just crank the fan higher.
-
A $20 borescope inserted through the drain plug can show you the condition of those fins before the problem gets serious.
-
Catching an external clog early often means a simple foam clean can restore full performance – no dash removal needed.
And if you’re still troubleshooting weak AC or warm air, always rule out the simple stuff first: check the refrigerant level with a pressure test, inspect the condenser for debris, and make sure the compressor clutch is engaging. For more on diagnosing related cooling issues, I’ve got a couple of other articles that might help: Engine Overheating with Normal Coolant Level: Common Causes and Fixes and How to Spot a Radiator Leak: Steam from Under the Hood or Antifreeze Smell?.
