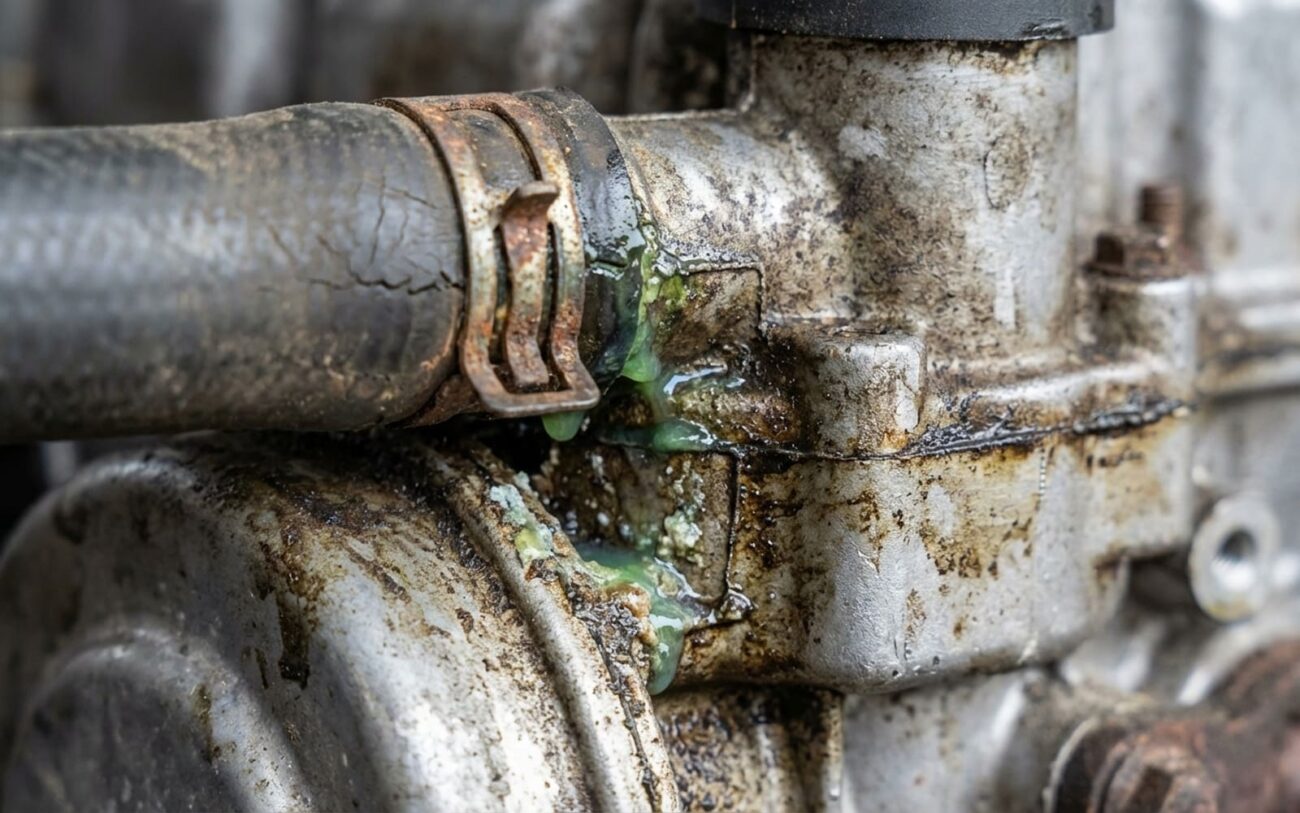
Alright, let’s talk engine blocks. When you’re chasing a disappearing coolant problem, seeing oil puddles, or worse, watching that temperature gauge climb, the mind often jumps straight to the worst-case scenario: a cracked block. I’ve seen plenty of good folks panic over this, but here’s the straight truth from my 25+ years in the shop: in most cases, the block itself isn’t the culprit. More often, it’s something bolted to it—a failed gasket, a rotted hose, a tired radiator, or a worn-out water pump. Those are common, fixable issues.
But if it is the block? Well, that’s a whole different ballgame. You need to catch it early and confirm it definitively, because a misdiagnosis here can cost you thousands. I’m going to walk you through how I approach these problems, how to spot the real signs, and how to avoid throwing good money after bad.
First Things First: External Coolant Leaks
When coolant is weeping out, your first job is to pinpoint the exact source. The clearest indicator of a block-related external leak is coolant coming directly from the engine casting itself—not from a gasket seam, a hose connection, or a bolt. Look for a trail of dried, chalky white or rusty residue. This often traces back to a hairline crack, a porous spot in the casting, or around a freeze plug.
Freeze Plugs: A Common Culprit, But Check the Bore
A leaking freeze plug is pretty common, especially on older iron blocks. If the plug itself is corroded and leaking at its edge, that’s a failed part, and it’s usually a straightforward repair. But here’s the critical distinction: if coolant is seeping from the bore in the block where the plug sits, that tells me the block material itself has corroded or expanded. That’s a much bigger problem, indicating internal block integrity issues, not just a bad plug.
Similarly, if you see moisture coming straight from a casting surface between bolt holes or near cylinder walls, don’t just assume it’s a head gasket. You need to verify that source precisely. Remember, just because coolant is near the block doesn’t mean the block is the source. A leak at the rear of the engine, for instance, could be a failing heater hose fitting, a cracked plastic intake manifold, or a degraded head gasket. You’ve got to be methodical.
My Diagnostic Approach for External Leaks:
- Clean and Dry: First, I’ll thoroughly clean and dry the suspected area of the block. Brake cleaner works great for this, just make sure to let it evaporate completely. We want a perfectly clean surface to observe.
- Pressurize the System: Next, I’ll hook up a cooling system pressure tester and pressurize the system to the manufacturer’s specification—typically between 14 and 18 psi. This mimics the pressure the system sees when the engine is running and often makes small leaks visible.
- Inspect Closely: With a bright LED light and an inspection mirror (a borescope is invaluable for those tight, obscured spots, especially at the back of the engine), I’ll carefully watch for drips. If that drip comes straight from the casting surface—not a gasket line, a bolt, or a hose connection—then it’s likely the block.
Red Alert: Coolant in the Oil (Internal Leaks)
Now, if coolant is getting into the oil, that’s an emergency. You’ll see a milky, mayonnaise-like sludge on the oil cap, the dipstick, or inside the valve cover. This isn’t just a maintenance alert—it’s a flashing red light. Coolant in the oil destroys lubrication, and within minutes of running the engine, you risk spinning a bearing or scoring a crankshaft. The result? A seized engine. If you see this, shut the car off immediately and have it towed. Don’t try to “drive it to the shop.” I’ve seen too many engines completely trashed by just a few miles after this symptom appears.
Common Look-Alikes for Internal Leaks:
Just like external leaks, internal coolant-in-oil symptoms can have other causes. A failed head gasket is the most common, but it could also be a failed oil cooler (especially if it’s an engine oil-to-coolant type), or even transmission fluid mixing with coolant if the transmission cooler is integrated into the radiator. So, before you condemn the block, we need a methodical diagnostic approach.
My Diagnostic Approach for Internal Leaks:
- Cooling System Pressure Test: I’ll start with a pressure test. If the system rapidly loses pressure without any visible external leaks, that’s a strong indicator of an internal failure.
- Combustion Gas Tester (Block Tester): Next, I’ll use a combustion gas tester on the coolant. This tool checks for exhaust gases in the cooling system. If it comes back negative, it helps rule out a typical head gasket blow-by into a cylinder. If it’s positive, it points more towards a head gasket or a crack that goes into the combustion chamber.
- Used Oil Analysis: The definitive proof for coolant in oil is a used oil analysis. I’ll send a sample to a lab. They’ll test for glycol presence, which confirms coolant contamination. This is especially useful if the block tester is inconclusive or you suspect a more subtle internal leak.
Why an Engine Block Fails
The engine block isn’t a wear item like a bearing or a belt. It’s a structural casting, so when it fails, it’s usually due to a defect, extreme stress, or corrosion. Based on what I’ve seen in the shop over the years, there are four main causes:
- Manufacturing Defects: Sometimes, the casting process isn’t perfect. Porosity or sand inclusions can create weak spots that might not leak for years. Eventually, though, constant pressure and heat cycles cause these spots to seep. I’ve noticed some aluminum engines, especially certain V6 designs with thinner walls, are more prone to this.
- Thermal Stress Cracks: A severe overheating event is a killer. It can cause the block to crack, particularly between cylinders or near coolant jackets. Aluminum expands more than cast iron, so these cracks are more common in modern aluminum blocks.
- Electrolytic Corrosion: This is a sneaky one. Using the wrong coolant type, or letting it go too long without a change, can turn the cooling system into a battery. This electrochemical reaction literally eats away at aluminum passages, especially around oil coolers or water pump mounts. I’ve seen blocks with pinholes in coolant galleries after 10 years of neglected OAT (Organic Acid Technology) coolant service. It’s not pretty.
- Impact Damage: A thrown rod or severe detonation can crack the block from the inside out. These are rare, but when they happen, they’re catastrophic.
And let’s be clear: a leaking head gasket is not a block failure. That’s a gasket issue. A leaking oil pan or a rear main seal? Those are seal or gasket problems. When I talk about block failure, I’m talking about the integrity of the engine’s core casting itself.
What Can You Actually Do About It? (Repair Options)
The fix, if there is one, depends entirely on the leak’s location, severity, and how accessible it is. Here’s how I break it down:
Small, Accessible External Leaks (DIY-Feasible)
For a small, external leak—like minor porosity on the front of the block or a standard freeze plug that’s corroded—you might be in luck. This is DIY-FEASIBLE with proper tools. You’ll need a cooling system pressure tester, a brass freeze plug and driver set, gasket scraper, brake cleaner, and an OEM-approved sealant (like GM’s 3634621 for aluminum blocks, for example). Clean the area thoroughly, pressurize to confirm the leak, repair or replace the plug, and let any sealant cure fully.
For a minor seep, I’ve used liquid aluminum-based stop-leak products in a pinch, but I’ll be honest: they’re a TEMPORARY/LAST-RESORT. These things can clog heater cores, radiators, and especially oil coolers. Never, ever use them for internal leaks. They’re a “get-you-home” solution, not a permanent fix, and I generally advise against them unless you’re truly stuck.
Hard-to-Reach External Leaks (Professional-Only)
If the leak is in a hard-to-reach area—say, a rear freeze plug buried behind the transmission or a crack near a motor mount—this jumps straight to PROFESSIONAL-ONLY. You’ll need engine support, a transmission jack, and possibly exhaust disassembly. The repair might still involve replacing a plug or using anaerobic sealant for a bore, but the real cost is labor. In many cases, the book time includes pulling the engine or transmission just to get access. It’s simply not worth fighting it unless you’ve got a lift and a fully equipped shop at your disposal.
Confirmed Internal Leaks or Major Cracks (Non-Repairable)
For any confirmed internal leak—porosity between oil and coolant galleries, or a crack between cylinders—there’s no reliable field repair. This is NON-REPAIRABLE → REPLACE BLOCK OR ENGINE ASSEMBLY. Welding or epoxy sealing production engine blocks has a very poor track record in my experience. The constant heat cycles, pressure, and vibration will almost always break the repair. The only smart long-term options are replacing the block with a remanufactured unit (and reusing your good internals) or installing a complete remanufactured engine.
Making Sure the Fix Actually Worked
Don’t assume it’s fixed just because the coolant level holds for a day or two. You need real validation, and it takes time.
For External Repairs:
My standard is strict: no visible seepage and no pressure loss after three full heat cycles. That means cold start to operating temperature, then let it cool completely back to cold, three times. The system should be pressurized to about 1 psi below the radiator cap rating during these cycles. A UV light and fluorescent coolant dye are your best friends here for catching tiny weeps you’d miss otherwise.
For Internal Repairs (or confirming a block is sound after other repairs):
If you were troubleshooting an internal leak—say, after replacing a head gasket and wanting to confirm the block is sound—the validation is more involved. After about 50 miles of driving, use a coolant hydrocarbon test strip; contamination should be less than 0.1%. The system should also hold pressure for at least 30 minutes. But the real proof comes at 1,000 miles: get a used oil analysis. It should show no glycol or coolant additives. If it does, you’ve still got an internal leak, and it’s likely in the block.
Tools you’ll need for validation: A pressure tester, a combustion gas analyzer, and a lab oil analysis kit.
Cost and Long-Term Outlook
Here’s the reality: fixing a block issue isn’t cheap, but it’s often less than the complete engine replacement most people fear—if you catch it early and it’s a type that can be repaired.
| Repair Type | DIY Cost (Parts) | Shop Cost (Parts & Labor) | Success Rate | Risk if It Fails |
|---|---|---|---|---|
| External Freeze Plug (DIY) | $20 – $50 | $300 – $800 | 95% (if bore is undamaged) | Repeated coolant loss, potential overheating, further block corrosion |
| Block Swap / Engine R&R | $2,000 – $5,000 (parts) | $6,000 – $12,000+ | 98% (with professional install) | Major financial loss; possible collateral damage to other components |
How to Protect Your Engine Block
Prevention is always the best defense. The number one thing you can do? Use the exact coolant specified in your owner’s manual—whether it’s Dex-Cool, OAT, HOAT, or a brand-specific type like Honda Type 2—and always mix it 50/50 with distilled water. The wrong coolant, or mixing types, can cause galvanic corrosion in aluminum blocks that will eat them alive.
And never, ever skip coolant changes. Most modern coolants last 5–7 years, but after that, the corrosion inhibitors break down, the pH drops, and the coolant turns acidic. That’s when the block starts taking a beating.
Make it a habit to inspect the block during every oil change. Look for fresh stains, white crusty deposits, or dampness around freeze plugs, casting seams, and water pump mounts. And never ignore slow coolant loss. If you’re topping off the overflow tank more than once a year, get a pressure test. Small leaks only get worse. Catching one early can save you from a complete engine replacement down the road. For more on overheating that isn’t caused by leaks, check out engine overheating with a normal coolant level.
