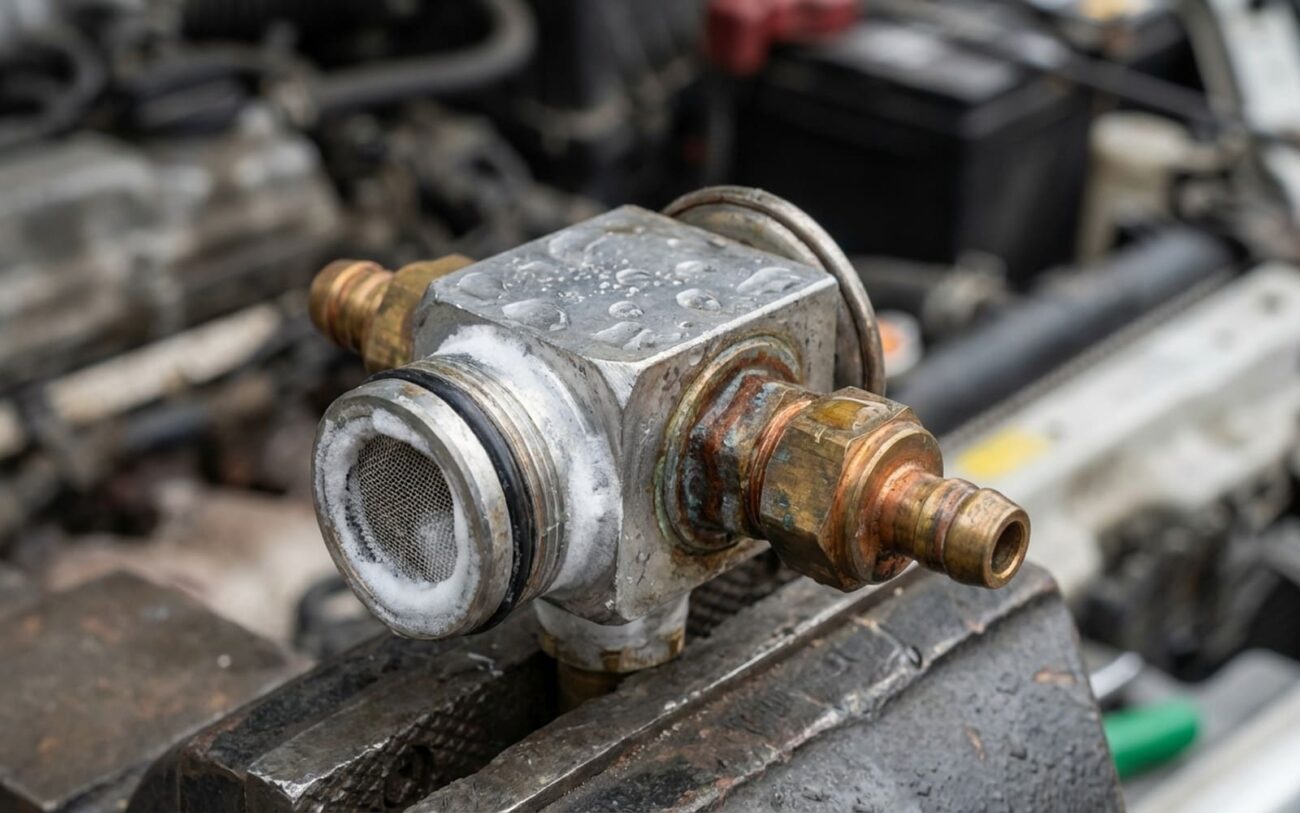
If your car’s AC blows ice-cold for a bit, say 15 or 20 minutes, and then suddenly just… stops cooling, like someone flipped a switch, you’re probably dealing with a frozen thermostatic expansion valve (TXV). I’ve seen this pattern countless times over my 25+ years in the shop. It’s one of the most common causes of intermittent AC failure, especially on humid days.
The Dreaded TXV Freeze-Up: How to Spot It
The classic tell? You get great cold air, then warm air starts blowing from the vents even though the fan’s still cranking. If you listen carefully, you might even hear a gurgling or hissing sound from behind the dash. That’s the refrigerant fighting its way through a partially blocked evaporator core.
What really nails it down is what happens next. If you shut the AC off for about 30 minutes — just long enough for the ice to melt — and then turn it back on, boom! Cold air again. Until the cycle repeats. That on-again, off-again cooling is the absolute hallmark of a TXV freezing up.
Why This Happens (And Why It’s Bad News)
So, why does this happen? The TXV is a precision valve. It meters high-pressure liquid refrigerant into the evaporator through a tiny orifice. When that liquid hits the low-pressure side, it expands and cools rapidly – often well below freezing. If there’s any moisture in your AC system, it freezes solid right at that orifice, slowly building up until it completely blocks the flow.
And let me tell you, ignoring this isn’t just an annoyance; it’s a ticking time bomb for your compressor. When that TXV gets blocked, liquid refrigerant can’t fully evaporate in the evaporator. Instead, it gets sucked back into the compressor as a liquid. Problem is, compressors are built to compress gas, not liquid. When liquid gets in there, it’s called “slugging.” It’s a violent hydraulic shock that can bend connecting rods, crack valves, or just plain grenade the internal bearings. I’ve seen compressors come out looking like someone shook a can of ball bearings inside them. What could have been a few hundred dollar repair suddenly jumps to well over a thousand. Catching a TXV freeze-up early isn’t just about staying cool; it’s about saving your wallet from a much, much bigger hit.
Diagnosing It Right: My Go-To Tests
Now, intermittent cooling isn’t always a frozen TXV. A failing evaporator temperature sensor, a clogged receiver-drier, or even just a low refrigerant charge can all act pretty similar. That’s why you can’t just guess and throw parts at it. Proper diagnosis with a good set of manifold gauges and a methodical approach is absolutely essential. I’ve seen too many guys replace a TXV only to have the car come right back because they missed the real problem.
The “Melt Test”
This is my number one way to confirm a TXV freeze-up. When the cooling stops, switch off the AC compressor, but leave the blower fan running on high heat for about 10 to 15 minutes. The engine’s heat will warm up the evaporator housing and melt any ice around the TXV. If you restart the AC and the cold air comes back immediately, you’ve just confirmed it: you had a transient restriction caused by ice, not a mechanical failure.
What the Gauges Tell Me
While the system is acting up – meaning, no cold air – hook up your manifold gauges. With a frozen TXV, you’ll typically see very low suction (low-side) pressure, often dipping below 10 psi. That’s because the ice is blocking the refrigerant flow. The high-side pressure might also be lower than normal due to the reduced circulation. Once the system thaws out and the cold air returns, those pressures should normalize: usually around 30-40 psi on the low side and 180-220 psi on the high side, assuming it’s about 80°F outside. Keep in mind, these numbers can vary a bit depending on the specific vehicle.
| Symptom | What It Points To (TXV) | Other Common Culprits | How I Confirm It |
|---|---|---|---|
| Loss of cooling, very low suction pressure, warm vent air after 15-20 min. | Ice forming at the TXV’s metering orifice, blocking refrigerant flow. | Clogged receiver-drier, faulty evaporator temperature sensor, low refrigerant charge. |
Melt Test: Turn AC off, run blower on high heat for 10–15 min. If cooling returns immediately, ice blockage is confirmed. Watch your gauges: expect very low suction pressure (<10 psi) during the failure, then it should normalize after thawing. |
| System pressures don’t equalize after shutdown. | Ice physically blocking refrigerant flow, preventing pressure balance. | Compressor discharge valve failure, severe restriction in a high-side line. |
With the engine off, monitor gauges for 5-10 min. If high and low pressures stay separated, there’s a blockage. Feel for localized cold spots at the TXV or filter-drier. |
Remember, a good diagnosis saves money. Don’t just swap parts based on a hunch.
Where Does the Moisture Come From Anyway?
Alright, so we know ice forms at the TXV. But where does the moisture come from in a supposedly sealed system? Almost every time, it’s introduced during a previous repair. Think about it: every time the AC system gets opened up – whether for a new compressor, condenser, or even just a hose – the internal components are exposed to humid air.
Your system has a receiver-drier (or an accumulator on some setups) that contains a desiccant bag. Its job is to absorb any moisture that gets in. But here’s the kicker: that desiccant has a limited capacity, and it’s a one-time-use component. Once it’s exposed to air, it starts absorbing moisture, and its lifespan begins to tick down. If a tech doesn’t replace the drier after opening the system, or if the system is left open to the atmosphere for too long during service, that moisture stays in there. And eventually, it finds its way to the coldest spot – the TXV – and freezes.
Less common sources include slow leaks that can actually draw humid air into the system during off-cycles, especially if you live in a really humid climate. Or, sometimes, it’s just bad refrigerant from a questionable source that’s already contaminated with moisture. In rare cases, manufacturing debris or internal corrosion in the TXV itself can give ice crystals something to grab onto, but moisture is always the primary culprit.
It’s important not to confuse this with a frozen evaporator core caused by poor airflow – like a weak blower motor or a completely plugged cabin air filter. In those cases, the ice forms on the evaporator fins, not at the TXV orifice. A clogged receiver-drier can also restrict flow, but that’s a mechanical blockage, not necessarily ice at the TXV. Though, a failed drier is what allows the moisture to circulate and cause the TXV to freeze in the first place.
The Fix: No Shortcuts Here
Once you’ve confirmed that TXV ice blockage, there’s only one permanent solution: you have to get all the moisture out of that system and replace any components that can’t be cleaned. And let me be clear, this is not a DIY job for most folks. You’re dealing with refrigerants that require EPA Section 609 certification to handle, and the specialized tools – a recovery machine, a proper vacuum pump, a micron gauge, and a calibrated scale – are expensive and absolutely essential.
Here’s the process I follow, every single time:
- First, I recover all the refrigerant using a certified recovery/recycle machine. You can’t just vent it to the atmosphere; that’s illegal and bad for the environment.
- Then, I replace the TXV. I always recommend using an OEM-specified unit. Aftermarket valves sometimes have slightly different flow characteristics, and you don’t want to introduce new problems.
- This next step is non-negotiable: replace the receiver-drier or accumulator. I don’t care if it was replaced last year; once the system is opened, that desiccant bag is exposed to air and its capacity is compromised. It’s a one-and-done component.
- If there’s any sign of contamination, like metal debris from a failed compressor, I’ll flush the system. But you have to be careful not to over-flush aluminum components; they can get damaged.
- Now for the crucial part: evacuating the system. I pull a deep vacuum, down to at least 500 microns, and let it hold for a minimum of 30 minutes. This boils off any remaining moisture. If it doesn’t hold vacuum, you’ve either got a leak somewhere or still too much moisture.
- Finally, I recharge the system with the exact factory charge of refrigerant (whether it’s R134a or R1234yf) and the correct type and amount of PAG or POE oil. Getting the charge exactly right is key to proper performance.
You’ll see products out there – “moisture-removing additives” or “stop-leak” chemicals – that claim to dry out a wet AC system. Look, I consider these last-resort, temporary measures at best. They might absorb a tiny bit of moisture, but they won’t get enough out to prevent future freeze-ups. Worse, they can coat the inside of your evaporator, making it less efficient, or contaminate a shop’s recovery equipment. I’ve seen too many systems “treated” this way come back months later with a completely grenaded compressor. The risk just isn’t worth the perceived savings.
After the Repair: Proving It’s Done Right
Once everything’s buttoned up, you can’t just fire up the AC and call it a day. Validation is absolutely critical. The first thing I do is re-verify the vacuum. The system needs to pull down to below 500 microns and hold that level for at least 30 minutes. If that micron reading starts creeping up, you’ve either got a leak somewhere or there’s still residual moisture boiling off – and you are definitely not done yet.
After a successful vacuum and recharge, I perform a full performance test. On a day that’s around 80°F or warmer, I’ll run the engine at about 1500 RPM, with the AC on max cold and the blower on high. The center vent temperature should stabilize between 35°F and 45°F. Use a proper thermocouple for this; don’t just wave an infrared gun at it or rely on your hand. Accuracy matters here.
While it’s running, keep those manifold gauges hooked up. The low-side pressure should be stable and high enough to keep the evaporator above freezing – typically 25-35 psi, though it can vary with humidity. If that pressure drops too low, you could still be freezing up the evaporator, which means something isn’t quite right with the airflow, the charge level, or even the new TXV. A stable high-side reading (180-250 psi) confirms your condenser is doing its job and the refrigerant charge is correct.
If all those checks pass, I’ll run the system for at least 30 minutes, sometimes longer, just to be sure there’s no recurrence of that intermittent cooling loss. That’s your real proof that the job was done right.
What It Costs & Why It’s Worth It
Let’s talk money, because that’s always a big factor. Fixing a TXV freeze-up isn’t cheap, but I promise you, it’s almost always less costly than ignoring it. Here’s a realistic breakdown of what you’re looking at:
| Repair Type | DIY Cost | Shop Cost | Success Rate | Secondary Risk if Failed |
|---|---|---|---|---|
| Full professional repair (evacuate, replace TXV & drier, recharge) | Not feasible without EPA cert and $2000+ in specialized equipment. | $500 – $1200 (parts and labor) | >95% if diagnosed correctly and system is properly evacuated. | Incorrect oil charge or residual moisture may lead to repeat failure or compressor damage. |
| Temporary additive use | $20 – $50 | N/A (reputable shops won’t install these – and for good reason). | <30% for a permanent fix. | Additive can reduce heat transfer, coat internal components, and significantly increase risk of future compressor failure. |
Shop costs can vary quite a bit depending on your vehicle. Some TXVs are buried deep, requiring a partial or full dash removal, which obviously adds to the labor bill. But even at the higher end, say $1,200, it’s almost always a smarter investment than risking a $1,500+ compressor job down the road. I’ve seen it too many times where a customer tries to cheap out, the compressor dies, and suddenly they’re looking at a $2,000+ system overhaul because the failed compressor sent debris through the condenser and lines. It just snowballs.
Of course, if you’ve got an older, low-value car, you have to weigh the repair cost against the vehicle’s overall worth. But understand the risks of cutting corners.
Keeping It From Happening Again
Preventing a TXV from freezing up really boils down to one simple thing: keeping moisture out of your AC system. Period. This means a few critical things:
- Always replace the receiver-drier or accumulator whenever the AC system is opened up. I don’t care if it’s just for a hose replacement; that desiccant bag inside is a single-use item. Once it’s exposed to air, it’s compromised, and it won’t protect your system like it should.
- Choose your shop wisely. Make sure any technician working on your AC uses proper procedures: quick connections, clean hoses, and a good vacuum pump with a micron gauge. A system left open to the humid air for more than 15 minutes without protection is just asking for trouble.
- Steer clear of those “top-off” cans. You know, the ones with dye or sealant? They often contain contaminants, and they give you a false sense of security. They’re not a fix, and they can mess up your system and a shop’s recovery equipment.
For early detection, especially if you live in a humid climate, pay attention to how your AC is performing. If you have access to gauges, an abnormally low or wildly fluctuating low-side pressure on a humid day could be the first sign of moisture-induced ice forming. Some newer vehicles even log evaporator temperature data via OBD2, which can be a useful diagnostic clue if you have a capable scan tool.
Manufacturers are well aware of this issue. I’ve seen service bulletins, especially for certain models in humid regions, that specifically recommend vacuum decay testing before replacing components. For instance, some Chrysler and GM models had recurring intermittent cooling problems that were eventually traced back to moisture getting in through improperly sealed service ports. The real fix wasn’t a new TXV; it was better sealing and a thorough evacuation. The moral of the story? Diagnosis always saves money in the long run.
