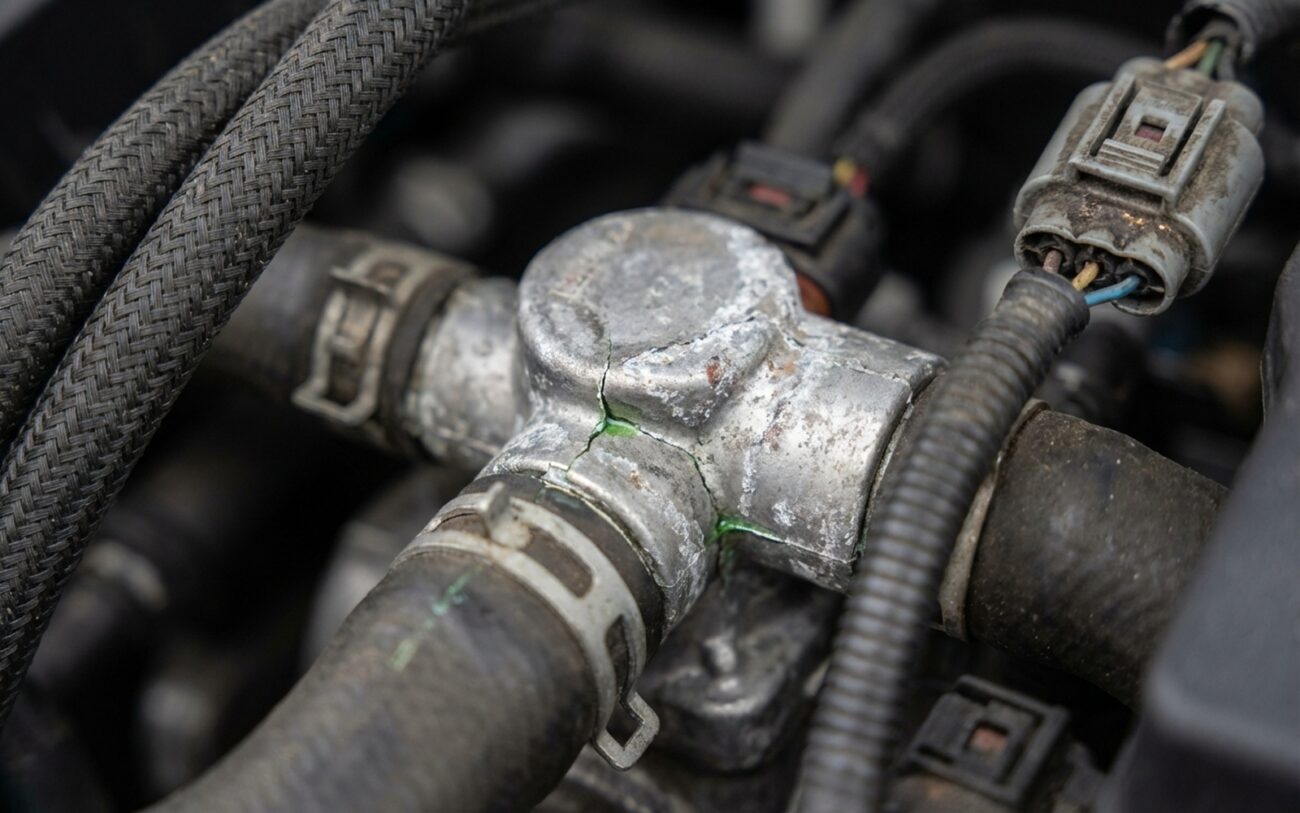
Heat Pump Trouble in Your EV? Let’s Talk.
So, your Hyundai Ioniq 5, VW ID.4, or whatever modern EV you’re driving isn’t keeping you warm when the mercury drops, huh? You’re not alone, and you’re definitely not imagining it. I’ve been turning wrenches for over 25 years, and in the last few, I’ve seen dozens of these EV heat pump systems come through my bay. They’re a critical part of your car’s thermal management, not just a comfort feature. When they underperform, you lose heat, and more importantly, you lose range. I’ve got a pretty clear picture of how these things act up and what it takes to fix ’em right. Let’s cut through the noise and get straight to what you need to know.
Is It Really the Heat Pump, or Something Else?
Before we jump to conclusions and start talking about big repairs, we need to figure out if it’s truly the heat pump or just another HVAC problem mimicking it. The key here is usually the refrigerant circuit’s inability to move heat around like it should.
The most telling sign I see is weak or no heat in the cabin when it’s cold outside—especially below 40°F. And this is with a fully charged battery and no major warning lights screaming at you. See, your heat pump is designed to pull what little heat there is from the cold outside air and bring it inside. When it can’t, the car defaults to its backup, the PTC (Positive Temperature Coefficient) heater. That PTC heater? It’s basically a big electric toaster oven, and it sucks power straight from your main high-voltage battery.
Here’s a trick: if you crank the temperature knob all the way up and suddenly get hot air, that’s almost certainly the PTC heater kicking in. That’s your clue the heat pump isn’t doing its job. You might also see some HVAC-related fault codes on a scan tool, usually pointing to refrigerant pressure, temperature sensors, or compressor control issues.
And the real-world impact? Running on that PTC heater alone can knock 30% or more off your winter driving range. On platforms like the Ioniq 5 and ID.4, the heat pump also helps precondition the battery for fast charging. A dead heat pump means slower DC charging in cold weather, adding insult to injury.
My Approach to Diagnosis: No Guesswork
Diagnosing these heat pump issues isn’t about swapping parts until something works. That’s a quick way to empty your wallet. This is a high-voltage, high-precision refrigerant system that uses R1234yf, so you can’t just wing it. In my shop, we start with the right tools: an OEM-level scan tool (not a generic code reader), a manifold gauge set rated for R1234yf, and a good multimeter. A thermal imaging camera can be super helpful, but it’s not strictly mandatory.
The whole point is to figure out if the problem is actually inside the refrigerant circuit or if it’s something external that just looks like a heat pump problem—things like a bad PTC heater, a stuck blend door, or a flaky control module. I see misdiagnosis all the time when shops skip the proper data analysis and jump straight to expensive component replacements.
| Symptom | Likely in Heat Pump Circuit | Common External Mimics | How I Confirm It |
|---|---|---|---|
| No heat, A/C works fine | Reversing valve stuck in cooling mode, internal compressor failure | PTC heater failure, HVAC blend door actuator fault |
I use the scan tool to command the reversing valve to switch modes and watch the refrigerant pressures. A thermal camera can show temperature changes across the valve, telling me if it’s actually shifting flow. If it doesn’t move, it’s either stuck or electrically dead.
|
| Insufficient heating, takes forever to warm up | Refrigerant undercharge, internal compressor shaft seal leak, clogged TXV | Blocked cabin air filter, low coolant in the PTC loop, faulty cabin temp sensor |
Connect my gauges and compare high-side and low-side pressures to the OEM specs for the current ambient temperature. Low suction pressure and high discharge pressure usually point to an undercharge. If both pressures are consistently low, I’m thinking restriction or a weak compressor.
|
| HVAC error codes showing up | Failed refrigerant pressure or temperature sensor, compressor control fault | Wiring harness chafing, corroded connectors, poor ground, control module fault |
I’ll check sensor resistance and reference voltage right at the connector, using the factory wiring diagram. Compare what I get to known-good values. If the signal is erratic or missing, I’m checking the harness and connectors thoroughly before even thinking about replacing a sensor.
|
| Poor heating efficiency (even if some heat is present) | Failed or clogged thermal expansion valve (TXV), partial restriction | Faulty cabin or evaporator temperature sensor, software calibration issue |
This one requires measuring superheat (at the compressor inlet) and subcooling (at the condenser outlet) using my service port data. If those values are outside the OEM ranges, it tells me the refrigerant isn’t metering correctly, which usually points to a TXV problem.
|
One thing I see often that gets overlooked: low 12V battery voltage. The heat pump control module, like most modern vehicle modules, needs stable power. If that 12V system is weak, modules can reset, throw phantom codes, or just plain fail to communicate. It’s always worth checking your 12V battery’s health before you dive deep into refrigerant repairs. I’ve seen it save a lot of headaches.
What Actually Breaks Inside These Heat Pumps
When we talk about a “heat pump failure,” we’re usually pointing fingers at one of three main components: the compressor, the reversing valve, or the thermal expansion valve (TXV). These are all sealed, integrated parts of the refrigerant loop, and for the most part, you can’t service them individually in the field.
- Reversing valve: This is a solenoid-operated valve that literally reverses the flow of refrigerant to switch between heating and cooling. Over time, internal wear or an electrical coil failure can cause it to stick—often in cooling mode. If it won’t shift, your system can’t heat, even if everything else is working perfectly.
- Compressor: Most EVs use a variable-speed scroll compressor, often with its own internal inverter. Failures can come from the motor burning out, the inverter failing, or refrigerant starvation due to a slow leak. I often see a slow leak past the shaft seal, which goes unnoticed until the system’s performance really drops off.
- Thermal expansion valve (TXV): This little metering device controls how much refrigerant flows into the evaporator. Debris, moisture, or even just old, broken-down oil can clog it or cause it to stick. When that happens, you get poor heat transfer and a very inefficient system.
And here’s something many owners don’t realize: sometimes, it’s not hardware at all. Software can mimic a hardware failure. For example, some early Hyundai Ioniq 5 models had a known calibration issue in the heat pump control logic. Owners were complaining about insufficient heating in cold weather, and a simple dealer software update resolved it—no parts needed. That’s why a full diagnostic with real scan tool data is absolutely essential. Don’t let anyone replace parts until they’ve ruled out a control issue.
Lastly, just to be clear: a failed PTC heater or a stuck blend door is NOT a heat pump failure. Those are separate systems that affect cabin temperature but don’t involve the refrigerant circuit. Mixing them up leads to wasted time and money.
Your Repair Options: From Simple to Major
This is Professional Territory. Period.
Working on a high-voltage refrigerant system is not a DIY job. You need specialized tools, HV safety training, and proper PPE—including Class 0 insulated gloves rated for 1,000V DC. There are no safe shortcuts here. Don’t even think about it.
External Leak Repair Professional Only
Line Fitting or O-ring Replacement Professional Only
Full Heat Pump Assembly Replacement Professional Only
- Replacing the receiver-drier (always, no exceptions—moisture is the enemy of these systems).
- Adding the correct type and exact amount of PAG or POE oil, strictly following OEM specifications.
- Weighing in the precise charge of R1234yf refrigerant.
- Evacuating the system to 500 microns or better, and holding that vacuum for at least 30 minutes to boil off any moisture.
Get the oil or the charge wrong, and that brand-new compressor could fail in a matter of weeks. I’ve seen it happen more times than I care to count.
Now, about stop-leak additives: yeah, there are some OEM-approved sealants for R1234yf systems, and they can work for minor seeps at O-rings. But I’ve also seen them clog TXVs and filter driers, turning what might have been a $200 leak fix into a $3,000 heat pump replacement. I only recommend them as a very short-term bridge to a proper repair—and only if you’ve confirmed the leak is minor and external.
Making Sure the Fix Actually Worked
For me, a proper repair isn’t done just when the system is charged. It’s done when it’s thoroughly verified. Here’s how we validate the work in my shop:
My Validation Checklist
-
For leak repairs: After evacuation, I close the vacuum pump valve and let the system sit for at least 30 minutes. Any pressure rise above 500 microns means there’s still a leak or moisture. Then I follow up with an electronic leak detector on every single joint—no bubbles, no spikes.
-
For component replacements: Once the system is recharged, I fire up the OEM scan tool and monitor real-time refrigerant pressures, compressor speed, and valve positions. I compare those numbers to what the factory specs say they should be for the current ambient conditions.
-
Performance test: I set the HVAC to max heat, recirculate mode, and stick a probe in the center vent. That vent temperature should reach within 10% of the target temperature within about 5 minutes. If it’s slow or just can’t hit the target, something’s still off.
-
Final checks: Clear all DTCs, cycle the ignition, and make absolutely sure no codes return. I also watch the energy flow display—PTC usage should drop significantly once the heat pump is doing its job.
If your car supports battery preconditioning for fast charging, I’ll test that too. A properly working heat pump should enable faster DC charging in cold weather, just like it’s supposed to.
What This Is Going to Cost You
Let’s be realistic: heat pump repairs aren’t cheap. The labor is intensive, the parts are expensive, and handling R1234yf refrigerant requires specialized tools and certification. This isn’t your grandpa’s R134a system.
| Repair Type | DIY Cost | Shop Cost (Typical) | Success Rate (If Done Right) | Secondary Risk if Failed |
|---|---|---|---|---|
| Recharge & leak sealant | N/A (requires recovery, special tools) | $500 (includes leak check, recovery, recharge) | Low (<30% for true leaks) |
Contamination, TXV clogging, compressor failure from lack of lubrication.
|
| External O-ring/seal replacement | N/A (requires recovery, special tools) | $800–$1,200 (labor-intensive, seals + evacuation) | High (>90%) if done correctly |
Re-leak due to poor surface prep or incorrect torque.
|
| Heat Pump Assembly Replacement | N/A | $2,000–$3,500+ (parts dominate cost) | High (>95%) with proper procedure |
Compressor failure from incorrect oil charge or moisture in the system.
|
That big number—$2,000 to $3,500+—is a reality check for a lot of folks. If a quote is over, say, 40% of your EV’s current market value, you really need to weigh the long-term ownership cost. For some, it’s still worth it, especially if the car is otherwise perfect. For others, it’s the financial tipping point. I’ve seen owners try used assemblies or rely on extended warranties, but be careful: used units can have hidden wear, and warranty claims often need proof of prior, proper maintenance.
Always, always check your EV’s battery warranty status before you authorize any major repairs. Sometimes the heat pump is covered.
My Two Cents on Saving Money
Independent EV specialists are popping up, and a good one can often save you 30–50% compared to dealership pricing on these kinds of repairs. But here’s the kicker: you HAVE to verify their experience. This isn’t a job for a general mechanic who just bought a new scan tool. If your car is out of warranty, a truly qualified indie shop might be your best bet to save thousands.
How to Avoid This Headache Next Time
Prevention starts with awareness and proper service. Trust me, it makes a huge difference:
-
Only use qualified shops: Any refrigerant work on your EV needs to be done by a technician certified in R1234yf handling. They must use the correct oil (PAG or POE, depending on the system) and absolutely avoid mixing lubricants. Wrong oil means rapid compressor failure, every time.
-
Annual leak checks: Ask your shop to do a quick electronic leak detection scan during your routine maintenance. Catching a slow seep early can prevent a full system failure and a much bigger bill.
-
Monitor HVAC performance: If your car starts taking longer to warm up in cold weather, or your energy screen shows high heater usage even when it’s not freezing, investigate it early. That’s usually the first sign your heat pump’s efficiency is dropping.
-
Keep software updated: Make sure your EV’s software is current. Manufacturers often release updates that improve thermal management logic or fix known bugs. Sometimes, that’s all it takes.
I’ve said it before, and I’ll say it again: the heat pump is one of the most efficiency-critical systems in your EV. When it works, you don’t even think about it. When it fails, you feel it in your comfort, your charging time, and your wallet. But with proper diagnosis and a methodical approach, most issues can be resolved. No guesswork needed, just good old-fashioned technical expertise.
