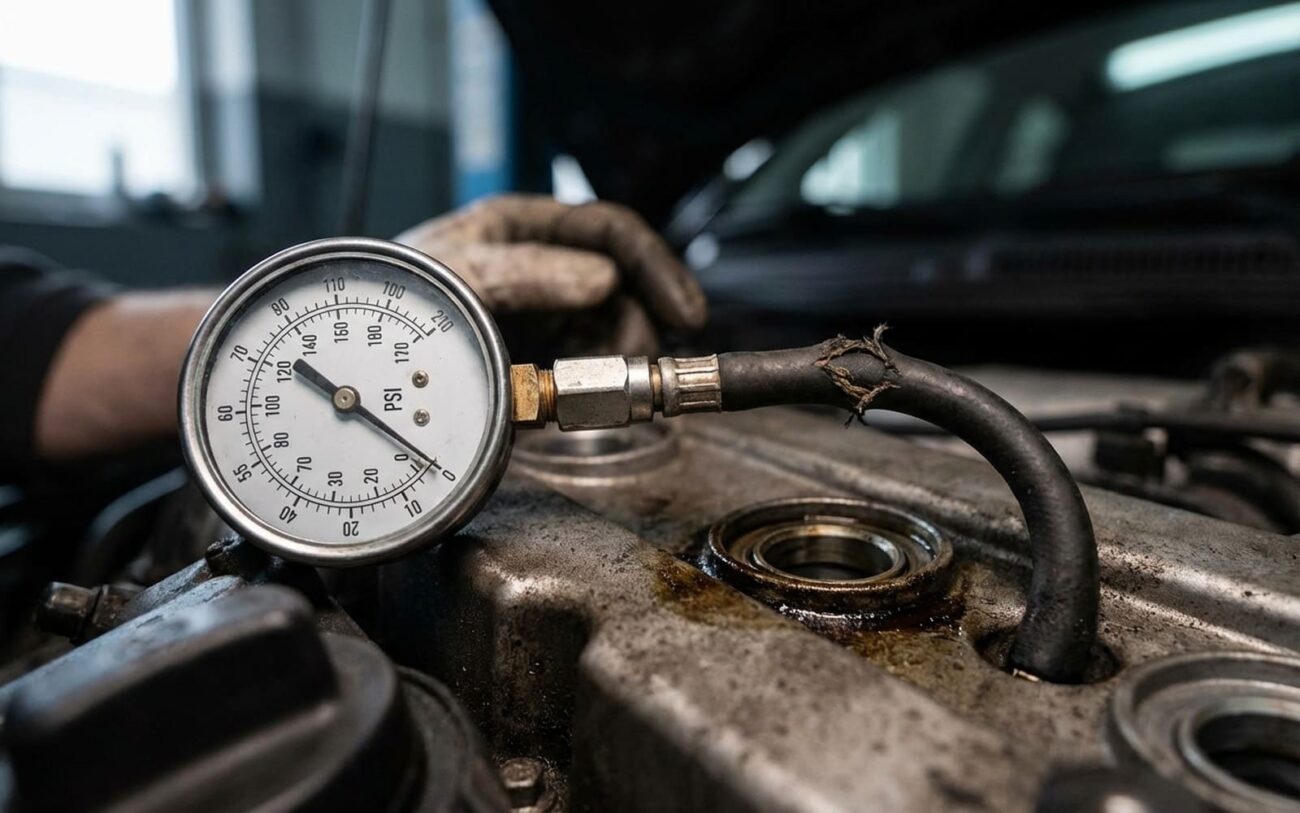
Alright, let’s talk about engine compression. After pulling apart more engines than I can count over the last 25 years, I can tell you this: if your engine isn’t making good compression, it’s not making good power. Period. It’s like trying to run a marathon with one lung – it just won’t happen efficiently, and eventually, something’s gonna give. Recognizing the signs early is your best bet to save yourself a whole lot of headache and money down the road.
What Bad Compression Looks, Feels, and Sounds Like
When an engine starts losing compression, it’s usually not subtle. You’ll often see, feel, or even hear things that tell you something’s wrong. Here are the big ones I look for:
First up, smoke from the exhaust. If you’re seeing blue or gray smoke, especially when you hit the gas after letting off (like coming out of a coast), that’s usually oil burning in the combustion chamber. Most of the time, that means worn piston rings are letting oil sneak up from the crankcase. But don’t rule out worn valve stem seals or guides; they can drip oil down the valves too. We’ll figure out how to tell the difference in a bit.
Then there’s the loss of power. The engine just feels tired. It’s sluggish, maybe misfires, and doesn’t respond like it used to. This is a dead giveaway that the combustion process isn’t generating enough force. Pressure is escaping somewhere it shouldn’t be – could be rings, valves, or even a head gasket. A compression test will confirm it.
And finally, high crankcase pressure, what we call “blow-by.” If you pull your oil dipstick while the engine’s running and it feels like a mini-geyser, or your oil cap keeps trying to jump off the engine, you’ve got combustion gases pushing past the rings and into the crankcase. That’s definitely not normal. Now, a clogged PCV (Positive Crankcase Ventilation) system can mimic this, so always check that first. But if the PCV is clear and you still have serious blow-by, those piston rings are probably shot.
Diagnosing the Problem: Is It Rings, Valves, or Something Else?
Once you’ve got a symptom that screams “compression problem,” the next step is to figure out exactly where the pressure is going. A simple compression test is a good start, but it’s just a starting point. It’ll tell you if a cylinder is low, but not why. That’s where we roll up our sleeves and do some real diagnostic work.
Step 1: The Standard Compression Test
This is your baseline. You pull all the spark plugs, disable the fuel and ignition, and crank the engine while measuring the pressure in each cylinder. You’re looking for two things:
- Overall readings: Most healthy engines should be somewhere between 120-180 psi, but always check your specific vehicle’s specs.
- Consistency: All cylinders should be within about 10-15% of each other. If one cylinder is significantly lower than the rest, or worse, reads zero, you’ve found your problem cylinder.
A zero reading on a single cylinder often points straight to a burnt or bent valve, or maybe a really bad head gasket leak. But if multiple cylinders are low, or they’re all low but consistent, then we need to dig deeper.
Step 2: The Wet Compression Test (for suspected ring issues)
This is a quick trick I use to differentiate between worn rings and valve problems. If you’ve got a cylinder with a low compression reading:
- Add about a tablespoon of clean engine oil directly into that cylinder through the spark plug hole.
- Crank the engine a few times to spread the oil around.
- Immediately re-test the compression in that same cylinder.
Here’s what it tells you:
- Significant increase (25% or more): If the compression jumps up considerably, it means the oil temporarily sealed the gaps around the piston rings. That’s a strong indicator of worn piston rings.
- Little to no change: If the reading stays about the same, the problem isn’t the rings. It’s likely a valve issue (burnt, bent, or bad seat) or a head gasket leak.
Step 3: The Cylinder Leak-Down Test (the gold standard)
This is the test I rely on most. It doesn’t just tell you if you have a leak, but where it’s coming from. You’ll need a leak-down tester and an air compressor for this. Here’s the gist:
- Bring the cylinder you’re testing to Top Dead Center (TDC) on its compression stroke. This closes both valves.
- Hook up the leak-down tester and pressurize the cylinder with shop air (usually 100 psi).
- Listen carefully.
What you’re listening for:
- Hissing at the oil fill cap or dipstick tube: Air escaping here means it’s getting past the piston rings and into the crankcase. Bad rings.
- Hissing at the exhaust pipe: This indicates a leaking exhaust valve. Could be burnt, warped, or a bad valve seat.
- Hissing at the throttle body/intake manifold: This points to a leaking intake valve.
- Bubbles in the coolant reservoir (or a gurgling sound): This is a definite sign of a blown head gasket or a cracked head/block, with air escaping into the cooling system.
A properly sealed cylinder should have less than 10% leakage. Anything over 20% is a serious problem. On high-mileage engines, I use this test routinely, especially when a customer reports power loss or oil consumption. It’s direct, and it leaves little room for guesswork.
A quick note on head gaskets: If you’re seeing oil mixing with coolant, or white smoke that smells sweet from the exhaust, you’re likely dealing with a head gasket or a cracked head. That’s a different path entirely. For that, you’d want to check out how to deal with coolant in oil after a head gasket replacement.
Why Rings and Valves Give Up the Ghost
Understanding why these parts fail helps you prevent it next time. It’s not always just “old age.”
Piston Rings
The most common reason for piston ring failure is simply gradual wear from age and mileage. This is sped up significantly if you skip oil changes or use cheap, incorrect oil. Dirty oil is abrasive, and it grinds down those rings and cylinder walls over time.
But rings can also fail suddenly. Detonation (engine knock or pinging) is a killer. It’s like hitting the top of the piston with a tiny hammer thousands of times a minute, and it can crack rings or break the lands they sit in. Detonation usually comes from incorrect ignition timing, excessive carbon buildup in the combustion chamber, or using lower-octane fuel than your engine needs.
Abrasive wear is another big one. If your air filter is compromised, or you’ve got a leak in your intake system, dirt and grit get pulled straight into the cylinders. That grit acts like sandpaper on the cylinder walls and rings, accelerating wear dramatically. I’ve seen engines with perfectly clean rings but cylinder walls that look like they’ve been sandblasted – chronic blow-by and oil consumption, guaranteed.
And don’t forget overheating. Severe overheating can warp or distort the cylinder bores themselves. If the cylinder isn’t perfectly round, new rings won’t seal properly, even if you do a full rebuild. That’s why getting cooling system issues fixed immediately is non-negotiable. If the block is warped or cracked, you’re looking at a much bigger problem. For that, you’ll need to know how to tell if your engine block is cracked.
Valves
Valves typically fail in two main ways: burning or mechanical damage.
A burnt exhaust valve is common. This happens when an engine runs too lean – meaning not enough fuel for the air. Fuel helps cool the combustion chamber, and without enough of it, the exhaust valve overheats and erodes. Lean conditions are often caused by vacuum leaks, a faulty MAF (Mass Air Flow) sensor, or clogged fuel injectors.
Mechanical damage usually means a bent or broken valve. The most common culprit is a snapped timing belt or chain, especially in interference engines (like many Honda K-series or Subaru EJ25 engines). In these designs, the pistons and valves literally occupy the same space at different times. If the timing belt breaks, the piston will smack into an open valve, bending it. If you own one of these, stick to the timing belt replacement schedule religiously – it’s cheap insurance.
Finally, gradual wear of the valve stem and guide happens over time. This is especially true in high-mileage engines. Worn guides allow oil to seep down into the combustion chamber, causing oil consumption and that tell-tale puff of blue smoke on startup. That’s not a ring issue; it’s a top-end problem.
The Fix: What It Takes to Get Compression Back
Let me be blunt: fixing compression issues isn’t for the faint of heart, or the novice DIYer. We’re talking about serious internal engine work here. There are no magic additives or shortcuts that will fix worn rings or burnt valves. If someone tells you there are, they’re selling snake oil.
This is Advanced Mechanical Work
You’ll need specialized tools like a dial bore gauge to check cylinder taper, a torque-to-angle wrench for assembly, and precision measuring equipment. More importantly, you need the experience to know how to use them and what the numbers mean. There are no safe shortcuts when you’re tearing into an engine’s internals.
Repair Option 1: Piston Ring Replacement
If your diagnosis points to worn piston rings, you’re looking at a “ring job.” This involves removing the oil pan, dropping the connecting rods, and pulling the pistons out of the cylinders. Then, you replace the old rings with new ones. But it’s not just a swap-out; you absolutely must hone the cylinder bores first. Honing creates a cross-hatch pattern on the cylinder walls that allows the new rings to seat properly and seal. Without it, the new rings won’t break in correctly, and you’ll be right back where you started.
In my shop, for a proper ring job, the engine usually needs to come out of the car. Trying to do it “in-frame” (with the engine still in the vehicle) is possible on some older, simpler designs, but it’s risky. You risk contamination, improper honing, and poor assembly, which often leads to a failed repair within months. I’ve seen too many “budget” in-frame ring jobs fail because the cylinder walls weren’t prepped correctly or debris got into critical areas.
Beyond the rings, you’ll also likely need new connecting rod bearings, a full gasket set, and potentially new main bearings, depending on the engine’s condition and mileage. This is a significant undertaking.
Repair Option 2: Cylinder Head Valve Job
If the problem is with the valves – burnt, bent, or worn guides – then the cylinder head needs to come off. This is often called a “valve job.” Once the head is removed, it goes to a reputable machine shop. They’ll inspect the valves, valve seats, and guides. They’ll replace worn valve stem seals, cut new valve seats (or grind them), and replace any bent or burnt valves. They’ll also check the head for warpage and resurface it if needed to ensure a perfect seal with the engine block.
Removing and reinstalling the cylinder head can be a meticulous DIY job if you’re careful and follow the service manual to the letter. However, the actual machine work on the head itself should always be left to a professional shop. They have the specialized equipment and expertise to ensure the valves seal perfectly. One critical detail: modern engines almost universally use Torque-To-Yield (TTY) head bolts. These bolts stretch when tightened and must be replaced every single time the head is removed. Reusing them is asking for head gasket failure.
Proving the Repair Worked: Validation is Key
Never assume the job is done just because the engine starts up. You’ve just invested a lot of time and money, so you need to validate the repair. Skipping this step is how you end up doing the job twice.
After a piston ring replacement, a leak-down test is essential. On a properly rebuilt engine, you should see leakage under 10%. If it’s above 20%, something isn’t right – either the rings aren’t seating, the bore wasn’t honed correctly, or there’s another mechanical issue. A compression test should also show consistent readings across all cylinders, ideally within 10% of each other, and well above the manufacturer’s minimum (usually around 100–130 psi for healthy cranking pressure).
You’ll also need to monitor oil consumption closely for the first 1,000 miles or so. It’s normal for a freshly rebuilt engine to burn a little oil during break-in, but anything more than a quart per 1,000 miles means the rings aren’t sealing. Don’t panic immediately, but keep a close eye on it. If it persists, you’ve got a problem.
After a valve job, a compression test is your primary validation. All cylinders should now read close to each other and be within spec. I also like to do a borescope inspection through the spark plug hole. This lets you visually confirm the valves are seating cleanly and there’s no carbon buildup or physical damage that might indicate a problem.
If the engine runs rough or misfires after the repair, don’t just hope it “gets better.” A misfire post-rebuild could mean a valve isn’t sealing, a hydraulic lifter collapsed, or the timing is off. Diagnose it early. A simple misfire diagnosis using live data and a compression check can save you from costly comebacks and more engine damage.
The Hard Truth: Cost and the Tough Decision
Look, at some point, you have to be realistic. You’ve got to weigh the repair cost against the vehicle’s overall value and your long-term plans for it. It’s a tough conversation I have with customers all the time.
| Repair Type | DIY Parts Cost (Est.) | Shop Cost (Est.) | Success Rate (if done right) | Risk if Failed |
|---|---|---|---|---|
| Piston Ring Replacement (Engine Out) | $400 – $800 (parts, machine work) | $2,500 – $5,000+ | High | Complete engine replacement needed; all labor and parts lost. |
| Cylinder Head Valve Job & Reinstall | $500 – $1,500 (parts, machine work) | $1,500 – $3,000 | High | Repeat head gasket failure, valvetrain damage, or engine seizure if timing is off or debris enters engine. |
These are just estimates. Costs vary wildly depending on your specific vehicle, parts availability, and shop labor rates. A complex V6 or V8 will always cost more than a simple 4-cylinder.
Here’s my rule of thumb after decades in this business: if the repair estimate starts pushing past 60% of the car’s private-party value, you need to seriously consider other options. That might mean a good used engine swap (which can often be cheaper than a full rebuild) or, frankly, replacing the vehicle altogether. Dropping $4,000 into a car worth $6,000 might keep it running for a bit, but what about the next big failure? The transmission, the suspension, the electrical gremlins? Age catches up with everything. And if you’re tackling this yourself, be brutally honest about your skill level. A failed ring job or a botched valve job can easily destroy a perfectly good engine block, turning a costly repair into a total loss.
How to Keep Your Engine Healthy and Avoid This Mess
My Proactive Maintenance Checklist
-
For piston rings: The simplest advice is the most important: keep your oil clean and change it on schedule with the correct viscosity and type. If your engine is known for being hard on oil, use a quality full-synthetic. And for crying out loud, make sure your air filter is in good shape. Dirt ingestion is like sandpaper for your cylinder walls and rings.
-
Listen for detonation: If you hear pinging or knocking under load, especially going uphill, don’t ignore it. It could be bad fuel, excessive carbon buildup, or a timing issue. All of these hammer your rings and pistons over time.
-
For valves: Stick to the timing belt or chain replacement interval. If you have an interference engine, a broken belt means bent valves – guaranteed. Also, avoid overheating at all costs. It warps cylinder heads, ruins valve seats, and blows gaskets.
-
Don’t ignore the Check Engine Light (CEL): A CEL for a lean condition (like P0171/P0174) or a persistent misfire (P030X) means a cylinder is running hotter than it should. That’s a recipe for a burnt valve. Get it diagnosed.
-
Practice early detection: On high-mileage vehicles, I recommend a cylinder compression test once a year. It establishes a baseline and can catch a problem before it becomes catastrophic. And check your oil level regularly – sudden consumption is a huge red flag.
