Oil Pressure Problems on Your Nissan MR20DD? Here’s What I See.
Alright, let’s talk Nissan MR20DD oil pressure. If you’re reading this, you’re probably seeing some warning signs, and frankly, on these engines, they’re rarely minor. After decades in the shop, I can tell you these symptoms usually point to one of a few critical issues. And with oil pressure, “critical” means exactly what it sounds like.
First, and this is the big one: if that red oil pressure warning light comes on and stays on, especially at idle or low RPM, you need to shut that engine down. Immediately. No questions asked. This isn’t a suggestion; it’s your engine screaming for help. That light means the oil pressure has dropped below a safe level, and you’re risking metal-on-metal contact inside the engine. Trust me, the cost of a tow is nothing compared to a new engine.
Actual: 8 PSI
Next up, you might see an oil pressure gauge that’s bouncing all over the place, or a warning light that flickers on and off. This usually happens when the engine’s hot, or you hit a bump. To me, that screams electrical problem. Nine times out of ten, it’s a dying oil pressure sensor itself, or maybe some wiring that’s seen better days – chafed, corroded, you name it.
Then there’s the check engine light. If it pops on, and you scan it, you’ll often pull codes like P0520 (Oil Pressure Sensor Circuit) or P0524 (Low Oil Pressure). These codes mean the engine computer (ECM) is seeing a signal from the sensor that just doesn’t make sense. But here’s a golden rule I’ve lived by for decades: never, ever assume the code tells you the whole story. You absolutely have to verify the actual oil pressure with a mechanical gauge. Always.
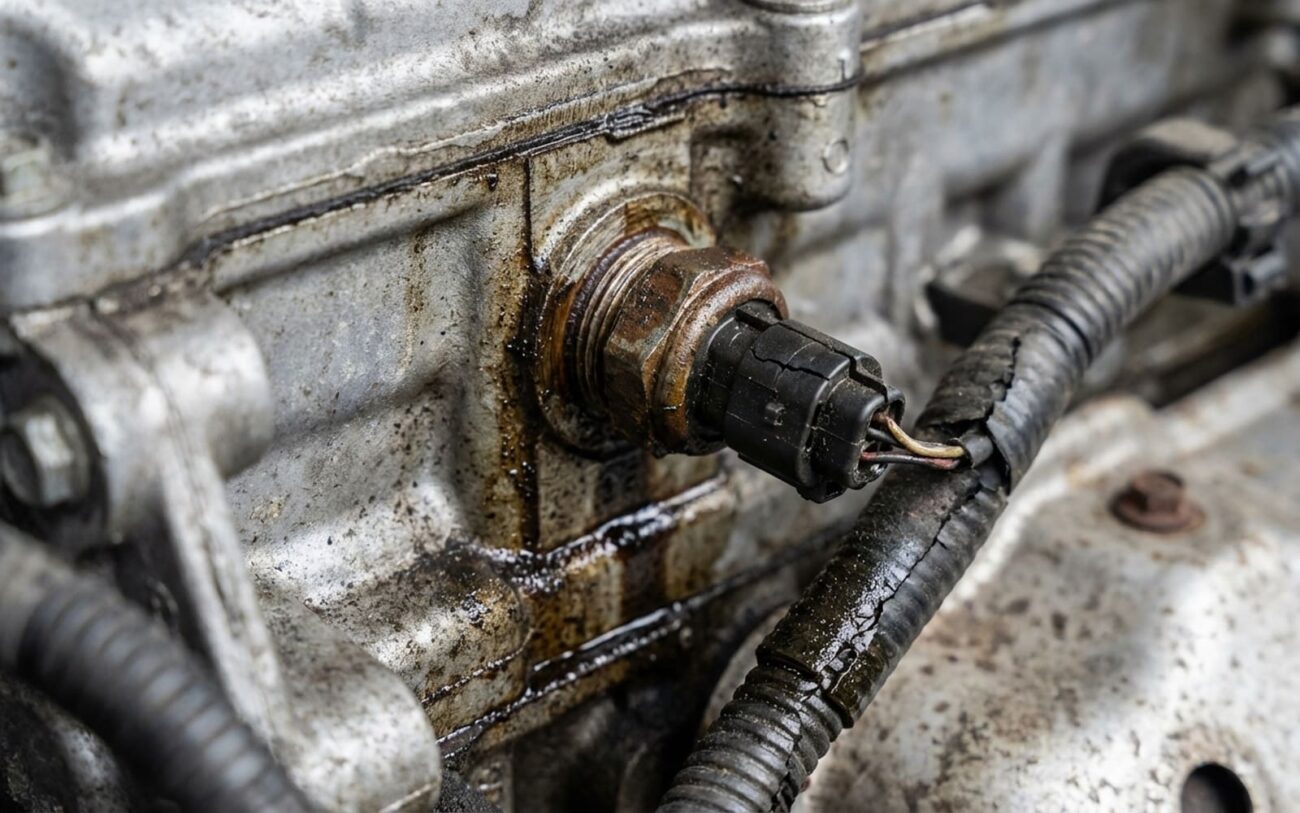
Finally, sometimes the problem is just plain obvious: an oil leak. If you see fresh oil pooling around the base of the sensor, or even dripping right out of its electrical connector, that usually means the internal O-ring or the sensor housing itself has failed. But be careful here – I’ve seen plenty of “sensor leaks” that were actually oil running down from a leaky valve cover gasket or something higher up. Always trace the leak carefully.
Diagnosing It Right: Sensor or Something Worse?
When you’re dealing with oil pressure, guesswork is a fast track to a blown engine. You absolutely cannot just throw parts at it. Your main goal here is to figure out if you’ve got an electrical problem (bad sensor, bad wiring) or a mechanical problem (actual low oil pressure in the engine). The diagnostic steps I use are pretty straightforward, but they’re non-negotiable.
What I Look For and How I Test It:
| Symptom | Likely Sensor Fault | Common Mimics | My Go-To Test |
|---|---|---|---|
| Solid low oil pressure warning light | Internal diaphragm failure or signal drift giving false low readings. | Low oil level, worn oil pump, clogged pickup screen, worn engine bearings. |
This is the big one: Install a mechanical oil pressure gauge. The spec for a hot MR20DD at idle is a minimum of 14 PSI. At 2,000 RPM, you should see 51–56 PSI. If your mechanical gauge reads low, you’ve got a real engine problem, not just a sensor. |
| Erratic gauge or flickering light | Intermittent internal connection, failing potting compound, or a cracked diaphragm allowing oil into the electronics. | Poor harness connection, chafed wiring, corroded terminals, or even a partially clogged sensor inlet. |
First, check the mechanical pressure (see above). If that’s stable, then back-probe the sensor’s signal wire with a multimeter or oscilloscope. Look for voltage drops or erratic signals. Also, inspect the wiring harness for any signs of chafing or corrosion, especially near the connector. I’ve seen bad grounds or compromised wire shielding cause all sorts of weird readings. |
| DTC P0520 or P0524 | Sensor circuit open, short to ground, or out-of-range signal. | Damaged connector, ECM software glitch, frayed wires in conduit, or actual low oil pressure. |
Always start by verifying the 5V reference voltage and a good ground at the sensor harness connector. If those are good, check the internal resistance of the sensor itself (consult your service manual for specs). Don’t forget that Nissan issued a service bulletin for some 2013–2016 models where the ECM software could falsely trigger a P0524. A software update was the fix there. Also, keep an eye out for general corrosion issues in wiring harnesses – I’ve seen them mimic sensor failures on plenty of cars, not just Nissans. |
| Oil leak at sensor base | Failed O-ring, cracked housing, or overtightened installation (which stresses the housing). | Valve cover gasket, oil filter housing, camshaft sensor seal, or even a front timing cover leak. |
Clean the area thoroughly. Add some UV dye to the engine oil and run the engine for a bit, then inspect with a UV light. This will tell you exactly where that oil is coming from. Don’t be fooled by gravity – oil always runs downhill. |
A Quick Note on False Alarms:
Just a heads up: Nissan did issue a service bulletin for certain 2013–2016 MR20DD models. Apparently, the ECM software could sometimes falsely trigger a P0524 code. If your mechanical pressure is spot on, a software update might be all you need. Also, I’ve seen plenty of wiring harness corrosion issues that can make a perfectly good sensor look bad. Always check the harness carefully.
Why These Sensors Give Up the Ghost
So, once you’ve confirmed it’s definitely the sensor, it helps to understand why these things fail. It’s not usually a mystery. The most common culprit I see is what we call diaphragm fatigue. Inside that sensor is a tiny, thin metal diaphragm. Every single time your engine runs, that diaphragm flexes with every oil pressure pulse. After years, millions of cycles, it just gets tired. It can crack, lose its spring, or just stop reading accurately.
The Failure Pattern
“Think of it like a drumhead: constant beating from oil pulses eventually causes it to crack. Once that happens, oil can seep into the electronics, and that’s the end of it.”
Another big one is the potting compound. That’s the epoxy material that seals all the delicate internal electronics. Engine bays are brutal – temperatures swing from freezing to well over 200°F. This constant heating and cooling makes that epoxy brittle, and eventually, it cracks. Once it cracks, engine oil (or even just moisture) gets in there, shorts out the circuits, and boom – dead sensor. I’ve personally dissected dozens of these things over the years, and internal oil contamination from cracked potting is a consistent pattern.
Okay, It’s the Sensor. Now What? Your Repair Options.
Standard Sensor Replacement DIY-FEASIBLE
Cleaning a Clogged Sintered Filter DIY-FEASIBLE (with caution)
Stripped Block Thread Repair (Professional Only)
If you’ve stripped the threads in the engine block where the sensor mounts, you’re in a tough spot. This isn’t a DIY job, full stop. You’ll need to use a Timesert or Helicoil kit, which involves drilling and tapping the oil gallery. The risk here is immense: one tiny metal shaving left behind can circulate in your oil system and destroy your engine bearings. This is a job for an experienced machinist or a shop that specializes in engine repair.
Temporary Fixes (There are NONE!)
Did We Fix It? Verifying Your Repair
Don’t just slap the new sensor in and call it a day. That’s how you end up with a comeback. After you’ve replaced the sensor, here’s my routine:
- Clear any stored diagnostic trouble codes (DTCs) using a scan tool.
- Start the engine. That oil pressure warning light should extinguish immediately. If it doesn’t, you’ve still got a problem.
- If you have a good scan tool, monitor the oil pressure live data. On a cold start, you’ll see higher pressure, sometimes up to 90 psi. As the engine warms up, it should settle down to a stable 14–20 psi at hot idle.
- If you performed a thread repair, you need to do a static leak test. Refill the oil, install the sensor, and let the engine sit overnight on a clean drip pan. Check for any drips in the morning. Then, perform a dynamic test using a mechanical gauge. Run the engine through various RPM ranges – idle, 2000 RPM, 3000 RPM – and watch for pressure stability. Any sudden drops or wild fluctuations could indicate a poor seal at the insert or, worse, an underlying mechanical issue.
What’s This Going to Cost Me? (And When to Walk Away)
Cost is always a factor, especially when you’re talking about engine issues. Here’s a rough breakdown based on what I see in the shop:
| Repair Type | DIY Cost (Parts) | Shop Cost (Est.) | My Biggest Concern (Secondary Risk) |
|---|---|---|---|
| Replace Oil Pressure Sensor | $40 – $80 | $150 – $300 | Undiagnosed mechanical failure (like a weak oil pump) leading to complete engine seizure shortly after. |
| Repair Block Threads | $100 – $200 (for the kit) | $400 – $600 (specialized labor) | Improper repair causing a major oil leak or, worse, internal engine damage from metal shavings. |
Keeping Your MR20DD Happy: Prevention Tips
An ounce of prevention is worth a pound of cure, especially with oil pressure. Here are a few things I tell all my customers to help avoid these headaches:
-
Regular, on-schedule oil changes are paramount. Use a high-quality synthetic 0W-20 oil, exactly what Nissan specifies. This is your best defense against sludge buildup, which is a killer for oil pumps and sensor inlets.
-
If you’re ever using RTV sealant (like for a timing cover or oil pan), be extremely careful with how much you apply. Excess RTV can squeeze out, break loose, and then float around in your oil, eventually clogging that tiny sintered filter on the sensor or even the oil pump pickup screen. Less is more with RTV.
-
Every time you’re under the hood for an oil change or any other service, take a few extra minutes to visually inspect the oil pressure sensor and its wiring. Look for any fresh oil seepage, chafed wires, or loose connectors. Catching a small leak early can save you a big headache later.
