CAN Bus Short Circuits: The Ultimate Electrical Gremlin
Can a short circuit on the CAN bus cause random system malfunctions? Absolutely. After more than 25 years turning wrenches and chasing electrical ghosts, I can tell you a short on the Controller Area Network (CAN bus) is one of the most frustrating, widespread, and downright disruptive faults you’ll ever encounter in a modern vehicle.
Think of the CAN bus as the central nervous system of your car. It’s a high-speed, two-wire data highway – usually a twisted pair – that lets all your vehicle’s computers, or modules, talk to each other. We’re talking about the powertrain control module (PCM), body control module (BCM), ABS unit, instrument cluster, and dozens of others, all sharing information in real time. If that communication breaks down, things get weird, fast.
NETWORK MONITOR
Status: 0.0V (SHORT)
The Concept
Imagine a massive multi-car pileup on the busiest highway in your city. Every lane is blocked. No information gets through, and the whole system grinds to a halt. That’s what a CAN bus short does to your vehicle’s electronics.
When either the CAN High (CAN_H) or CAN Low (CAN_L) line shorts – whether to each other, to power, or to ground – that critical communication breaks down. Instead of clean, digital data packets, modules receive corrupted signals, or worse, nothing at all. This is when you start seeing what looks like completely random, unrelated system failures: dashboard lights flashing, windows acting possessed, the radio cutting out, or critical systems just dropping offline with no clear reason. It’s not magic; it’s a failed network.
Recognizing the Chaos: Symptoms of a Shorted CAN Bus
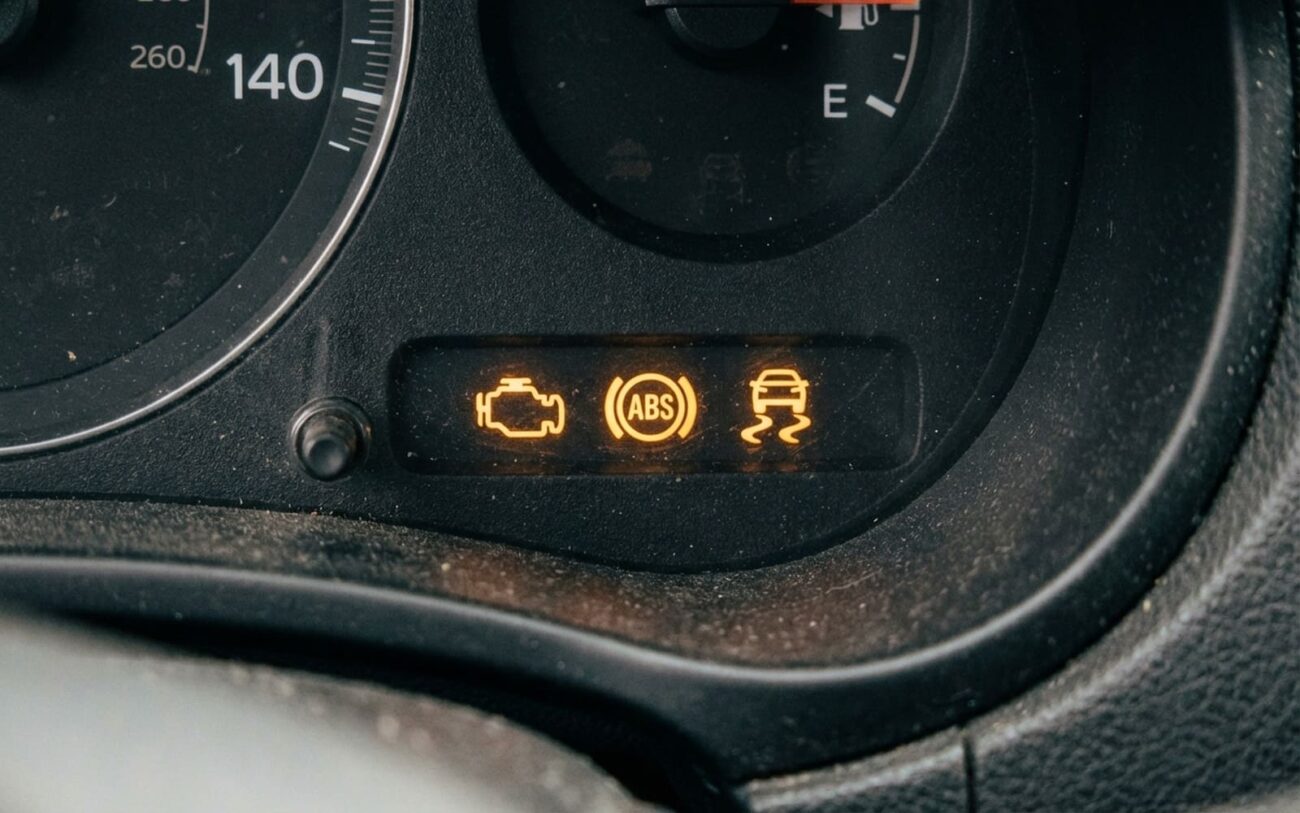
The biggest giveaway for a CAN bus issue isn’t a single component failure, but rather widespread, intermittent chaos. You might see the check engine light, ABS warning, and airbag light all pop up at once, even if the engine runs fine. If you pull codes, you won’t get one clear culprit. Instead, you’ll likely find a flood of U-codes – those are your network communication errors. Common ones include U0100 (lost communication with PCM), U0140 (lost communication with ABS), or U0400 (invalid data received). These are huge red flags.
Sometimes you’ll also get “implausible signal” DTCs. This is where a sensor reading makes no logical sense – like the speedometer showing 80 mph while you’re parked, or the engine temperature reading -40 degrees in the middle of summer. The module is getting some data, but it’s garbage.
I’ve seen all sorts of other symptoms: the instrument cluster freezing or going completely dark, HVAC controls responding erratically or not at all, doors locking and unlocking themselves, or even the transmission shifting poorly because it can’t talk to the TCM. In severe cases, the engine might crank but not start because the immobilizer can’t authenticate with the PCM over the bus. It’s a mess, plain and simple.
Intermittent faults are the trickiest. I’ve seen cases where the network fails only when someone turns the steering wheel fully left – because the harness gets pinched under the column at that specific point. Or when hitting a bump – the vibration jostles a frayed wire just enough to cause a momentary short. These kinds of clues almost always point to physical wiring damage, not a failing module itself.
My Diagnostic Approach: Finding the Needle in the Haystack
Before you start tearing into wiring, you absolutely have to rule out other possibilities. A failing module can sometimes mimic a shorted bus by transmitting corrupted data or pulling the bus voltage out of spec. A poor ground at a control module can also cause communication errors. That’s why my diagnosis is always methodical.
First, you need the right tools: a capable scan tool that can monitor live network communication, a good digital multimeter (DMM), and ideally, an automotive oscilloscope. A basic OBD2 code reader won’t cut it here; you need deep visibility into network health. I always start with the basics: check battery voltage (it needs to be stable, no low voltage issues) and ensure there are no parasitic draws affecting the network. Then, I use the scan tool to see which modules are communicating. If multiple modules show “no response,” I immediately suspect the network itself. If only one module is down, I focus on its power, ground, and connector.
The 60-Ohm Test: My Go-To First Check
This is a critical step. Disconnect the battery. Go to your OBD2 port, and with your DMM, measure the resistance between Pin 6 (CAN_H) and Pin 14 (CAN_L). A healthy CAN bus should read approximately 60 ohms. This is because most CAN networks have two 120-ohm terminating resistors, one at each end of the bus, in parallel. If you read significantly lower than 60 ohms – say, 0 ohms or very close to it – you’ve confirmed a direct short between CAN_H and CAN_L. If you read 120 ohms, one of the terminating resistors is likely missing or open, or you have an open circuit somewhere. If you read an open circuit (OL), then something is completely disconnected.
Once you’ve done that, also check resistance from CAN_H to chassis ground, and from CAN_L to chassis ground. You should read open (OL) on both. If you get a low resistance reading, you have a short to ground. Then check CAN_H to battery positive and CAN_L to battery positive. Again, you should read open. If not, you have a short to power.
If the 60-ohm test points to a short, the next step is isolating it. This often involves disconnecting modules one by one or in sections, re-checking the resistance after each disconnection. When the resistance returns to 60 ohms, you’ve found the section or module causing the short. If it’s a specific module, then the internal transceiver in that module is likely shorted. If it’s a section of the harness, you’ll need to visually inspect that area.
For intermittent issues, an oscilloscope is invaluable. I’ll hook it up to CAN_H and CAN_L, then start wiggling harnesses, tapping on modules, and simulating the conditions that cause the fault. A healthy CAN signal has a clean, differential waveform – typically 1.5V to 3.5V on CAN_H and its inverse on CAN_L. When a short occurs, you’ll see the waveform collapse, become noisy, or flatline. This “bus-off” state means the module has detected too many errors and has stopped transmitting to prevent further corruption.
Where to Look: Common Causes of CAN Bus Shorts
When the fault is in the wiring, it’s almost always physical damage. The CAN bus uses twisted pair wiring specifically to resist electromagnetic interference (EMI), but it’s still vulnerable to chafing, pinching, and corrosion. Over time, harnesses rub against sharp brackets or frame components, especially at stress points. I’ve diagnosed countless cases where the CAN harness was worn through by contact with a transmission crossmember or a sharp edge on the firewall. Some GM models, for example, had known service bulletins for intermittent no-start or cluster failures due to harnesses chafing under the dash or near the engine.
Water intrusion is another major culprit. If a connector gets wet – say, from a leaking sunroof drain, a cracked windshield seal, or floorboard flooding – corrosion can bridge the CAN_H and CAN_L pins, creating a short. I once spent days tracing a recurring network fault to a completely saturated connector under a rear seat, all caused by a slow trunk leak that the owner never noticed.
Important Distinction: Module vs. Wiring
If disconnecting a specific module immediately restores normal network resistance (back to 60 ohms), then the module itself is at fault. Its internal transceiver has shorted out. That’s a module replacement job, not a wiring repair. Also, aftermarket modifications are a frequent cause – splicing into the CAN bus without proper T-harnesses is a recipe for permanent shorts and headaches.
Fixing the Problem: Repair Pathways
Localized Wire Repair DIY Feasible
Main Harness or Dash Repair Professional Only
Control Module Replacement
Diagnostic Disconnection Temporary Only
Post-Repair Validation: Don’t Skip This Step
Just repairing a wire or replacing a module isn’t the finish line. You absolutely must verify the network is truly healthy before calling the job done. I always start with another resistance check at the OBD2 port: reconnect the battery, then measure between CAN_H and CAN_L. You should see approximately 60 ohms. Anything significantly lower means another short remains, or your repair isn’t good. If it’s higher (like 120 ohms), you might have an open circuit or a missing terminating resistor.
Next, use an oscilloscope to monitor the CAN signal. A healthy bus shows a clean, differential waveform – CAN_H typically swings between 2.5V and 3.5V, and CAN_L between 1.5V and 2.5V, with their difference being around 2V. While watching the scope, wiggle the steering column, operate windows, cycle lights, and drive the vehicle if possible. Any signal collapse, excessive noise, or flatlining indicates an unresolved issue. You want to see consistent, clean, square-ish waves.
Finally, clear all diagnostic trouble codes (DTCs) from every module. Drive the vehicle under various conditions – city, highway, bumps, turns. Then, rescan for codes. You should have no U-codes or any other communication-related faults. If everything’s clear, you’ve done your job right.
Cost, Risk, and When to Walk Away
This kind of repair can be cost-effective, or it can turn into a financial black hole, depending heavily on the location of the fault and the age/value of the vehicle.
| Repair Type | DIY Cost | Shop Cost | Success Rate | Secondary Risk |
|---|---|---|---|---|
| Simple external wire repair | $50–$150 | $200–$500 | >95% | Poor splice can lead to re-chafing or high resistance later. |
| Complex harness/dash repair | N/A | $500–$1500+ | >90% | Risk of broken trim clips or incomplete repair if multiple sections are degraded. |
| Control module replacement | $300–$1500+ | $500–$2000+ | 100% | Incorrect software calibration can cause mismatched behavior after replacement. |
Here’s a reality check I give my customers: if the diagnostic and repair estimate approaches 40% of your car’s current market value, especially on an older vehicle, you need to seriously consider the long-term outlook. If one section of the CAN harness has failed due to age or corrosion, it’s often a sign that other sections might follow soon. I’ve seen these situations turn into absolute money pits – particularly on high-mileage European or luxury models with incredibly extensive and complex network integration. Sometimes, the smart move is to walk away.
Keeping Your Network Healthy: Prevention is Key
Preventing CAN bus issues largely comes down to good habits and common sense. Never allow aftermarket installers to cut or tap into CAN wires directly. They should always use proper plug-in T-harnesses designed for network integration. If you’re doing any work near wiring yourself – like installing a stereo, dash cam, or even just replacing a headlight – take the time to properly route and secure harnesses. Make sure they’re not pinched, chafing, or sagging near heat sources.
Maintenance Checklist
-
During routine maintenance, always check for stored or pending U-codes, even if no warning lights are on. Catching intermittent issues early can save you a lot of grief.
-
Perform visual inspections of accessible harness areas – near door hinges, under pedals, around the firewall, and under the vehicle – to catch chafing or damage early.
-
Keep connectors dry. Address any leaks promptly, especially water intrusion in the floorboards or trunk.
-
If you park outdoors, be mindful of rodents. Chewed wiring is a surprisingly common cause of hard shorts and open circuits.
Pro Tip: Watch for Heat Damage
While less common than chafing, heat damage is definitely a factor. Exhaust components can melt insulation if a harness sags too close. Always ensure any aftermarket wiring is properly shielded and routed well away from high-heat zones to prevent both EMI and physical shorts.
