The Ghost in the Machine: How a Frayed Wire Fools Your Car’s Computer
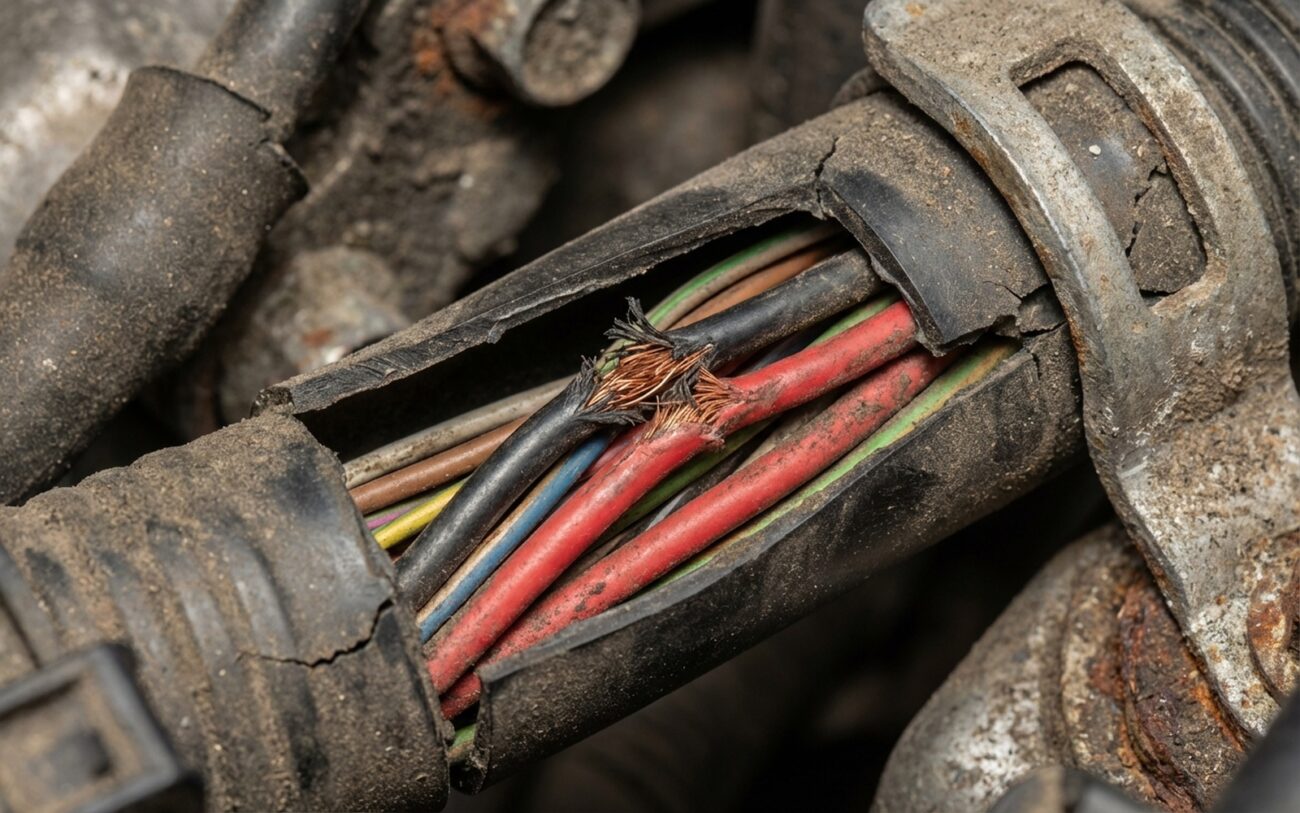
I’ve seen this scenario play out more times than I can count: a customer comes in with a check engine light, a sensor code, and they’ve already replaced that sensor two, maybe three times. They’re frustrated, I’m looking at a repeat problem, and the real culprit is almost always the same: a frayed wire hiding inside its own protective conduit. It’s a classic misdiagnosis, and it costs people a lot of time and money.
That conduit is supposed to shield the wiring from heat, abrasion, and moisture. But if a wire inside gets damaged, it starts sending erratic or incorrect signals to the Engine Control Module (ECM). The computer doesn’t know the wire itself is compromised. It just sees a signal that doesn’t make sense, blames the sensor, and throws a code. You can swap that sensor all day long, and the code will keep coming back.
SIGNAL MONITOR
Fluctuation: 1.2V – 4.8V
Spotting the Real Culprit: Signs of a Bad Wire
For me, the biggest red flag is inconsistency. If your scan tool shows live data from a sensor—throttle position, oxygen sensor voltage, coolant temperature—jumping erratically when you tap the throttle, go over a bump, or even just wiggle the harness, you should be thinking wiring. A healthy sensor produces a smooth, logical signal. Wild fluctuations that correlate with vibration or movement almost always point to a wiring issue.
The same goes for intermittent DTCs. You clear a code like P0117 (coolant temperature circuit low), and it might stay gone for days. Then, boom, it’s back after a rainstorm or a hard drive. That kind of pattern screams wiring problem, not sensor failure. A sensor usually either works or it doesn’t, or it degrades predictably. Wiring, though? It’s all about those intermittent connections.
My Diagnostic Approach: Pinpointing the Problem
Alright, so you suspect wiring. Now what? This is where real diagnostics begin. A failing sensor, a corroded connector, or even a rare ECM fault can mimic wiring problems. You need to rule them out methodically. For accurate diagnosis, you’ll need a quality digital multimeter (DMM), a scan tool with live data capability, and some back-probe pins or a breakout box to test circuits without damaging connectors. Don’t just start cutting wires.
Here’s the approach I use:
Perform a Voltage Drop Test
This is my go-to for intermittent opens or high resistance. Connect your DMM to measure voltage drop across the suspect wire, from one end of the circuit to the other (e.g., sensor connector to ECM connector). You’re looking for anything over 0.1V. And here’s the kicker: gently flex and wiggle the conduit and harness while monitoring the reading. If that voltage drop jumps around or spikes, you’ve found your high resistance point.
Measure Resistance to Ground
If you suspect a short, disconnect the wire at both ends (sensor and ECM) to isolate it. Then, measure resistance from the signal wire to a known good ground. You should see very high resistance, ideally over 10 megaohms. Now, again, wiggle that conduit. If the resistance suddenly drops below 5 ohms—or even to near zero—you’ve found your short to ground. This is a common cause of “circuit low” codes.
Check for Open Circuits
While the wire is disconnected at both ends, measure its end-to-end resistance. It should be less than 1 ohm. If it’s infinite, or very high, you have an open circuit. Again, wiggle the harness to see if it momentarily makes contact.
Rule Out the Sensor and Connector
Before you commit to tearing into a harness, make sure the sensor itself isn’t the problem. Test the sensor directly if possible (e.g., resistance for a temperature sensor, voltage output for a TPS). Also, visually inspect the connector pins for corrosion, bending, or spreading. A poor connection at the terminal can mimic a bad wire.
Why These Wires Give Up the Ghost
It’s not usually a sudden thing. These wires don’t just fail for no reason; it’s almost always wear and tear over time. That protective conduit can actually be part of the problem.
The Concept
“The sharp edge of a metal conduit can act like a saw, slowly cutting through insulation every time the engine vibrates.”
Over 100,000 miles, that tiny, constant motion wears through the insulation, then starts breaking individual copper strands. I’ve seen this on countless vehicles, especially certain GM and Ford platforms where harnesses route near suspension components or engine mounts. Sometimes, there are even known service bulletins for this exact issue, usually involving mass airflow, camshaft, or crankshaft sensor circuits. That little bit of movement adds up.
Moisture and Fluids are Major Culprits:
If a conduit seal degrades or a grommet cracks, water can seep in. Once inside, it causes internal corrosion that eats away at both insulation and conductors. In oily engine bays, leaked fluids can soften plastic insulation, making it brittle and prone to cracking. It’s a slow death for the wiring.
Fixing It Right: Your Repair Options
Once you’ve pinpointed the exact spot, you’ve got a few ways to tackle it. But remember, a shoddy repair is no repair at all.
Accessible Wire Repair DIY Feasible
Harness Section Replacement Professional Only
Full Harness Replacement
Don’t Just Clear the Code: Validating the Fix
This is where most people, even some less experienced techs, fall short. You don’t just clear the code and assume it’s fixed. You need to validate the repair properly to ensure long-term reliability. Otherwise, you’ll be seeing that customer again in a few weeks.
My Validation Checklist:
-
Measure end-to-end resistance of the repaired wire; it should be less than 1 ohm. If it’s higher, your splice isn’t good enough.
-
Check insulation integrity: ensure no continuity between the signal wire and ground (you want over 10 megaohms). This confirms your repair isn’t shorting out.
-
Monitor live data while wiggling the entire harness, especially around the repair area. The signal should remain stable with no spikes or dropouts. This is your real-world test.
-
Perform a full OBD2 drive cycle. Let the ECM run all its monitors and confirm functionality. If everything passes, you’ve done your job.
What This Is Going to Cost You
Look, fixing wiring isn’t always cheap, but it’s almost always cheaper than replacing parts unnecessarily and repeatedly. Here’s a general idea of what you’re looking at:
| Repair Type | DIY Cost (Parts) | Shop Cost (Parts + Labor) | Success Rate (When Done Right) |
|---|---|---|---|
| Single Accessible Wire Repair | $20 – $50 | $150 – $300 | >95% |
| Harness Section Replacement | $200 – $600 | $800 – $2,000+ | ~99% |
Stopping It From Happening Again
Proactive Maintenance Tip
During routine oil changes or any time you’re under the hood, take 30 seconds to trace major harnesses. Look for cracked conduit, missing clamps, or any signs of chafing where a harness rubs against metal or another component. A simple zip tie, a piece of split loom, or even some friction tape can prevent years of trouble. And always use the “wiggle test” whenever you suspect an intermittent electrical fault – it’s not just for diagnostics, it’s a good preventative check too.
