You’ve got a parking sensor throwing a fit — now what?
I’ve seen this a thousand times: customer pulls up, reverse beeping like a broken metronome, dashboard screaming “Sensor Blocked”, and they’re convinced the whole system’s shot. Truth is, it’s almost never the whole array. One bad sensor takes the whole thing offline — by design. The system fails safe. So before you start yanking bumpers or dropping cash on four new sensors, let’s find the real culprit.
If your scan tool pulls a DTC like “Front Left Sensor Circuit Low”, that’s your starting point. But not everyone’s got a $1,200 Autel. So here’s what I tell owners at the bay: watch the pattern. Does the warning only trigger when backing toward the rear-right corner? Consistently? Then that sensor’s suspect number one. And if you clean it, the warning clears — then comes back in 10 seconds? That’s not dirt. That’s internal failure. Wiping it won’t fix a dead transducer.
The Concept
“Think of it like driving with one flat tire: possible, but risky.”
Don’t replace the sensor yet — rule out the mimics
Here’s where most DIYers and even some shops go sideways: they see a sensor code and swap the sensor. But wiring damage, corroded connectors, or a flaky control module can mimic a dead sensor. I’ve pulled sensors that tested perfect — only to find chewed wiring behind the wheel liner on a 2018 Volvo XC60. So before you touch the bumper, do this:
| Symptom | Likely in Named Sensor | Common External Mimics | Definitive Test to Confirm Source |
|---|---|---|---|
| Single-sensor DTC | Internal sensor transducer or circuit failure | Wiring harness damage, connector corrosion, control module fault |
Test: Perform a sensor swap test. Move the suspect sensor to a known-good location (and swap a good one into its place). Clear codes with a scan tool and retest. If the DTC follows the sensor, it’s faulty. If the code stays in the original location, the issue is likely in the wiring or connector for that zone. |
| False activation in one zone | Damaged or degraded sensor diaphragm | Physical obstruction (ice, mud, bumper sticker), sensor face damage, reflected signal from misaligned trim |
Test: Visually inspect the sensor face under magnification for cracks or chips. Then, use an oscilloscope to compare the signal output (frequency and amplitude) of the suspect sensor against a known-good one at the same distance from a flat surface. A weak or erratic return signal confirms internal degradation. |
| “Sensor Blocked” alert for one sensor | Complete sensor failure or severe signal attenuation | Dense contamination (paint overspray, thick wax), fascia misalignment creating air gap, aftermarket bumper modification |
Test: After cleaning, verify the sensor is flush with the bumper using a feeler gauge (OEM specs typically allow no more than 0.5mm protrusion or recess). Then, use a bi-directional scan tool to command the sensor to activate. Listen closely for the high-frequency “click” it should emit. No sound? The transducer is likely dead. |
The swap test is gold. It’s dead simple and eliminates guesswork. I do it on every single sensor complaint — even when the code seems obvious. And if you’ve got a scan tool with bi-directional control, use it. Tell the sensor to ping. If it doesn’t respond, it’s done. No scope? No problem. The click test works 9 times out of 10.
What actually dies inside the sensor?
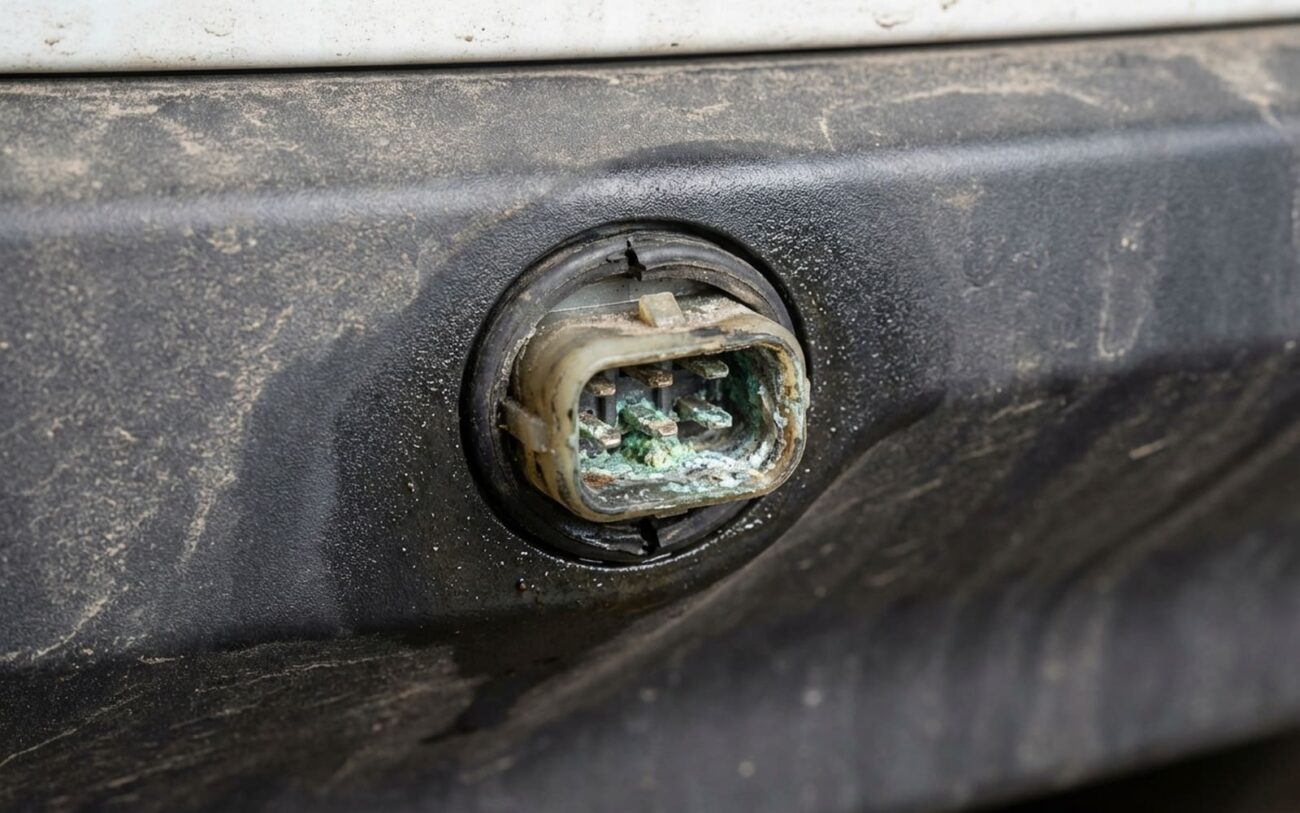
These aren’t magic — they’re ultrasonic transducers in a sealed housing. But they fail in predictable ways. The diaphragm — that thin plastic dome — fatigues over time from thermal cycling and vibration. I’ve pulled sensors with hairline cracks you could barely see, but they killed the signal. The piezoelectric crystal inside degrades, especially in front bumpers that bake in summer sun. And moisture? That’s a killer. Once water gets in, it corrodes the PCB and shorts the driver circuit. I’ve seen it on BMWs, Audis, even some Toyotas — usually after a pressure wash or a deep puddle.
Impact damage is another big one. Curb rash, car wash brushes, even parking too close to a wall — all can crack the face or dislodge internal components. And yeah, there are known batches with bad seals. I’m looking at you, 2019–2021 German luxury brands. Some had undersized gaskets from the factory. If you’re seeing multiple failures on a car under three years old, check for a TSB. Dealer might cover it.
So how do you fix it?
[DIY-FEASIBLE] External, accessible sensor replacement.
[NON-REPAIRABLE → REPLACE]
[TEMPORARY]
Did it actually work? Test like a pro.
Slapping in a new sensor isn’t the end. I’ve had customers come back mad because the beeping came back — turns out they skipped calibration. On BMWs, Mercedes, Audis, and some Toyotas, you need to run a static calibration after replacement. No shortcuts. You’ll need the OEM target board (usually a flat panel), placed exactly 1 meter straight ahead. Then run the sequence via a capable scan tool. If the system doesn’t report “Calibration Successful,” you’re not done.
Even without calibration, check live data. Use a bi-directional tool, hold a board in front of each sensor, and watch the distance values. Should be smooth, no dropouts. Cycle the ignition three times — the system should complete its self-test without warnings. Miss this, and you’re just guessing.
What’s it gonna cost? And is it worth it?
| Repair Type | DIY Cost (Parts) | Shop Cost (Parts & Labor) | Success Rate | Secondary Risk if Failed |
|---|---|---|---|---|
| Single Sensor Replacement | $50 – $150 | $200 – $400 | >98% if correct part and proper installation | Improper handling can damage connector, O-ring, or fascia clips. |
| Full Array Replacement (if diagnosis poor) | $400 – $800 | $1000 – $1500 | N/A (Over-repair) | Unnecessary expense; underlying wiring or control issue may persist. |
Cost-Saving Tip
If a diagnostic fee is creeping toward 30% of the sensor’s cost, do the swap test yourself. It’s low-risk and tells you more than a code ever could. But if you’re seeing multiple faults? Stop. That’s not normal. Check shared power and ground feeds first. Bad ground at the control module can kill all sensors. And on older, low-value cars — be honest: is $400 worth it? Maybe. But a working system adds resale appeal, especially on luxury models. A nagging “Park Assist Off” message bugs drivers more than you’d think.
Keep them alive — the easy way
To Prevent Recurrence
-
Avoid high-pressure sprayers aimed directly at sensor faces. I’ve seen seals blow out from a 3,000 psi wand at close range.
-
Never paint over them. Not even clear coat. Not even “just a little.” It blocks the signal.
-
During washes, take five seconds to look at each one. Cracks, cloudiness, grime — catch it early.
-
If the beep starts earlier on one side, or the system drops out intermittently, that’s early warning. Replace one sensor now, or risk losing the whole system later.
For related issues, see Why do VW/Audi Side Assist radar sensors fail from moisture? and What to Do If Your Blind Spot Detection (BSD) Stops Working After Washing the Rear Bumper.
