Your Car’s Sagging: How to Spot a Shot Spring (From a Tech Who’s Seen It All)
Alright, let’s talk about that feeling you get when your car just doesn’t sit right. Maybe one corner looks a little lower, or it just feels… off. You’re not imagining things. After 25 years in the bay, I can tell you a drooping or uneven ride height is a serious red flag for your suspension.
While shocks, struts, and control arm bushings definitely wear out, the most common culprit for a visibly sagging vehicle is a tired or broken coil spring. Springs don’t just “get old”; they fail in some pretty predictable ways. Catching these issues early? That saves you money, saves your tires, and frankly, it keeps you safer on the road.
Delta: 1.25″
What a Failing Spring Looks, Sounds, and Feels Like (And How to Know It’s Not Something Else)
Not every clunk or sag means you’ve got bad springs, but there are definitely some telltale signs. The first thing I always check is visual: your wheel arch gap. Stand back from your car, either front or rear, on a flat surface. If one side is noticeably lower than the other—especially at a specific corner—you’ve got a ride height problem. This isn’t just cosmetic; a sagging suspension throws off your alignment geometry, particularly camber and toe, which directly impacts tire wear and how the car handles.
My Take
“Think of it like this: a spring is your car’s backbone. If it’s broken or weak, the whole posture of the vehicle is off, and everything else suffers.”
Another unmistakable sign is a loud, sharp metal-on-metal clang when you hit a bump. I’ve diagnosed countless cars with this: it’s usually the broken end of a coil spring slapping against the strut housing or a control arm. This isn’t the vague thud you get from a worn sway bar link; this sound is sudden, distinctly metallic, and usually localized to one corner. Sometimes, if the broken coil is binding, you might even hear a faint grinding when turning the wheel at low speeds.
And don’t ignore abnormal tire wear. A sagging spring forces the tire to tilt inward, causing accelerated wear on the inner shoulder. If you’re burning through tires faster than every 30,000 miles and you haven’t been hitting potholes or curbs like a maniac, check your ride height before you blame alignment or inflation. It’s often a symptom of a deeper suspension issue.
My Diagnostic Flow: Is It Really the Spring?
Before you start ordering parts, you need to rule out other common suspension failures that can mimic a bad spring. That clunk? It could be a few things. That lean? Might be more serious than just a spring. Here’s how I approach it in the shop:
| Symptom | Most Likely Spring Cause | Common Mimics I See | My Definitive Test |
|---|---|---|---|
| Reduced Ride Height / Sagging | Spring fatigue (it’s just worn out) or a complete coil fracture. | A completely collapsed control arm bushing, a bent control arm (from an impact), or a failed strut mount that’s dropped. |
Measure ride height from the fender lip to the wheel center on all four corners. Then, get under there and visually inspect the springs for breaks or severe rust. Check control arm bushings for tears. |
| Sharp Metal-on-Metal Clunk | A broken spring end hitting the strut housing, spring perch, or control arm. | A failed strut mount bearing, a worn sway bar link (very common), or a loose ball joint. |
Use a chassis ear or stethoscope to pinpoint the sound while someone bounces the car. Lift it and check sway bar links and ball joints for play. |
| Abnormal Tire Wear (Inner Edge) | A sagging spring changes the camber angle, tilting the tire inward. | Worn control arm bushings or ball joints, or simply a bad alignment (without a sag). |
After confirming ride height (see above), get an alignment check. The machine will tell you your camber and toe angles. Compare to common tire wear patterns. |
Why Springs Give Up the Ghost
Springs are built tough, but they’re not immortal. The main killer is metal fatigue. Every bump, every turn, every load you put in the trunk cycles that spring through compression and rebound. Over time, usually 100,000+ miles, this constant stress creates microscopic cracks, especially at the coil ends. Once those cracks start, the spring loses its tension and sags, or worse, it just snaps.
The Corrosion Factor (It’s a Big One):
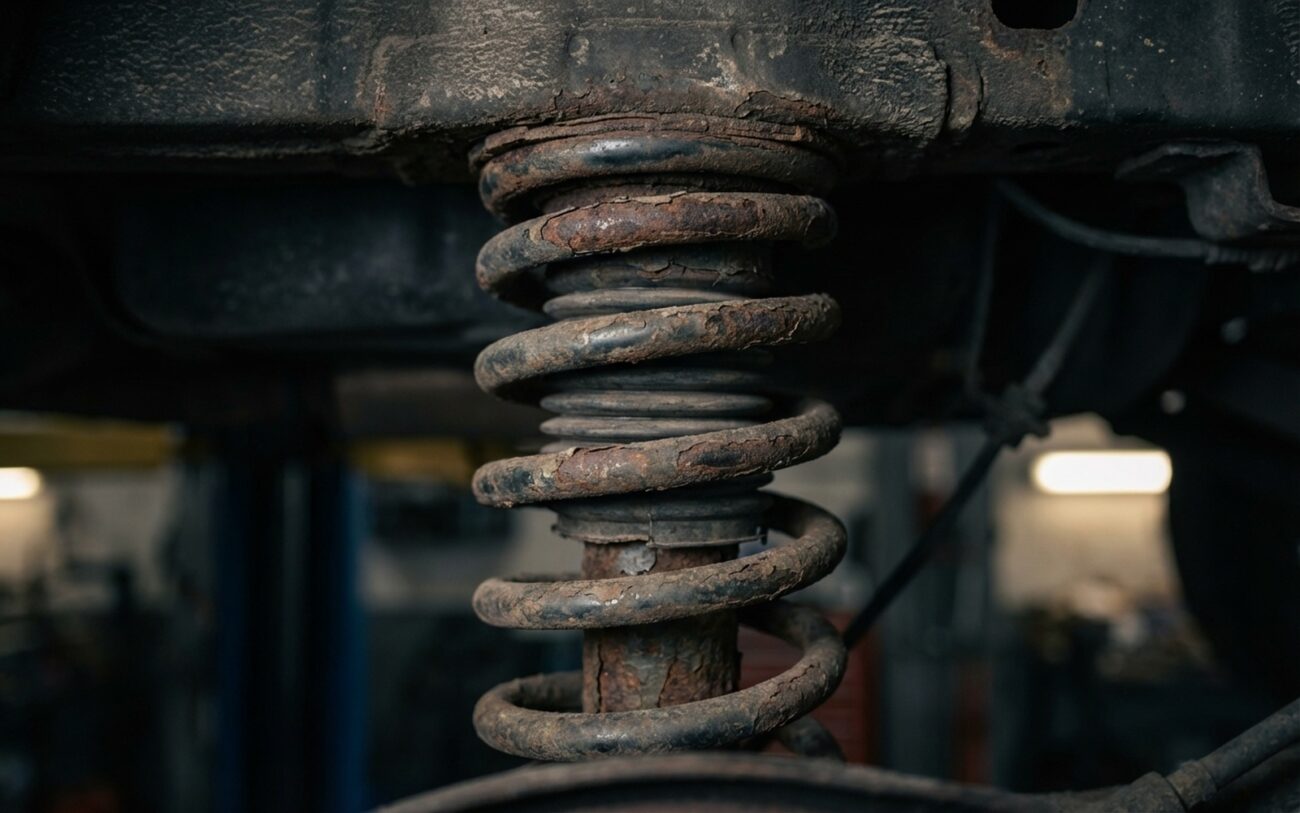
Rust is a spring’s worst enemy. It eats into the surface, creating tiny pits that act like stress points. Almost every broken spring I’ve pulled has failed at the bottom coil, right where water, dirt, and road salt love to collect. You might look at the top of a spring and think it’s fine, but the base could be deeply pitted and ready to snap.
Less common, but it happens, are manufacturing defects. I remember a batch of Ford F-150s from the early 2010s that had front spring issues, traced back to a supplier. And then there’s overloading. If you’re constantly hauling heavy gear or towing beyond your vehicle’s capacity, you’re accelerating that fatigue. Expect those springs to wear out a lot sooner than average.
How I Approach the Fix: Your Options and What to Expect
CRITICAL SAFETY WARNING
Coil springs are under immense tension. Seriously, they can kill you if handled improperly. Replacing them requires specialized, high-quality spring compressors and strict safety protocols. Never, ever use cheap, makeshift tools for this job. If you’re not absolutely confident, take it to a pro.
Front MacPherson Struts Advanced DIY / Pro Recommended
Rear Coil Springs (Separate from Shock) DIY Feasible
Temporary Fixes Absolutely Not Safe
Confirming the Repair: My Post-Job Checklist
Just bolting in new parts isn’t the end of the job. You’ve got to make sure the repair actually fixed the problem. First, check your ride height. Let the vehicle sit for at least 24 hours – springs need time to settle. Then, measure from the fender lip to the center of the wheel on all four corners. I look for a variance of no more than 1/4 inch side-to-side.
My Post-Repair Checklist
-
Take it for a good road test, especially over some rough patches, to confirm that metallic clunk is completely gone.
-
Get a professional alignment. New springs will change your camber and toe, and you’ll chew through new tires if you skip this.
-
With the car on the ground, turn the steering wheel lock-to-lock a few times. Listen for any binding, rubbing, or unusual noises.
What This Repair Will Cost You (Shop vs. DIY)
Rear Coil Spring
This is my estimate for a shop, per corner, including parts and labor. If you’re doing it yourself, parts are usually $100–$200.
Front Strut Assembly
Per corner, for a complete pre-assembled strut (which I recommend). DIY parts will run you $200–$400 per unit.
Full Alignment
This is non-negotiable after any front spring or strut replacement. It’s cheap compared to new tires.
Technician’s Insight: When to Walk Away
If your car needs multiple springs, and the total repair bill starts creeping up towards 40% of the vehicle’s current value, it’s time to seriously reconsider. You likely have other major wear items lurking, like control arms, ball joints, or even brakes, that will need attention soon. Sometimes, it’s just not worth the investment.
How to Keep Your Springs Happy (and Prevent Future Headaches)
Look, springs are wear items; they’re going to give out eventually. But you can definitely extend their life. My biggest piece of advice: fight corrosion. If you’re in a winter climate where they use road salt, rinse your undercarriage regularly. A quick spray in the wheel wells and around the suspension components after a salty drive makes a huge difference.
-
Make ride height checks part of your routine. Grab a tape measure and record the gap at all four corners once a year. It gives you a baseline.
-
Every time you change your oil, take a peek at the springs. Look for cracked paint, rust scaling, or coils that are actually touching each other when the car is at rest.
-
Avoid overloading your vehicle. Seriously, don’t push it. Regularly towing or hauling near max capacity is a fast track to spring fatigue.
