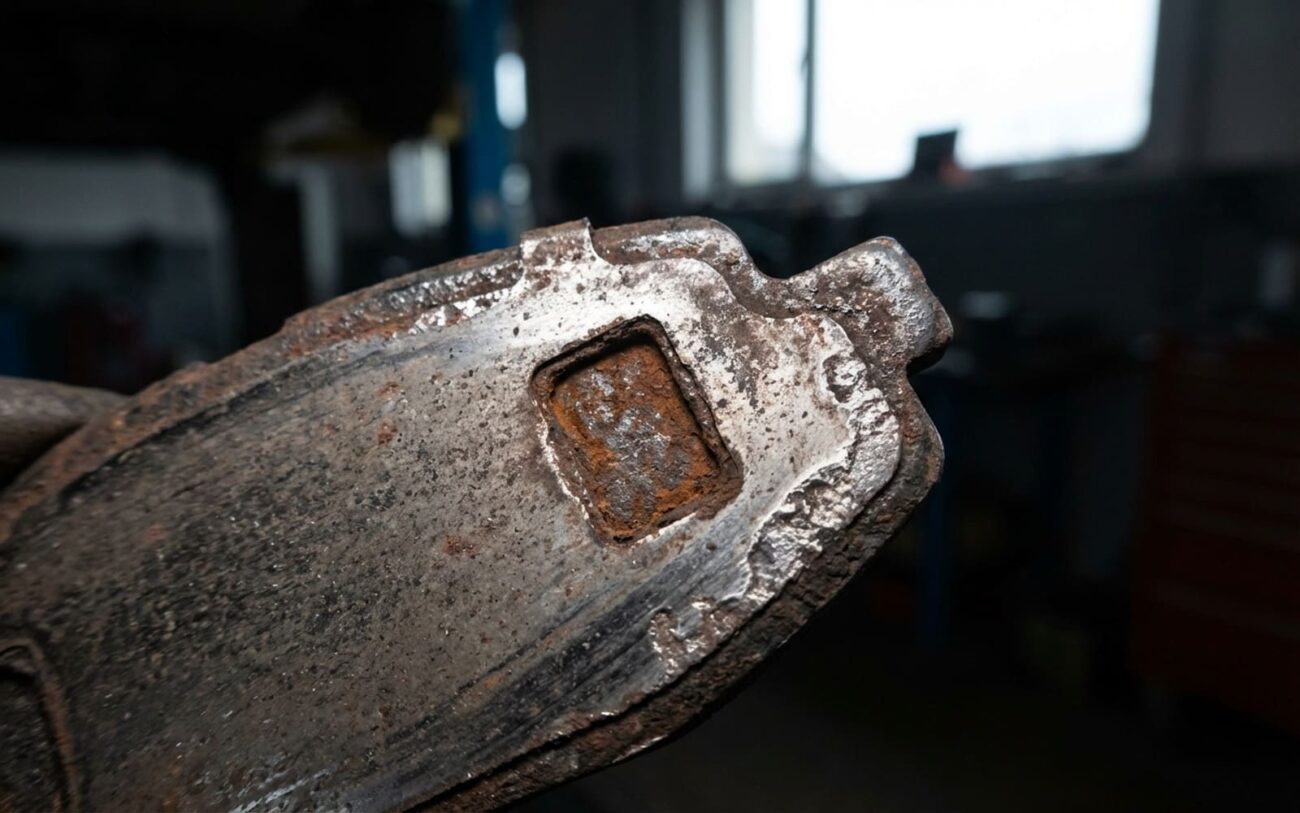
You know the sound. You back out of the driveway on a cool, damp morning, touch the brakes, and squeal! A sharp, high-pitched chirp that makes you wince. I’ve been turning wrenches for over 25 years, and I can tell you, I’ve heard that sound hundreds, probably thousands, of times. My first thought? “Yep, another set of brake shims acting up.”
Look, it’s almost never a sign your brakes are about to fail and send you into a ditch. But it is a symptom. It means something isn’t quite right, mechanically speaking. What you’re hearing is a high-frequency vibration, usually between the brake pad and the caliper assembly. It only shows up when everything’s cold and a bit contracted, then it goes away once things warm up and expand a little. That’s the key.
Tech Tip: This isn’t a mystery. Manufacturers know about it. I’ve seen plenty of service bulletins over the years, especially for certain domestic and Asian models, specifically addressing cold brake squeal due to missing or degraded anti-squeal shims. It’s a known design consideration, not some rare anomaly.
Why That Annoying Squeal Happens
The main culprit, in my experience, is almost always the anti-squeal shim. These are those thin, often multi-layered metal or composite plates that are bonded to the back of the brake pad. Their job is simple: dampen vibrations. They create a buffer between the steel backing plate of the pad and the caliper piston or bracket.
When these shims are missing (which happens more often than you’d think, especially after a quick brake job), corroded, or just not installed properly, that pad backing plate can vibrate directly against the caliper. That’s your high-pitched chirp. While it won’t leave you stranded, ignoring it can lead to accelerated pad edge wear, more heat getting into your caliper piston, and even uneven braking down the road. So, it’s worth fixing.
Pinpointing the Noise: Is It Really the Shims?
Before you tear into your brakes, let’s make sure we’re chasing the right ghost. Not all brake noises are cold squeal, and not all cold squeals are shim issues. Here’s how I typically narrow it down:
-
If your pedal pulsates, you’re probably looking at rotor thickness variation – what most folks call “warped rotors.” That’s a different problem.
-
A constant squeal, regardless of temperature, usually means your wear indicator is scraping the rotor. That’s the little metal tab telling you it’s time for new pads, period.
-
But if it’s only when things are cold, and then it vanishes? That’s when I put my money on vibration, and the shims are ground zero.
Here’s a quick rundown of symptoms and how I confirm what’s going on:
| Symptom | What It Usually Means (Shim-Related) | Other Possibilities (Mimics) | My Go-To Test |
|---|---|---|---|
| Cold-only squeal | Missing, corroded, or dry anti-squeal shim; pad backing plate hitting the caliper. | Glazed pad surface; rotor surface deposits; insufficient pad chamfer (less common for cold-only). |
Pull the wheel and caliper. Inspect the shim: Is it there? Is it rusty? Is it sitting right? Apply a thin layer of brake lube to contact points and retest. |
| Squeal with light pedal pressure | Shim not fully seated against the pad or caliper; adhesive bond has failed. | Wear indicator tab just starting to contact the rotor (check pad thickness). |
With the caliper off but the pads still in the bracket, gently try to wiggle the pad assembly. Any noticeable movement means the shim isn’t doing its job. |
| Squeal from one wheel only | Isolated shim failure on that specific wheel. | Contaminated rotor (oil, brake fluid); sticky caliper slide pin (can cause uneven pad wear leading to noise). |
Compare the shim condition on the noisy side to a quiet side. Clean the rotor thoroughly with brake cleaner. Then, perform 5–10 controlled stops to see if it clears up. |
To do any of this, you’ll need some basic tools: a jack and stands (safety first!), a lug wrench, a C-clamp or caliper piston tool, brake cleaner, and a good flashlight. A thorough visual inspection is key here. Look for shims that are just plain missing, rust buildup under them, or even aftermarket shims that were poorly cut and are now rubbing where they shouldn’t.
How Those Little Shims Give Up the Ghost
It’s not always just a missing shim. These things fail in a few predictable ways, and I’ve seen every single one of them repeatedly in the shop.
First up, adhesive failure. The shim is usually glued to the pad’s backing plate with some pretty tough, heat-resistant stuff. But if the surface wasn’t cleaned properly before installation, or if someone used cheap aftermarket parts, that bond can weaken. Once the shim detaches even a little, it starts vibrating independently, and that’s your noise.
Corrosion is another huge one, especially if you live where they salt the roads in winter. Rust loves to form between the shim and the backing plate. It acts like tiny little spacers, preventing full, even contact. That uneven surface allows for micro-movements during light braking, which are perfect conditions for a squeal.
Then there’s heat deformation. Brakes get hot, then they cool down. Over and over again. This constant heating and cooling can warp the shim, especially if it’s just a thin piece of stamped steel. A warped shim won’t make full contact with the caliper piston, leading to uneven pressure points and, you guessed it, vibration.
And finally, incorrect installation. Oh man, I’ve seen it all. Universal shim kits cut with tin snips, leaving jagged edges that rub against the caliper bracket or even the rotor. Even a tiny bit of interference can make noise. And some folks skip lubricating the shim-to-piston interface entirely – that’s a big mistake. Proper damping needs both solid physical contact and a controlled slip, and you only get that with the right lubricant.
Your Options to Make It Stop
Safety First, Always
Any brake work requires precision. Make sure all hardware, especially caliper mounting bolts, are torqued to the manufacturer’s exact specifications. This is usually in the 25–85 ft-lbs range, but check your vehicle’s service manual. Overtightening or undertightening can lead to binding, uneven pad wear, or worse.
Just Replace the Shim
Replace Pads and Shims Together (My Preferred Method)
Advanced Cases: Caliper Issues
How to Know You Actually Fixed It
You don’t need fancy diagnostic equipment to confirm the fix, just a careful test drive and a bit of patience. After you’ve completed the repair, let the vehicle sit overnight – at least 8 hours – to ensure everything is completely cold. The next morning, perform your first five brake applications from speeds of 10–15 mph. They should be silent. If you hear any squeal, it means you haven’t resolved the root cause.
If you replaced the pads, don’t forget the proper brake pad bedding procedure. Over the first 50 miles, do several moderate stops from about 40 mph, allowing the brakes to cool between each stop. After that, pull a wheel and inspect the rotor. You should see an even transfer layer across the entire friction surface. That tells you the pads are making full contact and working as they should.
What’s This Going to Cost You?
Alright, let’s talk brass tacks. Here’s what you can expect to pay, depending on how you tackle it:
| Repair Type | DIY Cost (Parts) | Shop Cost (Parts & Labor) | My Success Rate Estimate | Potential Downsides |
|---|---|---|---|---|
| Shim Kit Install Only | $15–$40 | $100–$200 | 70–80% | Might need full pad replacement later if the diagnosis wasn’t 100% complete. |
| Pad & Shim Replacement | $80–$150 | $250–$400 | 90% | Low, assuming you use quality parts and follow proper bedding procedures. |
| Caliper, Pad & Shim | $200–$400 | $400–$600 | 95%+ | Mainly financial; only justified if you’ve confirmed a caliper piston issue. |
Stopping the Noise Before It Even Starts
Prevention is always your best bet, and it’s something I preach in my shop. Every time you pull a caliper off, treat it as an opportunity to prevent future noise. Clean the caliper piston face and the pad abutment points in the bracket with a wire brush. Get all that old crud off. Then, apply a thin, even coat of high-temperature brake lubricant to these critical areas:
-
The back of the anti-squeal shim (or the pad backing plate if there’s no separate shim).
-
The “ears” of the brake pads where they slide in the caliper bracket.
-
The caliper slide pins and their bores (make sure they move freely!).
Pro Tip: Pad Material Matters
If you’re constantly fighting cold squeal, consider your pad material. Semi-metallic pads are generally more prone to this kind of noise than ceramic formulations. If you’re replacing pads anyway, switching to a ceramic compound is often a good move – they’re typically quieter and produce less dust, too.
