Uneven Brake Wear? Let’s Find the Real Problem.
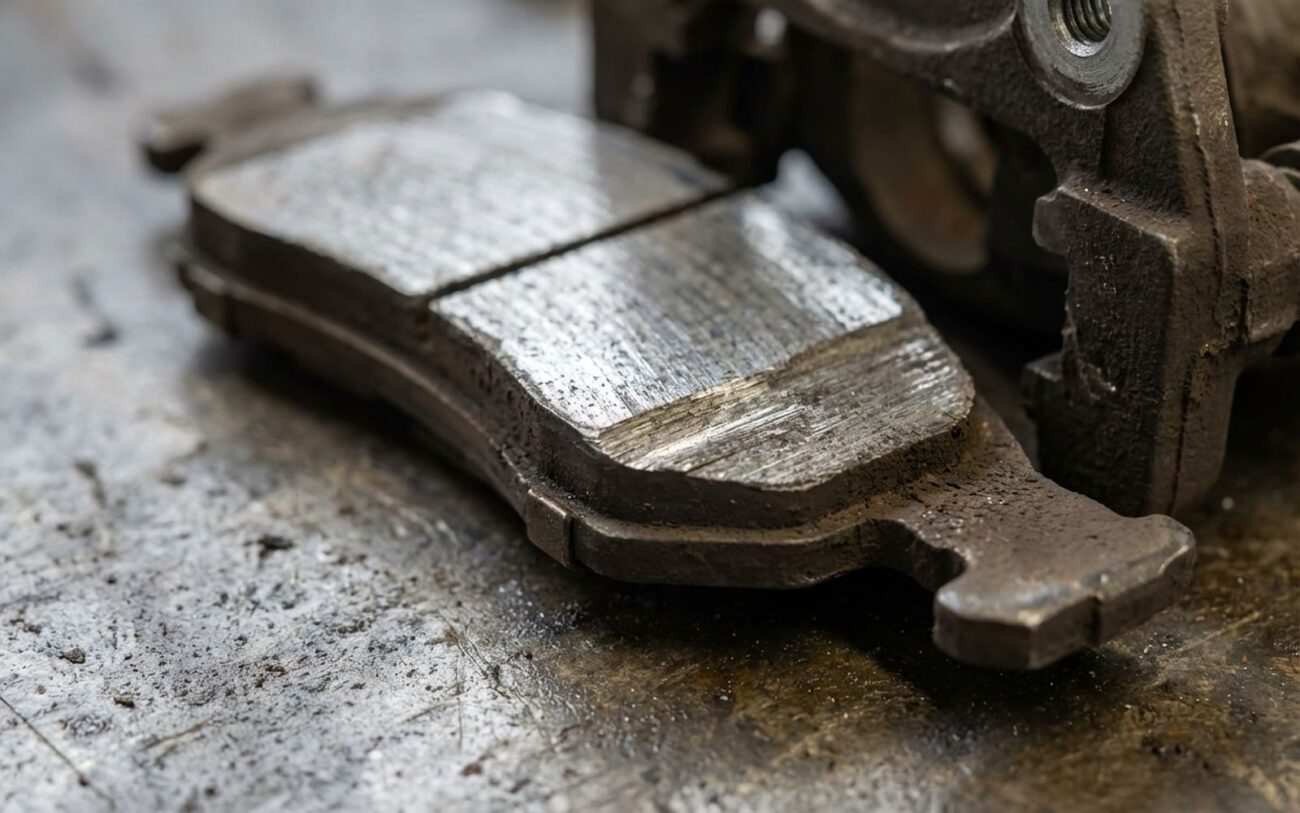
Look, if you’ve pulled a wheel and seen one brake pad chewed down to the metal while its partner still looks brand new, you know that gut feeling. Something’s definitely wrong. But here’s what I’ve learned over 25 years in the shop: that uneven wear isn’t just bad luck. It’s a symptom, a clear sign pointing to a mechanical failure in the caliper or the hub assembly.
I’ve seen countless guys — even experienced techs — just throw new pads, rotors, and sometimes even calipers at a car, only to have the customer back in a few months with the exact same issue. Why? Because they never bothered to read the wear pattern and find the root cause. That’s a waste of time and money, and frankly, it’s not how we do things. Let me walk you through how I diagnose these problems, so you fix it once and fix it right.
Drag: HIGH
Reading the Pads: What the Wear Tells You
A healthy brake caliper is a thing of beauty. It moves freely, applying even pressure across both the inner and outer pads. When it can’t do that, you get uneven wear. It’s like a roadmap, really. The pattern tells you where to start looking.
If you see the inner pad worn way down while the outer pad is still thick, that’s classic seized caliper piston behavior. The piston pushes out to apply the brake, but it can’t retract. So, that inner pad stays clamped against the rotor, dragging constantly. I see this a lot on older vehicles where the piston boot has torn, letting in moisture and road salt to corrode the piston bore.
Now, if it’s the outer pad that’s worn thin and the inner looks fine, that usually means the slide pins are seized. Think of it like a sliding door on a rusted track: if the rollers are stuck, the door won’t move smoothly no matter how hard you push. The caliper itself can’t float or slide, so the outer pad ends up doing all the work, getting chewed up in the process. Again, torn boots and neglected lubrication are the usual culprits here.
Then there’s tapered wear, where a pad is thinner on one end than the other. This often points to a caliper bracket that’s either corroded, bent, or simply wasn’t torqued down correctly. It can also be a sign of excessive hub flange runout, causing the rotor to wobble. That’s a bit more subtle, but still fixable.
And if you’ve got both inner pads on the same axle wearing fast? That’s a different ballgame. That’s usually not a caliper problem on its own. That points to a systemic hydraulic issue, like a failing proportioning valve or an ABS hydraulic unit holding residual pressure. That’s a deeper dive, but for now, let’s stick to the common stuff: caliper and hub issues.
My Go-To Diagnostic Flow: Confirming the Problem
Reading the pads gives you a good starting point, but you absolutely have to test to confirm. I’ve seen too many techs guess wrong because other components can mimic caliper or hub failure. Just swapping parts without a proper diagnosis is a surefire way to waste money and time. This table is my quick reference for what to look for and how to definitively test it.
| Brake Wear Symptom | Most Likely Root Cause | Possible Mimics | Definitive Test Procedure |
|---|---|---|---|
| Inner pad worn significantly; outer pad still thick | Seized caliper piston (unable to retract) | Collapsed flexible brake hose acting as a one-way valve |
Try to compress the piston with a C-clamp. If it resists, open the bleeder screw. If the piston then moves easily, the flexible brake hose is the culprit, not the caliper itself. |
| Outer pad worn; inner pad in good condition | Seized caliper slide pins (caliper can’t slide) | Corroded or deformed pad abutment clips |
Remove the caliper from its bracket. Try to slide it freely on its guide pins. Any binding or excessive resistance confirms seized pins. Also check the pad abutment clips for corrosion. |
| Tapered wear (pad thinner at top or leading edge) | Caliper bracket misaligned or incorrect bolt torque | Excessive hub flange runout causing rotor wobble |
First, verify the caliper bracket mounting bolt torque against factory specs. Then, use a dial indicator on the hub flange. If runout exceeds 0.05mm (0.002 inches), you’ve likely got a damaged or corroded hub. |
Why Do These Parts Give Up?
Knowing why something fails is half the battle in preventing it from happening again. With brake calipers, it almost always comes down to corrosion and heat. Water and road salt are the biggest enemies. They creep past worn or cracked piston boots, get into the bore, and start rusting everything up. Once that piston binds, it’s not retracting – and that’s your constant drag and inner pad wear. The slide pins? Same story. Torn rubber boots let moisture in, wash out the high-temp grease, and then rust locks those pins solid. On a lot of older Japanese cars, for example, those pins are particularly susceptible if not serviced regularly.
Important Distinction:
Let’s be clear about something: a collapsed flexible brake hose isn’t a caliper problem; it’s a hydraulic system issue that just mimics a seized piston. Same goes for a sticky brake pedal return switch or a master cylinder that’s holding residual pressure. Always rule out the hose and master cylinder before you condemn a caliper. That’s a mistake I’ve seen too many times.
As for wheel hubs, failure usually starts with impact or, again, corrosion. A nasty pothole can bend the hub flange, causing rotor runout and that annoying, erratic pad contact. And then there’s galvanic corrosion – that’s when you get dissimilar metals, like an aluminum hub and an iron rotor, basically welding themselves together. That creates drag that looks exactly like a seized caliper. In these cases, a thorough cleaning of the mating surfaces often solves the issue, but if the flange is bent, you’re replacing the hub.
The Repair: Doing It Once, Doing It Right
Safety First, Always.
There is no such thing as a “temporary fix” for a hydraulic brake failure. Don’t even think about driving with a dragging caliper, hoping it’ll “free up.” It won’t. You’re just asking for warped rotors, boiled brake fluid, and a serious loss of braking power. Get it fixed.
Once you’ve pinpointed the problem, here’s how I approach the repair:
Slide Pin Service DIY Friendly
If your slide pins are the issue, this is usually a straightforward fix. Remove the caliper, pull those pins out, clean them and their bores thoroughly (a small wire brush works wonders), replace any damaged rubber boots, and then re-lubricate everything with a high-temperature silicone brake grease. Don’t skimp on the grease, and make sure you use the right kind. Reassemble and torque everything to spec. This is a cheap, effective job that can really extend the life of your calipers.
Caliper Replacement Intermediate
If the piston is seized, the bore is pitted, or the caliper body itself is damaged, replacement is the only safe option. I always recommend a quality remanufactured unit over a cheap new one – often better quality control. Bench-bleed the new caliper before you install it to save yourself a headache later. And for crying out loud, flush the old, contaminated brake fluid! That’s crucial for preventing future corrosion and keeping your whole brake system healthy.
Hub & Flange Repair Professional Only
For hub issues, start by cleaning any surface corrosion from the hub face with a wire wheel. If that doesn’t fix your runout, or if the flange is visibly bent, you’re replacing the entire hub bearing assembly. This isn’t a DIY job for most folks. It often requires specialized tools like a hydraulic press for the bearing, and high-torque tools (we’re talking 180+ ft-lbs on some lug nuts and axle nuts) to get everything back together safely. If you don’t have the right tools and experience, take this one to a pro.
Don’t Assume: Verifying Your Work
Just because you bolted on new parts doesn’t mean the problem is gone. You have to test it. After any caliper or hub repair, I always take the car for a good test drive. I do a few moderate stops, then some firm ones. The car should track perfectly straight, no pulling to one side. Then, and this is key, I use an infrared temperature gun on the rotors after those stops. The temperatures on both sides of the same axle should be within 20°F (about 11°C) of each other. If one rotor is significantly hotter, you still have drag, and you’ve got to figure out why.
Keeping Trouble Away: My Prevention Checklist
-
Change your brake fluid every 2–3 years. This is huge. It prevents internal moisture from building up and corroding your hydraulic components, including those caliper bores.
-
Inspect and re-lubricate those slide pins during every tire rotation or brake inspection. It’s a quick job that pays dividends.
-
Clean the pad contact points on the caliper bracket. This ensures the pads can slide freely, which is critical for even wear.
-
Do a quick “heat check” yourself. After a drive, carefully wave your hand near each wheel (don’t touch!). If one side feels significantly hotter, you might be catching early drag before it becomes a major problem.
What’s This Going to Cost You?
Alright, let’s talk money. Catching uneven wear early can save you a bundle. A simple slide pin service is a fraction of the cost of a full caliper replacement, let alone a hub assembly. Here’s a general idea of what you’re looking at, both if you do it yourself (parts only) or take it to a reputable shop:
| Repair Type | DIY Cost (Parts) | Shop Cost (Total) | Success Rate | Secondary Risks |
|---|---|---|---|---|
| Slide pin service | $15–$30 | $120–$180 | 95% | Rotor scoring, fuel loss |
| Caliper replacement | $100–$250 | $400–$600 | 98% | Soft pedal, ABS codes |
| Hub bearing assembly | $150–$400 | $500–$800 | 99% | Wheel separation risk |
My Advice on Proactive Maintenance:
Seriously, catching uneven wear early means a $20 service instead of a $500 repair. If you know your vehicle model is prone to brake or hub issues (and many are, like certain years of the Ford F-150 or older Honda Civics with rear caliper issues), stay extra proactive. The more you know about your car’s weak points, the longer you’ll keep it stopping safely and reliably.
