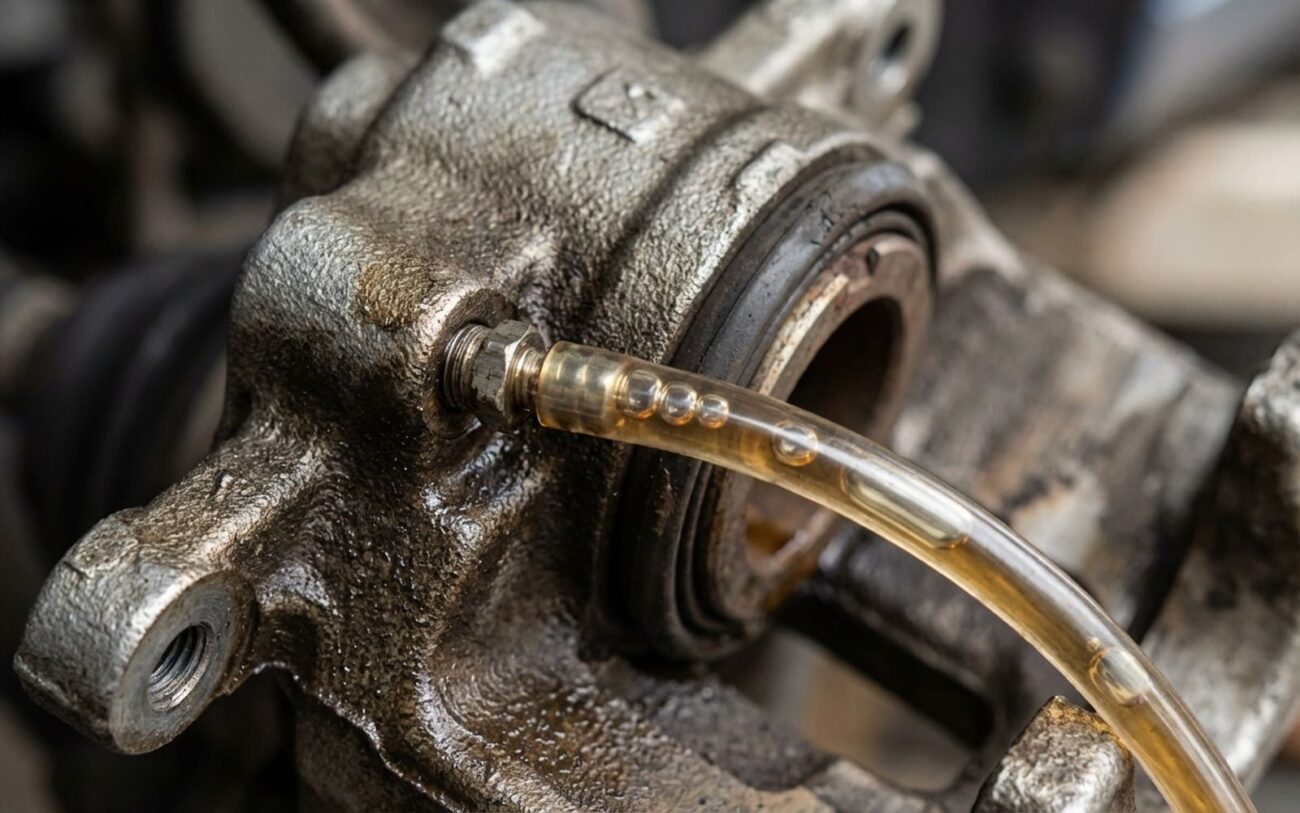
You’ve got that sinking feeling, literally. One brake pedal that feels soft or spongy, but only when you’re thinking about one specific wheel. The rest of the system feels fine, right? That’s a huge clue, and in my 25+ years turning wrenches, it tells me the master cylinder is probably okay. We’re dealing with a localized hydraulic problem, isolated to a single corner of the vehicle.
Ignoring this isn’t just an inconvenience; it’s dangerous. You’re risking uneven braking, longer stopping distances, and the car pulling hard to one side under deceleration. I’ve seen it lead to close calls more times than I can count.
My Go-To Diagnosis for a Single Soft Brake
When a car rolls into my shop with this complaint, I don’t just start bleeding. That’s a common mistake. Air doesn’t just appear; it gets in because of a problem. The real goal is to figure out if the issue is “upstream” (like the flexible brake hose or even further back) or “downstream” (the caliper itself). Here’s the first test I always perform.
The Static Pressure Hold Test: Pinpointing the Leak
This test is simple, effective, and tells you a lot. With the engine off, pump the brake pedal several times until it feels firm. You’re building up maximum hydraulic pressure. Now, hold firm pressure on the pedal. Keep it there.
Next, use a proper brake hose clamp (the kind designed for hydraulic lines, not just a vice grip) to pinch off the flexible rubber brake line leading to the suspect caliper. Be gentle but firm; you don’t want to damage the hose internally. While you’re holding the pedal, carefully clamp the hose.
- If the pedal immediately firms up and stays firm: This tells you the problem is downstream of the clamp. That means it’s likely the caliper itself, or possibly the bleeder valve. The clamp has isolated the leak.
- If the pedal remains soft or still slowly sinks: The issue is upstream of the clamp. This points to a problem with the flexible brake hose itself (often an internal collapse or delamination), a corroded hard line, or, less commonly, an issue closer to the master cylinder or ABS unit.
This test is your first major fork in the road. It saves you a lot of time and prevents you from replacing parts unnecessarily.
If the Caliper is the Culprit
Let’s say the static pressure hold test pointed to the caliper. Now we need to dig deeper. There are a few common ways a caliper can fail and give you that soft pedal.
Internal Piston Seal Failure (The Hidden Leak)
This is probably the most common cause. The internal piston seal allows fluid to bypass under pressure. You might not see an external leak because the fluid just cycles back into the caliper bore. To confirm this:
Remove the caliper from its mounting bracket, but leave it connected to the brake line. Have an assistant apply steady, firm brake pressure while you carefully observe the piston. If it moves excessively, or if you see fluid weeping from behind the rubber dust boot (the external seal), then the internal piston seal is compromised. That caliper is done.
External Leaks: Where to Look
Sometimes, the leak is obvious. If you see brake fluid at the wheel, you’re looking for an external leak. Clean the area thoroughly with brake cleaner. Then, apply a light dusting of talcum powder or use a UV dye kit to highlight any seepage. Have your assistant press and hold the brake pedal again while you inspect. Fresh fluid coming from:
- Behind the piston boot: Failed piston seal.
- Around the bleeder valve: Loose, damaged, or corroded bleeder screw.
- At the banjo bolt or line fitting: Loose fitting, damaged crush washer, or a cracked caliper casting around the port.
- From a hairline crack in the caliper body: This is less common but can happen from impact damage or a casting defect.
Other Caliper Failures I See
Beyond simple leaks, calipers can fail in other ways:
- Internal Corrosion: Brake fluid is hygroscopic, meaning it absorbs moisture over time. If you haven’t done a brake fluid flush in 3-5 years, that water content can corrode the smooth bore where the piston slides. Pitting destroys the seal’s ability to maintain pressure, leading to fluid bypass and a soft pedal. This is an internal failure, often with no visible external leak.
- Casting Defects: Some calipers, particularly on certain model years or specific vehicle platforms, can have porosity in the aluminum body. These tiny voids can create internal or external leaks under pressure. While I can’t name specific TSBs offhand for every car, manufacturers have addressed this in service campaigns, especially on compact performance models where caliper stress is higher.
- Impact Damage: A rock, road debris, or even hitting a curb can crack a caliper, particularly on lower-mounted rear calipers. Even a small crack can cause a slow leak or allow air into the system when the piston retracts.
Here’s a critical distinction: air in the caliper is not a failed caliper. Air gets in due to leaks, improper bleeding, or a failing master cylinder. But a bad caliper seal can pull in air when the piston retracts, which complicates diagnosis. So if you keep getting air in one caliper after bleeding, don’t just keep bleeding—you need to find out how it’s getting in.
If the Brake Hose is the Culprit
If your static pressure hold test indicated an upstream problem, the flexible brake hose is the prime suspect. These hoses are made of rubber and can degrade over time, especially from heat, age, and exposure to road chemicals.
What happens is the internal lining of the hose can delaminate or collapse. When you apply the brakes, the fluid pushes against this restriction, creating a soft, spongy feel because the pressure isn’t fully reaching the caliper. When you release the pedal, the collapsed lining can even act like a one-way valve, holding residual pressure in the caliper and causing brake drag. Visually inspect the hose for cracks, bulges, or chafing. Sometimes, the internal collapse isn’t visible externally, but the clamp test will tell you it’s there.
Repair Options: What Actually Works
Leaking or Damaged Bleeder Valve
If the leak is at the bleeder screw, this is a relatively simple fix. Replace it with an OEM-spec part. I’ve seen too many aftermarket bleeder screws that are undersized or poorly threaded, leading to more headaches. Use a six-point flare-nut wrench to avoid rounding the head – trust me, you don’t want to drill out a bleeder screw. Clean the threads in the caliper with a tap and thread chaser before installing the new one. Torque it to spec, usually between 60 and 100 inch-pounds, but always refer to your vehicle’s service manual. After replacement, you’ll need to bleed that entire brake circuit to ensure no air remains. This is a common cause of persistent air in a caliper, and it’s often overlooked.
Failed Caliper (Seal, Corrosion, or Crack)
If the caliper is leaking internally or externally due to seal failure, corrosion, or damage, replacement is the only reliable fix. While rebuilding calipers is possible, remanufactured units from reputable suppliers are often more cost-effective and come with new seals and hardware already installed. Unless it’s a specialty caliper for a classic car, I usually go with a quality reman.
I strongly recommend replacing calipers in axle pairs. If one has failed from age or corrosion, the other is likely degraded too. Running mismatched calipers—one new, one old—can lead to uneven clamping force, which shows up as a pull during braking or an uneven brake pedal feel. Swap both fronts or both rears, even if only one is clearly bad.
The job involves removing the old caliper, transferring the pads (if they’re still in good condition), installing the new unit, and then bleeding the system. Be careful not to damage the flexible brake hose when removing the caliper—if it looks at all suspect, replacing a damaged hose at the same time is a smart move.
Damaged or Collapsed Flexible Brake Hose
If the clamp test points to the hose, replace it. There’s no repairing a collapsed or delaminated brake hose. Always use an OEM-quality replacement. When installing, make sure the hose isn’t twisted or kinked, and that it has enough slack for full suspension travel and steering lock. Torque the fittings to spec, then thoroughly bleed the system.
Trapped Air in the Brake Line
If the caliper and hose test fine, the issue is likely air trapped in that corner of the system. But remember, air doesn’t just appear—it gets in due to a leak, low fluid, or improper maintenance. To fix it, you need to perform a proper brake bleeding procedure.
I prefer the two-person method (one on the pedal, one at the bleeder) or a pressure bleeder for best results. Start with the wheel farthest from the master cylinder (usually the right rear on most cars) and follow the manufacturer’s sequence. Always use clear tubing on the bleeder valve so you can watch for air bubbles. And for goodness sake, keep the reservoir full—running it dry is the quickest way to introduce more air than you started with.
If air keeps returning to the same caliper after multiple bleeding attempts, go back and inspect the entire hydraulic path: bleeder screw, hose, caliper, and master cylinder. A failing master cylinder can sometimes draw air into the system when the pedal is released, which can mimic a local issue.
Final Steps: Bedding and Validation
After any brake repair involving new pads or rotors, you must perform a bedding procedure. Find a safe, empty stretch of road and make 5–10 moderate stops from 30–40 mph, allowing a few seconds between stops to let the brakes cool slightly. This transfers pad material evenly to the rotor and ensures full contact. Skipping this step can lead to reduced braking performance, noise, and uneven wear, even with brand new parts.
Finally, after a test drive, check for brake drag. Carefully feel each wheel hub. If one is significantly hotter than the others (without having just done a hard stop), it could indicate a stuck caliper, a collapsed hose, or even a parking brake issue. If you find a hot wheel, you need to go back and inspect that corner again.
