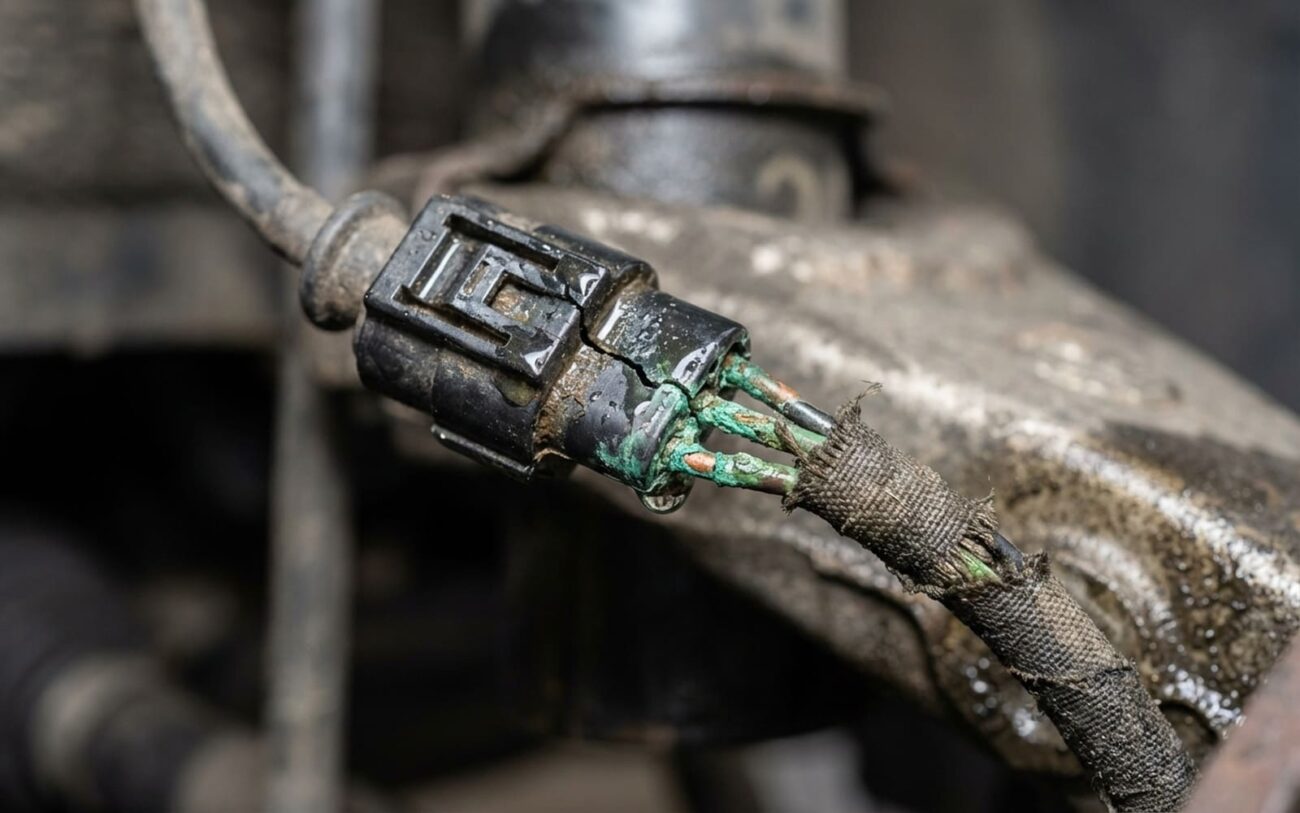
If you’re driving a Mk5 Golf or an Octavia A5, and that ABS light starts flickering after a car wash or a good rain, you’re not alone. I see this problem walk through my shop doors all the time. Usually, it’s a compromised wheel speed sensor that’s taken on some water. It starts intermittent, but eventually, that light just stays on. And when it does, it’s not just an annoyance—it’s a real safety issue.
Recognizing the Signs & Why It Matters
What you’ll typically see is the ABS warning light, sometimes the traction control (TC) or Electronic Stability Program (ESP) light, flashing on after your car gets wet. Heavy rain, splashing through a puddle, or even just a good car wash can trigger it. At first, it might go away once things dry out, but eventually, it’ll just stay illuminated.
Now, here’s the critical part: this isn’t a mechanical brake issue. You won’t feel grinding, pulsation, or dragging in the pedal. Your regular brakes still work, but the problem is purely electronic. The ABS control module relies on accurate wheel speed data from each corner. If it gets no signal, or a really erratic one, from a sensor, it has to play it safe. It disables the anti-lock braking and ESP functions for that wheel, and sometimes for the whole system.
Why does that matter? In an emergency stop, especially on wet or slippery roads, you lose those critical safety nets. Your stopping distances can increase, and you risk losing control because the system can’t prevent wheel lockup or skidding. So, don’t ignore those lights. They’re telling you something important about your car’s ability to keep you safe.
Diagnosis: Don’t Guess, Test!
Look, the ABS light just tells you there’s a problem. It doesn’t tell you what problem. This is where a lot of DIYers, and even some less experienced techs, go wrong. They see an “implausible signal” code for the front left and just replace the front left sensor. But that same code can come from a corroded connector, chafed wiring, or even a damaged tone ring on the wheel bearing. You need to confirm the root cause before you start replacing parts.
Step 1: Scan Tool First
Your first move is always a capable scan tool. I’m talking something that can talk to the ABS module directly, like VCDS for VW/Skoda, or a good professional-grade OBD2 scanner. It’ll pull the fault codes and tell you which wheel is reporting the issue. It might even tell you if the fault is intermittent or constant. This narrows down your focus significantly.
Step 2: Get Out the Multimeter
The scan tool points you to the corner, but the multimeter tells you if it’s the sensor itself. Here’s how I approach it:
-
Resistance Test (Dry): Unplug the sensor connector. Measure the resistance across the two pins on the sensor’s pigtail. A healthy passive inductive sensor (which these VAG sensors typically are) should read somewhere between 1000 and 1600 ohms. If you get an “OL” (open circuit) reading, or something wildly out of range, that sensor is internally dead.
-
AC Voltage Test (Spinning): Reconnect the sensor. Set your multimeter to AC millivolts (mV). With the wheel off the ground, backprobe the two signal wires at the sensor connector (or even further up the harness if you suspect wiring issues). Spin the wheel by hand, as fast as you can. A good sensor should produce at least 100mV AC. If you have good resistance but no AC voltage, that points to an issue with the tone ring (reluctor ring) being damaged, missing, or having too large an air gap to the sensor.
-
The “Water Test” for Intermittent Faults: If the fault only happens when it’s wet, you need to simulate that. Perform the resistance test when everything is dry. Then, spray the sensor and its connector liberally with water (a spray bottle works great). Immediately retest the resistance. If the resistance drops sharply, or if you suddenly detect continuity to ground (less than 1 megaohm), you’ve found your culprit. Moisture is getting inside the sensor housing, shorting out the coil. This is a definitive sign of internal water damage.
I’ve seen too many guys replace hub assemblies or bearings because they didn’t do these tests. A $50 sensor with internal corrosion can mimic a much more expensive problem. Always test to confirm!
Why These Sensors Fail from the Inside Out
So, why are these VAG sensors so prone to water damage? It’s a combination of design and environment. On the PQ35 platform (Golf Mk5, Octavia A5, Jetta, etc.), these are passive inductive sensors, often sealed in epoxy and plastic. They’re mounted right into the steering knuckle, which puts them directly in the line of fire for road grime, salt, and constant temperature changes.
Over time—I usually see this around the 8-12 year mark—that plastic housing and internal potting compound just degrade. Tiny, almost invisible cracks develop from the constant expansion and contraction. Once that seal is compromised, moisture gets in. And with road salt in the mix, that fine copper winding inside the coil corrodes quickly. Even a little bit of internal rust changes the coil’s resistance, distorts the AC voltage signal, and eventually, the sensor just quits.
This isn’t some rare fluke; it’s a known pattern. It’s important to differentiate this from other issues. If the electrical connector is green with corrosion, that’s a harness problem. If the wiring is physically chafed, that’s a wiring repair. If the tone ring on the CV joint or wheel bearing is bent or missing teeth, the sensor might read wrong, but the sensor itself is fine. True ABS sensor corrosion means the sensor unit itself has failed internally.
The Fix: Replacing the Sensor (And That Bolt)
Alright, you’ve confirmed it’s the sensor. Now for the actual repair. This isn’t a hard job, but there’s one thing that can turn it into a nightmare: that damn mounting bolt. It’s usually an M10 or M12 triple-square (XZN) bolt, and after years of road salt and grime, it loves to seize up. I’ve seen more than a few of these bolts fight back, sometimes winning.
Preparation & Removal Steps:
- Disconnect the battery. Always a good idea when messing with electrical systems.
- Jack up the car and remove the wheel. Locate the sensor on the steering knuckle, usually behind the brake dust shield.
- Unplug the electrical connector. Inspect it closely. If you see any green corrosion or moisture, clean it thoroughly with electrical contact cleaner.
- Soak that bolt! This is crucial. Spray the mounting bolt liberally with a quality penetrating oil (like Kroil or PB Blaster). Let it soak for at least 15-30 minutes. If it’s really rusty, hit it a few times over an hour.
- Use the right tool. You need a high-quality triple-square bit. Don’t cheap out here. Use a breaker bar or an impact driver on a low setting. Apply steady, firm pressure. If that bit slips and rounds the head, you’ve just made your life a lot harder.
- Extract the sensor. Once the bolt is out, the sensor itself might be stuck in its bore. Gently twist and pull. If it’s really seized, a dedicated ABS sensor puller can be a lifesaver. Don’t just hammer on it; you can damage the knuckle.
- Clean the bore. Use a wire brush or a small round file to thoroughly clean out the sensor bore in the knuckle. Remove all rust, dirt, and debris. The new sensor needs to seat perfectly for an accurate signal and proper sealing.
Installation Tips:
When you put the new sensor in (I always recommend OEM or a reputable aftermarket brand), apply a very light coat of copper anti-seize to the metal sleeve of the sensor. This isn’t just about making future removal easier; it can also help create a better seal against moisture. Reinstall the mounting bolt and torque it to spec: 8 Nm ± 1 Nm. Seriously, don’t overtighten it. You risk cracking the new sensor’s housing or, worse, stripping the threads in the aluminum knuckle.
When to Call a Pro:
If that mounting bolt breaks off or you round the head, this job quickly moves out of DIY territory. Extracting a broken bolt from an aluminum knuckle requires precision drilling and thread repair, and a mistake can mean replacing the entire wheel bearing hub assembly. That’s a job for someone with the right tools and experience.
And for those thinking about temporary fixes, like sealing the outside of the sensor with silicone—don’t. It won’t fix internal corrosion, and it can interfere with proper sensor seating or heat dissipation. Just replace the bad sensor.
Confirmation: Making Sure It’s Really Fixed
Replacing the sensor isn’t the end of the job. You’ve got to confirm that the repair actually worked. Don’t just button it up and hope:
- Clear those fault codes. Use your scan tool to clear all ABS codes from the module. This is non-negotiable.
- Test drive the car. The ABS module needs to run its self-check, which usually happens above 20 km/h. Drive it for a bit. The warning lights should stay off.
- Rescan the system. After your test drive, connect the scan tool again. Check for any pending or active codes. Even a temporary glitch might show up here.
- Check live data. This is key. Drive straight on level ground and monitor all four wheel speeds in the live data stream. They should all match within 1-2 km/h. If one wheel is reading zero, or fluctuating wildly, you still have a problem.
- Optional: Static Resistance Check. For extra confidence, you can unplug the new sensor and perform another static resistance test. It should read solidly within that 1000-1600 ohm range.
If everything checks out, you’ve successfully restored full function to your ABS and ESC systems. That peace of mind, knowing your safety systems are working, is absolutely worth the effort.
Cost, Risk, and Prevention
Is it worth fixing? Absolutely. Your ABS and ESP are critical safety systems. Even if that bolt fights you and you end up needing a new hub, the total repair cost is almost always justified on a functional Mk5 or Octavia A5. Here’s a quick look at what you might expect:
- DIY Sensor Replacement (Bolt Cooperates): Parts run $40-$100. Your time is free, but you’ll need the right tools.
- Shop Sensor Replacement (Bolt Cooperates): Expect $200-$350, including parts and labor.
- DIY Sensor Replacement (Seized Bolt, You Extract): Parts could be $100-$300 (including extraction tools, anti-seize, maybe a new bolt). High risk of damaging the knuckle.
- Shop Sensor Replacement (Seized Bolt, Professional Extraction/Hub Replacement): This can jump to $350-$800+, especially if the hub needs replacing.
Stopping It from Happening Again:
Can you stop it from happening again? Not entirely, but you can definitely stack the odds in your favor. Since these symptoms often start intermittently, don’t wait for the light to stay on. If it flashes after rain or a car wash, scan the system early. A recurring fault code for one wheel is a clear warning sign.
When you’re doing brake jobs or any work around the wheels, take a moment to inspect those sensors. Look for:
-
Any visible cracks or cloudiness in the plastic housing.
-
Heavy corrosion on the connector or around the mounting area.
-
A loose or wobbly fit in the knuckle bore.
If a sensor ever comes out for any reason, always use a light coat of copper anti-seize on its metal sleeve before reinstalling. It won’t prevent internal failure, but it dramatically reduces the chance of a seized bolt down the road, making the next replacement much easier. While newer VAG vehicles often have more robust sensor designs, on the Mk5 and A5, this is a known weak point. Staying ahead of it means you won’t be caught without stability control when you need it most.
For deeper insight into how these systems interact, especially if you’re dealing with broader stability or steering diagnostics, understanding how the steering angle sensor (SAS) works with ESP can give you a more complete picture of your vehicle’s safety electronics.
