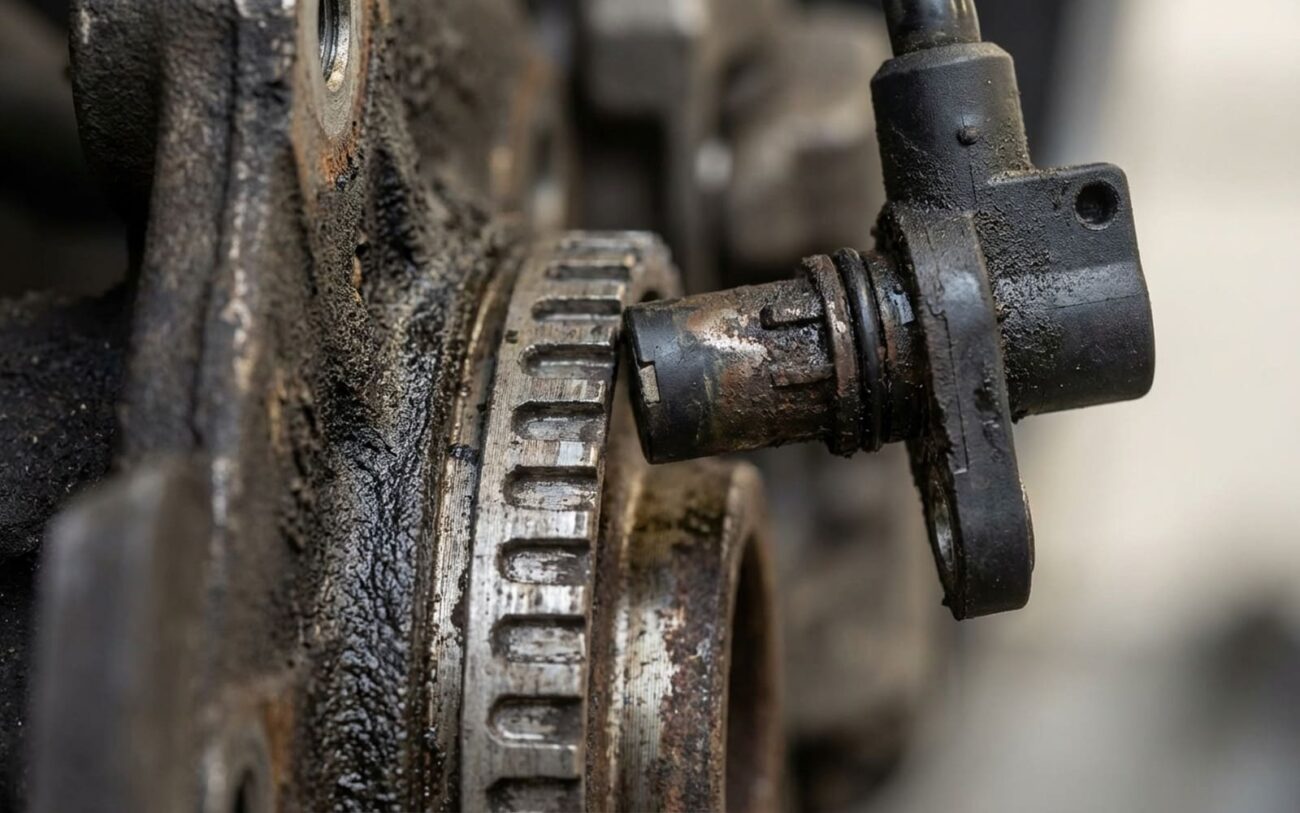
ABS Light On After a Wheel Hub Replacement? Here’s What I’ve Learned Over 25 Years.
Alright, so you just swapped out a front or rear wheel bearing hub assembly. You did everything by the book, torqued it all down, and you’re feeling pretty good. Then you start the car, and there it is: that stubborn yellow ABS warning light staring back at you from the dash.
Frustrating, right? You didn’t even touch the ABS system directly. Maybe you reused the old sensor carefully, or you put in a brand new one. So why is that light on? In my 25+ years turning wrenches in shops, I’ve seen this exact scenario play out hundreds of times. And nine times out of ten, the real culprit isn’t the sensor itself, but the air gap between that wheel speed sensor and the reluctor ring.
SIGNAL MONITOR
Status: OUT OF SPEC
The Concept
“Think of the air gap like a whisper in a crowded room: if you’re standing too far away, the message never gets through.”
How Your ABS System “Listens” to Your Wheels – And Why That Gap is Critical
To really nail this down, you need to understand how the system actually works. Most cars today use either passive magnetic or active Hall-effect wheel speed sensors. These little guys are essentially listening for the “clicks” or “pulses” from a rotating reluctor ring – sometimes called a tone ring or ABS ring – that’s pressed onto your hub or CV axle.
As each tooth or magnetic pole on that ring passes the sensor tip, it generates an electrical signal. The ABS module counts these signals to figure out how fast each wheel is spinning. Pretty straightforward, right?
But here’s the kicker: when you swap out a hub, any tiny change in that sensor-to-ring distance – what we call the air gap – can mess with that signal. If the gap is too wide, the signal gets weak, especially at low speeds. The module can’t “hear” it properly, so it throws a fit. If the gap is too small, the sensor can actually rub the ring, damaging both. Either way, the system logs a fault code – usually something like C0035 or C0040 for a specific wheel speed sensor fault – and disables your ABS and traction control. That’s why the light comes on.
My Diagnostic Approach: Don’t Guess, Test.
Before you start pulling things apart or blaming the new part, you need a logical diagnostic path. Trust me, I’ve chased my tail enough times to know this. First things first, grab your scan tool. You need one that can talk to the ABS module, not just the engine computer. Pull those ABS codes, then jump straight to live data.
You want to see all four wheel speed sensors reporting. Spin the wheel you just worked on by hand (if it’s a drive wheel, you might need the car in neutral and on stands, obviously). Watch the speed reading. It should be consistent, even at low RPMs. Then, take the car for a short drive, say 15-25 mph, and watch all four sensors. They should all read within 1 mph of each other. If one is dropping out, reading erratically, or showing a significantly different speed, you’ve found your problem corner.
Pro Tip: Don’t Just Clear Codes
Clearing the code with a scan tool might make the light go away temporarily, but it won’t fix the underlying issue. The ABS module performs a self-check every time you drive above 10–15 mph. If the signal is still bad, that light will be back.
What the Live Data Tells You:
-
No Signal or Erratic Signal: This is the classic “air gap too wide” symptom, or a completely dead sensor/wiring. Could also be a truly defective reluctor ring on the new hub.
-
Flickering Light at Low Speed, Fine Above 15 mph: Often means the air gap is just a bit too wide. The signal strength drops off at lower RPMs.
-
Visible or Audible Scraping: This is bad. The reluctor ring might be sitting too high on the hub, or the sensor bore in the knuckle is damaged. Could also be the wrong (too long) sensor.
Why That New Hub Might Be The Problem (It Happens More Than You Think)
I’ve had plenty of customers swear they did everything perfectly, only for us to find the brand new aftermarket hub was the actual problem. It’s not always user error. The issue usually comes down to the quality or design of the reluctor ring on the hub itself. Some cheaper aftermarket hubs have rings that aren’t pressed on perfectly concentrically, causing runout. Others use lower-grade magnetic material that just doesn’t generate a strong enough signal for the ABS module, especially at low speeds.
Before you reinstall everything, it’s always a good idea to compare the new hub side-by-side with the old one. Check the height and position of the reluctor ring. Are the teeth the same size? Is the ring sitting at the same depth? Small differences here can make a huge difference in signal quality.
Fixing It Right: My Go-To Solutions From The Bay
Professional Territory
While some air gap adjustments are DIY-friendly, really digging into complex diagnostics with an oscilloscope or replacing a steering knuckle usually calls for shop-level tools and expertise. Don’t be afraid to call in a pro.
Adjust the Air Gap DIY-Friendly
Replace the Hub Assembly (Again) Recommended
Repair or Replace Steering Knuckle Shop-Level Job
Pro Tip: Test Before Final Reassembly
Here’s a trick that’s saved me hours. After you’ve installed the hub and sensor, but before you put the brake caliper and rotor back on, plug in the sensor harness. Start the car (or just turn the key to ON, depending on the vehicle) and, with your scan tool showing live data, spin the wheel by hand. If you see a speed reading that’s consistent, even if it’s just 1 or 2 mph, you’re usually good to go. If not, you know you still have a problem before you’ve buttoned everything up.
Confirming the Fix: Don’t Just Trust the Light
Once you’ve done the repair, don’t just clear the code and assume you’re golden because the light’s off. That’s a rookie mistake. You need to confirm the repair actually worked. Take the car for another test drive, 15–25 mph, and monitor all four wheel speed sensors in live data again. All values should match up closely – I’m talking within 1 mph of each other. If one is still lagging or erratic, you’ve still got a problem.
For the absolute gold standard, especially on those really tricky ones, I’ll hook up an oscilloscope. That lets you see the actual waveform from the sensor. You’re looking for a clean, consistent signal with good amplitude and frequency. If it’s weak, choppy, or dropping out, the module isn’t getting what it needs.
What This Repair Costs: Real-World Estimates
So, what’s this going to set you back? Here’s a rough idea based on what I see in the shop:
| Repair Type | DIY Cost (Parts) | Shop Cost (Est.) | My Success Rate |
|---|---|---|---|
| Adjusting air gap / shims | < $20 (for feeler gauges/shims) | $75–$150 (labor for diagnosis & adjustment) | Near 100% (if that’s the actual issue) |
| Replacing a defective hub assembly | $120–$300 (for a quality aftermarket hub) | $400–$700 (parts + labor) | High (if using quality parts) |
| Replacing steering knuckle | $250–$600 (knuckle itself, plus associated parts) | $800–$1,500 (this is a big job) | High (when done correctly) |
How to Prevent This Headache Next Time
-
Don’t cheap out on parts. I can’t stress this enough. Skip the cheapest option you find online. Reputable brands like SKF, Timken, Moog, or OEM parts are worth the extra money for their machining tolerances and material quality. You’ll save yourself a lot of grief.
-
Compare the old and new hubs carefully. Before you even think about installing the new one, put it next to the old hub. Look at the reluctor ring height, the tooth count, and the overall dimensions. Any noticeable difference is a red flag.
-
Clean that sensor bore! This is huge. Use a wire brush or even a small round file to thoroughly clean out any rust, dirt, or old grease from the knuckle’s sensor hole. A perfectly clean bore ensures the sensor seats fully and correctly, giving you the best possible air gap from the start.
