Look, your engine’s knock sensor? It’s not just another little part; it’s the guardian angel of your pistons and rods. After 25 years under the hood, I’ve seen countless engines saved by a functioning knock sensor and just as many grenaded because someone ignored the warnings. Getting this diagnosis right means the difference between a simple repair and a full engine rebuild. This isn’t a part you guess on.
What I See: Symptoms and My First Checks
When a car rolls into my shop with a potential knock sensor issue, the symptoms usually fall into one of three buckets. But here’s the kicker: none of them automatically mean the sensor itself is bad. My job is to figure out if it’s the sensor, the wiring, or something else entirely.
1. The Check Engine Light (CEL) with a P-Code
This is the most common one. You get a check engine light, and when I hook up my scanner, I see a diagnostic trouble code like P0325 (Knock Sensor 1 Circuit) or P0330 (Knock Sensor 2 Circuit). Now, right away, most folks think “bad sensor.” Not so fast. That code just tells me the engine control module (ECM) isn’t getting a signal it likes from that circuit. It doesn’t tell me why.
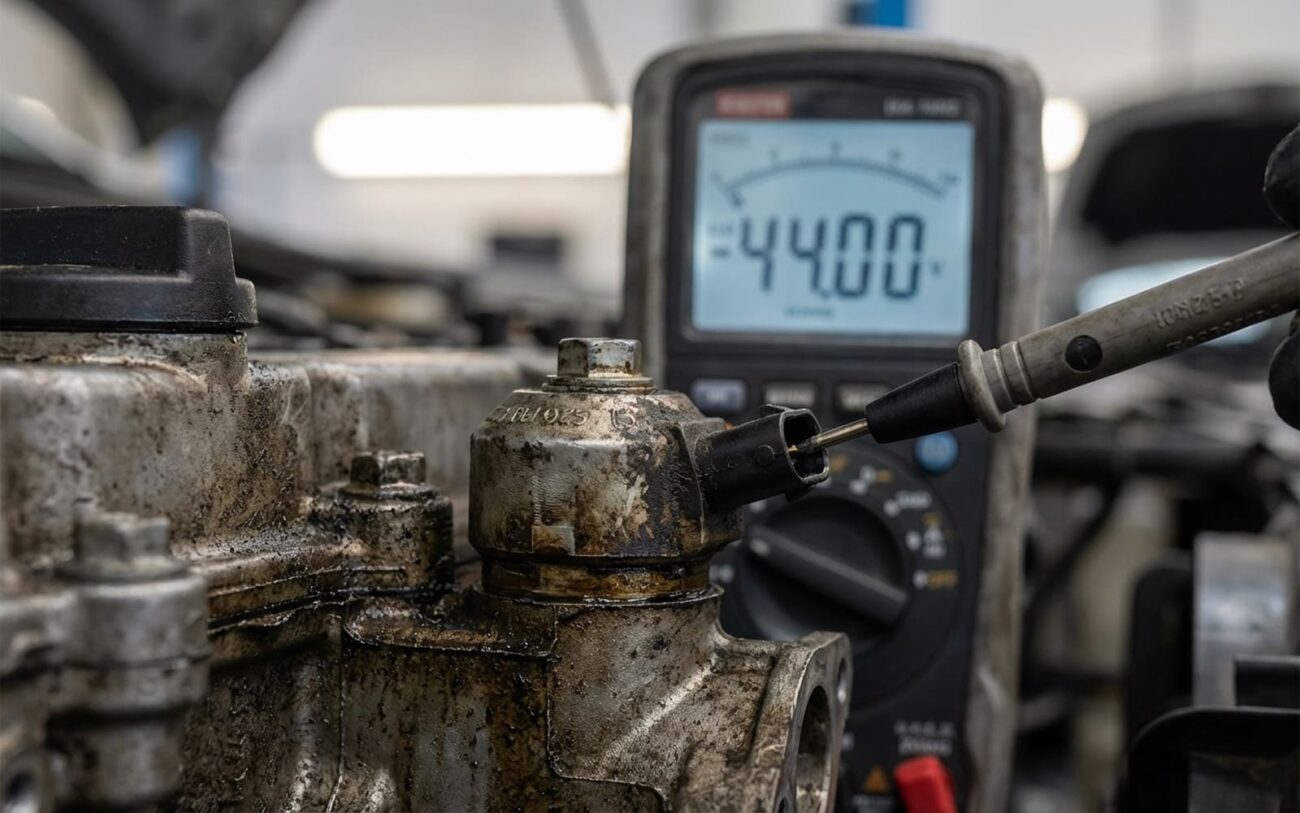
My first move here is always electrical. I’ll get out my digital multimeter and check the sensor’s resistance. Most knock sensors should read between 100k and 1M ohms. If it’s open (infinite resistance) or shorted (zero resistance), then yeah, the sensor’s probably toast. But if it reads good, then I’m checking the wiring harness for continuity back to the ECM. I’ve seen countless chafed wires, corroded connectors, or even a bad ground mimic a dead sensor perfectly. Jumping to replacement without testing is a common, expensive mistake.
2. Audible Engine Knock or Pinging
Now, if there’s no code but you hear a metallic pinging or rattling sound, especially when you’re working the engine hard—climbing a hill, accelerating, or towing—that’s actual engine knock, or detonation. This happens when the air-fuel mixture ignites prematurely and unevenly, causing pressure spikes. A healthy knock sensor detects these vibrations and tells the ECM to pull back the ignition timing, stopping the knock. If the sensor isn’t doing its job, the engine can’t protect itself.
This is where live data comes in. I’ll hook up the scanner and monitor “Ignition Timing Retard.” Then I’ll induce a light load (sometimes just blipping the throttle in neutral, or a quick road test if it’s safe). If the sensor is working, I should see the timing retard values briefly jump as it detects the vibrations. If it stays at zero while you’re clearly hearing knock, that sensor isn’t sensitive enough or it’s dead.
But hold on: that noise can also come from other places. I’ve seen it from excessive carbon buildup in the combustion chambers (especially on direct-injection engines), using too low an octane fuel, or a cooling system that’s failing and letting the engine overheat. Don’t assume it’s the knock sensor right away.
The Concept
“Think of the knock sensor like a doctor’s stethoscope, constantly listening for the first sign of trouble in your engine. It’s there to catch that ‘heart murmur’ before it turns into a full-blown heart attack.”
3. Reduced Power and Poor Fuel Economy
This one’s a bit more subtle and builds up over time. If the ECM gets a bad or erratic signal from the knock sensor—or no signal at all—it often defaults to a conservative “safe mode.” This means it retards the ignition timing significantly to protect the engine from potential knock. The downside? You lose power, and your fuel economy goes down the drain. The engine just feels sluggish.
This symptom can easily be confused with other issues, like a dirty mass airflow (MAF) sensor, a failing oxygen sensor, or even a clogged catalytic converter. That’s why a thorough diagnosis is always key. I’ll check for pending codes, look at fuel trims, and compare actual timing advance to commanded timing advance on the scanner.
Root Cause: Why Knock Sensors Fail (When They Actually Do)
So, you’ve done your tests, ruled out the wiring and connectors, and it looks like the sensor itself is the culprit. What gives? The knock sensor is a pretty simple, sealed piezoelectric device. Inside, there’s a crystal that generates a tiny voltage when it vibrates. The ECM reads that voltage to understand what’s happening in the combustion chambers.
What I typically see go wrong with the sensor itself:
- Crystal Degradation: Over time, with age and constant thermal cycling (hot, cold, hot, cold), the piezoelectric crystal inside just loses its sensitivity or fails entirely. It’s like any electronic component; it has a lifespan.
- Physical Damage: This is a big one. Over-torquing during installation (anything over 12–18 ft-lbs, check your specific vehicle’s spec!) can crush that delicate internal crystal. I’ve seen new sensors killed on install more times than I can count.
- Environmental Contamination: If oil or coolant seeps into the sensor’s connector, it can carbonize or corrode the pins, creating a false ground or an intermittent signal. This isn’t a sensor failure per se, but it’s a sensor system failure that often gets blamed on the sensor.
Remember, wiring damage, connector corrosion, or an ECM fault are not knock sensor failures. They’re circuit problems. Always test the harness and connector before condemning the sensor. A frayed wire inside the conduit can mimic a dead sensor exactly. Testing saves you time, money, and a lot of headaches.
The Fix: Getting It Done Right
Safety & Precision are Non-Negotiable
This isn’t a part you just crank down. You absolutely must follow the factory torque spec exactly. Over-torquing destroys the internal crystal instantly, and you’ll be doing the job twice. Also, avoid anti-seize unless the manufacturer specifically calls for it. Many knock sensors rely on a clean metal-to-metal contact with the engine block for a proper ground and signal transmission.
Once you’ve confirmed it’s the sensor itself, the repair path depends entirely on where that sensor is located. Some are easy, some are a nightmare.
Accessible Sensor Replacement DIY-FEASIBLE
Intake Manifold Removal PROFESSIONAL-ONLY
No Field Repair Possible
Post-Repair Validation: Don’t Skip This
Replacing the part is only half the job. You gotta make sure it’s actually fixed and working correctly, both electrically and operationally. This is my standard checklist:
My Validation Checklist
-
Pre-Installation Resistance: Before you even put the new sensor in, measure the resistance across its terminals. It should be within the 100k–1M ohms range. This confirms you’re not installing a dead-on-arrival part.
-
Live Data at Idle: With the engine running at idle, check your scanner for “Knock Retard” or “Ignition Timing Correction” values. They should be stable and ideally at or very close to zero. Any constant high numbers mean something is still off.
-
Load Test (Static): In a safe environment (brakes applied, transmission in gear), blip the throttle and watch the “Knock Retard” values. A healthy sensor will typically show a brief, small dip in timing as it reacts to the sudden engine vibration, then settle back to zero. This confirms it’s actively listening.
-
Road Test: Take the vehicle for a proper road test. Accelerate hard from 20–60 mph, especially up a slight incline if possible. Listen carefully for any pinging or rattling. The check engine light should stay off, and the engine should feel responsive.
The Real Cost & How to Avoid the Worst
Let’s talk brass tacks. What’s this going to set you back? It varies a lot based on the vehicle and sensor location.
Accessible Sensor
This includes parts and labor for sensors that are easy to get to, like those on the side of the block. If you’re doing it yourself, parts are usually $50–$150.
Intake Removal Job
Higher labor costs here due to the extensive teardown required for sensors under the intake manifold. This is common on many V-style engines and often includes new gaskets.
Engine Rebuild
This is the cost of ignoring those knock codes and audible pinging until the engine self-destructs. Pistons melt, rods bend, heads crack. It’s not a pretty sight, and it’s entirely avoidable.
Prevention & Monitoring
I always tell my customers to use an OBD2 scanner regularly, even just a cheap one. Catching “pending” codes, like a pending P0325, is a huge red flag that something’s starting to go wrong. Also, always address any engine overheating promptly—heat is a killer for electronics and can cause knock. And for crying out loud, use the correct octane fuel your manufacturer specifies. These simple steps reduce stress on the knock sensor and the engine, helping you catch intermittent faults early before they become big, expensive problems.
