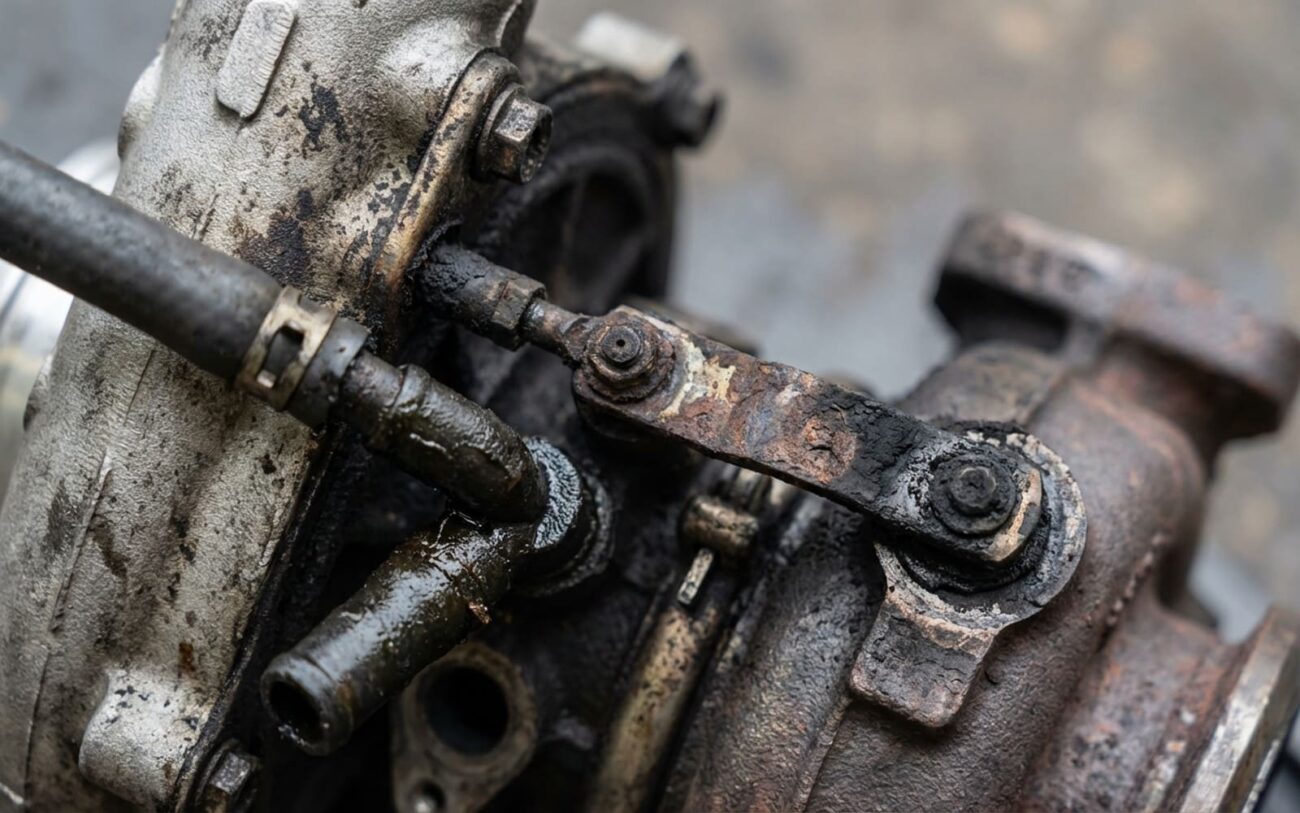
Alright, if you’re driving an N57 diesel BMW and it feels like it’s lost its mojo, especially with those turbo-related fault codes popping up, you’re in good company. I’ve seen more of these come through my shop than I can count. Most times, the culprit is that small electric actuator bolted right onto the side of the turbocharger.
This little guy is crucial. It’s what physically moves the variable geometry vanes inside the turbo. Think of those vanes like tiny shutters, opening and closing to control how much boost pressure your engine gets. The DDE (Diesel Engine Electronics) — that’s your engine computer — tells the actuator what to do, and it’s supposed to respond instantly.
When it starts to fail, your engine goes sluggish, fuel economy takes a hit, and your dashboard lights up like a Christmas tree. While the actuator itself is often the problem, what causes it to fail isn’t always straightforward. Things like constant heat cycles, engine vibration, water getting where it shouldn’t, and even carbon buildup elsewhere in the system can all play a part. I’ve seen some actuators just give up internally, and others were just victims of a bigger problem.
The DDE is constantly monitoring the turbo’s performance. When it sees a big difference between where it wants the turbo vanes to be and where they actually are, it throws a fit. That’s when you get those warning lights and the car goes into limp mode, cutting power to protect the turbo from damage. It’s a safety feature, but man, is it annoying when you’re trying to merge onto the highway.
DDE MONITOR
Status: ERR: P334B
What I See When the Actuator is Going Bad
The N57 usually gives you some warning signs. It’s rare for these to just die without a peep. The most reliable indicator I’ve found is a pair of persistent DDE fault codes: P334B and P334C. These codes are pretty specific, pointing right to a problem with the actuator’s internal position sensor circuit. You might be able to clear them with a basic scanner, but they’ll be back almost immediately — often within a few minutes of driving. To me, that’s a strong sign the issue is inside the actuator itself, not just a loose wire or a dirty connector.
The tell-tale sound
“If you hear a rapid buzzing or chattering sound coming from the turbo area at idle, that’s usually the actuator’s internal gearmotor struggling to find its correct position. It’s like it’s fighting itself.”
When things really go south, you’ll lose boost entirely. The engine will definitely go into limp mode, and you’ll likely see additional codes like P0299 (Underboost). In some cases, if the vanes get stuck wide open, you might even see overboost codes. Visually, I’ve seen the actuator’s metal arm completely disconnected from the turbo linkage, or just frozen solid in one spot. At this point, I tell my customers: stop driving. A seized or stuck actuator can lead to uncontrolled boost pressure, which can overspeed the turbo, cause mechanical failure, or even create excessive exhaust backpressure that damages the engine itself.
How I Diagnose It: Actuator or Something Else?
Now, don’t jump straight to replacing the actuator. I’ve seen too many people throw parts at a problem only to find out it was something else. The symptoms of a failing turbo actuator can easily mimic other issues, especially with the whole VNT (Variable Nozzle Turbine) system. A proper diagnosis saves you money and, more importantly, actually fixes the car.
Here’s how I typically break it down in the shop:
| Symptom | What it usually means for the actuator | Common things that can fool you | My go-to test to confirm |
|---|---|---|---|
| Persistent P334B/P334C codes | Internal failure of the actuator’s position sensor (potentiometer) or the gearmotor itself. | Damaged wiring harness, corroded connector pins, or a very rare DDE control unit issue. |
I monitor the position sensor voltage in ISTA. A healthy actuator will sweep smoothly from around 0.7V to 4.3V as it moves. If it jumps around or stays static, that’s your problem. |
| Audible actuator chattering at idle | Wear in the internal gear train, causing slippage and constant attempts to reposition. | Noise from the throttle body actuator, a loose heat shield, or even a failing wastegate solenoid. |
Grab a stethoscope. If the sound is loudest right on the actuator, and it stops when you unplug the electrical connector, then it’s definitely the actuator. |
| No boost, arm seized or disconnected | A worn pivot bushing, a broken output lever, or the internal motor has seized up. | Carbon-locked turbo vanes (very common on diesels), a damaged vane control ring, or a broken linkage pin. |
Disconnect the actuator arm from the turbo linkage. Try to move the turbo’s arm by hand. If it moves smoothly with consistent resistance, the turbo vanes are likely fine, and your actuator is the problem. If it’s gritty, stiff, or completely frozen, you’ve got seized turbo vanes, and that’s a much bigger job. |
Why These Actuators Give Up
The N57 uses an electrically driven VNT actuator, not the older vacuum-operated kind. Inside that black housing, you’ve got a small DC gearmotor, a potentiometer (which is the position sensor), and a plastic output lever assembly. Over years of operation, I’ve seen a few common failure points:
-
Potentiometer wear: This is probably the most common. The resistive track inside wears out or gets contaminated, leading to those erratic position feedback signals and the P334B/C codes. BMW even issued a technical service bulletin (TSB) on this specific failure mode for the N57.
-
Pivot bushing failure: The plastic bushing where the output lever pivots can wear down or crack. This creates play in the arm, which the DDE interprets as incorrect positioning.
-
Moisture ingress: Over time, the shaft seals can degrade. This allows road splash or condensation to creep in and corrode the motor windings or the internal circuit board. Once water gets in, it’s usually game over.
-
Solder joint fatigue: The constant heating and cooling cycles under the hood can cause the tiny solder joints on the internal PCB to crack, especially around the motor terminals. This creates intermittent connections.
Don’t forget the turbo itself:
It’s important to remember that a carbon-clogged variable vane system in the turbo will force the actuator to work much harder. This extra strain accelerates wear and tear on the actuator, so sometimes the actuator is just the symptom of a dirty turbo.
The Fix: What I Recommend
This isn’t a “plug and play” job.
After you install a new actuator, you absolutely must perform a Turbocharger Control Adaptation and Actuator Run-In. You’ll need OEM-level diagnostic software like ISTA or INPA for this. Skipping it guarantees problems.
Replace the unit, don’t try to repair it. Professional Only
Stick with OEM or a high-quality equivalent.
Calibration is non-negotiable. ISTA/INPA Required
Confirming the Fix
Once the new actuator is in and you’ve run the calibration, you need to validate the repair. I always monitor the adaptation process in ISTA to make sure it completes smoothly without any warnings. Then, it’s time for a test drive with live data streaming. The specified boost (Soll) and the actual boost (Ist) values should track very closely, ideally within 50 hPa (about 0.7 psi) under moderate load. If you see big deviations, that tells me either the adaptation didn’t take, or there’s another issue in the boost control system. Finally, clear all fault codes and put the car through a full operating cycle.
What This is Going to Cost You
Here’s a rough idea of what you’re looking at for this repair, based on my experience:
| Repair Type | DIY Cost (Parts Only) | Shop Cost (Parts & Labor) | Success Rate | Secondary Risk |
|---|---|---|---|---|
| Replace VGT Actuator | $300 – $600 | $800 – $1,500 | >95% | Improper calibration leads to limp mode or turbo damage. |
How I Keep Them From Coming Back
Preventative Maintenance
-
Keep the intake system clean: A failing CCV (Crankcase Ventilation) system will dump oil vapor into the intake, leading to carbon buildup on those turbo vanes. When the vanes get sticky, the actuator has to work harder, and that accelerates its wear.
-
Periodically inspect engine bay wiring: I always tell customers to keep an eye out for corrosion in the connectors, especially near the actuator harness. Moisture and heat can do a number on those pins. (You can check out how to spot oxidation or corrosion if you’re not sure what to look for.)
-
Monitor adaptation values: If you have access to diagnostic software, check the actuator’s adaptation values. If they’re consistently pushing the limits (like near ±90%), it means the system is constantly compensating for resistance. Address it then, before it completely fails.
-
Allow proper cool-down: After a hard drive, letting the engine idle for 30–60 seconds before shutting it off helps cool down the turbo and the actuator. This reduces thermal stress and can extend their lifespan.
