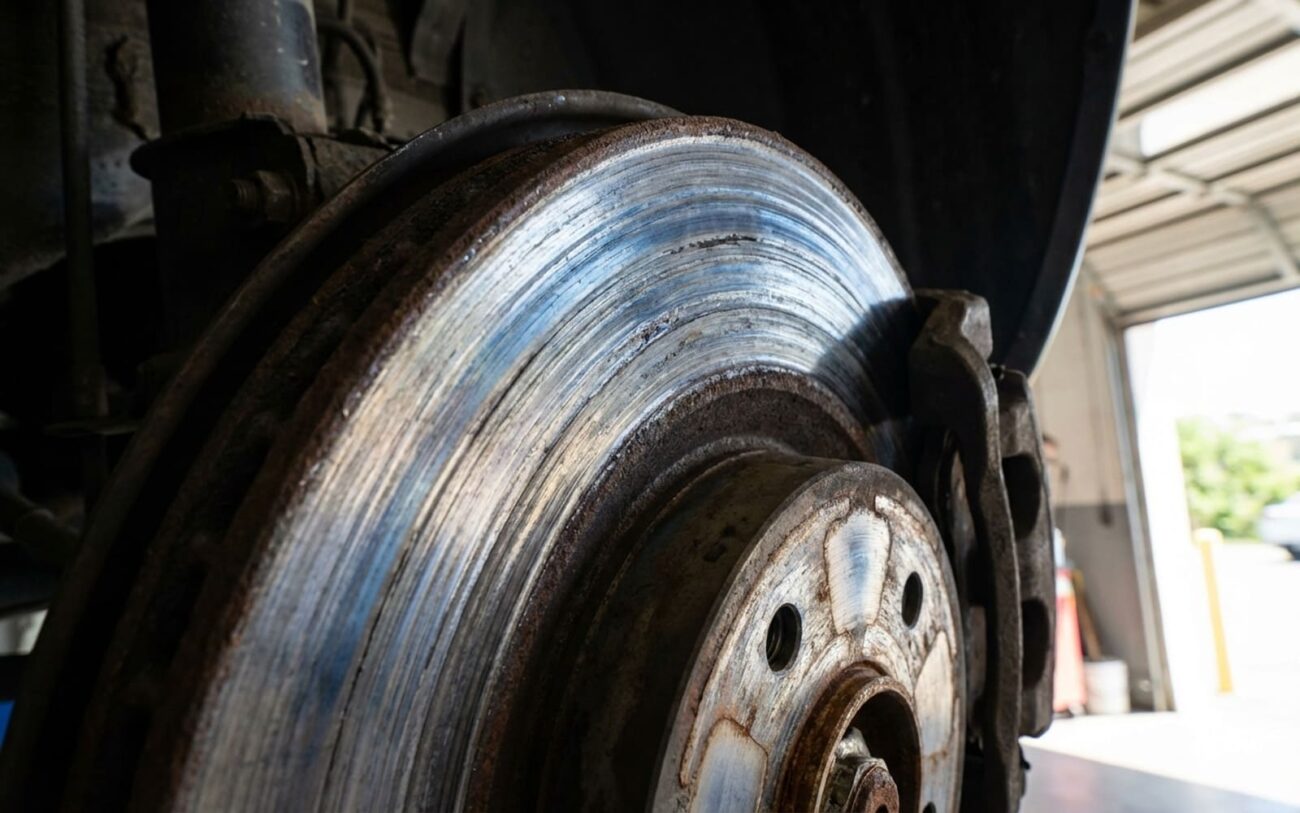
When your car pulls to one side as you hit the brakes, it’s more than just annoying – it’s a clear warning. After 25 years in the shop, I can tell you that a vehicle that doesn’t stop straight is a safety hazard, plain and simple. This isn’t just about comfort; it’s about control, especially in an emergency stop. You need to figure out what’s going on, and fast.
First Things First: Rule Out the Easy Stuff
Before you dive deep into brake or suspension components, always check your tires. I’ve seen countless hours wasted because someone overlooked the obvious. A significant difference in tire pressure (more than 5-6 PSI between sides), mismatched tire brands, or severely uneven tread wear can absolutely make your car pull. These are quick checks, and sometimes, a simple tire rotation or inflation is all it takes to solve the problem. Don’t skip this step.
Pinpointing the Problem: Brake or Suspension?
The key to diagnosing a pull is understanding when it happens. Does it only happen when you press the brake pedal, or is the car already drifting even when you’re just cruising or accelerating? This distinction is critical because it points you in two very different directions: the brake system or the suspension/steering system.
If Your Car ONLY Pulls When You Brake
This is the most common scenario, and it almost always points to a problem with your brake system. When one side of the car applies more braking force than the other, it’s like trying to row a boat with one oar pulling harder – you’re going to veer off course. You might feel a sharp tug on the steering wheel the moment you hit the pedal, and it usually gets worse the harder you brake.
What I Look For (Symptoms & Initial Checks):
- After a drive, carefully check the temperature of your wheels and rotors. If one wheel hub or rotor is significantly hotter than the others (I’m talking 100°F+ hotter, easily detectable with an infrared temp gun), or you smell a sharp, burnt odor from a single wheel, that’s a dead giveaway. It means that brake is dragging.
- A consistent pull that happens on flat roads, crowned roads, and at different speeds points strongly to a brake issue.
The Usual Suspects (Root Causes):
Uneven braking force is almost always due to restricted movement or a hydraulic imbalance on one side. Here’s what I typically find:
- Stuck Caliper Piston: Corrosion in the caliper bore is a common culprit. This usually happens when the rubber boot tears, letting water and road grime get in. The piston can’t retract fully, so the brake stays partially applied.
- Seized Slide Pins: These pins allow the caliper to float and center itself over the rotor. If they seize up (again, often due to corrosion or using the wrong lubricant that breaks down under heat), the caliper can’t move properly, and one pad might drag.
- Collapsed Brake Hose: This is a sneaky one. The inner lining of a brake hose can deteriorate and act like a one-way check valve. It lets fluid pressure apply the brake, but it won’t let the pressure release fully. The brake stays engaged, causing drag, heat, and a pull.
- Contaminated Brake Fluid: Over time, brake fluid absorbs moisture. This lowers its boiling point and can lead to internal corrosion in calipers and the master cylinder, contributing to sticking components.
My Diagnostic Approach (Brakes):
The most definitive test for a brake pull is a brake drag test. After a test drive, use an infrared thermometer to measure the temperature of each rotor. A dragging brake will be noticeably hotter. I’ve seen them glow red on the lift after a hard stop. You can also visually inspect the caliper for seized pins or a torn piston boot.
If Your Car Drifts or Pulls All the Time (and Worse When You Brake)
If your car has a directional preference even when you’re not touching the brake pedal – while coasting or accelerating – and that pull just gets worse when you brake, then the problem is likely in your suspension or steering system. These systems are responsible for keeping your wheels aligned and stable. When they wear out, braking forces exaggerate any existing geometry issues, making the pull more pronounced.
What I Look For (Symptoms & Initial Checks):
- Crooked Steering Wheel: Is your steering wheel off-center when you’re driving straight? That’s a strong indicator of alignment issues, often caused by worn suspension components.
- Uneven Tire Wear: Look for feathering (tread blocks worn more on one side), cupping (scalloped wear), or excessive wear on one edge of a tire. This tells you the wheel isn’t tracking straight.
- Clunking Noises: If you hear clunks or thuds from the front end, especially when braking over bumps, it’s a sign of loose or worn suspension components.
- General Looseness: Does the car feel “floaty” or less precise than it used to?
The Usual Suspects (Root Causes):
The front suspension takes a beating, especially under braking. Components like control arm bushings and ball joints are under immense stress. When they wear, they allow the wheel assembly to move unpredictably.
- Worn Control Arm Bushings: These rubber or polyurethane components isolate the control arm from the chassis. Over time, they crack, harden, or separate, allowing the control arm to shift. This changes your toe and camber angles dynamically, causing a pull.
- Loose Ball Joints: Ball joints connect the steering knuckle to the control arm. When they wear out, they develop play, allowing the wheel to move in ways it shouldn’t. I’ve seen ball joints separate completely on the road – when that happens, you lose all directional control of that wheel. It’s not theoretical; it’s a terrifying reality.
- Worn Tie Rod Ends: These connect the steering rack to the steering knuckle. Play here means imprecise steering and can contribute to a pull.
- Failed Strut Mounts or Bearings: These are at the top of your strut assembly. If they wear, they can cause clunking, binding, and affect steering returnability and alignment.
- Weak or Failed Shock Absorber/Strut: If one side isn’t damping properly, weight transfer during braking becomes uneven. This can increase the load on one front tire, making it more prone to lock up or drag, leading to a pull.
My Diagnostic Approach (Suspension):
For suspension issues, I start with a “dry-park inspection.” With the car on the ground (or on a lift with the suspension loaded), have someone rock the steering wheel back and forth while you visually inspect all ball joints, tie rod ends, and control arm bushings for any play. You’re looking for movement where there shouldn’t be any. A pry bar can help you check for play in ball joints and bushings. Also, check for torn boots on ball joints and tie rod ends, as these allow contaminants in and accelerate wear.
A Common Misdiagnosis I See:
People often blame “warped rotors” for a pull. In my experience, truly warped rotors usually cause a pulsation or a steering wheel shake, not a consistent directional tug. Don’t confuse vibration with a pull.
How I Fix It: Your Repair Options
Safety First
Brake and suspension work directly affects vehicle control. There’s absolutely no room for cutting corners here. If you’ve found significant play in ball joints or tie rods, do not drive the vehicle until it’s repaired. Period.
Brake System Repairs DIY Accessible
If you’ve got seized slide pins, you might be able to clean them up and re-grease them with high-temperature silicone brake grease. But if the caliper piston itself is stuck, I usually recommend replacing the entire caliper. Rebuilding them can be done, but a new or remanufactured “loaded” caliper (with new pads and hardware) saves time and reduces the risk of a repeat failure. You’ll need a line wrench for the brake hose and a proper bleeder kit. And never, ever reuse old crush washers – they’re single-use items.
If you suspect a collapsed brake hose, replace it. It’s not something you can fix, and it’s a critical safety component.
Suspension System Repairs Advanced / Pro
Replacing press-fit ball joints or bushings requires specialized tools, like a press kit. For many vehicles, I find it’s often more efficient and reliable to replace the entire control arm assembly if it comes with new bushings and ball joints pre-installed. It costs a bit more in parts but saves a lot of labor and potential headaches.
Critical Step: When replacing control arms or bushings, you absolutely must torque the pivot bolts with the vehicle at its normal ride height. If you torque them while the suspension is hanging, the bushings will be pre-stressed and fail prematurely – I’ve seen brand new parts wear out in a year because of this oversight.
For tie rod ends, it’s usually a straightforward replacement. Just make sure to count the turns on the old one or measure its length to get the new one close for the alignment shop.
Making Sure It’s Really Fixed: Post-Repair Checks
Just doing the repair isn’t enough; you’ve got to verify it. Otherwise, you’re risking a repeat job or, worse, a failure on the road.
After Brake Work:
Always bleed the brake system thoroughly – I mean thoroughly – to get all the air out. Then, take the car for a test drive. Make 5–6 moderate stops from 30–40 mph. The car should track straight with minimal steering correction. After these stops, use your infrared thermometer again to check rotor temperatures. All rotors should be within 50°F of each other. If one is still significantly hotter, you still have a drag issue, possibly from an improperly seated piston, a pin that wasn’t fully freed, or even a new caliper that’s faulty out of the box (it happens).
After Suspension Work:
A professional four-wheel alignment is non-negotiable. Even if the car feels better, the alignment settings (camber, caster, toe) will almost certainly be out of spec. Demand a printout showing all readings within factory tolerances. Before the alignment, double-check that all bolts are torqued correctly and there’s no play in the new components. Skipping the alignment might save you $100 now, but you’ll pay for it in rapid tire wear and persistent handling issues later. I’ve seen brand-new tires wear out in 3,000 miles because someone skipped this step.
Cost, Risk, and the Tough Decisions
Repairs cost money – sometimes a lot. But safety and long-term value matter just as much. Here’s a realistic breakdown to help you weigh your options:
| Repair Type | DIY Cost (Parts) | Professional Shop Cost | Typical Success Rate | Secondary Risk if Repair Fails |
|---|---|---|---|---|
| Single Brake Caliper Replacement | $150 – $300 | $350 – $500 | Near 100% (if done right) | Return of pull, excessive heat, premature rotor wear, possible brake fire. |
| Front Lower Control Arm Replacement (both sides + alignment) | $400 – $800 | $900 – $1500 | 95%+ (if quality parts and proper torque) | Rapid tire wear, persistent pull, unstable handling, risk of mechanical failure. |
Here’s a rule I’ve learned over 20 years in the bay: if repairs for the brakes and suspension exceed 50% of your car’s current private-party value (check KBB or NADA), it’s time to ask yourself some hard questions. Is it really worth investing $1,200 into a $2,000 car? Sometimes yes, especially if it’s been reliable otherwise and you know its history. But if you’re looking at multiple major repairs, consider whether that money would be better spent toward a more dependable vehicle. Throwing good money after bad isn’t just poor economics – it’s how people end up stranded on the side of the road, frustrated and out of pocket.
Keeping It From Happening Again: Prevention
My Maintenance Checklist
-
Flush your brake fluid every 2–3 years. Brake fluid absorbs moisture, which leads to internal corrosion in calipers and lines. A $30–$50 flush can prevent a much more expensive caliper or master cylinder replacement down the road.
-
Inspect brake and suspension components during every oil change. Take a good look for torn boots, leaking fluid, and uneven pad wear. Catching minor issues early is always cheaper than waiting for a major failure.
-
Stay alert to changes in handling. A new clunk over bumps, a steering wheel that doesn’t return smoothly, or a general “looseness” are early warnings of suspension wear. Don’t ignore them.
-
Lubricate grease fittings. If your car has zerk fittings on ball joints or control arms, make sure they get greased at every oil change. This is often overlooked on older vehicles.
Pro Tip
For a quick, rough check of shock absorber condition, try the bounce test. It’s not foolproof, and it won’t tell you everything, but it can definitely flag an obvious failure before it contributes to a pull under braking.
“`html
When your car pulls to one side as you hit the brakes, it’s more than just annoying – it’s a clear warning. After 25 years in the shop, I can tell you that a vehicle that doesn’t stop straight is a safety hazard, plain and simple. This isn’t just about comfort; it’s about control, especially in an emergency stop. You need to figure out what’s going on, and fast.
First Things First: Rule Out the Easy Stuff
Before you dive deep into brake or suspension components, always check your tires. I’ve seen countless hours wasted because someone overlooked the obvious. A significant difference in tire pressure (more than 5-6 PSI between sides), mismatched tire brands, or severely uneven tread wear can absolutely make your car pull. These are quick checks, and sometimes, a simple tire rotation or inflation is all it takes to solve the problem. Don’t skip this step.
Pinpointing the Problem: Brake or Suspension?
The key to diagnosing a pull is understanding when it happens. Does it only happen when you press the brake pedal, or is the car already drifting even when you’re just cruising or accelerating? This distinction is critical because it points you in two very different directions: the brake system or the suspension/steering system.
If Your Car ONLY Pulls When You Brake
This is the most common scenario, and it almost always points to a problem with your brake system. When one side of the car applies more braking force than the other, it’s like trying to row a boat with one oar pulling harder – you’re going to veer off course. You might feel a sharp tug on the steering wheel the moment you hit the pedal, and it usually gets worse the harder you brake.
What I Look For (Symptoms & Initial Checks):
- After a drive, carefully check the temperature of your wheels and rotors. If one wheel hub or rotor is significantly hotter than the others (I’m talking 100°F+ hotter, easily detectable with an infrared temp gun), or you smell a sharp, burnt odor from a single wheel, that’s a dead giveaway. It means that brake is dragging.
- A consistent pull that happens on flat roads, crowned roads, and at different speeds points strongly to a brake issue.
The Usual Suspects (Root Causes):
Uneven braking force is almost always due to restricted movement or a hydraulic imbalance on one side. Here’s what I typically find:
- Stuck Caliper Piston: Corrosion in the caliper bore is a common culprit. This usually happens when the rubber boot tears, letting water and road grime get in. The piston can’t retract fully, so the brake stays partially applied.
- Seized Slide Pins: These pins allow the caliper to float and center itself over the rotor. If they seize up (again, often due to corrosion or using the wrong lubricant that breaks down under heat), the caliper can’t move properly, and one pad might drag.
- Collapsed Brake Hose: This is a sneaky one. The inner lining of a brake hose can deteriorate and act like a one-way check valve. It lets fluid pressure apply the brake, but it won’t let the pressure release fully. The brake stays engaged, causing drag, heat, and a pull.
- Contaminated Brake Fluid: Over time, brake fluid absorbs moisture. This lowers its boiling point and can lead to internal corrosion in calipers and the master cylinder, contributing to sticking components.
My Diagnostic Approach (Brakes):
The most definitive test for a brake pull is a brake drag test. After a test drive, use an infrared thermometer to measure the temperature of each rotor. A dragging brake will be noticeably hotter. I’ve seen them glow red on the lift after a hard stop. You can also visually inspect the caliper for seized pins or a torn piston boot.
If Your Car Drifts or Pulls All the Time (and Worse When You Brake)
If your car has a directional preference even when you’re not touching the brake pedal – while coasting or accelerating – and that pull just gets worse when you brake, then the problem is likely in your suspension or steering system. These systems are responsible for keeping your wheels aligned and stable. When they wear out, braking forces exaggerate any existing geometry issues, making the pull more pronounced.
What I Look For (Symptoms & Initial Checks):
- Crooked Steering Wheel: Is your steering wheel off-center when you’re driving straight? That’s a strong indicator of alignment issues, often caused by worn suspension components.
- Uneven Tire Wear: Look for feathering (tread blocks worn more on one side), cupping (scalloped wear), or excessive wear on one edge of a tire. This tells you the wheel isn’t tracking straight.
- Clunking Noises: If you hear clunks or thuds from the front end, especially when braking over bumps, it’s a sign of loose or worn suspension components.
- General Looseness: Does the car feel “floaty” or less precise than it used to?
The Usual Suspects (Root Causes):
The front suspension takes a beating, especially under braking. Components like control arm bushings and ball joints are under immense stress. When they wear, they allow the wheel assembly to move unpredictably.
- Worn Control Arm Bushings: These rubber or polyurethane components isolate the control arm from the chassis. Over time, they crack, harden, or separate, allowing the control arm to shift. This changes your toe and camber angles dynamically, causing a pull.
- Loose Ball Joints: Ball joints connect the steering knuckle to the control arm. When they wear out, they develop play, allowing the wheel to move in ways it shouldn’t. I’ve seen ball joints separate completely on the road – when that happens, you lose all directional control of that wheel. It’s not theoretical; it’s a terrifying reality.
- Worn Tie Rod Ends: These connect the steering rack to the steering knuckle. Play here means imprecise steering and can contribute to a pull.
- Failed Strut Mounts or Bearings: These are at the top of your strut assembly. If they wear, they can cause clunking, binding, and affect steering returnability and alignment.
- Weak or Failed Shock Absorber/Strut: If one side isn’t damping properly, weight transfer during braking becomes uneven. This can increase the load on one front tire, making it more prone to lock up or drag, leading to a pull.
My Diagnostic Approach (Suspension):
For suspension issues, I s
