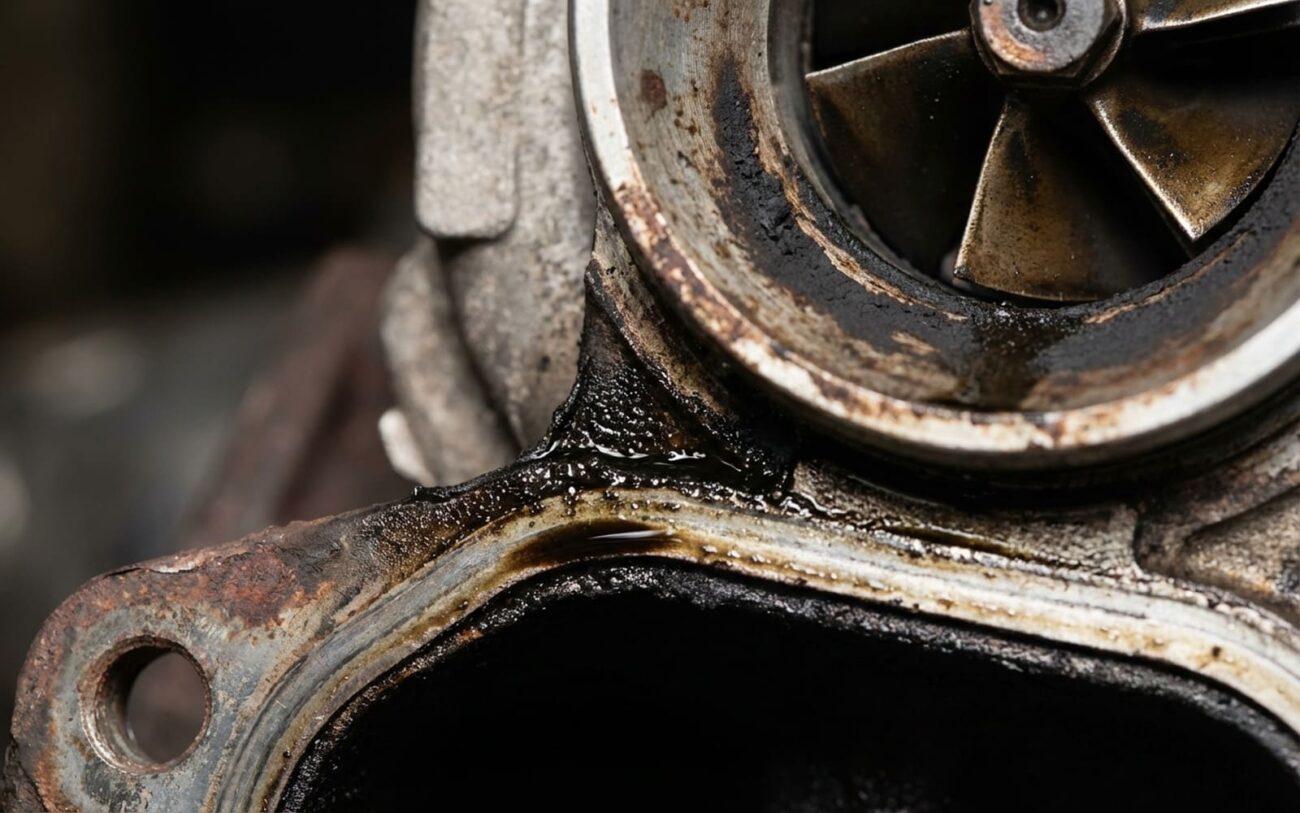
Alright, let’s talk turbos. After 25 years under the hood, I can tell you these little powerhouses are both incredibly robust and surprisingly delicate. When one starts to go, it’s not subtle—it’ll usually scream for attention. But here’s the kicker: those early warning signs often get brushed off or, worse, misdiagnosed as something else entirely. My job, and yours, is to know exactly what each symptom means and how to trace it back to the turbo, or rule it out.
Spotting a Failing Turbo: Symptoms & What They Really Mean
When a turbo’s on its way out, it’ll usually give you one of a few classic signs. But remember, these symptoms can mimic other engine problems, so you’ve got to be sharp about your diagnosis.
Blue or Blue-Gray Smoke from the Exhaust
This is probably the most common red flag, especially when you’re on the throttle or after you’ve decelerated. We’re not talking about a little puff on startup; this is persistent, and it’s burning engine oil. When it’s the turbo, that oil is usually sneaking past the oil seals inside the center housing. You’ve got one seal on the compressor side and one on the turbine side, and their job is to keep pressurized oil from getting into the air or exhaust streams. When they wear out, or the shaft gets too much play, oil gets sucked right into the intake or burned off in the exhaust. I’ve seen engines consume a quart of oil every 1,000 miles, with zero external leaks – all of it going straight through the turbo and out the tailpipe or pooling in the intercooler.
Loss of Power or Lack of Boost
You hit the gas, and the engine feels like it’s wearing a lead vest. It’s sluggish, like it’s struggling to breathe. This is a classic sign of a turbo that isn’t spooling up correctly or isn’t moving enough air. It could be oil fouling the compressor wheel, making it inefficient, or more commonly, excessive bearing wear allowing the turbo shaft to wobble. When that shaft starts dancing, the compressor or turbine wheel can rub against its housing. That kills spool-up speed, reduces airflow, and basically chokes the engine. In really bad cases, you’ll actually hear a scraping sound and see physical contact marks if you pull the intake or exhaust pipes.
Unusual Noises: Whines, Screeches, Grinding
Your turbo makes a certain sound when it spools up, a kind of whoosh or whistle. That’s normal. What’s not normal is a high-pitched whine that gets louder with RPM, a screech, or, God forbid, a metallic grinding sound. That’s failing bearings, plain and simple. The turbo shaft spins at insane speeds—over 100,000 RPM under load—and it’s supported by a thin film of oil. If that oil flow is compromised or the bearings wear out, you get metal-on-metal contact. The sound is unmistakable once you’ve heard it a few times. If you’re hearing grinding, the turbo is already toast, and you’re gambling with your engine.
Unexplained Oil Consumption (No External Leaks)
This is the “silent killer.” If you’re constantly topping off your oil, but there’s no puddle on the driveway and the engine isn’t smoking like a chimney, the turbo is a prime suspect. A failing oil seal will steadily feed oil into the intake tract. It either gets burned off (sometimes without obvious smoke) or pools in the intercooler. Left unchecked, this doesn’t just waste expensive oil; it can lead to dangerously low oil levels, which is a fast track to spun crankshaft bearings and a complete engine meltdown. I’ve seen it happen.
Differential Diagnosis: Is It Really the Turbo?
Look, you can’t fix what you haven’t correctly diagnosed. Blue smoke, power loss, weird noises—these symptoms have plenty of look-alikes. I’ve seen shops blame valve stem seals for turbo oil leaks and vice versa, wasting a lot of time and money. The key is methodical testing to isolate the true source. Below, I’ve laid out the common symptoms, what they usually mean if the turbo is the culprit, what else it could be, and most importantly, how to confirm the real problem with some hands-on testing.
| Symptom | Likely Turbo Problem | Common External Mimics | How I Confirm It |
|---|---|---|---|
| Blue Smoke (Under Boost/Decel) | Oil passing worn turbo seals or a cracked turbine housing. | Worn valve stem seals, piston ring wear, PCV system issues. |
Tool: Flashlight, wrench, borescope (optional). Test: Remove the intake hose from the turbo compressor inlet. If it’s dry here, but the exhaust side (check by removing the downpipe) is oily, the turbo seals are leaking. A borescope can confirm oil in the intercooler. |
| Loss of Boost/Power | Damaged compressor wheel, excessive shaft play, seized VGT mechanism. | Boost/vacuum leak, failed wastegate actuator, clogged catalytic converter, engine mechanical fault (low compression). |
Tool: Boost pressure gauge, smoke machine, dial indicator. Test: First, rule out leaks with a smoke test on the intake system. Then, check turbo shaft play: axial movement greater than 0.10mm (0.004 inches) or radial movement greater than 0.50mm (0.020 inches) signals internal failure. |
| Whining/Grinding Noise | Bearing failure, wheel-to-housing contact. | Accessory bearing (alternator, power steering pump), intake air leak, clogged air filter, exhaust leak. |
Tool: Mechanic’s stethoscope, gloves. Test: With the engine off and cool, place a stethoscope on the turbo housing. Then, carefully try to manually rotate the compressor wheel. If you feel resistance, hear grinding, or notice any wheel contact with the housing, the bearings are shot. |
| Oil Consumption (No External Leaks) | Turbo oil seal failure, or clogged oil drain line. | Internal engine consumption (worn piston rings, valve guides), PCV system issues. |
Tool: Oil catch can, compression/leak-down tester. Test: First, confirm the engine’s health with a compression and leak-down test. If the engine is solid, check the turbo. Disconnect the intercooler pipes and look for oil. For a long-term check, install an oil catch can in the PCV/breather line. Excessive oil accumulation there, coupled with a clean engine, points to turbo seal leakage. |
Why Turbos Die: Root Cause Analysis
Once you’ve confirmed the turbo is the problem, the next question is critical: why did it fail? Too many shops just slap a new turbo on without addressing the root cause, and then the new unit fails in a few months. I’ve seen it repeatedly, especially with remanufactured units. You’ve got to fix the underlying issue, not just the symptom.
Lubrication Issues: The Number One Killer
The vast majority of turbo failures trace back to oil—or a lack of it. The bearings and bushings rely entirely on a thin film of oil. If that film breaks down, it’s game over. This can happen for a few reasons:
- Oil Starvation: Ignoring oil change intervals, using the wrong viscosity oil, or having a clogged oil feed line (especially common on some older Audi/VW models) will starve the turbo.
- Oil Contamination: Dirty oil, or oil with excessive carbon deposits, acts like sandpaper on those precision bearings.
- Oil Coking: This is a big one. If you shut off an engine immediately after hard driving (like pulling a heavy trailer or a track day), the turbo’s center housing can get incredibly hot. Without oil circulating to cool it, the residual oil in the housing literally bakes into carbon deposits. These deposits restrict future oil flow, leading to dry starts and rapid bearing wear. I’ve seen this on countless heavy-duty trucks and performance cars.
Foreign Object Damage (FOD)
Something getting sucked into the turbo is always bad news. On the compressor side, a torn air filter, a loose clamp, or even a piece of a disintegrating intake hose can get ingested, bending or breaking the delicate compressor fins. On the exhaust side, things like failing EGR valve components, a broken piston ring, or even carbon chunks from a clogged DPF can get blasted into the turbine wheel. Either way, the damage creates an imbalance that quickly destroys the bearings and can even fracture the shaft. Always check the air filter and intake tract carefully.
Thermal Fatigue
This is a silent killer, particularly on high-output or modified engines. Constant, rapid heat cycles—think hard driving followed by immediate shutdown—cause the turbine housing to expand and contract repeatedly. Over time, this leads to cracks, often near the exhaust inlet or in the volute itself. I’ve pulled turbos from otherwise low-mileage trucks that were used for heavy towing without proper cooldown, and the turbine housing looked like a spiderweb.
VGT Vane Issues (Variable Geometry Turbos)
On Variable Geometry Turbos (VGT or VNT), carbon buildup is the Achilles’ heel. Exhaust soot accumulates on the movable vanes and their pivot points, causing them to stick. When the ECU can’t move the vanes as commanded, boost control goes haywire. The turbo works harder than it should, accelerating wear, and you’ll get boost-related fault codes. This is a common issue on many diesel engines.
External Components Mimicking Failure
And just as important: not every turbo-related symptom means the turbo core itself is dead. A leaking oil feed line, a clogged oil drain line (especially if it’s kinked or collapsed), a blown intercooler hose, or a failed wastegate actuator are all external problems that mimic internal turbo failure. Diagnose properly—don’t condemn a $1,500 turbo because of a $20 hose or a $100 actuator. I’ve seen it happen more times than I care to admit.
Resolution Pathways: Fixing the Problem Right
The right repair depends entirely on what’s damaged and how badly. Just jumping straight to a full replacement isn’t always necessary, or wise, considering the cost. Let’s break it down by failure type and what I recommend.
Technical Expertise Required
Look, turbocharger internal repairs demand incredibly tight tolerances and specialized balancing equipment. While swapping an external housing might be DIY-feasible for some, rebuilding the core is strictly professional territory. Don’t try this at home unless you’ve got the right tools and training.
External Housing Damage DIY-FEASIBLE
Internal Wear (Bearing & Seal Failure) Professional Only
Severe Internal Damage REPLACE ASSEMBLY
Carbon-Bound VGT Vanes LAST-RESORT
Post-Repair Validation: Did We Fix It?
Replacing or rebuilding a turbo isn’t the finish line—it’s just the starting point. You’ve got to verify the repair worked and that you didn’t miss any secondary issues that could kill the new unit.
Initial Inspections & Test Drive
For any housing swap or rebuild, drive the vehicle for at least 100 miles under mixed conditions: idle, cruise, and moderate boost. Then, get it back in the shop and reinspect. Pull the intake hose off the compressor inlet and check for any fresh oil. Do the same on the exhaust side by pulling the downpipe. Any sign of fresh oil means your seals are still leaking, or, more likely, your oil drain line is clogged or kinked. You should also be monitoring boost pressure with a scan tool, comparing actual vs. requested boost. A consistent shortfall suggests a leak, incorrect VGT vane positioning, or internal drag from worn bearings.
Listen Closely
Noise is a dead giveaway. Even a slight whine after a repair means something’s wrong. Use a mechanic’s stethoscope to confirm silence from the turbo housing. Also, check the intercooler—if you have a borescope, peek inside for any oil residue. A clean intercooler after 100 miles is a very good sign.
Full Assembly Replacement Specifics
If you’ve replaced the whole turbo assembly, pre-lubrication is non-negotiable. On most turbos, you’ll disconnect the fuel or ignition system (or both) and crank the engine for 10–15 seconds. This primes the oil passages. Then, reconnect everything, start the engine, and let it idle for at least 60 seconds before you even think about revving it. Watch your oil pressure gauge—it should come up immediately. After a gentle warm-up drive, verify you’re getting full boost and use an infrared thermometer to check for even heating across the turbine housing. Hot spots can indicate restricted exhaust flow or an internal issue.
Cost, Risk, & The Hard Truth About Your Wallet
Let’s be realistic: turbo repairs are expensive. And on older or high-mileage vehicles, the cost can easily exceed what the car is actually worth. Here’s a breakdown of typical costs and success rates to help you make an informed decision. These are rough numbers, of course, but they’ll give you a ballpark.
| Repair Type | DIY Cost (Parts) | Shop Cost | Success Rate | Secondary Risk if Failed |
|---|---|---|---|---|
| Compressor Housing Swap | $150 – $400 | $400 – $700 | 95%+ | Overtorquing can crack the new housing. If the internal seals were the actual issue, the oil leak will just come right back. |
| Professional Rebuild | $500 – $1,000 | $800 – $1,500 | 80–90% | Poor balancing, incorrect clearances, or improper assembly can destroy the turbo quickly and send metal debris straight into your engine. |
| Full Assembly Replacement | $800 – $2,500+ | $1,500 – $3,500+ | 98%+ | Failure to prime the turbo with oil or incorrect installation (like a kinked oil drain line) can kill a brand-new turbo in mere minutes. |
My Economic Reality Check:
Here’s the bottom line I give my customers: if the total repair cost—that includes the turbo, all new oil lines, gaskets, labor, and any necessary intercooler cleaning—starts to creep past 50% of your vehicle’s current market value, you’re in a tough spot. At that point, you really need to consider whether throwing more money at it makes financial sense. Sometimes, investing in a replacement vehicle or even a used engine is the smarter play. I’ve advised many good people to walk away from otherwise solid cars because the turbo repair was just a money pit waiting to happen.
Prevention & Monitoring: Keep That Turbo Happy
The best way to deal with a turbo failure? Prevent it from happening in the first place. Turbos are incredibly robust when they’re treated right, but they are absolutely unforgiving of neglect. Follow these practices, and you’ll maximize that turbo’s lifespan.
My Turbo Longevity Checklist
-
Use the right oil, always. This isn’t just about viscosity; it’s about the correct specification. Modern turbos, especially diesels, often require low-SAPS (Sulfated Ash, Phosphorus, Sulfur) full-synthetic oil meeting standards like API SP or ACEA C3. Don’t guess, check your owner’s manual.
-
Maintain your coolant. For water-cooled turbos, use the correct coolant mix. Corrosion or sludge in those narrow passages can restrict flow, leading to localized overheating and premature failure.
-
Cool down after hard driving. Let the engine idle for 30–60 seconds after you’ve been pushing it hard. This allows the turbo to spool down and gives fresh oil time to circulate and cool the center housing, preventing oil coking. Trust me, it’s worth the wait.
-
Monitor oil consumption. If you’re consistently adding oil between changes, find out why. A quart every 3,000 miles is a red flag on a turbo engine, even if there’s no visible smoke.
-
Inspect the intake system periodically. Every oil change, take off the hose to the compressor inlet and look for pooled oil or sludge. Check the air filter, too. Any signs of damage or excessive oil here are early warnings.
And yes, some manufacturers—like Ford with their EcoBoost engines—have even issued service bulletins recommending Top Tier gasoline to reduce carbon buildup on t
