When Your Engine Stumbles Instead of Surging
You hit the gas, expecting that smooth, responsive push, right? But instead, you get a cough, a hesitation, or just a general sluggishness. That lack of power when you accelerate is probably the most common complaint I hear in my shop. It’s more than just annoying; it can be downright dangerous when you need to merge onto the highway or pass someone quickly.
In my 25+ years turning wrenches, this symptom almost always points back to issues in one of two places: the fuel delivery system or the air intake system. I like to think of them as the engine’s circulatory and respiratory systems. If either one isn’t working right, the engine can’t breathe or feed itself properly, and it just won’t make the power it needs.
What does this feel like? Sometimes it’s a distinct stumble right when you first press the pedal—like the engine is catching its breath. Other times, it’s a more general feeling of weakness, where the engine revs up, but the car just doesn’t seem to keep up. In the worst cases, you might feel the car surging or bucking, especially under a light load, almost like it’s misfiring or losing its rhythm.
My Approach: Pinpointing the Real Problem
Diagnosing acceleration hesitation isn’t always straightforward. A failing ignition coil, for example, can feel almost identical to a clogged fuel filter when you’re just lightly pressing the throttle. That’s why I never just start throwing parts at a problem. You need a systematic approach to figure out the root cause, and that means gathering good data—both from what I see and what my tools tell me.
I always start with the basics: a visual inspection for obvious vacuum leaks (hissing sounds, cracked hoses), checking the air filter, and, of course, scanning for diagnostic trouble codes (DTCs). Codes like P0171 (system too lean) or P0300 (random misfire) are good starting points. But don’t stop there; many intermittent issues won’t trigger a code until they’re really bad. The table below outlines the common symptoms I see, the usual suspects in the fuel and air systems, what else might fool you, and the definitive tests I use to confirm the diagnosis.
| Symptom | Likely Fuel/Air Culprit | Common External Mimics | My Go-To Test to Confirm |
|---|---|---|---|
| Hesitation on acceleration | Fuel pump pressure drop, clogged fuel filter, dirty fuel injectors, faulty Mass Air Flow (MAF) sensor | Ignition coil breakdown, worn spark plugs, exhaust restriction (like a clogged catalytic converter) |
I use a fuel pressure gauge to watch pressure at idle, during a quick throttle snap, and under load. Then, I cross-reference with scan tool data: checking MAF readings (grams/second) and Long-Term Fuel Trim (LTFT) at a steady 2500 RPM. |
| General lack of power | Severe fuel pressure loss, grossly inaccurate MAF sensor, failed throttle body | Low engine compression, clogged catalytic converter, incorrect ignition timing |
This calls for a running fuel pressure test. I’ll also use the scan tool to compare calculated engine load or volumetric efficiency against spec. For a suspected catalytic converter, an infrared thermometer on the inlet/outlet pipes will tell me if it’s plugged. |
| Surging or bucking under steady throttle | Intermittent fuel pump operation, erratic MAF or Throttle Position Sensor (TPS) signal | Faulty torque converter clutch solenoid, cylinder misfire, vacuum leak |
Here, I need to monitor fuel pressure in real-time during a test drive. I’ll also graph MAF and TPS voltage on the scan tool, looking for any sudden spikes or dropouts. Sometimes, an electronic throttle body adaptation reset is all it needs. |
Why These Components Give Up the Ghost
Once my testing points to a specific component, it’s helpful to understand why it failed. This isn’t just academic; it helps prevent repeat failures and lets me explain things clearly to the customer.
Let’s talk about the fuel pump first. Most in-tank electric pumps don’t just die instantly; they usually go out gradually. The internal motor brushes wear down over time, which reduces the pump’s speed and, critically, its pressure. The check valve inside the pump can also fail, letting fuel pressure bleed off after the engine shuts down—that’s what causes those hard starts after the car has been sitting for a while. And don’t forget the inlet “sock” filter; it can clog up with sediment from the tank, especially if you’re one of those folks who regularly runs the tank down to fumes.
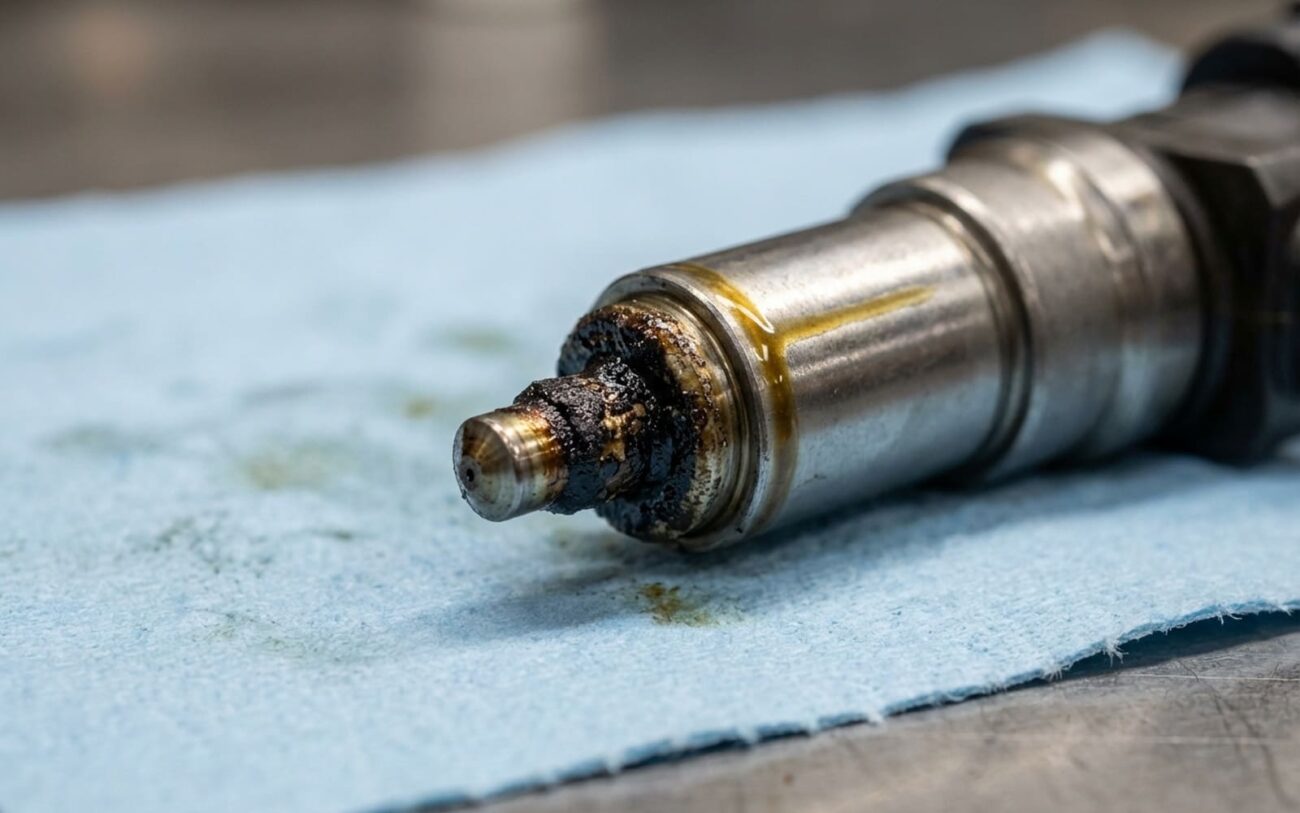
A clogged in-line fuel filter or dirty injectors usually comes down to fuel quality. Injectors rarely fail electrically; what happens instead is internal coking—carbon buildup from fuel varnish that restricts flow or messes up the spray pattern. I see this more often with cheaper gasoline that doesn’t have enough detergent additives. On the air side, the Mass Air Flow (MAF) sensor is a common culprit. Its hot-wire or hot-film element is incredibly sensitive. Oil from an over-oiled aftermarket air filter, road grime, or just years of exposure can coat that element, skewing its readings. When that happens, the engine control module (ECM) gets bad info, miscalculates the airflow, and delivers the wrong fuel mixture.
Technician’s Insight:
The throttle body can fail in a few ways: the Throttle Position Sensor (TPS) can wear out, sending erratic signals to the computer. Carbon buildup is also a big one; it can cause the throttle plate to stick or not return properly. I see this misdiagnosed a lot—techs replace the whole throttle body when a simple cleaning or an adaptation reset would have fixed it. Also, while it’s not universal, I’ve seen documented service bulletins for certain fuel pump control modules in some mid-2010s vehicles (Ford F-150s, for example) that cause intermittent fuel pressure loss and, you guessed it, acceleration hesitation. Always check for TSBs!
And just to be clear: a clogged in-line fuel filter is a maintenance item, not a fuel pump failure. A vacuum leak from a cracked hose isn’t a throttle body defect; it’s an intake system leak. Being precise in diagnosis matters, both for fixing the car right and for explaining it to the customer.
Your Repair Options: From Simple to “Call a Pro”
The repair path depends heavily on what’s actually broken and how hard it is to get to. Some jobs are definitely DIY-friendly; others require specialized tools, experience, and frankly, a bit of bravery.
Fuel Filter Replacement DIY-FEASIBLE
In-Tank Fuel Pump PROFESSIONAL-ONLY
Throttle Body Replacement DIY-FEASIBLE (ADVANCED)
MAF Sensor & Injectors NON-REPAIRABLE → REPLACE
For a truly failed MAF sensor or fuel injector, your only real option is replacement. Always buy OEM or a high-quality aftermarket unit; cheap sensors can cause more problems than they solve. For injectors, if one is bad and your vehicle has high mileage, I often recommend replacing the full set. Flow imbalances between old, worn injectors and a single new one can cause rough running and other headaches.
TEMPORARY FIX If your MAF sensor is just contaminated—not actually damaged—you can try cleaning it. Use only a manufacturer-approved MAF sensor cleaner. Spray it directly on the sensing element; never, ever touch it with anything, as it’s extremely delicate. Let it dry completely before reinstalling.
Did It Actually Work? Validating Your Repair
Replacing a part is only half the job. The other half, and just as important, is validating that the repair actually solved the problem and didn’t introduce any new ones. This is where many DIYers, and even some less experienced pros, fall short.
For fuel system repairs—like a new pump or filter—I always check that fuel pressure holds steady for at least five minutes after shutdown, per OEM specs. Then, a thorough visual and olfactory (smell!) inspection for any fuel leaks at all connections. Critically, I use my scan tool to monitor Long-Term Fuel Trim (LTFT): it should stabilize within ±5% at idle and cruise. If it’s still above +8%, you likely have a lingering lean condition, possibly from a vacuum leak you accidentally created during the repair.
After replacing a throttle body or MAF sensor, I verify a smooth idle and responsive throttle. I’ll graph the TPS voltage on a scan tool: it should rise linearly from idle to wide-open throttle without any spikes or flat spots. The MAF reading should also scale predictably with RPM; I compare it to known good values for that specific engine. And again, don’t skip that adaptation procedure for electronic throttle bodies. If everything’s done correctly, any stored codes should clear themselves and not return under normal driving conditions. For extra confidence, I often perform a smoke test to definitively rule out any accidental vacuum leaks from disconnected hoses or loose clamps during reassembly. The tools you’ll absolutely need for proper validation: a fuel pressure gauge, an OBD-II scan tool with live data and graphing capability, and ideally, a smoke machine. Without them, you’re just guessing, and that’s not how I run my shop.
The Cost and the Tough Decision: Fix It or Ditch It?
Before you even start buying parts or scheduling a repair, you need to weigh the cost against your vehicle’s overall value. This isn’t just about parts and labor; it’s about the risk of future problems and long-term reliability.
| Repair Type | DIY Cost (Parts) | Shop Cost (Est.) | My Success Rate | Secondary Risk if Failed |
|---|---|---|---|---|
| Fuel Filter Replacement | $20 – $60 | $100 – $200 | 95%+ | A fuel leak or fire hazard if connectors aren’t fully seated or are overtightened. |
| Fuel Pump Assembly | $150 – $400 | $600 – $1200 | 90% | Contamination of the new pump if the tank isn’t properly cleaned; fuel leak from an improperly installed seal. |
| Throttle Body | $200 – $600 | $500 – $900 | 95%+ | Idle or performance issues if electronic adaptation isn’t performed; vacuum leak from a damaged gasket. |
| MAF Sensor | $80 – $250 | $200 – $400 | 98%+ | Electrical damage from improper handling; incorrect readings if a low-quality sensor is used. |
Here’s the reality check I give my customers: if the total repair cost starts to creep above 50% of the vehicle’s current market value—what you’d pay for a similar, running car—you really need to think hard about whether it’s worth it. Putting $1,000 into a car that’s only worth $1,800 might make sense if the rest of the vehicle is in fantastic shape. But if the transmission is tired, the body is rusted out, or other major systems are showing signs of failure, it’s often better to cut your losses and put that money towards a newer, more reliable vehicle. I’ve seen too many people sink money into one big repair only to face another, equally big bill just weeks or months later. Be honest with yourself about the car’s overall condition.
How to Keep This From Happening Again
Look, many of these failures aren’t inevitable. With a few smart habits, you can significantly reduce your risk of dealing with acceleration hesitation down the road. First and foremost, use Top Tier detergent gasoline. It contains higher levels of deposit control additives that actually help keep your fuel injectors, intake valves, and even your MAF sensor cleaner over time. Second, stick to your manufacturer’s maintenance schedule—especially for that fuel filter. If your vehicle has an in-line filter, I typically recommend replacing it every 30,000 to 60,000 miles, depending on your fuel quality and driving habits.
My Proactive Maintenance Checklist
-
Keep an eye on your fuel economy. A sudden, unexplained drop in MPG can be an early warning sign of a weak fuel pump or a MAF sensor sending bad data.
-
If you have an OBD-II scan tool, check your Long-Term Fuel Trim values periodically. If LTFT is consistently above +10% or below -10%, it’s time to investigate before a code even sets.
-
Every time you’re under the hood, quickly check for vacuum leaks, inspect the air filter, and consider a preventative MAF sensor cleaning (if appropriate for your sensor type).
-
While you’re in there, check for fluid leaks. Sometimes seemingly unrelated issues can contribute to broader engine problems.
