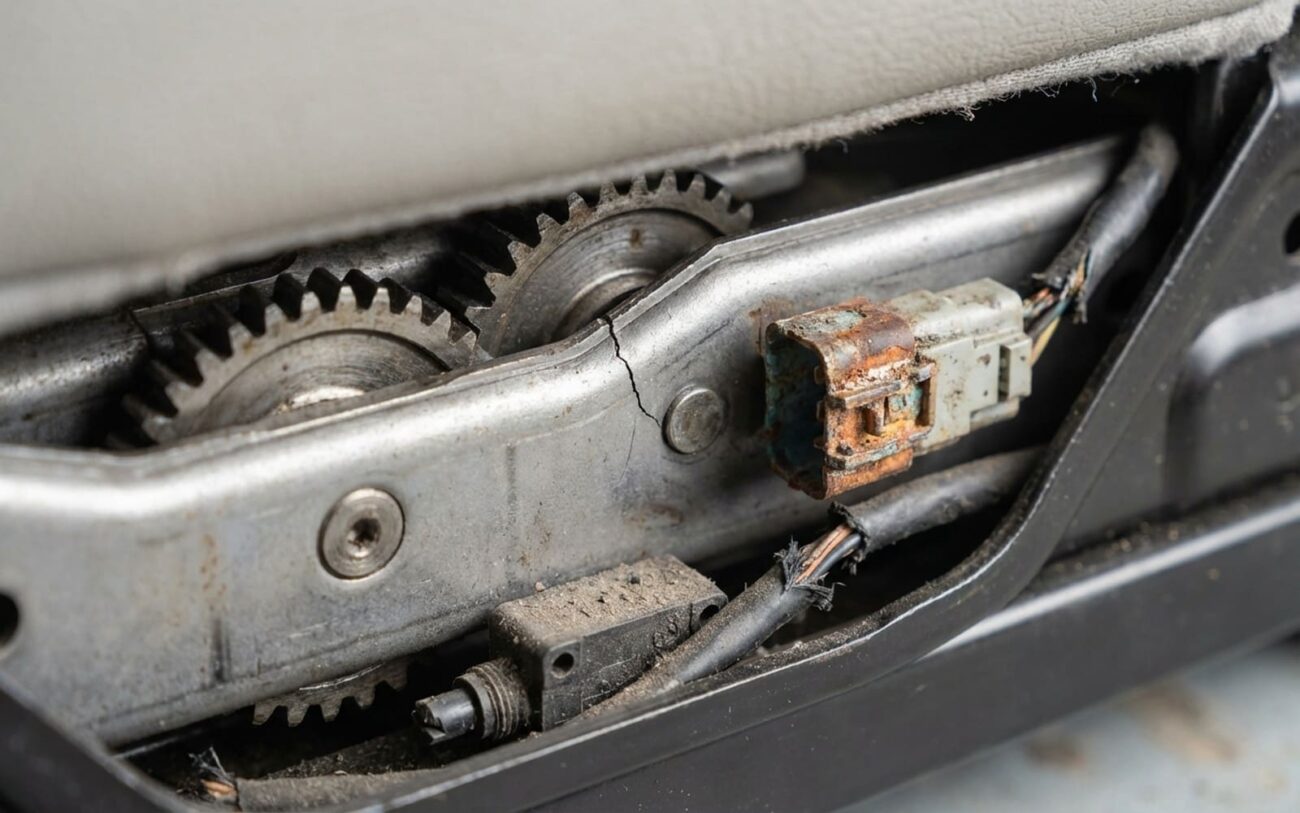
Alright, let’s talk power seats. You hit the switch, hear that distinct click from under the seat, but nothing budges. I’ve seen this a thousand times. It’s frustrating, sure, but that click? That’s not just a random noise; it’s the first real clue you’ve got. Power’s getting there, but something’s telling the system to shut down before the seat can move. In my experience, it’s usually one of two things: either the motor’s internal overload protection is kicking in, or a relay in the seat control module is activating but can’t hold the circuit.
That Click: Initial Diagnosis & What NOT To Do
First things first: when you hear that click and the seat doesn’t move, stop pressing the switch immediately. Seriously. Holding it down just builds heat in the motor windings, can melt insulation, or even strip those little nylon drive gears inside the mechanism. If there’s a mechanical bind, you’re only making it worse. Let go, disconnect the battery (safety first, especially with airbags nearby), and then we can start figuring it out.
Now, about that click. If the seat won’t move in any direction – forward, back, up, down, recline – then I’m usually looking at the motor’s internal overload clutch. This is a mechanical safety feature, designed to slip when it senses too much resistance. It prevents the motor from burning out or damaging the gears. It engages briefly, you hear the click, and then it disengages. If it’s doing this for every direction, it’s either genuinely bound up, or the clutch itself is worn out and slipping under normal load.
On the flip side, if the seat moves fine in some directions but clicks and fails in just one specific direction (say, it goes forward but won’t go back), then my money’s usually on a faulty limit switch. These are small microswitches along the track that tell the control system when the seat has reached its travel limit. If one fails “open,” the system thinks the seat is already at its max travel for that direction, cuts power, and you get the click with no movement.
My Diagnostic Playbook: Pinpointing the Real Problem
That click narrows it down, but it doesn’t tell you exactly what’s wrong. We need to figure out if it’s an electrical problem (motor, switch, wiring) or a mechanical one (track obstruction, drive cable). This isn’t guesswork; it’s a process of elimination. You’ll need a digital multimeter (DMM), a wiring diagram for your specific vehicle (don’t skip this!), and ideally, a DC clamp meter to measure current draw.
Scenario 1: Click, No Movement in Any Direction
This is often a sign of a mechanical seizure in the tracks or a problem with the motor’s internal overload clutch.
-
First, visual inspection: Get under the seat with a good flashlight. Look for obvious obstructions in the tracks – coins, pens, toys, anything that could jam the mechanism. I’ve pulled out everything from LEGO bricks to old cell phones. Also, check the wiring harness for any obvious damage or disconnected plugs.
-
Next, test the motor directly: If you can access the motor assembly (sometimes you have to unbolt the seat first), disconnect its electrical connector. Then, carefully apply 12V directly to the motor terminals. If the motor spins freely, then the overload clutch is either faulty or it was tripping due to an external bind that you’ve now removed. If it doesn’t spin at all, the motor itself is electrically dead – brushes worn out, open circuit in the windings, something internal. This bypasses the vehicle’s control module and switches, isolating the motor.
Scenario 2: Click, Movement in One Direction Only
When one direction fails, but others work, it screams “limit switch” to me.
-
Test the limit switch: Grab your DMM and your wiring diagram. Locate the limit switch for the non-working direction. Back-probe its terminals (don’t pierce the wires!) and activate the seat switch. A healthy switch should change state – either go from open to closed, or vice-versa, depending on its normal operation. If you see no change, that switch is faulty. It’s telling the control module the seat is at its limit, even when it’s not.
Scenario 3: Intermittent Movement with Clicking
This is a trickier one, often pointing to a clutch that’s just starting to wear, a limit switch with high resistance, or even a loose connection.
-
Monitor motor current: This is where a DC clamp meter earns its keep. Clamp it around one of the motor’s power wires. Activate the seat switch and watch the current draw. A healthy power seat motor typically draws between 5 and 15 amps under normal load. If you see consistent spikes above 20 amps, especially when the seat stops moving, that’s a clear indication of excessive mechanical resistance – a bind in the track, a failing drive cable, or a clutch slipping under too much load. If the current is high but the motor isn’t moving, you’ve got a definite bind.
Look, I’ve seen too many people skip these basic tests and just throw parts at the problem. “Oh, it clicks, must be the motor!” Then they replace the motor, and the same problem comes right back because a penny was jammed in the track. You gotta test, verify, and then repair. It saves time, money, and a whole lot of frustration.
Understanding the Failure: Why These Parts Give Up
We’re talking about components that fail due to wear or design limitations, not just external junk getting in the way.
The overload clutch is a spring-loaded friction mechanism, usually tucked right inside the motor housing. Its job is to slip when the torque required to move the seat exceeds a safe level. Over years of use, that spring can weaken, or the clutch plates themselves can wear down or get contaminated with grease or dirt. Once that happens, it starts slipping under normal loads, giving you that click-no-movement symptom. It’s not a design flaw; it’s just wear and tear. On high-mileage vehicles, especially ones where the seat gets adjusted a lot (think fleet vehicles or cars with multiple drivers), this is pretty predictable.
Then there are the limit switches. These little guys are wear items too. Each direction of seat travel has a small switch that gets actuated by a cam or lever on the track. The plunger can bend, wear out, or corrode. Inside, the electrical contacts degrade over time, particularly in humid climates, leading to high resistance or an open circuit. The control module then interprets this as the seat being at its travel limit, even when it’s nowhere close. I’ve seen manufacturers issue service advisories for specific models – some Ford, GM, and Toyota platforms, for instance, tend to have these switches fail after 80,000+ miles. It’s a consistent pattern.
Here’s a critical distinction: if your seat track is genuinely jammed by debris or a roller is seized, and the overload clutch trips, that clutch isn’t “failed.” It did its job. The root cause is mechanical, not an internal electrical component failure. Always inspect the track and drive mechanism thoroughly before you condemn the motor or clutch itself.
The Fix: Repair, Replace, or Walk Away?
How you tackle this depends on the specific component, your vehicle’s design, and your own comfort level with wrenching. Can you just repair the overload clutch or a single limit switch? In theory, maybe. In reality? Most seat motor assemblies are sealed units, not really designed to be serviced. Opening them up risks damaging delicate internal gears or losing tiny parts. Even if you manage to get it apart and back together, misalignment or premature failure is a real possibility. A few specialized shops might offer rebuilds, but for most folks, a full replacement is the only practical option.
If the overload clutch tripped because of a temporary bind (say, a coin got wedged), letting the motor cool down for 20-30 minutes might allow it to re-engage. But this is a Temporary solution, really just a diagnostic step. If the clutch itself is worn, it’ll just slip again immediately. Don’t count on cooling as a permanent fix.
The most common and reliable repair I see is replacing the entire motor and switch assembly. On a lot of vehicles – especially Ford, GM, and Toyota platforms – this is actually quite DIY-Feasible if you’ve got the right tools. You’ll need a socket set, trim tools, Torx bits (often T20 or T25), your DMM, and the replacement part. Crucial safety step: Disconnect the negative battery terminal before you start. You’re working near airbag connectors under that seat, and you absolutely do not want an accidental deployment.
If your diagnosis confirms a dead motor (no spin when you apply direct 12V), then the path is clear: it’s Non-Repairable → Replace Assembly. Internal components like brushes or armatures aren’t sold separately. The motor is treated as a single, sealed unit by OEMs and aftermarket suppliers.
Cost, Risk & Economic Decision Framework
Repair costs can swing pretty wildly depending on your vehicle, the shop’s labor rate, and where you source your parts. Here’s a realistic breakdown I usually share with customers:
| Repair Type | DIY Cost (Parts Only) | Shop Cost (Parts & Labor) | Success Rate | Secondary Risk if Failed |
|---|---|---|---|---|
| Replacement of Integrated Motor/Switch Assembly | $150 – $400 | $450 – $800 | 95% (if diagnosis was accurate) | Undiagnosed wiring fault, connector corrosion, or body control module (BCM) issue causing repeat failure |
That high success rate? That’s assuming you did your homework and diagnosed it correctly. If you replace a motor, but the real issue was a corroded connector under the seat or a failing seat control module, the problem’s just going to come right back. And now you’re out hundreds for a part you didn’t need.
Here’s a rule I always use with my customers: if the repair cost is going to be more than 40% of what a base-model version of your vehicle is worth on the private market, it’s time to seriously reconsider the economics. For instance, dropping $700 to fix a power seat on a $2,500 car? Rarely makes sense. At that point, you might look into a manual seat conversion kit (they exist for some models) or factor that repair into a bigger decision about replacing the vehicle entirely.
After the Repair: Don’t Pack Up Yet!
Just replacing the part isn’t the finish line; it’s the start of verification. Don’t just reconnect the battery and assume you’re good to go. Run a full functional test. Move that seat through its entire range of motion in every single direction. It should move smoothly, without any hesitation or weird noises. Listen closely. Any grinding, screeching, or – worst of all – that telltale click means you haven’t fully solved the problem.
For a professional-level check, I’ll use my DMM with min/max recording or that DC clamp meter again. Monitor the current draw during operation. A healthy motor should still be pulling between 5 and 15 amps under load. If you see current spikes above 20 amps, there’s still a bind somewhere – likely in the track or drive mechanism. This electrical validation catches issues that a simple “does it move?” test will miss.
If your vehicle has memory seat functions, you’ll probably need to perform a memory seat calibration or a system reset. Check your service manual; some modules need to “relearn” their travel limits after a motor replacement.
Keeping Your Seat Moving: Prevention Tips from My Bay
Most of these failures come down to wear and tear, but you can absolutely extend the life of your power seat system with a few simple habits I recommend to everyone:
-
Keep those tracks clean. Every time you vacuum the interior, take a flashlight and shine it down the seat rails. Get rid of any coins, paper clips, crumbs, or anything else that can get crushed into the mechanism. Like I said, I’ve pulled out everything from LEGO pieces to pen caps – each one a potential cause of a track bind that trips that overload clutch.
-
Listen to the motor. You know what your seat sounds like when it’s working normally – a steady, moderate-pitched whir. If you start hearing a faint click during movement, or notice the seat slowing down, that’s an early warning. It could mean the overload clutch is starting to slip, or a limit switch is developing high resistance. Address it early, and you might avoid a complete failure down the road.
-
Avoid overloading the system. Don’t try to move the seat while someone is sitting heavily in it, especially if it’s already near a track limit. That extra load puts unnecessary stress on the motor and clutch. It’s a small habit – just ask the passenger to shift their weight slightly – but it can prevent a lot of strain.
-
Check the wiring harness. If you’re ever under the seat for any reason, give the wiring harness for damage a quick once-over. These connectors move constantly with seat adjustments and are prone to corrosion or pin fatigue. They’re common culprits behind intermittent power seat failures that can drive you crazy.
