Your BMW X5 G05 Coolant Pump: What That Error Really Means (And How I Fix It)
Alright, so your check engine light just popped on in your BMW X5 G05, and the scan tool’s pointing to a coolant pump fault. I get it, that’s enough to make anyone sweat, especially when you hear folks talking about engine damage. But before you panic, let’s cut through the noise and talk about what’s actually going on under the hood.
This isn’t your granddad’s belt-driven water pump. On the B58 engine in your G05, you’ve got a smart, electric, variable-speed unit. The DME (that’s BMW’s Digital Motor Electronics, the engine’s main computer) controls it directly. It only runs when it needs to, adjusting coolant flow based on everything from engine load to the cabin climate. Pretty slick, right?
The Codes, The Symptoms, And The Real Danger
When I see a coolant pump fault, it usually starts with a stored fault code. The most common ones are 1E3E20 (coolant pump activation: line disconnection) or 1E3E21 (activation: power reduced). What these codes tell me is that the DME sent a command to the pump, but it didn’t get the “roger that” signal back. Now, that doesn’t automatically mean the pump itself is toast. It could be an electrical issue, a mechanical jam, or even just air in the system messing with things. But it definitely means your cooling system isn’t doing its job.
Beyond the codes, you might notice some other tell-tale signs. A persistent high-pitched whine or grinding noise coming from the front passenger side of the engine bay, especially with the ignition on but the engine off, is a big red flag. That’s not the normal two-second prime cycle you hear; that’s usually internal bearing or impeller failure. I’ve heard too many of those.
Sometimes, though, these pumps fail silently. You might just notice the engine running hotter than usual, particularly when you’re stuck in traffic or idling with the A/C blasting. If it gets worse, you’ll eventually see that dreaded coolant temperature warning pop up in your instrument cluster. Look, this isn’t something to ignore. Without proper coolant circulation, heat builds up fast. We’re talking cylinder head warpage, head gasket failure, and in the worst cases, piston damage. The pump failing isn’t catastrophic on its own, but the damage from running with inadequate cooling absolutely is. I’ve seen engines completely cooked because someone put off this repair.
My Diagnostic Approach: Don’t Just Swap the Pump
Here’s the thing: just because the scan tool points to the electric coolant pump doesn’t mean you automatically need a new one. I’ve seen too many perfectly good pumps replaced because a technician didn’t do their homework. This pump needs power, ground, and a clear path for the coolant. A problem with any of those can make it look like the pump itself is dead. My approach is always systematic.
Scenario 1: Fault Codes (1E3E20/1E3E21) and No Pump Operation
If I’ve got those codes and the pump isn’t doing anything, the first thing I check is the basics. Is fuse F267 good? Any visible damage to the wiring harness leading to the pump? Is the ground connection solid? A simple blown fuse or a chewed wire (yes, rodents love BMW wiring) can throw these codes. If those check out, I’m going to dig deeper.
I’ll use a BMW ISTA system or a compatible professional scan tool to command the pump to 100% speed. Then, I back-probe the pump connector (pins 1 and 3) with a digital voltmeter. If I’m seeing good voltage (12V or more) but the pump draws zero amps and stays silent, then yeah, that tells me the internal electronics or the motor itself has failed. That’s a bad pump.
Scenario 2: Lack of Coolant Flow, Engine Overheating, No Pump Noise
Sometimes the pump just silently quits, or it’s not moving coolant. Before condemning the pump, I always make sure the system isn’t just air-locked. These modern BMW systems are notoriously sensitive to air. So, I perform a full vacuum fill and bleed procedure first. If that restores flow, great, problem solved (for now). If not, then I’ll disconnect the pump’s outlet hose, command the pump on, and watch for fluid discharge. If there’s no flow, even with confirmed power, then it’s an internal mechanical failure – a seized motor or a jammed impeller, maybe from some debris. The pump’s done.
Scenario 3: Persistent Whirring, Grinding, or Squealing Noise
This is usually the easiest one to pinpoint. That high-pitched whine or grinding sound? Nine times out of ten, it’s the pump’s internal bearings failing or a shaft seal that’s let coolant leak into the motor housing. But I don’t just assume. I’ll grab my mechanic’s stethoscope (or a long screwdriver, if that’s all I’ve got) and carefully pinpoint the source of the noise. With the ignition on, I’ll unplug the pump’s electrical connector. If the noise stops immediately, then we’ve found our culprit. If it keeps going, then I’m looking at other things like a failing electric radiator fan or even an A/C compressor clutch bearing (though that’s less common on these).
Why These Pumps Fail (And a Critical BMW Bulletin)
So, why do these fancy electric pumps give up the ghost? Most of the time, it’s an internal issue. We’re talking about failure of the motor windings, the MOSFETs on the pump’s control board, or the internal bearings that keep the impeller spinning smoothly. Sometimes, a shaft seal will fail, allowing coolant to seep into the motor housing, which is a death sentence for the electronics.
A heads-up for some owners:
BMW actually issued a service information bulletin (SI B17 01 21) in early 2023 for premature failures in B58TU engines built between August 2020 and September 2022. They traced it back to a batch of pumps that had inadequate internal sealant, which led to coolant getting into the electronics and causing early electrical failure. It’s not a full-blown recall, but it’s definitely worth checking with your dealer using your VIN. You might qualify for some goodwill assistance on the repair.
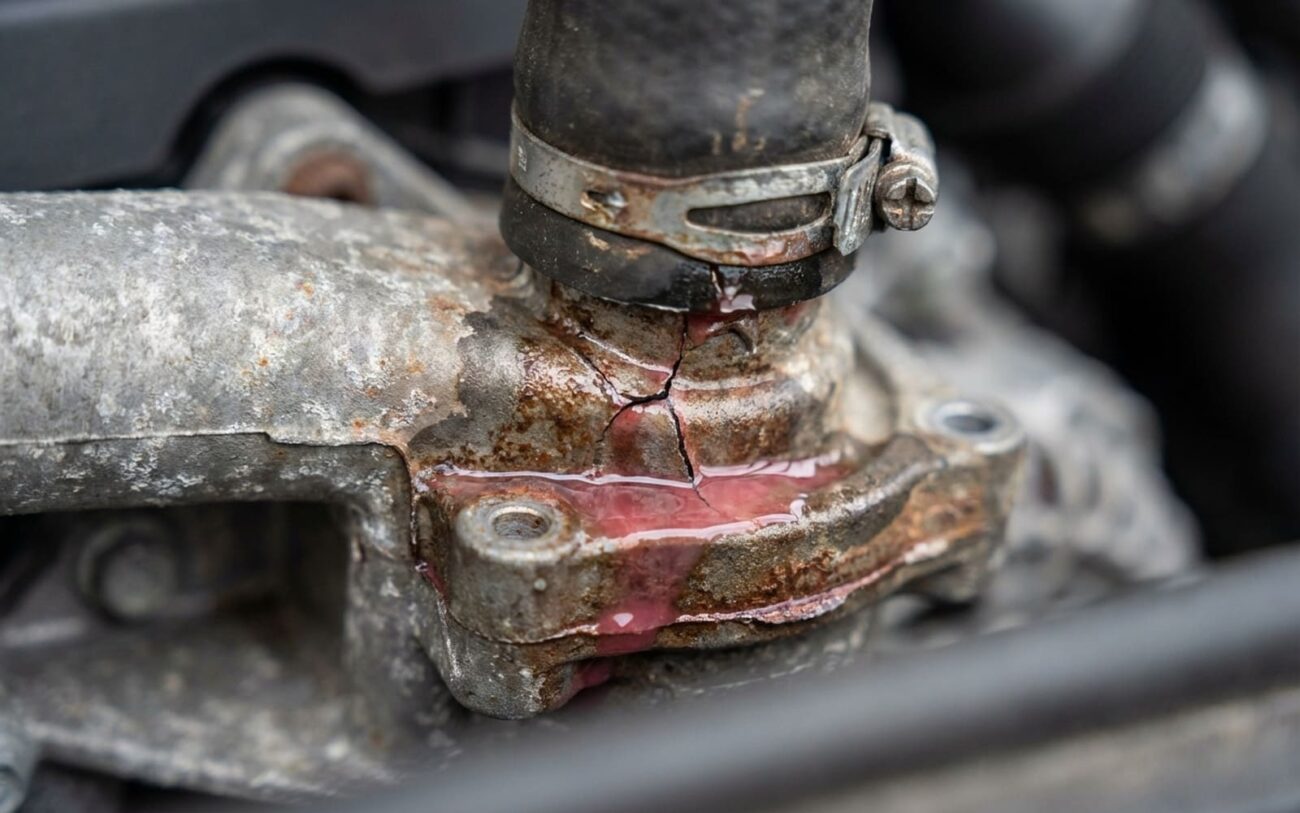
And just to be clear: a leaking hose at the pump isn’t a pump failure—that’s a hose or clamp issue. A faulty thermostat or low coolant from another leak doesn’t mean the pump failed. Don’t let a misdiagnosis turn a $100 hose clamp fix into a $1,500 pump replacement. I’ve seen it happen.
The Fix: No Shortcuts, No DIY (Seriously)
Professional Territory Only
Let me be blunt: this isn’t a weekend DIY job for most folks. You’re dealing with a critical engine component, and the proper procedure requires specialized tools and knowledge. If you’re not an experienced technician with access to BMW service information, leave this to the pros.
The BMW electric coolant pump is a sealed, non-serviceable unit. Period. There are no rebuild kits, no field-replaceable bearings or seals, and absolutely no approved internal repairs. Once the electronics or motor fail, replacement is the only viable option. This isn’t a “maybe” scenario; it’s the only way to get your cooling system back to where it needs to be.
For a complete pump unit failure, this is a professional-level replacement job. You’ll need the correct OEM pump for your specific VIN (always verify with ISTA or a trusted parts catalog), genuine BMW G48 coolant (either pre-mixed 50/50 or concentrate mixed with distilled water), and a vacuum coolant fill and bleed tool. This system absolutely cannot be properly bled by just opening a bleed screw or “burping” the hoses. Air pockets will cause the new pump to cavitate, overheat, and fail prematurely. Trust me on this. You’ll also need an E-Torx socket set—usually E10 or E12—for the mounting bolts.
Follow BMW’s ISTA repair instruction RA-11-51-010 closely. Here are some critical details I always pay attention to: torque those mounting bolts to exactly 8 Nm (±1 Nm). They’re going into aluminum, and they strip out easily. Replace the large O-ring seal every single time, and lubricate it with pure silicone grease (not assembly lube or oil) to prevent pinching and ensure a proper, leak-free seal.
If you see even a small drip from the pump housing itself, that’s still a non-repairable situation. The housing is sealed at the factory using ultrasonic welding. Any crack or seam leak means the unit is compromised and has to be replaced. No exceptions. Don’t try to epoxy it; it won’t hold.
I know people look for shortcuts. Let me be direct: There is no approved temporary fix for an internal electric coolant pump failure. You cannot bypass it with a jumper wire—the DME expects feedback and variable speed control. Forcing the pump to run constantly can overload the circuit and damage the DME, which is a much more expensive problem. And under no circumstances should you ever add chemical “stop leak” products to the cooling system. These will absolutely clog the fine passages in the pump, the thermostat, and especially the heater core. I’ve seen this turn a $1,500 repair into a $3,000+ headache involving heater core replacement. Just don’t do it.
Making Sure the Fix Actually Worked
Installing the new pump is only half the job. You’ve got to verify the repair is complete and the system is functioning exactly as designed. First, vacuum-fill and bleed the coolant system precisely according to the ISTA procedure. Once it’s filled, use your scan tool to command the pump from 0% to 100% speed. You should hear a smooth ramp-up, no grinding, screeching, or hesitation. Check the upper and lower radiator hoses for flow—there should be a noticeable temperature difference when the pump is active. An infrared thermometer can help confirm this quickly.
Next, pressure test the entire cooling system. Connect a tester to the expansion tank and pressurize it to the cap’s rating—usually 1.4 bar (about 20 psi). Let it sit for at least 15 minutes. If you see a drop of more than 0.1 bar (1.5 psi), you’ve got a leak. Start by re-checking the new pump’s connections, hoses, and that O-ring. Then, clear all fault codes. Finally, take the vehicle for a test drive while monitoring live data from the DME. The reported coolant temperature should stabilize between 105°C and 110°C under normal load. No pump-related codes should return. If they do, you need to double-check those electrical connections, fuse F267, and ground integrity.
What This Is Going to Cost You
Nobody likes a big bill, but this repair is absolutely essential for protecting your engine. Here’s a realistic breakdown of what you can expect:
| Repair Type | DIY Cost (Parts Only) | Shop Cost (Est. Parts & Labor) | Success Rate of Repair | Secondary Risk if Repair Fails/Incorrect |
|---|---|---|---|---|
| OEM Pump Replacement | $450 – $700 | $1,100 – $1,600 | >99% if procedure followed |
Engine overheating due to airlock or improper bleeding; DME fault codes from incorrect installation, poor electrical connection, or damaged harness.
|
For a 2019–2023 X5 G05, this repair is almost always worth it. You’re preserving a high-value vehicle that still has years of life left in it. The only time I’d hesitate is if the car has some serious pre-existing issues—like a salvage title, major unibody damage, or it’s well over 180,000 miles with multiple system failures piling up. If the repair cost starts to creep over 40% of the car’s current market value, then yeah, it’s time to seriously weigh your options. But for most owners, replacing the pump is the smart, safe move.
Keeping This From Happening Again
Prevention starts with coolant chemistry and good maintenance habits. Always, and I mean always, use BMW-approved G48 coolant. It’s specifically formulated to protect aluminum components, prevent electrolysis, and maintain seal integrity in these engines. Using the wrong coolant—even if it claims to be “compatible”—can accelerate internal corrosion and seal degradation, which will absolutely shorten your pump’s life. I’ve seen it too many times.
To Prevent Recurrence
-
Keep air out of the system. Any time the cooling system is opened—whether for a thermostat, water pump, or hose replacement—it must be vacuum-filled and bled. Never rely on gravity fill and “burping.” Air pockets cause localized overheating and pump cavitation, both of which stress the motor and electronics.
-
Address minor coolant leaks immediately. A slow drip may seem harmless, but over time it leads to low coolant, air ingestion, and eventual pump failure.
-
For early detection, make a habit of simple checks. During oil changes, ask your technician to inspect the pump housing and electrical connector for white residue or green crust—those are classic signs of past or present coolant seepage. Have them scan for pending codes in the DME, even if no light is on.
-
And listen: when you unlock the car, the pump runs for a few seconds as part of its prime cycle. Learn that sound. If it ever becomes rough, noisy, or completely absent, investigate it right away.
