Alright, let’s talk about that low coolant light. You’ve seen it, I’ve seen it a thousand times: that little warning icon glowing on your dash, but you pop the hood, and the expansion tank looks full. It’s easy to think, “Oh, it’s just a finicky sensor.” And sometimes, yeah, it is. But you absolutely cannot ignore it. Why? Because that light is there for a reason, and even a false alarm needs to be investigated properly. It could be masking a real coolant loss, or it might just be the sensor itself throwing a fit. The good news? Most of the time, we’re not looking at a blown head gasket here. It’s usually an electrical or sensor issue. But before we jump to any conclusions, let’s make sure we’re checking the right things.
First Things First: Is It Really Full?
That coolant reservoir, or expansion tank, it only tells you part of the story. It’s the overflow. The real check needs to be done at the radiator itself, and here’s the kicker: the engine has to be stone cold. Like, sitting overnight cold. Pop the radiator cap (carefully, even when cold, sometimes there’s residual pressure). If that radiator is topped off, right up to the neck, and your reservoir is sitting at the “Cold Full” line, then you can breathe a little easier. Low coolant isn’t your primary problem. At that point, my focus shifts from mechanical to electrical.
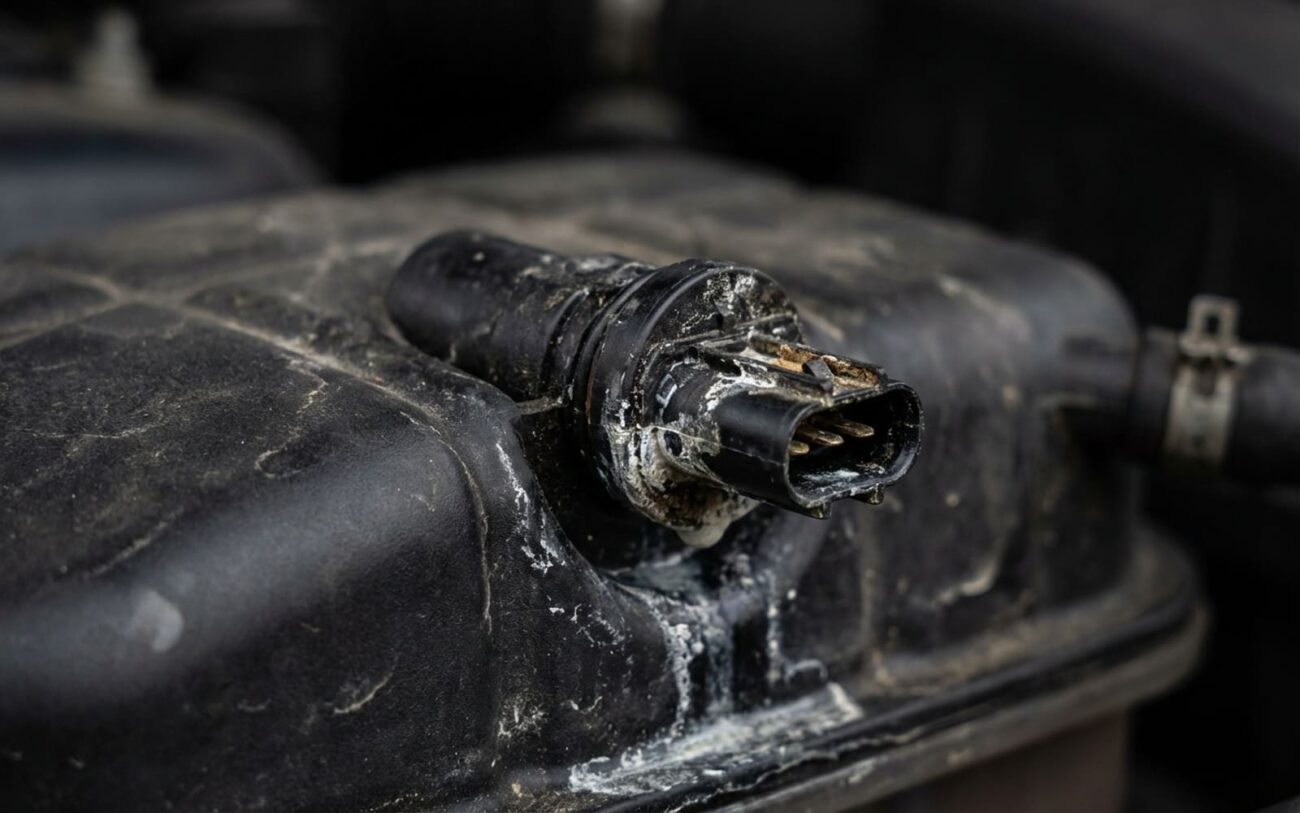
What’s usually going on then? That little float sensor tucked into the side of the reservoir. It’s a pretty simple setup: when the coolant level drops, a magnetic float sinks, which closes a reed switch inside the sensor, completing a circuit that tells your dashboard, “Hey, we’re low!” If that sensor fails—either electrically (internally shorted or open) or mechanically (the float gets stuck)—it can trigger the light regardless of the actual coolant level. It’s lying to you. Now, let’s figure out why.
Diagnosing the Liar: Sensor or Wiring?
My first step is always to observe the light. Is it a solid, unwavering warning? Or does it flicker, maybe over bumps, when you turn, or hit the brakes? That behavior gives us a big clue.
A Constant Coolant Light
If the light’s on solid, and you’ve confirmed the coolant levels are good, I’m usually looking at an internal sensor failure. The float might be waterlogged and sinking permanently, or the reed switch inside the sensor could be stuck closed (or open, depending on the sensor’s normal state). But don’t rule out a wiring issue just yet. A signal wire shorted to ground in the harness, or even a fault in the instrument cluster itself, can mimic a bad sensor.
To confirm, here’s what I do: Unplug the sensor connector. With the key on, the light should go out. If it stays on, you’ve got a short to ground in the wiring harness, or the instrument cluster itself is faulty. If the light goes out, the problem is likely the sensor. Next, I’ll test the sensor directly. With the sensor unplugged from the car, I’ll grab my multimeter and check resistance across its terminals. When the float is in the “full” position (or dry, if you’ve pulled it out), it should read open (infinite ohms). If I manually lift the float (or submerge it in water to simulate full), the resistance should drop to near zero ohms. If there’s no change, or if it reads zero ohms all the time, that sensor is toast.
An Intermittent Coolant Light
Now, if that light is flickering, coming on and off, especially when you hit a bump or make a sharp turn, that’s a different animal. This usually points to a mechanical issue with the float itself—maybe it’s sticking due to sludge buildup in the reservoir, or the internal reed switch is making intermittent contact. It could also be a loose electrical connection at the sensor, corroded terminals, or even a chafed wire in the harness that’s intermittently grounding out.
For intermittent issues, I’ll often use a scan tool that can monitor live data for the coolant level switch. I’ll watch that parameter in real-time while I wiggle the harness, tap the reservoir, and even drive the car around the block. If that status jumps between “OK” and “Low” without any actual fluid movement, then I know I’ve got a wiring or sensor fault. I’ll also grab a flashlight and really inspect the sensor well in the reservoir for any gunk or debris that might be restricting the float’s movement. On some models, like older BMWs and Mercedes, I’ve seen these sensor harnesses get routed in ways that cause chafing and grounding issues over time. It’s worth a close look.
Tech Tip: Always visually inspect the electrical connector. Green or white crust is a dead giveaway for electrolysis and corrosion, which can cause all sorts of intermittent electrical gremlins. Also, look for any cracks in the sensor housing or signs of coolant weeping around its base.
Why These Sensors Fail: The Usual Suspects
These coolant level sensors are pretty simple devices, but they fail for a few common, predictable reasons. After 25 years, I’ve seen these culprits over and over:
- Waterlogged Float: This is probably the most common. The plastic float itself can absorb coolant over time, especially if the wrong type of coolant has been used or if the coolant is just old and degraded. Once that float gets saturated, it loses its buoyancy and just sinks, even when the tank is full. Permanently triggers that low-level warning.
- Reed Switch Failure: Inside the sensor, there’s a tiny magnetic reed switch that activates as the float moves up and down. These little contacts, after years of cycling, can fatigue and fail. They might stick open, stick closed, or just become intermittent. No movement, no signal change.
- Sludge and Contamination: Using the wrong coolant, or simply neglecting coolant changes for too long, can cause silicate dropout. This creates a nasty, gel-like sludge that coats everything and, critically, can trap the float at the bottom of its well. I’ve seen this countless times, especially on some GM Ecotec engines where coolant wasn’t changed for well over 100,000 miles. The sensor was literally glued in place. While some specific TSBs have addressed this in certain models, the root cause is almost always poor coolant maintenance.
- Corrosion and Electrolysis: Mixing different types of coolants, or running coolant with depleted inhibitors, creates an electrolytic environment. This corrosive action can eat away at the metal components within the sensor or the float itself, leading to binding or outright electrical failure.
One critical point I always make: a cracked head gasket, a leaky radiator, or a faulty radiator cap isn’t a sensor failure. But they absolutely can cause coolant loss or contamination that then leads to a failed sensor. If you just replace the sensor and ignore an underlying leak, you’re not fixing the problem, you’re just buying time until the next, potentially more expensive, issue crops up. Always rule out actual coolant loss before you call this job done.
Getting It Fixed: Your Options
Once you’ve nailed down that the sensor is the problem, here are the ways I typically approach the fix, ranked by what I consider most effective and reliable.
Replace the Coolant Level Sensor
Clean the Reservoir and Sensor
Bypass the Sensor (Emergency Only!)
Don’t Just Assume: Confirm the Repair
Replacing a sensor isn’t the end of the job. You need to properly validate the repair. I’ve seen too many people replace a part, see the light go off, and think they’re done, only to have another problem pop up later.
Validation Steps I Always Take
-
Turn the key to “ON” (engine off). The coolant warning light should illuminate briefly during the bulb check, then go out after a few seconds. If it stays on, something’s still wrong.
-
If you have a scan tool, monitor the coolant level switch status. It should read “OK” or “Circuit Closed” with the float in the full position.
-
Take the car for a good test drive. Hit some bumps, take some corners, go up and down some hills. You want to make sure the light stays off under various driving conditions.
-
Finally, and this is crucial, perform a cooling system pressure test. Use a hand pump to pressurize the system to the cap’s rated pressure (usually 15–18 psi). Let it sit for at least 20 minutes. If the pressure holds within 1 psi, your system is sealed. If it drops, you’ve got an underlying leak somewhere—radiator, water pump, heater core, hoses, or even a head gasket.
That pressure test really matters. I’ve seen cases where a faulty radiator cap or a small head gasket seep was initially masked by a bad sensor. Fixing one problem shouldn’t make you blind to another waiting in the wings.
What’s This Going to Cost Me?
This repair is usually pretty affordable, but costs can swing depending on what we find and where you get the work done. Here’s a realistic breakdown based on my experience:
| Repair Type | DIY Cost (Parts & Fluids) | Shop Cost (Parts, Fluids & Labor) | My Expected Success Rate | Secondary Risk if Misdiagnosed |
|---|---|---|---|---|
| Sensor Replacement | $30–$80 | $150–$300 | Around 95% if the diagnosis is spot-on. | The fault might actually be in the wiring harness or instrument cluster, leading to repeat labor charges and frustration. |
| Reservoir Cleanout | $20 (coolant only) | $100–$200 | About 80% (lower if old coolant is reused, which I don’t recommend). | Sludge buildup can recur, causing the sensor to fail again. Also, you might still be ignoring actual coolant loss. |
One caveat: if, after all the diagnostics, we find the issue is actually a failed instrument cluster (it’s rare, but it happens), the cost jumps significantly. We’re talking over $1,000, often more, especially with programming. For an older vehicle that’s maybe not worth much, that might not be an economical repair. In those situations, I’ve sometimes recommended installing an aftermarket low coolant alarm with its own dedicated sensor. It’s not factory, but it provides reliable protection. Just make sure it’s wired to a switched circuit so it only alerts you when the key is on.
Keep It From Happening Again: Prevention is Key
Most coolant level sensor failures are totally preventable. It really comes down to good maintenance. Here’s what I tell my customers:
-
Use the Correct Coolant: I can’t stress this enough. Don’t ever substitute. Honda Type 2, GM Dex-Cool, BMW LL-04, Ford Orange—they all have specific inhibitor packages designed for different metals and plastics in your engine. Mixing types or using the wrong one can lead to gel formation, sludge, and corrosion that will absolutely kill your sensor and your radiator.
-
Change Coolant on Schedule: Most manufacturers recommend a coolant flush and fill every 5 years or 60,000–100,000 miles. Those inhibitors degrade over time, leaving your system vulnerable to corrosion. Set a reminder in your phone; treat it like an oil change, because it’s just as important.
-
Inspect Regularly: Every time you check your oil, take an extra 30 seconds to glance at the coolant reservoir. Is the fluid clear? Any discoloration, floating debris, or gunk building up around the sensor base? These are early warning signs.
-
Fix Leaks Promptly: Even a slow coolant drip might not trigger the light right away, but it can lead to low levels, overheating, and sensor damage over time. Address any wet spots under the car immediately.
-
Don’t Ignore the Light: Even if you’re convinced it’s “just the sensor,” always verify the coolant level at the radiator when the engine is cold. Trust your eyes, not just the dashboard. A false alarm today could very well be a real warning tomorrow.
And one last thing: if your car is known for cooling system issues—some older performance models or certain hybrids come to mind—consider adding a secondary, independent temperature gauge. It’s cheap insurance against silent failures that can cost you an engine.
