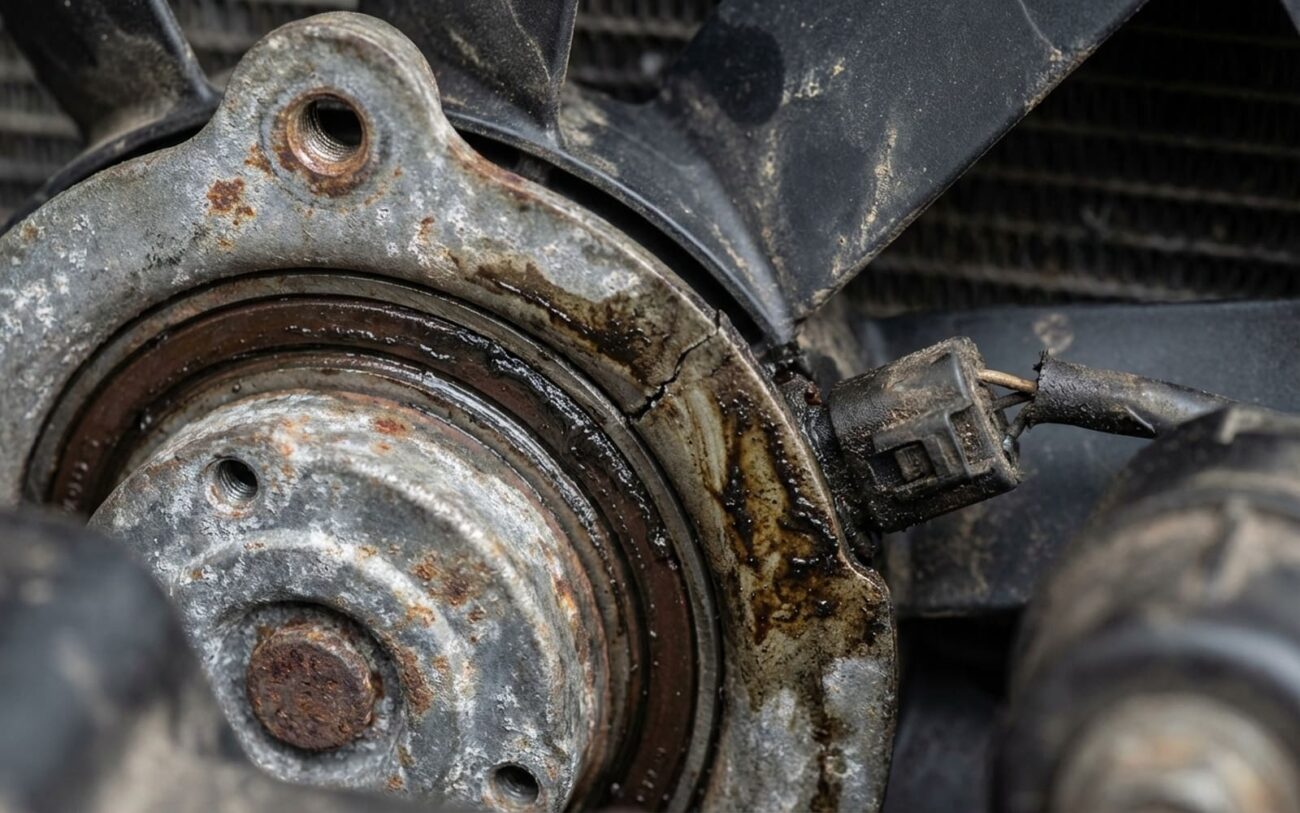
Look, if you’re hearing a new whine or grind from the front of your engine bay, especially one that changes pitch with RPM or when the fan kicks on, don’t just turn up the radio. Most times, that’s your radiator fan bearing screaming for help. After 25 years under the hood, I’ve seen this play out countless times. Ignoring it? That’s asking for trouble, and usually, a much bigger repair bill.
What a Failing Fan Bearing Sounds and Feels Like
The first thing you’ll usually notice is a new noise. It’s often a high-pitched whine or a low, rumbling grind. It’s coming from the front of the engine, right where the radiator fan lives. What I typically see is that it starts quiet when the engine’s cold, but as things heat up and metal expands, that noise gets louder. This happens because the little ball bearings inside the electric fan motor or the viscous clutch hub are wearing out. They lose their lubrication, develop play, and that metal-on-metal friction makes the racket.
And it’s not just noise. A bad fan bearing can cause a noticeable vibration. You might feel it in the steering wheel, or even see the whole fan assembly wobbling when it’s running. That’s because a worn bearing lets the shaft move too much, throwing the fan blades off balance. It’s like a tire that’s out of balance, but instead of just a shake, you’ve got a rapidly spinning piece of plastic that could decide to grenade itself.
Don’t ignore either of these symptoms. I’ve seen fans seize up completely without warning. When that happens, you lose airflow, especially when you’re stuck in traffic or idling, and your engine can overheat fast. Worse, that severe imbalance I mentioned? It can cause a fan blade to break off. I’m talking about shattered blades puncturing radiators or slicing through coolant hoses. What should have been a relatively simple fan replacement turns into a full cooling system overhaul, and trust me, that’s a much more expensive day.
My Approach to Pinpointing the Problem: Is it Really the Fan?
Before you start tearing things apart, we gotta make sure it’s actually the fan. I’ve seen too many guys throw parts at a car because they thought they heard something. A whine from the front of the engine could be a lot of things: alternator, power steering pump, idler pulleys, tensioners, even the water pump. The trick is isolating that noise.
My go-to tool is a mechanic’s stethoscope. If you don’t have one, a long screwdriver works in a pinch – just put the metal tip on the component and your ear on the handle. Be extremely careful around moving belts and fans, obviously. For an electric fan, I’ll press the tip against the center of the motor housing. For a viscous clutch fan, I’ll hit the clutch hub. If the noise is loudest there, you’re on the right track.
Here are a couple of other tricks I use:
- For Electric Fans: If you have a scan tool, you can often command the electric fan to turn on with the engine off (Key On, Engine Off, or KOEO). This eliminates all the engine noise and makes it much easier to hear if the fan itself is the culprit. If the noise is loud and clear only when the fan is running, you’ve likely found your problem.
- For Belt-Driven Viscous Clutch Fans: This one’s a bit more involved. With the engine cool and off, I’ll remove the serpentine belt. Then, I’ll briefly start the engine – and I mean briefly, 30-60 seconds max, because your water pump won’t be turning. If the noise disappears, you know it’s coming from a belt-driven accessory. Then, with the engine off again, I’ll spin each pulley by hand. A bad bearing will feel rough, gritty, or have noticeable play.
Vibration diagnosis follows similar logic. First, a good visual inspection. Look for bent or damaged fan blades, missing pieces, or even just a bunch of leaves or road grime packed onto one side. Even a small amount of debris can throw a fan way out of balance. Then, grab a fan blade and gently try to move the whole assembly in and out (axial play) and side to side (radial play). There should be almost no movement. If you feel a clunk or significant wiggle, that bearing is shot. If the fan checks out, then you start looking at other things, like a bad engine mount or a harmonic balancer that’s coming apart.
| Symptom | What I Usually See (Fan Bearing/Assembly) | Common Imposters (Other Components) | How I Confirm It’s the Fan |
|---|---|---|---|
| Whining/Grinding Noise from Front of Engine | Worn ball bearings in the electric fan motor, or degraded bushings/bearings in the viscous clutch fan hub. | Alternator bearing, power steering pump bearing, serpentine belt idler/tensioner pulley, water pump bearing. |
Use a mechanic’s stethoscope. For electric fans, command fan on with scan tool (KOEO). For viscous fans, remove serpentine belt and briefly run engine (30-60s max). Manually rotate fan hub for roughness when cold. |
| Vibration from Front of Engine Bay | Bent fan blade, debris imbalance, or worn bearing causing excessive shaft movement. | Unbalanced harmonic balancer, failed engine mount, fan blade contacting the shroud or other components. |
Visual inspection for damage or debris buildup. Check axial and radial play by hand (should be almost zero). Verify shroud mounting bolts are tight. |
Why These Bearings Kick the Bucket
So, why do these bearings give up the ghost? It’s usually the same old story as any other sealed bearing: mechanical fatigue, the grease breaking down, contamination, and corrosion. These fan motors work hard, especially in stop-and-go traffic or when the A/C is blasting. They’re constantly running, often in engine bay temperatures that can easily hit 200°F (93°C) or more. Over time, that heat cooks the factory grease inside the sealed bearing. Once that lubrication is gone, you get metal-on-metal contact, and that’s when the wear really accelerates.
I also see a lot of failures from contamination. A small coolant leak, even just a mist, can seep into the bearing housing, especially if the seal is compromised. That coolant mixes with the grease and turns into a grinding paste. Road salt and dirt from under the car can also accelerate corrosion. Sometimes, you even get galvanic corrosion between a steel bearing and an aluminum motor housing, which can cause binding or seizing. This is a mechanical failure, pure and simple, not an electrical one.
And that’s an important distinction. I see this misdiagnosed a lot. A tech might jump to an electrical issue because the fan isn’t coming on, when the real problem is mechanical wear in the fan assembly itself. A bad fan relay or temperature sensor will prevent the fan from turning on, sure, but that’s different from a worn bearing making noise or wobbling. Some manufacturers, like Chrysler on certain Pacifica models, have even put out service bulletins acknowledging fan motor bearing wear as a known cause of whining noise, recommending a full assembly replacement.
Alright, So How Do We Fix It? Your Repair Options
You’ve confirmed it’s the fan bearing. Now, how do we fix it? Your approach is gonna depend on what kind of fan setup your ride has.
Electric Radiator Fan Assembly
For most modern vehicles with an electric radiator fan, you’re going to replace the entire fan assembly. That means the motor, blades, and shroud, all as one unit. This is generally DIY-FEASIBLE for someone with basic tools, though access can be a pain on some models – I’ve had to pull bumpers or radiator supports more times than I can count. Always disconnect the battery first, and if the shroud blocks a radiator hose, drain enough coolant to work safely. Unplug the electrical connector, unbolt the unit, and swap it out. Pay attention to those torque specs on the shroud bolts; they’re usually pretty low, like 5–15 Nm (4-11 ft-lbs). Over-tightening can crack the plastic, leading to new problems like coolant leaks or vibrations.
Belt-Driven Viscous Clutch Fan
On older trucks or some V8s, you’ll have a belt-driven viscous clutch fan. Here, you’re replacing just the clutch hub. This is also usually DIY-FEASIBLE, but you absolutely need a fan clutch wrench set. That center nut is torqued down tight – often 35–50 ft-lbs (47-68 Nm) – and you have to hold the water pump shaft to keep it from spinning and getting damaged. A special holding tool or a strap wrench on the pulley is essential. Torque the new nut to factory specs; if you don’t, you risk damaging the water pump bearing or having the fan come loose, which is a really bad day.
Replacing Just the Bearing?
I have to be clear on this: trying to replace just the bearing in a passenger vehicle’s electric fan motor is GENERALLY NOT RECOMMENDED. Most electric fan motors are sealed units with press-fit bearings. Trying to press out the old one usually risks damaging the housing or the motor windings. Even if you manage it, getting a new bearing to seat perfectly is tough, and you’ll often end up with premature failure anyway. For classic cars or heavy-duty applications with truly serviceable hubs, it is possible, but it requires a bearing press, precision alignment, and frankly, the time usually doesn’t justify the savings.
Temporary Fixes? Forget About It.
As for temporary fixes – there aren’t any safe ones. Do not spray oil or lubricant into a sealed motor; you’ll just wash out any residual grease and accelerate the failure. And never, ever drive with a seized fan in hot weather or heavy traffic. The risk of overheating and engine damage is just too high to mess around with. It’s not worth the short-term convenience.
Making Sure You Actually Fixed It Right
After you’ve done the replacement, don’t just assume it’s fixed – test it. For electric fans, I’ll use a scan tool to command the fan on at both low and high speeds with the engine off. Listen carefully for smooth, quiet operation. No vibration, no new noises. Then, start the engine and let it warm up. Keep an eye on the temperature gauge or use live data to confirm the fan kicks on when the coolant hits operating temperature – usually around 200–220°F (93-104°C), depending on the vehicle.
For viscous clutch fans, I use the old “newspaper test.” Get the engine fully warmed up. Then, with the engine idling, hold a rolled-up newspaper against the spinning blades. When the engine is cold, the fan should stop easily. But when it’s hot, that clutch should be fully engaged, and the paper should be pulled in and torn – that confirms the fan is locked up and moving air. If the paper just slips through, the clutch isn’t engaging properly, and you’ll have insufficient airflow.
What’s This Going to Cost You?
Now, let’s talk brass tacks: what’s this going to set you back? These are realistic numbers based on common cars I see in my shop, like a Camry, Civic, or similar front-wheel-drive platforms.
| Repair Type | DIY Cost (Parts Only) | Shop Cost (Parts & Labor) | My Success Rate Estimate | What Can Go Wrong (Secondary Risk) |
|---|---|---|---|---|
| Replace entire electric fan module (DIY) | $150 – $400 | $450 – $750 |
95% if you get the right part and secure the wiring properly. |
Overheating from a poor electrical connection, or new vibrations if the shroud isn’t mounted tightly. |
| Replace viscous fan clutch assembly (DIY) | $80 – $250 | $300 – $500 |
98% if you torque it correctly and don’t damage the water pump shaft. |
Improper torque can damage the water pump bearing or, worst case, cause the fan to separate from the shaft. |
Here’s the reality check I give my customers: if the shop quote for this repair starts pushing roughly 40% of your car’s current market value, you really need to weigh this repair against the vehicle’s overall condition. A DIY fan replacement is often one of the more cost-effective ways to squeeze more life out of a car. But if you’ve got major repairs like transmission work or engine issues looming, it might make more financial sense to start looking at other options.
Keeping Your New Fan Bearing Healthy
Want to keep your new fan bearing from going south too soon? A little preventative care goes a long way. It starts with keeping the front of your radiator and condenser clean. Bugs, leaves, road debris – all that stuff restricts airflow. When airflow is restricted, the fan has to run longer and harder, which means more wear and tear on the motor and its bearings. I recommend a visual check every time you do an oil change. Gently wiggle the fan blades to check for play, and spin it by hand. It should turn smoothly with no grit or resistance.
Catching bearing wear early – when it’s just a faint whine – lets you plan the repair instead of dealing with a roadside breakdown. Regular inspections can also uncover related issues, like a failing radiator cap that won’t hold pressure or cracked coolant expansion tanks, which only add more stress to the entire cooling system. A few minutes of preventive care can save you hours of downtime and hundreds in repairs down the road. Trust me on that one.
