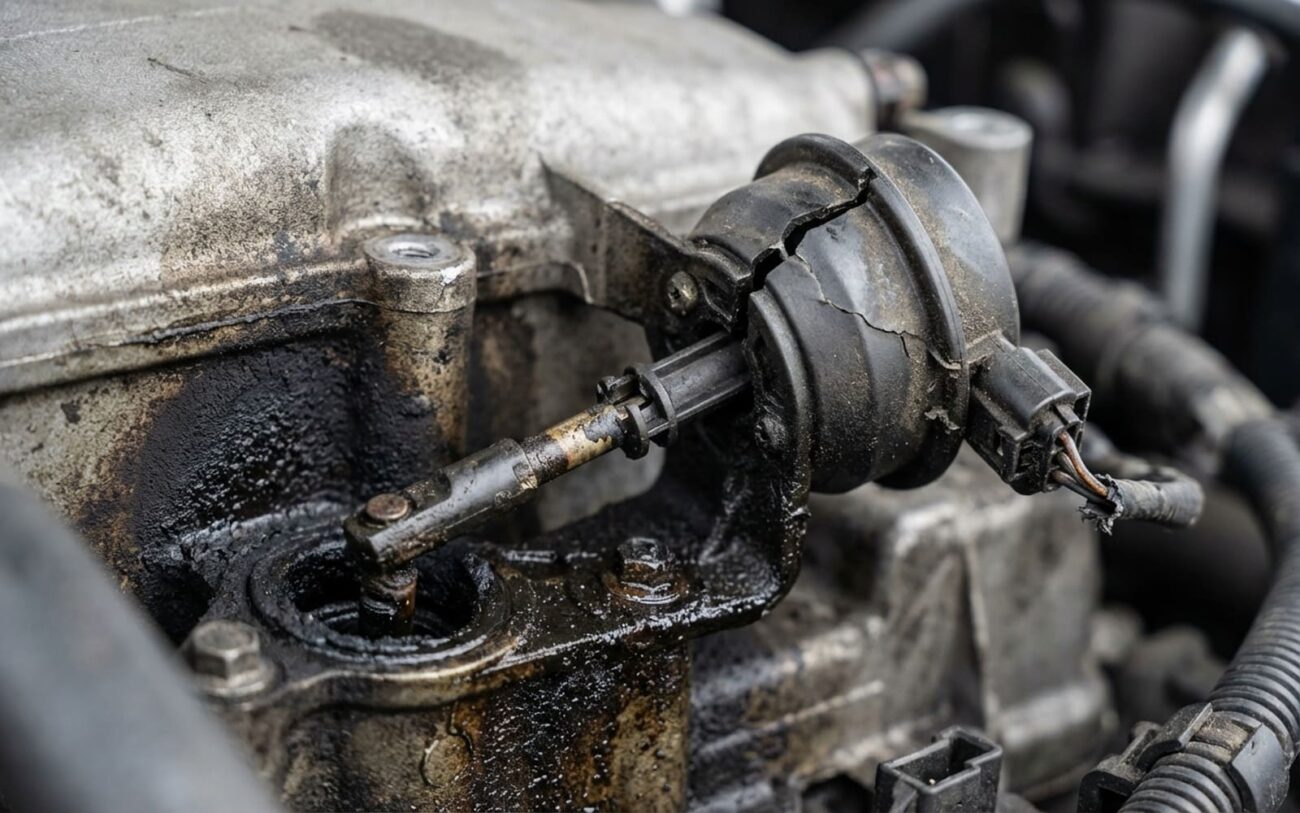
Alright, let’s talk about intake manifold flap actuators. You might hear ’em called swirl flap actuators or intake runner control actuators—doesn’t matter what you call ’em, when they go bad, they can really mess with how your engine runs. After 25 years under the hood, I’ve seen these things fail in just about every way imaginable, and I can tell you, catching the symptoms early is key to saving yourself a pile of cash.
What You’ll Notice: Symptoms & Codes
The actuator’s job is pretty simple: it rotates little flaps inside your intake manifold. At low RPMs, it closes them down a bit to create more swirl and velocity, which builds torque. When you hit higher RPMs, it opens them up for maximum airflow and horsepower. When that system can’t adapt, you lose control, and the engine’s performance goes right out the window.
The most common complaint I get is a real flat spot in the low-end power, usually below 3000 RPM. You step on the gas from a stop, and the car just feels sluggish, like it’s pulling a boat anchor. Then, all of a sudden, around 3000 to 3500 RPM, it wakes up and pulls like it should. That’s a textbook sign of the flaps being stuck open. They’re not doing their job to create that crucial swirl for low-RPM efficiency.
You might also get a rough idle or even some stalling when you come to a stop. That’s because with the flaps stuck in a fixed position, the engine can’t get the precise air/fuel mix it needs to idle smoothly. And honestly, a lot of times, you’ll hear the problem before the check engine light even thinks about coming on. Listen for a rhythmic clicking or a low, constant hum coming from the top-rear of the engine, often near the firewall. That’s usually the actuator motor trying its best to move a stuck flap, or worse, spinning with stripped plastic gears. Don’t ignore that noise, because once those gears are gone, the actuator is toast.
Error: P2004
Beyond the Code: Isolating the True Problem
Just because your scanner spits out a P2004 or P2006 doesn’t automatically mean the actuator itself is kaput. Those codes only tell you the system isn’t doing what it’s supposed to. They don’t point a finger at the exact part. The real issue could be mechanical, electrical, or even just a bad signal from some chewed-up wiring. That’s why a proper diagnosis always starts with ruling out the common imposters.
For instance, some older variable intake systems use vacuum, not an electric actuator. A leaky vacuum line or a sticky solenoid in that setup can give you identical symptoms and even throw similar codes. I’ve seen it many times. Or, what about electrical gremlins? A chafed wire in the harness, a corroded connector, or a poor connection at the ECU can absolutely trick the system into thinking the actuator has failed. And trust me, I’ve chased my tail on intermittent faults caused by a frayed wire hidden inside the conduit that looked exactly like an actuator problem. Always, and I mean always, inspect the wiring before you start throwing parts at it.
Here’s a quick breakdown of what I look for and how I test to make sure I’m hitting the right target:
| Symptom | Likely in Named Component | Common External Mimics | Definitive Test |
|---|---|---|---|
| Lack of low-RPM power with DTC P2004/P2006 | Stuck actuator, broken linkage, seized flap shaft | Faulty IMRC solenoid (vacuum type), vacuum hose leak, wiring fault |
Use a bidirectional scan tool to command actuator movement while monitoring live data. A borescope can confirm flap movement. |
| Audible clicking from intake manifold | Actuator motor or plastic gear teeth stripped | EVAP purge valve, secondary air injection valve, fuel injector noise |
Pinpoint the sound with a mechanic’s stethoscope. If possible, disconnect the linkage and command the actuator to see if the noise persists. |
| Rough idle with no specific flap DTCs | Flap stuck in intermediate position | Vacuum leak, dirty throttle body, failing crankshaft sensor |
Compare “Desired” vs. “Actual” flap position on your scan tool. A mismatch greater than 5% usually points to binding. |
The Real Culprits: Why These Actuators Fail
When an electric actuator fails, it’s almost always one of two mechanical issues, with a third, less common one. The number one culprit, by far, is internal gear failure. These actuators use a tiny DC motor to spin a set of plastic gears that drive the output shaft. Over time, especially in high-cycle engines like turbocharged direct injection (TDI) or gasoline direct injection (GDI) models, these plastic gears just wear out or strip their teeth. Once they start slipping, the motor spins, but nothing moves the flaps. That’s when you get your classic P2015 (position sensor range/performance) or P2004/P2006 codes.
The Carbon Buildup Problem:
This is a huge factor, especially in GDI and diesel engines. Oil blow-by and fuel impurities create these nasty, thick carbon deposits that just glue the flaps in place. The actuator then tries to fight against a completely seized shaft, which overloads the motor and strips those weak plastic gears. If you just replace the actuator in these cases, you haven’t fixed a thing. The flaps are still stuck, and you’ve just put a new bandage on a much bigger wound. You’ll be back in the shop in no time.
Less commonly, the motor itself can burn out. The brushes wear down, or the internal windings short out, leaving no power to turn the gears. But honestly, this is pretty rare compared to the gear stripping or the flaps binding up. And yes, manufacturers are well aware of these weaknesses. For example, some VW/Audi EA888 Gen 3 engines have known, documented issues with plastic gear degradation in their intake runner actuators. Just remember, a failed vacuum solenoid is a completely different animal than an electric actuator failure. And while a dirty EGR valve can certainly contribute to the carbon buildup problem, it’s not a direct cause of the actuator failing; it’s more like a partner in crime creating the environment for failure.
Getting It Fixed: Your Options
External Actuator Replacement DIY-FEASIBLE
Fixed Flap Position “Hack” TEMPORARY / LAST-RESORT
Internal Actuator Defect or Seized Flaps NON-REPAIRABLE → REPLACE
After the Repair: Validation & Test Drive
Replacing the part isn’t the finish line; it’s just the start of the real test. First, grab your scan tool and use its bidirectional controls to command the actuator to move from 0% to 100%. Watch the “Actual Position” parameter closely. It should mirror the “Desired Position” with almost no lag—I’m talking no more than a 5% deviation. If it hesitates, jumps around, or stops short, something is still binding, or you’ve got a faulty new actuator (yes, it happens).
Next, clear any codes and take the car for a real drive. The ultimate test is simple: find a slight hill, get into 4th gear (or a similar mid-range gear) at about 1500 RPM, then gently accelerate. A healthy variable intake system will smooth out that transition through 2500–3500 RPM, with no hesitation or flat spots. If that dead zone is gone, you’ve nailed the repair. If not, the flaps might still be binding, or the ECU might need a relearn procedure. Some VW/Audi models, for example, absolutely require an adaptation via VCDS after you replace this component.
The Bottom Line: Cost, Risk & When to Walk Away
Repair costs can swing wildly, mostly depending on how accessible the part is and whether you’ve got that nasty carbon buildup complicating things. Here’s what I typically see in my shop and what you can expect:
| Repair Type | DIY Cost (Parts) | Shop Cost | Success Rate | Secondary Risk |
|---|---|---|---|---|
| Actuator Replacement (Manifold On) | $150 – $400 | $450 – $750 | 95% | Failure due to undiagnosed carbon-seized flaps. |
| Actuator & Intake Manifold Replacement | $500 – $1200 | $1500 – $2500 | 98% | High financial risk if diagnosis was wrong. |
From a practical standpoint, I always tell my customers to compare the repair cost to the vehicle’s current market value. If the fix is going to cost more than 40% of what your car is worth privately, it’s time to seriously consider its long-term reliability. I’ve just seen too many folks pour good money after bad into high-mileage GDI or TDI engines, only to face head gasket issues, fuel pump failures, or DPF problems just a few months down the road. Sometimes, the smart money walks away.
Keeping It Healthy: Prevention & Monitoring
Proactive Maintenance from My Bench:
-
Always use Top Tier detergent gasoline. It really does help reduce deposits, especially in GDI engines.
-
For GDI engines, I strongly recommend periodic walnut blasting of the intake valves and ports every 60,000–80,000 miles. It’s not cheap, but it’s cheaper than a new manifold.
-
If you’ve got a scan tool, occasionally monitor the “Actual Intake Runner Position” during light acceleration. Look for any lag or stutter compared to the “Desired” value.
-
After you shut the engine off, listen. If you hear a prolonged whirring or clicking from the intake area, that’s your early warning sign that the actuator is struggling.
