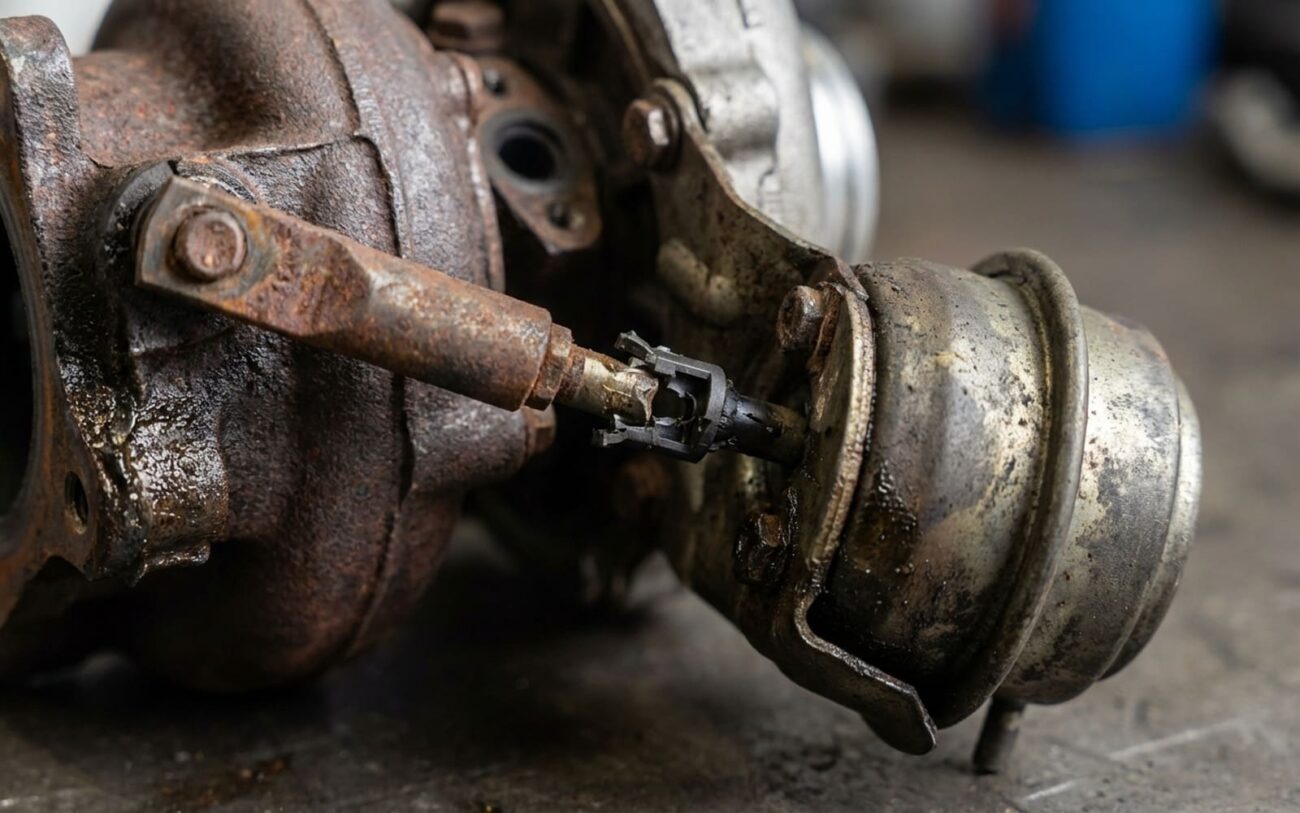
P0299: What That Underboost Code Really Means (From a Tech’s Bench)
Alright, so you’ve got that Check Engine Light glaring at you, and your OBD2 scanner spits out P0299 — Turbocharger/Supercharger A Underboost Condition. What does that really mean? Simple: your engine’s computer (ECM) told the turbo to make, say, 15 PSI of boost, but it’s only seeing 5 PSI in the intake manifold. It’s not getting what it asked for.
Now, there are a few things that can cause low boost, but after 25 years turning wrenches, I can tell you that a faulty wastegate actuator is often the first place I look. This little unit controls how much exhaust gas actually hits the turbo’s turbine. If it’s not working right, that exhaust just bypasses the turbo, and you don’t get the boost you need. It’s like trying to fill a balloon with a hole in it.
The Analogy
“Think of the wastegate actuator as the gatekeeper of exhaust energy: if the gate is stuck open, the power just walks away.”
What you’ll probably notice first is a lack of power, especially when you really step on it—think merging onto the highway or trying to pass someone. It feels sluggish, flat, like the engine’s just not breathing right. In stop-and-go traffic, you might not even feel it much, but trust me, it’s there. Sometimes, you’ll hear it too: a distinct hissing or fluttering sound coming from the turbo area under acceleration. That’s usually exhaust escaping where it shouldn’t, or the actuator itself failing.
Figuring Out If It’s Really the Actuator: My Diagnostic Approach
Alright, so you’ve got the code and the symptoms. Now, don’t just go throwing parts at it. That’s a rookie mistake and a waste of money. A P0299 doesn’t always mean the actuator is bad, even if it’s a common culprit. You’ve got to confirm it. I always start by ruling out the obvious stuff that can mimic an actuator problem.
1. Check for Boost Leaks
First, and this is critical, check for boost leaks. A cracked intercooler pipe, a loose clamp, or a failed diverter/bypass valve will bleed off boost pressure just as effectively as a bad actuator. I’ll usually do a smoke test or a simple pressure test on the intake system. Cap off the turbo inlet and pressurize the system to 20–25 PSI. Listen for hisses, spray some soapy water around connections. You’d be surprised how often a simple hose clamp or a small crack in a plastic pipe is the real problem.
2. Inspect the Wastegate Lever
Next, I physically check the wastegate lever. This is the arm on the turbo housing that the actuator rod connects to. Disconnect the actuator rod from the wastegate arm. Can you move the arm freely by hand? It should move smoothly, without binding or excessive play. If it’s stiff or seized, you’ve got carbon buildup or a mechanical issue inside the turbo housing, not just the actuator. That’s a much bigger job, and it means the turbo itself is probably coming out.
3. Test the Actuator Itself
Once you’ve ruled out leaks and a seized wastegate arm, it’s time to test the actuator directly:
- For Pneumatic Actuators (Vacuum/Pressure Operated): I use a hand vacuum/pressure pump. Apply vacuum or pressure directly to the actuator’s port. The rod should move smoothly and hold its position. If it leaks down quickly or doesn’t move at all, the diaphragm inside is shot. You might even hear the hiss from the actuator itself if it’s got a big tear.
- For Electronic Actuators: These are a bit more involved. You absolutely need a bidirectional scan tool. Command the actuator to open and close through its full range. Watch the rod move, and simultaneously monitor the position sensor feedback on the scanner. If it doesn’t move, or the feedback is erratic or out of range, then the internal motor or gears are likely toast. I’ve seen a lot of these fail due to stripped plastic gears, especially on higher-mileage vehicles.
Why Wastegate Actuators Give Up the Ghost
Understanding why these things fail helps with diagnosis and even prevention. It really depends on the type of actuator your vehicle has:
Pneumatic Actuators:
These are the older style, using a rubber diaphragm housed in a metal canister. Over time, constant heat cycles from the turbo, combined with oil vapor (even a little bit can get in there), just bake that rubber. It gets brittle, cracks, or splits. Once that diaphragm is compromised, the actuator can’t build or maintain the vacuum or pressure needed to move the rod, and it fails.
Electronic Actuators:
Most modern vehicles use electronic wastegate actuators—small servo units with a DC motor and a set of plastic gears. What I see most often isn’t the motor burning out, but those plastic gears stripping out. Heat is a big factor here too, breaking down the grease and making the plastic brittle. It’s a common failure point, especially on higher-mileage vehicles where those gears have seen a lot of action.
Your Repair Options: From a Simple Swap to a Full Turbo Job
Safety First, Always.
Turbochargers operate at extreme temperatures. Always allow the engine to cool completely before attempting any actuator work. You’ll burn yourself otherwise. For electronic units, calibration via a scan tool is mandatory to prevent immediate code return—don’t skip this step.
External Actuator Replacement DIY-FEASIBLE
Turbo Removal & Replace Professional Only
Limp-Home Rod Clamping LAST-RESORT (AVOID)
Making Sure the Fix Actually Worked (Crucial Step!)
You put in the new part, cleared the code—now what? Don’t just assume it’s fixed. Verification is non-negotiable. I’ve seen too many people skip this only to have the problem resurface a week later.
First, with your bidirectional scan tool, command the new actuator through its full range of motion. Watch that rod move. Does it look smooth? Does the scan tool show the position sensor feedback changing correctly? If it’s an electronic unit, make sure that calibration procedure finished without a hitch.
Next, take the car for a proper road test. Get it up to operating temperature. Find a safe place to accelerate hard, like a highway on-ramp. While you’re doing this, monitor your Manifold Absolute Pressure (MAP) or actual boost pressure on your scanner. Compare it to the target boost your engine should be making. If you’re hitting your target boost, and the engine feels strong, you’re on the right track. Drive it for a few cycles, make sure the code doesn’t come back. That’s how you know the job’s done right.
What This is Going to Cost You
Alright, let’s talk about the damage to your wallet. Here’s a rough idea of what you’re looking at, based on what I typically see in the shop:
| Repair Type | DIY Cost (Parts) | Shop Cost (Total) | Success Rate | Secondary Risk |
|---|---|---|---|---|
| External Actuator Replacement | $150 – $400 | $300 – $700 | High (>90%) | Low; recurrence if diagnosis was wrong. |
| Turbo Removal & Replace | $1,000 – $2,500 | $2,000 – $4,000 | Medium-High | High; improper oil lines or sealing. |
How to Prevent This Headache Next Time
Nobody wants to deal with this twice. Here’s what I tell my customers to help prevent another P0299 headache:
-
Use the right oil, religiously. Seriously, use the exact oil type and weight your manufacturer recommends, and change it on schedule. Clean oil means less sludge, less carbon buildup, and less oil vapor getting into places it shouldn’t, which can degrade those actuator diaphragms or gunk up electronic units.
-
Keep your heat shields intact. Make sure all your turbo heat shields are in place and in good condition. They’re there for a reason—to protect sensitive components like actuators and wiring from the extreme heat radiating off the turbo.
-
Perform periodic visual inspections. If you’re under the hood for anything else, take a quick look at the wastegate linkage. Is it corroded? Does it look like it’s binding? A little lubrication on the pivot points (if accessible and appropriate for your specific turbo) can go a long way. Do this when the engine is cold, obviously.
-
Stay proactive on platforms with known issues. Some cars are just more prone to this. VW/Audi engines, for example, have had their share of wastegate issues over the years. If you drive one, be extra vigilant. Knowing your car’s common failure points can save you a lot of grief.
