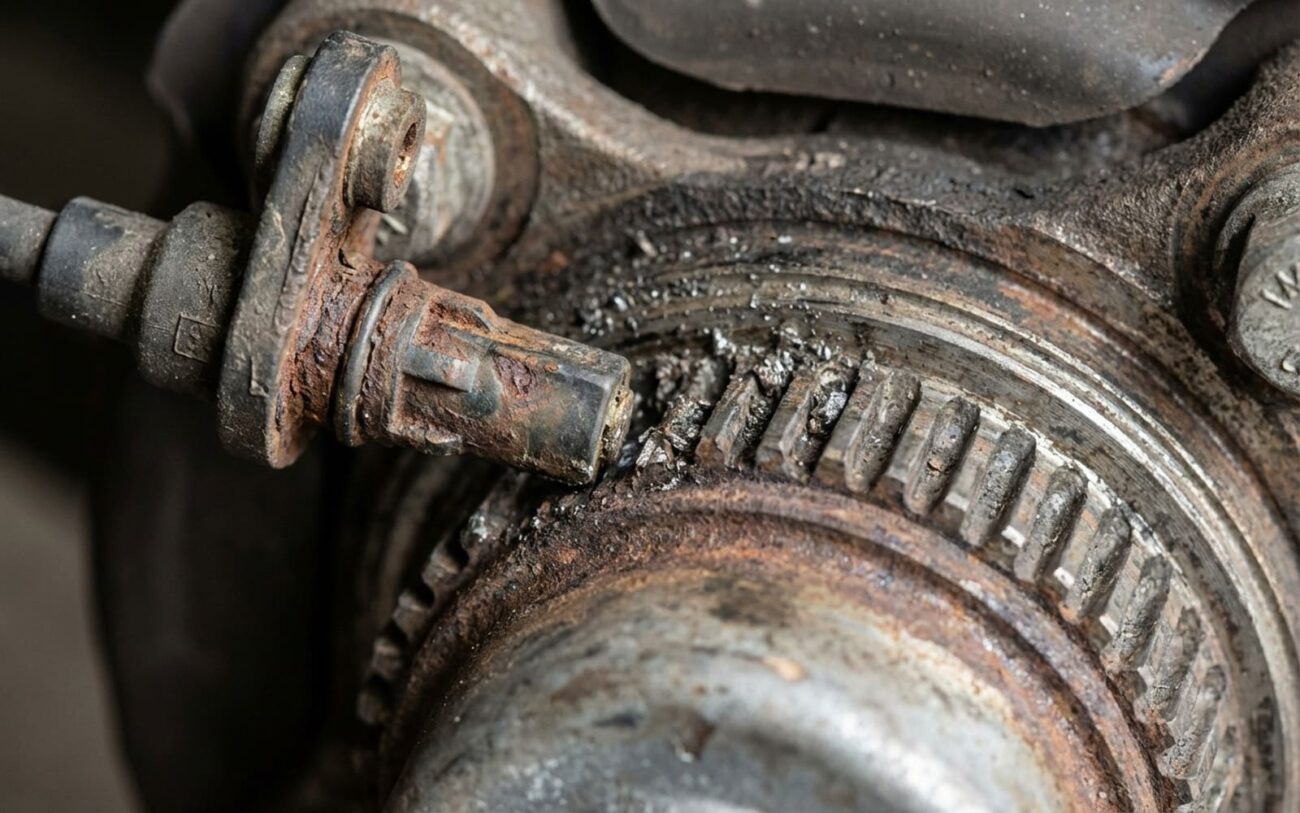
Alright, let’s talk about one of those head-scratcher ABS problems. You’re driving along, minding your business, and then BAM – the ABS light flickers on. Or maybe, even worse, that brake pedal starts pulsing on dry pavement, no ice, no gravel, just… pulsing. You hook up your scan tool, and sure enough, there it is: a “no signal” or “implausible signal” code from one of the wheel speed sensors.
Now, here’s the kicker, and where most folks get stumped: you pull out your multimeter, check the sensor’s resistance, and it reads perfectly within spec. On paper, that sensor looks fine. So, what gives? Why isn’t the ABS module seeing what it needs to see?
ABS MODULE MONITOR
Noise: 140mV AC
This is a classic scenario I’ve seen countless times in the shop: the sensor itself is technically generating a signal, but something is either corrupting it or weakening it significantly before it ever reaches the ABS control module. The root cause isn’t always a truly “dead” sensor. More often than not, it’s a compromised air gap, a failed internal shielding, or just too much electrical noise interfering with that signal.
My Approach: Finding the Real Culprit
Because ABS faults can mimic all sorts of other problems – traction control errors, general brake system malfunctions – you need a methodical approach. Don’t just jump to replacing the sensor. I’ve seen too many good sensors get swapped out because someone skipped a few steps. Start by ruling out the simple, common stuff first.
First Checks: Visual & Mechanical
-
Tone Ring: Get a good look at the tone ring (or reluctor wheel). Is it cracked, bent, or full of debris? A damaged tone ring will absolutely cause erratic signals. I’ve seen them packed with rust or even mud, especially on trucks.
-
Wiring and Connectors: Trace that sensor wire. Look for any signs of damage – chafing, cuts, corrosion at the connector. A frayed wire inside the conduit can intermittently break contact or short, mimicking a failing sensor. And a loose or partially seated connector in the ABS circuit? That’s a classic for intermittent dropouts.
-
Wheel Bearing Play: Grab the wheel at 12 and 6 o’clock, then 3 and 9. Try to rock it. Any play here means a worn wheel bearing, and that wobble will constantly change the air gap, causing signal issues. On many GM, Ford, and Toyota models, this is a very common cause.
Next Up: The Definitive Electrical Tests
Once you’ve ruled out the obvious mechanical stuff, it’s time to get electrical. This is where you really start to pinpoint the problem.
| Symptom | Likely Root Cause | Common External Mimics | Definitive Test |
|---|---|---|---|
| Intermittent ABS activation or warning light | Excessive air gap or internal shielding failure allowing EMI. | Damaged tone ring, corroded connector, frayed harness, or wheel bearing play. |
Measure air gap (0.3–1.1 mm) with brass feeler gauge. Back-probe for AC voltage spikes (>100mV) while revving. |
Pro Diagnostic Tip:
The AC voltage test is one of the most revealing diagnostics for shielding issues. A clean sensor circuit should show minimal AC ripple—ideally under 50mV. If you see spikes when revving the engine, you’re picking up noise from the alternator or ignition system. This is a dead giveaway that the sensor’s internal shielding has failed, or there’s an external EMI source messing with the signal.
Why the Sensor Itself Fails (Even When Resistance is Good)
When you’re diagnosing ABS signal loss, it’s crucial to distinguish between a truly “dead” sensor and one that’s failing in a more subtle way. These subtle failures, often involving the air gap or internal shielding, typically fall into three categories:
-
Incorrect mounting surface: I’ve seen this on new cars, believe it or not. The sensor’s mounting boss might be cast or machined just slightly out of spec from the factory, creating a permanent, excessive air gap. This means the sensor is ineffective from day one, regardless of its quality.
-
Internal shielding breakdown: Over time, exposure to heat, moisture, road salt, or even just vibration can cause the sensor’s housing to crack. Once that internal shielding is compromised, the sensor basically turns into an antenna, picking up electromagnetic interference (EMI) from the alternator, fuel injectors, or even spark plug wires. That’s where those AC voltage spikes come from.
-
Tip corrosion or magnetic field degradation: The magnetic tip of the sensor can corrode, or the magnet itself can simply weaken over years of use and exposure. Even if the air gap looks acceptable, a weakened magnetic field means a reduced signal amplitude, which the ABS module will interpret as a problem.
How I Fix It, Based on What I Find
Safety & Precision Warning
Let me be blunt: there are no reliable temporary fixes for these issues. Wrapping the harness in foil rarely helps if the failure is internal. These band-aids don’t address the root cause and can leave you with a silent failure during emergency braking. You lose a critical safety system when you need it most. Don’t take chances.
Mounting Boss Machining Professional Only
Sensor Replacement DIY-Feasible
Hub/Bearing Assembly Professional Only
Making Sure the Repair Actually Worked
Clearing the code isn’t enough. That’s just resetting the light. You need to verify the repair under real-world conditions. If you corrected an air gap issue, re-measure that gap statically and confirm it’s within the 0.3–1.1 mm spec. Then, and this is critical, take the car for a test drive. You need to get it above 25 mph while monitoring live data with a good scan tool. All four wheel speed sensors should report smoothly and consistently, with no erratic spikes or dropouts.
Finally, if possible, perform a functional ABS test on a safe, low-traction surface. You should feel the system activate smoothly, with even pulsation through the pedal. That’s how you know you’ve truly fixed the circuit, not just cleared a code.
Weighing the Cost and the Risk
Sensor Replacement
This includes parts and shop labor. If you’re doing it yourself, the sensor alone usually runs $50–$200.
Hub/Bearing Replacement
This is required if hub wobble is the root cause. When installed correctly, I see about a 98% success rate with this repair.
The Risk of Ignoring
While your base brakes will still work, you lose all skid control. This is a critical safety function, and ignoring it can also lead to failing state safety inspections.
Keeping It From Happening Again
-
During every brake service or tire rotation, take a moment to inspect the wheel speed sensors. Wipe the tip with isopropyl alcohol to remove any metallic dust or debris.
-
Be careful with compressed air around the sensor. It can actually force tiny metal particles into the magnetic tip, which will degrade its performance.
-
Watch for water intrusion, especially after engine washes or driving through deep puddles. Water can cause shorts or accelerate corrosion.
-
If you have a scan tool, monitor your wheel speed PIDs regularly. Catching erratic spikes or inconsistent readings early can save you a lot of headache before a hard fault code even sets.
