Look, after 25 years under the hood, I’ve seen a lot of ADAS issues. What often starts as a “minor glitch” can quickly turn into a serious safety concern. People think these systems—things like adaptive cruise control, lane keep assist, or automatic emergency braking—are just for convenience. But they’re active safety layers. When they act up, it’s not just annoying; it’s dangerous. And here’s the kicker: not every warning means you need a new sensor. The difference between a dirty lens and a dead ECU can be a 10-minute wipe-down versus a $2,000 repair. So, how do you really know when the system itself has failed?
Spotting a True ADAS System Failure
There are a few ways these systems tell you they’re truly broken, not just temporarily confused.
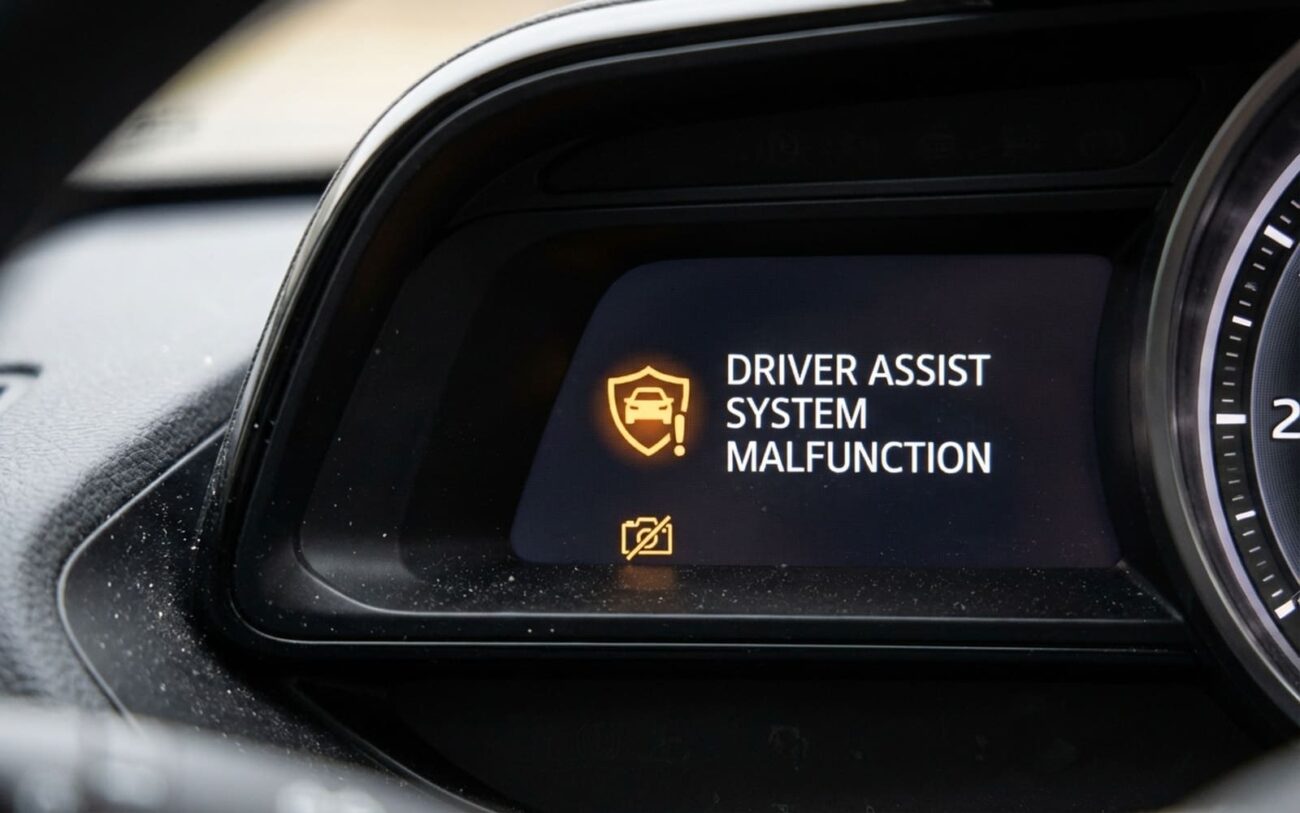
The clearest sign is a total system failure. You’ll get a persistent ADAS warning light or a message like “Front Camera Unavailable,” “Radar Blocked,” or “Driver Assistance Systems Offline.” This won’t clear, even after restarting the vehicle. Sometimes the system icon in the dash will be grayed out or have a line through it. This kind of hard fault usually means the control module or sensor has stopped communicating with the car’s network entirely. Now, before you condemn the unit, always check the basics first: a blown fuse, a wiring break, or a corroded connector can mimic this. But if you’ve confirmed good power, ground, and communication lines to the unit, then yeah, the fault’s inside. At that point, the sensor or its internal ECU is toast.
More dangerous—and frankly, what I see misdiagnosed more often—are intermittent or partial failures. These are the “phantom” issues: adaptive cruise suddenly braking for no reason, lane centering jerking the wheel left and right, or forward collision alerts going off when there’s nothing ahead. Drivers often brush this off as “bad software” or “just the weather.” But when it happens consistently under normal driving conditions, it’s a big red flag for internal electronic degradation. We’re talking about a failing voltage regulator, corrupted memory, or a cracked solder joint on the circuit board. Unlike a dirty lens, which only affects performance in certain conditions, internal faults usually get worse over time and are completely unpredictable.
Then there’s performance degradation. Say your lane keep assist only works at night but struggles on sunny days with clear lane markings. That’s not right. Modern cameras are designed to handle bright conditions. Consistent failure in ideal environments suggests an internal problem—either the image processor is failing or the calibration data inside the unit is corrupted. If you’ve already ruled out a dirty lens, a misaligned mount (maybe from a minor front-end ding), or a recent windshield replacement that wasn’t properly calibrated, then the problem is likely within the sensor or its ECU.
Ignoring these signs isn’t just inconvenient; it’s downright risky. A completely failed ADAS system just removes a safety layer. But a malfunctioning one? That’s worse. Imagine the system suddenly slamming on the brakes at highway speed or jerking the steering wheel during a turn. That’s not just disconcerting; it’s an accident waiting to happen. You can’t trust a system that gives false positives or drops out unexpectedly.
Diagnosing the Real Culprit: Sensor vs. Everything Else
Alright, before you condemn a $1500 sensor, let’s be smart about this. In my experience, probably half the “failed sensor” calls I get turn out to be something simple: dirt, a loose wire, or just needing a proper calibration. You gotta eliminate the easy stuff first. Here’s how I break it down and what I look for:
| Symptom | Likely Internal Sensor/ECU Fault | Common External Mimics | My Definitive Test to Confirm |
|---|---|---|---|
| Persistent “Sensor Blocked” or “System Offline” DTCs | Internal sensor failure (e.g., radar transceiver, camera image sensor), ECU power supply failure, internal communication fault. | Obstructed sensor surface (dirt, ice, snow), damaged sensor bracket causing misalignment, faulty fuse/relay, corroded connector. |
First, a thorough visual inspection. Clean the sensor. Then, use an OEM scan tool to view live data (e.g., radar target list, camera image feed). If you see no data, a black screen, or completely implausible readings, that’s a strong indicator of internal failure. Next, with the ignition on, use a digital multimeter (DMM) and the wiring diagram to verify power and ground at the sensor connector. If you have good voltage and ground, but the sensor still shows no response on the scan tool, the fault is internal. |
| Intermittent system operation/erratic behavior | Degrading internal component (e.g., failing voltage regulator on sensor PCB, cracked solder joint), memory corruption within ECU. | Intermittent wiring harness issue (chafed wire, loose connector), electromagnetic interference from aftermarket accessories, low system voltage from failing vehicle battery. |
This is where an oscilloscope shines. Monitor the sensor’s power supply and data lines during a test drive that replicates the fault. Voltage noise or drops point to wiring or a power issue. But if you see a clean power signal and data, yet the fault is present, it suggests an internal failure. Always check for manufacturer-specific codes like “Signal Implausibility” or “Internal ECU Fault” with your OEM scan tool. Generic P-codes won’t cut it here. |
| System inoperative after calibration attempt | Internal calibration parameters cannot be written (non-volatile memory failure), physical sensor alignment is mechanically impossible (internal damage). | Incorrect calibration procedure, target placement, or shop equipment; underlying vehicle alignment (thrust angle) out of specification. |
After you’ve triple-checked your calibration procedure, target placement, and equipment, try to reprogram the ECU via the scan tool. If the tool consistently fails to write configuration data or receive confirmation, it’s a strong sign the internal ECU memory or processor has failed. |
The most critical tool in your toolbox for ADAS diagnostics? An OEM-level diagnostic scan tool. A generic OBD2 reader won’t cut it. You need access to manufacturer-specific data streams and fault codes. For example, if the Mobileye camera feed is black or pixelated in live data, that’s a hardware failure. If the radar shows no targets in traffic, it’s not seeing anything—likely a dead transceiver. If the data is present but inconsistent (e.g., targets jumping around), it could be signal processing corruption inside the ECU. These tools give you the internal view you need.
Why These Sensors Fail Internally
Once you’ve ruled out all the external stuff, it’s time to accept the unit itself is bad. These sensors aren’t just plastic housings with a lens or a cover—they’re sealed electronics packed with processors, memory, and precision optics or antennas. And while they’re built tough, they’re not indestructible.
Material and component degradation is a big one. Even though these units are sealed, moisture can get in over time, especially if seals degrade from constant heat cycles or UV exposure. Once inside, it corrodes circuit board traces and components, often without any visible signs from the outside. The constant thermal cycling (hot days, cold nights, engine heat) also stresses solder joints and can cause micro-cracks on the PCB. Voltage regulators and image processors are especially vulnerable to heat damage—they’re working hard, after all.
Physical damage to internal components can happen without visible trauma to the exterior. A moderate front-end impact—say, hitting a curb hard or a nasty pothole—can shock the radar antenna array or crack the internal lens substrate in a camera. You won’t see it from the outside, but the sensor’s ability to focus or transmit signals is compromised. That’s why some vehicles with minor front-end damage suddenly lose ADAS functionality, even if the sensor housing looks fine.
Electronic failure is another common path. These are essentially mini-computers. Memory chips (like EEPROM) can wear out or become corrupted, preventing the sensor from booting or storing calibration data. High-speed data transceivers in the main processor can fail, breaking communication with the vehicle’s network. I’ve seen Bosch radar modules fail due to a corrupted firmware sector that simply couldn’t be rewritten—replacement was the only fix. Similarly, some Continental and Mobileye units have shown internal software faults that throw specific OBD2 codes, requiring a full sensor swap. These aren’t repairable in the field; the calibration and software are locked to the hardware.
The Only Fix: Replacement and Calibration
Non-Serviceable Modules
If the failure is truly internal, there is no repair. These are non-serviceable, sealed modules. You can’t open them, clean corrosion, or replace a chip and expect reliable, safe operation. The optical alignment, radar tuning, and software calibration are factory-set. Any tampering voids safety certification and could make the system dangerous.
So, you’ve confirmed it’s truly an internal failure. The hard truth? These aren’t repairable. Trying to “fix” it yourself will just create more problems and safety risks. Whether it’s a Continental radar sensor, a Bosch camera, or a Mobileye unit, the process is always the same: remove the old module, install the new or remanufactured OEM-approved one, and then reprogram and calibrate it using manufacturer-specific procedures.
You’ll need three things to do this right: the correct replacement part (OEM or OEM-equivalent), an OEM-level diagnostic tool (like Ford FDRS, GM GDS2, or Bosch ESI[tronic]), and the proper calibration targets or road procedures. Calibration isn’t optional—it’s absolutely critical. For example, a windshield-mounted camera might require a static calibration using a target board placed at a precise distance and height. Radar sensors often need a dynamic calibration—a test drive with specific speed and steering requirements. And don’t forget mounting torque; over-tightening the bolts (often 7–10 Nm) can warp the housing and misalign internal components, leading to an immediate comeback.
Confirming the Repair: No Shortcuts Here
Swapping the part isn’t the finish line. Validation is what ensures safety and prevents comebacks. You can’t skip this step.
Start with a full diagnostic scan. All ADAS-related trouble codes must clear and stay cleared after a key cycle. If a code pops back up, you’ve still got a problem. Then, use the OEM scan tool to check system status—look for “Ready,” “Active,” or “No Faults” in each module. Next, monitor live data: does the camera see lane markings? Does the radar detect vehicles ahead? Any missing or erratic data means something’s still wrong, and you’re not done yet.
Finally, do a thorough road test. This isn’t just a quick spin around the block. You need to activate adaptive cruise control in traffic, test lane centering on a straight road, and watch for any false warnings. Keep the scan tool connected during the drive to monitor real-time system status. If the system faults during the test, you’ll see it in the data stream. Only when everything performs exactly as expected—and the codes stay away—can you confidently call the repair complete.
Cost, Risk, and the Tough Economic Choices
ADAS repairs are expensive, and the cost-benefit analysis gets real fast—especially on older vehicles. Let’s be clear: this isn’t a DIY job. You need specialized tools and software that cost thousands, not to mention the training. So, you’re looking at a shop repair.
| Repair Type | DIY Cost | Shop Cost | Success Rate | Secondary Risk if Failed |
|---|---|---|---|---|
| Sensor/ECU Replacement & Calibration | Not feasible (requires OEM tool for programming/calibration) | $800 – $2500+ (parts & labor) | 95%+ if calibrated correctly | Incorrect calibration leads to system malfunction and safety risk. Vehicle may fail ADAS-related safety inspections. |
| “Used” Sensor Installation | Cost of used part ($200 – $1000) | $500 – $1500 (with calibration) | <50% (most require OEM-specific programming to vehicle) | Incompatible part may not program, causing wasted labor. Even if programmed, a used sensor may have latent internal faults. |
I’ve seen too many guys try to save a buck with a used sensor. Most of the time, they’re VIN-locked, or the vehicle’s gateway just won’t “talk” to it. You spend hours trying to program a used camera, only to fail. Even if you get it to program, you’re rolling the dice on its internal condition—it could have hidden moisture damage, prior crash history, or degraded components that will fail again soon. It’s rarely worth the headache.
That leads to the economic reality: if the repair cost exceeds, say, 40% of your car’s value, and the ADAS system isn’t required for state inspection, some owners choose to permanently disable it. It’s a safety trade-off, and it definitely hurts resale value, but for an older car, it can sometimes be the only sensible option. Just know what you’re giving up in terms of active safety.
How to Keep Your ADAS Systems Healthy
You can’t stop every internal failure, but you can definitely avoid a lot of avoidable ones. A little care goes a long way.
First, be extremely careful with windshield replacements. If your car has a camera behind the mirror, the glass must be OEM-spec or equivalent. A poor-quality windshield can have optical distortions that confuse the camera, causing false readings. And the technician must perform a proper calibration—static or dynamic—after installation. A misaligned camera by just 0.5 degrees can cause lane keep assist to drift or fail. For more on how small errors can cause big problems, even in other systems, see Can a Coolant Air Pocket Cause a False Temperature Sensor Reading?
My Top Tips to Prevent Recurrence
-
Keep sensor surfaces clean. Gently wipe the camera lens (behind the windshield) and the radar cover (usually in the lower grille) with a soft cloth and approved cleaner. Road grime, bugs, or ice can easily mimic a hardware failure. And never, ever use abrasive cleaners—they’ll scratch the coatings and ruin the sensor.
-
Pay attention to warning lights. Don’t ignore an ADAS warning that comes and goes. Note when it happens—after washing the car? After hitting a bump? In heavy rain? These patterns help diagnose real issues. Also, if lane centering feels jerkier or adaptive cruise disengages more often, that’s early degradation. Address it before it becomes a full failure.
-
Always use the right fuse. If an ADAS circuit blows a fuse, replace it with the correct amperage and type. A higher-rated fuse won’t protect the sensitive electronics and can lead to module damage. And if the fuse blows again, don’t just keep replacing it—there’s an underlying short you need to find.
