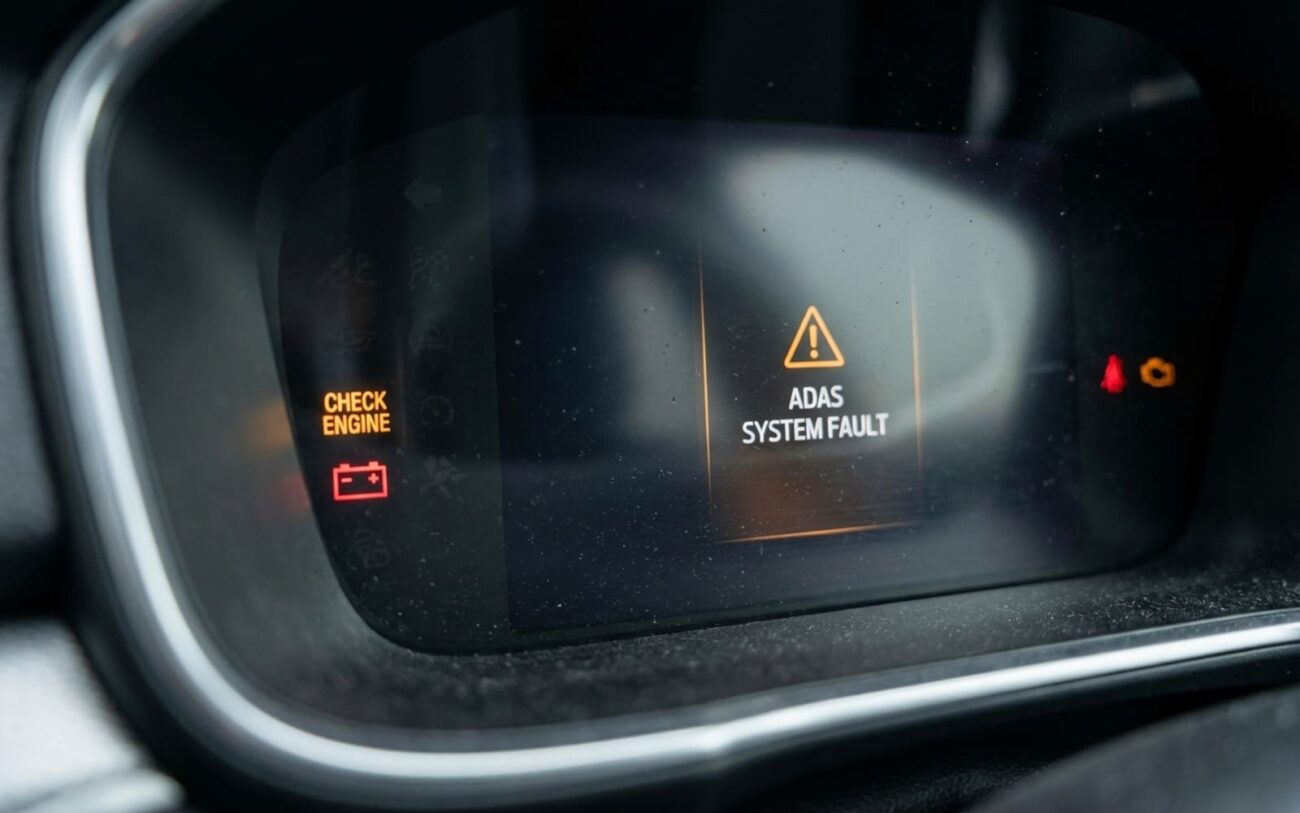
When Your ADAS Systems Go Dark: What I See First
Alright, let’s talk about that moment. You’re driving along, minding your own business, and suddenly your dashboard lights up like a Christmas tree. “Adaptive Cruise Control Deactivated,” “Lane-Keeping Assist Unavailable,” “Automatic Emergency Braking Offline”—all at once. This isn’t just a random glitch, and it’s definitely not a coincidence when every advanced driver assistance system (ADAS) throws in the towel simultaneously.
In my 25+ years, when I see this, it almost always points to a central issue, not a bunch of individual sensors failing. These systems are all connected, talking to a main brain—what we call a domain controller or ADAS master module. If that module doesn’t get stable power or loses communication, it’s like pulling the plug on the whole safety suite. Everything goes down.
And here’s the kicker: those warnings don’t just disappear after you restart the car. These systems are smart enough to log hard diagnostic trouble codes (DTCs) when they detect something’s seriously wrong. They’ll stay disabled until the problem is fixed and the system gets a proper reset. That’s just how they’re designed.
Now, sometimes it’s more subtle. You might notice your ADAS systems cutting out only when you crank the engine, or when you turn on a heavy-draw accessory like the rear defroster or heated seats. That, right there, is a classic tell-tale sign of voltage instability. The modules are sensitive, like tiny computers. They’re not getting enough juice to run reliably, so they shut down to protect themselves. It’s not always a dead battery, but it’s almost always a problem with how power is getting to them.
Here’s a critical point many folks miss:
These ADAS modules are essentially dedicated computers. A sudden or sustained voltage drop doesn’t just make them reboot; it can actually corrupt their internal firmware or force them into a fault state that won’t clear with a simple power cycle. I’ve had vehicles come into my shop where a corroded battery terminal was the obvious fix, but the ADAS module still needed a full recalibration and software flash at the dealership afterward. And honestly, driving with systems that flicker on and off is more dangerous than having them off entirely—you can’t trust them to work when you really need them.
How I Pinpoint the Problem: Differential Diagnosis
Just because you’re seeing a bunch of ADAS warnings doesn’t automatically mean your 12V battery or power supply is the culprit. The trick is to match the symptom pattern to the most likely root cause. A complete, persistent failure is usually different from one that only shows up under specific electrical loads.
| What You See (Symptom) | Is It a 12V Power Drop? | What Else Could It Be? | My Go-To Test to Confirm |
|---|---|---|---|
| Complete ADAS failure, all the time | Low probability. This usually points away from simple power loss and more towards a network or module fault. | A dead ADAS domain controller, a break in the CAN bus (open or short), or corrupt software. |
First, I grab my scan tool to check for communication with the modules. I’m looking for U-codes, like U0121 (lost communication with module). Then, I’ll put an oscilloscope on pins 6 (CAN High) and 14 (CAN Low) of the OBD-II port. If I see clean, stable waveforms, the network is powered and active, and the problem isn’t a general power loss to the network. |
| Intermittent ADAS failure, especially with electrical load | High probability. This is classic voltage sag—high-current draw starves those sensitive modules. | A weak battery (high internal resistance), a failing alternator, or a poor ground connection. |
I’ll perform a voltage drop test right at the ADAS module connector while trying to replicate the symptom (turn on everything!). I use a digital multimeter (DMM) with Min/Max recording to catch transient drops. If I see a reading below 10.5V under load at the module’s power pins, that’s my confirmation of insufficient supply voltage. |
| ADAS failure only during engine cranking | High probability. This screams weak battery or resistance in the cranking circuit. | An aged or sulfated battery, corroded battery cables, or a high-resistance starter circuit. |
First, a proper battery load test, following SAE J537 standards. Then, I’ll monitor the system voltage via OBD-II using my scan tool’s “Ignition Voltage” PID during cranking. If that voltage drops below 9.6V, the battery simply doesn’t have the reserve capacity needed, and those sensitive modules are going to complain. |
The pattern is everything. If the failure happens when you ask the electrical system for more power—like starting the engine or hitting the defroster—it’s almost certainly a power delivery issue. But if the ADAS systems are just dead all the time, no matter the load, then I’m looking at the CAN bus and the central control module. That oscilloscope test on the CAN lines is huge: if I see a healthy signal there, I know the network itself has power, and the fault is further downstream—likely the module itself or its software.
The Real Culprits: Specific 12V Power Faults
Once my testing confirms it’s a genuine 12V power delivery issue, I know I’m dealing with physical electrical faults. We’re not talking about software bugs or faulty sensors here; we’re talking about failures in the actual electrical infrastructure that’s supposed to supply stable voltage to these critical ADAS modules. Here’s what I typically find:
1. High-Resistance Connections
This is probably the most common thing I see in the shop. It’s often not obvious. It could be minor corrosion on a battery terminal that looks okay at a glance, a slightly loose main lug in a fuse box, or even oxidation inside the ADAS module’s connector itself. These connections might seem fine, but over time, they develop resistance. When current tries to flow, that resistance causes a voltage drop. So, a module expecting 12.6V might only get 9.8V under load, which is more than enough to trigger a shutdown. It’s a silent killer for electronics.
2. Conductor Degradation (Bad Wires)
Sometimes, the wiring itself is the problem. This usually happens in areas where harnesses flex repeatedly. Think door jambs (for side radar units), trunk harnesses (rear cross-traffic radar), or up the A-pillar (for windshield-mounted cameras). Over years of use, the copper strands inside the wire can break due to metal fatigue, or moisture can creep in and cause internal corrosion. The wire might still show continuity with a basic multimeter, but it simply can’t carry the full current required. A proper voltage drop test under load will expose this every time.
3. Internal Power Distribution Center Failure
Modern vehicles use sophisticated Integrated Power Modules (IPMs) or Central Electrical Boxes. These aren’t just simple fuse holders anymore; they contain bus bars, delicate solder joints, and control relays. A tiny cracked solder joint on the ADAS power circuit, or internal corrosion in a high-current path, can cause intermittent voltage loss. I’ve seen known field issues with this—for example, some GM models had documented problems with the underhood fuse block developing resistance due to poor crimp integrity or thermal cycling. That leads to low-voltage faults across multiple modules, including ADAS.
Just to be absolutely clear: this entire analysis is focused solely on power delivery. If you’ve got a dirty camera lens, a blocked radar sensor, or a software bug within the ADAS control unit, that’s a different beast. I’m talking specifically about why adequate voltage isn’t making it to the module in the first place.
My Approach to the Fix: Repair Options
HIGH-VOLTAGE SAFETY WARNING
Look, this article is about 12V systems, but any time you’re messing with the main vehicle battery or power distribution, you’re dealing with electricity. Always, always disconnect the 12V battery negative terminal before you start working on electrical components. And if you’re ever dealing with high-voltage batteries (which isn’t what we’re covering here), you need specialized tools, HV safety training, and proper PPE—like Class 0 insulated gloves rated for 1,000V DC. There are no safe shortcuts when it comes to high voltage.
Option 1: The Easy Fix – External, Accessible High-Resistance DIY-FEASIBLE
Option 2: The Tricky Fix – Hard-to-Reach Wire Degradation Professional Only
Option 3: The Replacement – Internal Power Distribution Defect NON-REPAIRABLE → REPLACE
Sometimes, if a weak battery is causing intermittent drops, a portable jump starter might get you home. But I’m telling you, this is a temporary fix at best. A failing battery can cause voltage to collapse during a critical ADAS operation—like when emergency braking kicks in—leading to a sudden system shutdown. That’s not just inconvenient; it’s a serious safety hazard. Use it as a last resort, but never as a solution.
My Final Step: Post-Repair Validation
A repair isn’t finished until you’ve proven it’s fixed under real-world conditions. Guessing isn’t good enough in my shop—we test it.
For Connection or Wire Repairs (Option 1 & 2):
I always perform a loaded voltage drop test. With the engine off, I’ll turn on every high-draw accessory: headlights on high beam, HVAC blower on max, rear defroster, heated seats—the works. Then, I’ll measure the voltage directly at the ADAS module’s power pin using back-probe pins (so I don’t damage the connector). It should stay above 12.8V. Then, I’ll start the engine, bring the RPMs up to about 1500, and recheck—it should be above 13.5V. Critically, I also measure the voltage drop from the battery positive post to the module’s power pin; that drop needs to be less than 0.5V. If it’s any higher, you still have resistance in that circuit, and the repair isn’t complete.
For IPM/Fuse Box Replacement (Option 3):
After the new unit is installed and programmed, I don’t just send it out the door. I perform a full system operational check. This means driving the vehicle through a normal cycle—accelerating, braking, turning—to allow all ADAS systems to self-check. All warning lights must clear. I’ll then use my professional scan tool to verify that no DTCs are present, especially U0121 (lost communication) or U3000 (control module malfunction). Any stored codes get cleared, and I confirm they don’t return after another test drive.
Tools You Can’t Skip:
You absolutely cannot do this job right without the proper tools. That means a quality digital multimeter with Min/Max recording (to catch those fleeting voltage drops), back-probe pins (to test connectors without causing damage), and an OEM-level or high-end aftermarket scan tool that can talk to all modules and clear codes. An oscilloscope is a huge plus for diagnosing CAN bus issues.
What It’ll Cost You (and Why)
Here’s the reality check: fixing these power delivery issues isn’t always cheap, but it’s often less than the cost of replacing an ADAS module itself. It’s about getting to the root cause, not just throwing parts at it.
| Repair Type | DIY Cost (Parts) | Shop Cost (Labor + Parts) | My Success Rate (if diagnosed correctly) | Risk if the Repair Fails |
|---|---|---|---|---|
| External Connection Clean/Tighten | < $20 (cleaner, grease) | $100 – $200 (includes diagnosis) | 95% | Minimal. Worst case, the connection loosens again over time if not torqued properly. |
| Harness Repair/Replace | $50 (splice kits, heat-shrink) | $300 – $800 (labor-intensive diagnosis and repair) | 90% | A poor repair can cause shorts, damage the module, or lead to recurring intermittent faults. |
| Fuse Box/IPM Replacement | N/A (not DIY-safe or feasible) | $600 – $1,500 (part cost + programming) | 98% | Incorrect programming can disable other systems or prevent the vehicle from starting. |
If you’re driving an EV, always check your battery warranty status before authorizing any repairs. Sometimes these issues can be related to the larger battery system.
My Cost-Saving Tip
I’ve seen more and more independent EV specialists popping up, and many of them offer diagnostic and repair services at a lower cost than dealerships. If you’re out of warranty, a qualified independent shop might save you a lot of money, sometimes 30–50% below dealership pricing. Just make sure they’re genuinely experienced with ADAS and EV electrical systems—this isn’t a job for just any general mechanic.
Keeping Trouble Away: Prevention & Monitoring
Most ADAS power failures are actually preventable. The root causes—corrosion, weak batteries, loose connections—they don’t just happen overnight. A little regular inspection and maintenance goes a very long way in keeping these systems online.
What I Recommend to Prevent Recurrence
-
If your vehicle sits for extended periods—I’m talking more than a week at a time—you really should be using a battery maintainer. Deep discharges and sulfation are silent killers of battery health. A battery can test “good” at rest, but then completely collapse under load due to high internal resistance. That’s exactly what trips up sensitive ADAS modules.
-
Make it a habit to inspect your main power circuits at least once a year. While you’re checking your coolant for proper mix and contamination, take an extra 10 minutes to visually inspect the battery terminals, ground straps, and fuse box connections. Look for any signs of white or green corrosion, loose bolts, or discoloration/melted plastic that indicates overheating. A slightly loose ground strap might not keep your car from starting, but it can absolutely destabilize the entire electrical system under load, causing all sorts of headaches for your ADAS.
-
Catching a corroded terminal early takes five minutes and a wire brush. Waiting until it causes a voltage drop that takes down your ADAS systems can cost you hundreds in diagnostics and programming. Prevention isn’t just cheaper; it ensures your safety systems are working when you need them most.
