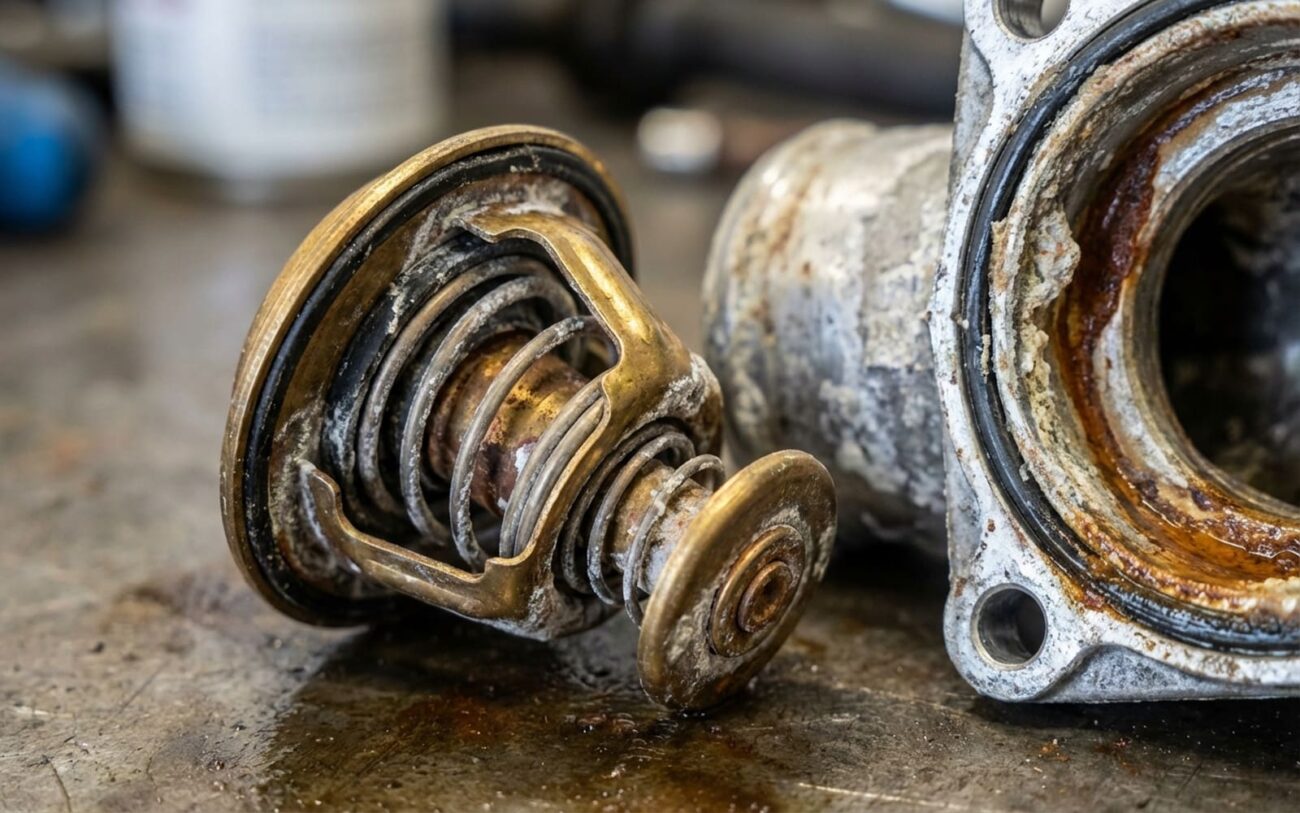
Alright, let’s talk thermostats. After more than 25 years turning wrenches, I can tell you this: a failing thermostat sends out clear signals, but man, do they ever get misdiagnosed. I’ve seen good engines get torn apart, chasing ghosts, all because someone jumped to conclusions about a thermostat without doing their homework. It’s a simple part, really, but critical to your engine’s health.
The Thermostat: What It Does & What Happens When It Doesn’t
Think of the thermostat as the bouncer for your engine’s coolant. It sits between the engine and the radiator, and its job is to keep the coolant in the engine block when things are cold, helping it warm up fast. Once that coolant hits its target temperature—usually around 195°F (90°C), give or take—the thermostat opens up, letting the hot coolant flow out to the radiator to get cooled down. Simple, right? Well, when it goes bad, things get complicated fast.
When It Sticks Closed: The Overheat Emergency
This is the big one, the one that can kill an engine in minutes. If that valve gets stuck shut, coolant can’t leave the engine. You’ll be driving along, everything seems fine, and then boom—the temperature gauge shoots into the red. And here’s the kicker, the dead giveaway: your heater might be blowing cold air, even though the engine is boiling. Why? Because that super hot coolant is trapped in the engine block and can’t make it to the heater core.
At the same time, if you can safely check (carefully, watch for steam!), the upper radiator hose (the one coming from the engine) will be rock hard and scorching hot, while the lower hose (the one returning from the radiator) will be cold. That’s a textbook sign of zero flow. You need to shut that engine off immediately. Continuing to drive like that is a surefire way to warp a cylinder head or blow a head gasket. I’ve seen it happen too many times.
When It Sticks Open: The Slow Killer
This isn’t an emergency, but it’s still bad news for your engine’s longevity. If the thermostat gets stuck open, or even partially open, coolant flows through the radiator all the time, even when the engine is cold. Your engine will struggle to reach its normal operating temperature. The gauge will stay low, and your heater will barely put out lukewarm air. It’s not as dramatic as overheating, but long-term, running too cold means increased cylinder wear, more oil sludge buildup, and your fuel economy will take a hit. Plus, on most modern cars, you’ll likely trip an OBD-II code, usually a P0128, telling you the engine isn’t reaching its target temperature.
Diagnosis: Don’t Guess, Test!
Here’s where experience really comes in. These symptoms I just described? They’re not exclusive to a bad thermostat. A failing water pump, a clogged radiator, even a bad coolant temperature sensor can mimic these issues. That’s why you don’t just throw parts at it. You diagnose.
In my shop, when I’m chasing a cooling system problem, I use a systematic approach. This table below is pretty much my cheat sheet for differentiating a thermostat problem from its common look-alikes. It’s all about confirming flow and temperature behavior under real conditions.
| Symptom | Likely Thermostat Issue | Common Mimics (Don’t Get Fooled!) | My Go-To Test to Confirm |
|---|---|---|---|
| Engine overheats quickly; upper radiator hose hot & pressurized, lower hose cold. Heater blows cold air. | Thermostat stuck closed | Bad water pump (damaged impeller), severely clogged radiator, collapsed lower radiator hose (check this first!), airlock in the system. |
Grab an infrared thermometer. With the engine warmed up and starting to overheat, measure the temperature right at the thermostat housing inlet (coming from the engine) and then at the outlet (going to the radiator). If you see a difference of more than 30°F (17°C)—hot inlet, cold outlet—that’s a strong indicator of flow restriction right at the thermostat. A dead water pump will usually show minimal temperature rise across the radiator itself, or the hoses won’t pressurize much. |
| Engine runs below normal temperature; heater weak; temperature gauge stays low. | Thermostat stuck open or missing | Faulty coolant temperature sensor (CTS) sending bad data, thermostat housing bypass stuck open (less common but happens). |
Connect an OBD-II scanner and monitor the live Engine Coolant Temperature (ECT). If that ECT reading stays stubbornly below the thermostat’s rated opening temperature (say, below 160°F / 71°C) even after a good 15-20 minute drive, your thermostat is likely stuck open. You can confirm with infrared readings at the housing—both sides should be near ambient if it’s stuck wide open. If the ECT reads low but the hoses feel hot, suspect the sensor. |
| Intermittent overheating or a wildly fluctuating temperature gauge. | Thermostat sticking intermittently | Airlock in the cooling system, failing electric cooling fan (especially at idle/low speed), thermostat not fully opening due to debris. |
First, do a cooling system pressure test to rule out any external leaks or air ingress. Then, monitor ECT and fan operation, especially under load (like driving uphill or idling with AC on). A thermostat that’s sticking will cause sudden, sharp ECT spikes that don’t quite line up with when the cooling fan kicks on. Bleed the system thoroughly and retest. If the fluctuations persist, that thermostat is likely on its way out. I’ve seen a lot of folks replace a thermostat for overheating at idle when it was actually a bad fan or an airlock. Always double-check. |
And just to reiterate: I’ve seen this misdiagnosed countless times. A car overheats at idle, owner replaces the thermostat, and the problem comes right back. Nine times out of ten, it was a failing electric cooling fan or an airlock. You’ve got to validate before you start replacing parts.
Why Thermostats Fail: The Real Root Causes
Thermostats don’t just fail for no reason. In my experience, it almost always boils down to a few key culprits: internal corrosion, mineral scale buildup, or the wax element degrading. And all these point back to one thing: coolant quality and maintenance.
Using plain tap water instead of a proper 50/50 mix of ethylene glycol and distilled water is the biggest offender. Tap water is full of minerals—calcium, magnesium, you name it. When that water heats up and cools down repeatedly, those minerals deposit as scale. This scale builds up on the thermostat’s moving parts, especially the wax capsule and the valve seat. It’s like rust on a hinge; it restricts movement, prevents full closure, or keeps it from opening all the way. Over time, the thermostat gets sluggish or just seizes up.
The heart of most thermostats is a little wax-filled pellet. As the coolant heats up, that wax expands, pushing a rod that opens the valve. If your coolant lacks the right corrosion inhibitors, or if it’s contaminated, that wax can degrade, leak out, or harden. Once that happens, the thermostat loses its ability to react to temperature changes. The return spring can also weaken or corrode, throwing off its calibration. Even the tiny jiggle valve, designed to vent air, can get clogged with crud, leading to air pockets and inconsistent cooling.
I’ve seen certain engine families that are particularly sensitive to this. For example, some aluminum-block engines with really tight coolant passages will react badly to improper coolant chemistry. There are even factory service bulletins out there for specific models, addressing silicate dropout and scale buildup caused by using non-OEM coolant. These conditions are a direct path to thermostat failure.
Just because it’s near the thermostat doesn’t mean it’s the thermostat.
A coolant leak from the housing gasket? That’s a sealing issue, not a bad thermostat. A faulty coolant temperature sensor? That’s an electrical or sensor problem. Don’t confuse proximity with causality; they need different diagnostics and different repairs.
Fixing It: Your Repair Options (and Warnings)
Once you’ve confirmed that thermostat is indeed the culprit, replacement is the only reliable fix. Trying to clean it or tap it loose might work for a day or two, but it’s not a repair; it’s just delaying the inevitable. You’re gambling with your engine.
This Ain’t a Game: Professional Territory Only
Working on a cooling system involves hot liquids, pressure, and critical engine components. Improper coolant handling can cause severe burns, and a botched replacement can ruin an engine. There are no safe shortcuts here, especially if you’re not experienced.
Standard Thermostats: Sometimes a DIY Job
For a lot of older vehicles and some simpler modern designs—think many GM LS engines, Ford Modulars, or older Toyotas with a standard, front-mounted thermostat housing—this can be a DIY-FEASIBLE job. You’ll need the right thermostat, a new gasket or O-ring, the correct coolant, a drain pan, and some basic hand tools. Always start with a stone-cold engine. Slowly open the radiator cap to depressurize the system. Drain enough coolant to get the level below the thermostat housing. Disconnect any hoses or electrical connectors, unbolt the housing, and pull out the old thermostat. Here’s a critical step I see people skip: clean both mating surfaces thoroughly. Any old gasket residue or corrosion will cause a leak, guaranteed. Install the new thermostat in the correct orientation (jiggle pin up, spring side toward the engine), reinstall the housing, and torque those bolts to spec. Over-torquing aluminum housings is a classic mistake and will lead to cracks and leaks. For instance, a GM LS thermostat housing typically wants 18 lb-ft (24 Nm), but you must check your specific vehicle’s factory service manual.
Integrated Modules: Leave This to the Pros
Now, on many modern vehicles—especially European models and some newer Japanese cars—the thermostat isn’t just a simple valve anymore. It’s often integrated into a larger, more complex module that might include the water pump, an electric actuator, or a full housing assembly. These are PROFESSIONAL-ONLY jobs. Take a BMW or Audi, for example; they use electronically controlled thermostats that often require specific programming with a scan tool after replacement. The electric water pump might need to be activated in a certain sequence during the bleed procedure to purge air. Skip that, and you’ll end up with airlocks and rapid overheating. Parts alone for these can easily run $500+, and the labor is complex. This is not a DIY-friendly repair, and trying it yourself often leads to more expensive damage.
Temporary Fixes? Don’t Even Think About It.
People always ask about temporary fixes. My answer is always the same: TEMPORARY / LAST-RESORT options are none worth recommending. Removing the thermostat entirely might stop an immediate overheat, but it forces your engine to run far too cold. This causes increased engine wear, fuel contamination in your oil (which leads to sludge), and you’ll definitely trigger a P0128 code. Long-term engine damage is practically guaranteed. The only acceptable “temporary” fix is to get it to the shop or replaced immediately.
After the Repair: Don’t Skip Validation
You’ve done the work, but don’t just refill the coolant and drive off. This is where a lot of DIYers, and even some less experienced techs, mess up. You need to validate the repair properly. First, do a functional test: start the engine cold, and if you have an OBD-II scanner, monitor the ECT. The temperature should rise steadily and hit its normal operating range (195–220°F / 90–105°C) within 5–10 minutes of driving. Once it’s there, it should stabilize, maybe fluctuating slightly with load. Your heater should be blowing strong, consistent heat.
Next, perform a thorough leak and bleed check. After three full heat cycles—that’s cold to hot to cold, letting it cool down completely each time—inspect the thermostat housing, all hoses, and connections for any seepage. If I used UV dye in the coolant (which I often do for tricky leaks), I’ll scan with a black light to catch anything tiny. Air pockets are a super common post-repair issue, especially in systems with high points or complex routing. A properly bled system will hold a stable temperature and show no signs of overheating, even under load.
If the engine still runs cool or overheats, go back and recheck your work. Was the thermostat installed backward? Is the system truly bled of all air? Did you grab the right thermostat type and temperature rating? These small details are often the difference between a successful repair and a recurring nightmare.
Cost, Risk, and Prevention: Making Smart Choices
The cost of a thermostat repair varies wildly depending on your vehicle. Here’s what I typically see:
Standard Thermostat Replacement
That’s usually just for parts and coolant if you’re doing it yourself. In a shop, expect $200–$500. If done correctly, I’d say there’s a 95% success rate. The big risks here are improper bleeding (leading to airlocks and immediate overheating) or using the wrong type of coolant, which sets you up for another failure down the road.
Integrated Module Replacement
This is just for the parts if you’re brave enough to try it DIY. A professional shop will charge $800–$1500+. DIY success rate drops to maybe 85% because of the bleeding and programming complexities. A pro should be 98%. The risks are high: incorrect installation, skipping programming steps, or airlocks can cause rapid overheating and potentially catastrophic engine damage.
When you’re looking at an integrated module replacement, especially on an older car, you’ve got to weigh that cost against the vehicle’s actual value. If the repair bill is going to be more than, say, 40% of what the car is worth in good running condition, it’s time to seriously consider if it’s worth the investment. For high-mileage vehicles, sometimes it’s just more economical to replace the car.
And always, always check your vehicle’s warranty status before authorizing any big repairs. You might be covered!
Prevention: Your Best Defense
Preventing thermostat failure comes down to one thing: coolant discipline. Seriously, I can’t stress this enough. Always use the coolant type specified by the manufacturer. Don’t mix different types (OAT, HOAT, IAT, etc.)—that’s a recipe for gel formation and losing your corrosion protection. Maintain a proper 50/50 mix of antifreeze and distilled water. That “distilled” part is critical; tap water introduces those minerals that cause scale, which is the leading cause of thermostat sticking.
Stick to the manufacturer’s recommended cooling system flush intervals, usually every 5–7 years or 100,000 miles. A clean system resists deposits. If you need to top off between flushes, use distilled water in a pinch, but get the correct mix ratio restored as soon as you can.
Finally, keep an eye out for early warning signs. If your engine starts taking longer to warm up than it used to—even just a little bit—that could mean the thermostat is starting to stick open. A temperature gauge that never quite settles in the middle is another red flag. Address it early. A thermostat replacement now is a whole lot cheaper than a head gasket job later, trust me on that one.
A Quick Tip on Shops
Independent specialists can often offer thermostat replacement services at competitive rates compared to a dealership. While it’s not as complex as, say, EV battery work, make sure they have experience with your specific vehicle make and model. A good indie shop can definitely save you some money on labor.
