That Annoying Buzzing? It’s Your Cooling Fan Screaming for Help
You know the sound. You’re stuck in traffic, A/C blasting, and there it is: a rhythmic buzzing or a low, strained hum coming from behind the grille. It’s not the smooth whir of a healthy fan doing its job. This sound is different. It’s almost electric, like something’s fighting itself to turn. In my 25+ years turning wrenches, that noise is almost always the first warning sign of a cooling fan assembly that’s on its last legs.
Especially on modern cars, these aren’t your grandpa’s simple on/off fans. Most use Pulse-Width Modulation (PWM) or two-speed relays to run at partial loads. This saves fuel and keeps things quieter. The fan’s internal control module rapidly switches power on and off to simulate those different speeds. When that motor or its built-in electronics start to fail, the result is often that distinct buzzing, particularly at lower speeds when the PWM signal is most active. Ignore it, and you’re not just risking a temporary temperature spike. We’re talking real damage here – warped cylinder heads, blown head gaskets – all before that needle even nudges “H.” I’ve seen it too many times.
Before You Rip Anything Out: Is It Really the Fan?
Hold on a second. Before you start unbolting things, you need to confirm the source of that buzz. A buzzing noise can fool you; it doesn’t always mean the fan motor itself is bad. I’ve chased down buzzing that turned out to be a loose fan shroud vibrating, some debris caught in the blades, a failing A/C compressor clutch, or even just a corroded electrical connector rattling at certain frequencies.
And if the fan isn’t turning on at all? That could be a blown fuse, a bad relay, or a wiring issue. None of those mean the fan motor assembly is toast. What I always teach my younger techs is to think of the fan system in three parts: the fan needs constant power, a solid ground, and a control signal from the PCM (Powertrain Control Module). If any one of those is missing, the fan won’t run. If the control signal is erratic, or the internal module is failing, then you get the buzzing, partial operation, or no response at all.
The table below is basically my cheat sheet. I use this same logic every time a car rolls into the shop with an overheating complaint or a fan issue. It helps me differentiate between a truly bad fan assembly and something upstream that’s causing the problem.
| Symptom | Likely in the Fan Motor/Module | Common External Mimics | My Definitive Test to Confirm |
|---|---|---|---|
| Buzzing/Humming (especially at low speed) | Worn motor brushes, failing PWM controller ICs, loose windings, or damaged MOSFETs in the internal module. | Loose shroud, debris contact, failing A/C compressor clutch, or vibrating electrical connector. |
Grab a long screwdriver and use it like a stethoscope. Touch the handle to your ear and the tip to the fan motor housing while it’s buzzing. If the buzz gets louder right at the motor, you’ve found your source. Also, with the engine off, spin the fan by hand. It should turn smoothly; any binding or roughness points to a bad bearing or motor. Finally, if you have a scan tool, command the fan to 25–30% speed. A healthy motor runs quiet and smooth; a failing one will often produce a loud, uneven hum or buzz. |
| Fan Only Runs at High Speed | Failed low-speed circuit in the control module. The motor often defaults to full voltage as a fail-safe. | Blown low-speed relay (on two-speed systems), open control circuit, or PCM not sending PWM signal. |
Back-probe the fan’s control wire with your multimeter set to measure duty cycle (or frequency). Command low speed via your scan tool. A working system should show a variable signal, maybe 20–40% duty cycle. If you see a steady 12V or no signal variation, it means the internal module isn’t modulating – it’s likely dead or stuck. |
| No Fan Operation (spins freely by hand) | Open motor windings, blown internal thermal fuse, or failed control module. | Blown fuse, bad relay, broken wire, poor ground, or missing PCM signal. |
You need to check the three essentials: 1) Is there battery voltage at the fan’s main power terminal (key on)? 2) Do you have good continuity on the ground path? 3) Is the PCM sending a changing PWM signal on the control wire when the engine is hot or the A/C is on? If you’ve got all three of those present and accounted for, then yes, the fan assembly itself is faulty. |
A quick note here: sometimes, communication issues can mess with the fan. If you’ve got multiple systems acting up – like the instrument cluster glitching or your scan tool refusing to connect – then it’s worth checking the CAN bus integrity. But for a localized buzzing, mechanical-sounding noise, stick to the fan circuit first. CAN problems rarely sound like a struggling motor.
Why These Fans Fail: A Look Inside the Assembly
Once your tests point to the fan module, it’s worth understanding what’s going on in there. These aren’t just simple motors anymore. They’re integrated assemblies, often with the motor, circuit board, and thermal protection all sealed up in one unit. And while they’re built tough, they live in a brutal environment: constant heat from the radiator, road vibration, moisture, and electrical stress from the alternator. It’s a wonder they last as long as they do.
The most common internal failure I see is worn motor brushes. The DC motor uses carbon brushes to transfer power to the spinning armature. Over time, they just wear down. As they get shorter, they start to bounce, causing arcing and inconsistent contact. That’s a big part of what creates that buzzing – especially at low PWM duty cycles, where the motor isn’t getting full voltage and struggles to turn smoothly. It’s like trying to pedal a bike uphill with a flat tire.
Next up is the PWM control module itself. This little circuit board uses power transistors, usually MOSFETs, to switch the motor current on and off hundreds of times per second. When one of these fails – often due to excessive heat or voltage spikes – the fan loses its ability to control speed. You might lose low speed entirely, or the fan might just quit altogether. Sometimes, a failing inductor or capacitor on the board can vibrate at a resonant frequency, producing an audible buzz even before the motor completely gives up.
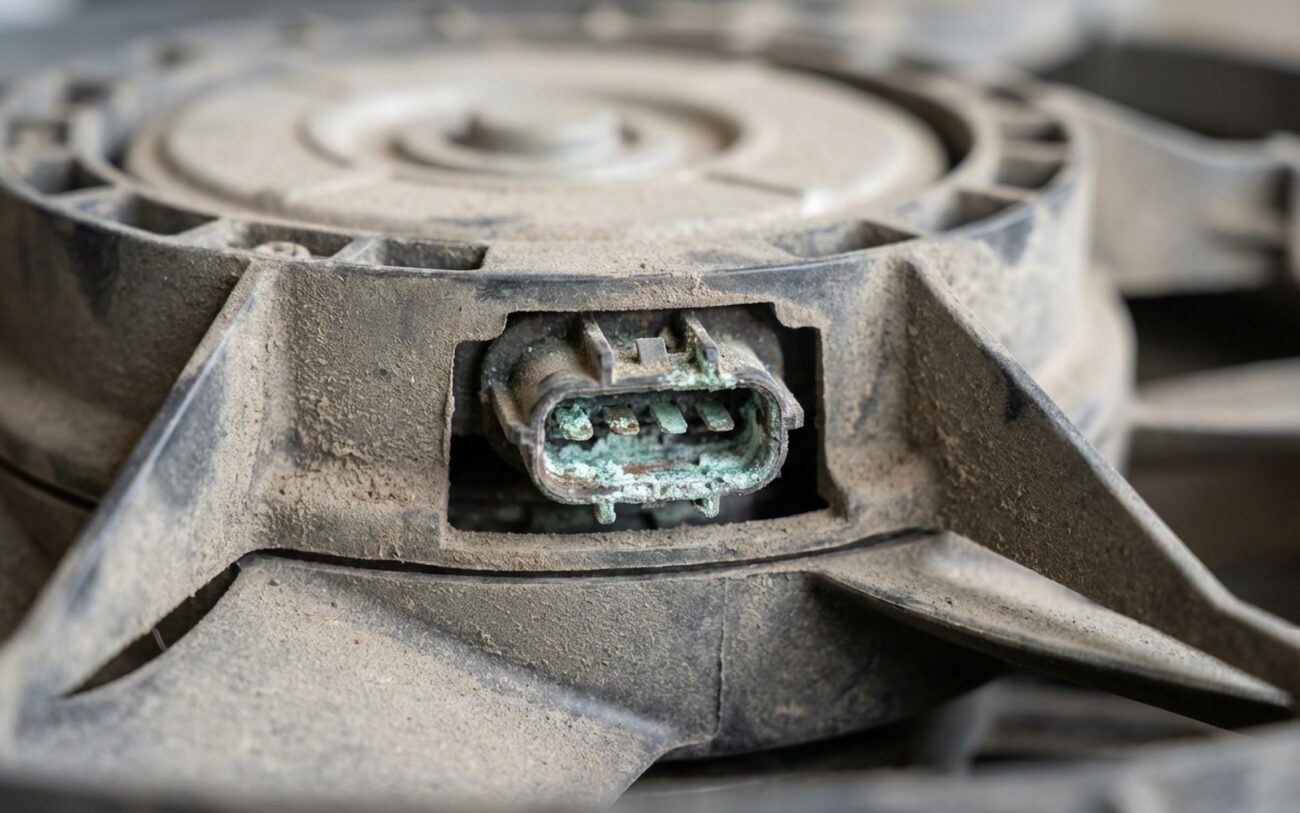
Corrosion is another silent killer. Moisture can seep into the electrical connector or along the potting between the module and motor. This increases resistance at solder joints, creating hot spots and leading to eventual failure. I’ve seen this pattern repeatedly in coastal areas or places where they use a lot of road salt. It’s a real problem.
And sometimes, it’s just a design limitation. For example, GM issued a service bulletin for certain trucks noting a “buzzing noise from the cooling fan at idle” due to motor resonance – specifically recommending replacement of the entire fan and module assembly. That’s not a repair you argue with; it’s a known issue.
One last thing: a bad coolant temperature sensor, a faulty A/C pressure switch, or a failed external relay can all cause fan issues. But remember, those are upstream failures. They don’t mean the fan motor itself is bad. Always rule those out with proper diagnostics before you condemn the whole assembly.
The Only Real Fix: Replacement, No Shortcuts
Professional Territory Only (Seriously)
Let me be direct here: when the fan motor or its integrated control module fails, you replace the entire assembly. Full stop. These units are sealed and non-serviceable. The motor, the blades, the shroud, and all the control electronics are one integrated unit. There’s no user-replaceable brush kit, no serviceable circuit board. Any attempt to open it up voids its weatherproofing and risks further damage. I’ve seen techs try to replace MOSFETs or re-solder boards. It’s technically possible – once. But without proper potting and sealing, moisture gets in, and the next rain kills it. Worse, a poorly repaired module can backfeed voltage into the PCM’s driver circuit, frying a $1,000 control unit. It’s just not worth the risk, not for me, and not for my customers.
So, replacement it is. It’s a straightforward job on many vehicles, but it demands care. You’ll need a new fan assembly (OEM or a high-quality aftermarket part – don’t cheap out here), Torx bits (usually T30 or T40 for the shroud bolts), a 10mm socket, and maybe some pliers if you need to loosen hoses. Always, always disconnect the negative battery terminal first. This circuit pulls high current, and you absolutely do not want a short while you’re working.
On some cars, you can get the shroud out without draining any coolant. But on others – especially front-wheel-drive models with tight engine bays – the radiator might have to come out. That means draining, removing, reinstalling, and then bleeding the system properly. One trapped air pocket can cause overheating and send the car right back to the shop. If you’re not comfortable with that whole process, seriously, leave it to a professional.
And forget about temporary fixes. I’ve seen people wire fans directly to switches or relays to bypass the PCM. That kills the variable-speed function, runs the fan at max all the time, and overloads wiring that isn’t designed for continuous high current. The only valid “shortcut” is swapping in a known-good assembly to confirm your diagnosis – something we do in the shop when we’re really in doubt.
Verifying the Repair: How I Know the Job’s Done Right
Just installing the new fan isn’t the end of the job – it’s the beginning of verification. A proper repair in my shop always includes validation. Don’t skip this part.
First, grab your bi-directional scan tool. With the key on and engine off, command the fan to run at 30%, 50%, 70%, and 100% duty cycle. The fan should respond smoothly at each step, with no hesitation, stuttering, or buzzing. At 30%, it should be barely audible; at 100%, it should spin hard and freely, without any strain or unusual noise.
Next, I always check the current draw with a DC clamp meter. At low speed (around 30%), the draw should typically be 8–15 amps, depending on the vehicle. At full speed, it can jump to 25–35 amps. The key is that it should stay within the circuit’s rated capacity, which is usually marked on the fan housing or in your service information. Excessive draw suggests binding, a poor installation, or maybe some remaining electrical issues.
Finally, perform a thermal cycle test. Start the engine, let it warm up to operating temperature, then turn the A/C on max. The fan should activate immediately. Drive the car for a bit, then let it idle in park. Watch the temperature gauge and listen as the fan cycles on and off. It should operate silently and respond appropriately to load changes. If it passes all three of these checks, you’ve done the job right.
What’s It Gonna Cost? And When to Walk Away
Cost is always a factor, and it’s something I talk about with every customer. Here’s a real-world breakdown, based on what I’ve quoted and what parts typically run.
| Repair Type | DIY Cost | Shop Cost | Success Rate | Secondary Risk if Failed |
|---|---|---|---|---|
| Complete Fan Module Assembly Replacement | $200–$500 (OEM or quality aftermarket) | $450–$800 (includes diagnosis, labor, and warranty) | 98% (when diagnosis is accurate) | Incorrect diagnosis wastes parts. Risk of damaging radiator fins or over-torquing shroud bolts during install. |
| Attempted Internal Component Repair | $50 (MOSFETs, solder, tools) | N/A (no professional shop will perform this) | <10% (short-term success at best) | Water intrusion leads to rapid failure. Risk of damaging PCM due to improper reassembly or electrical faults. |
The shop price includes the part, typically 1–2 hours of labor, and a proper diagnostic process. You’re paying for expertise and, crucially, a warranty. If it fails in a week, they fix it. The DIY route saves money, but it carries a higher risk. If you misdiagnose, you’re out $500 for a part you didn’t need, and you still have the original problem.
Here’s a rule we often use in the shop: if the repair cost exceeds 25% of the car’s private-party value, and there are other major repairs pending – like a timing belt, transmission work, or significant rust issues – you need to step back. Is this repair really extending the car’s life, or are you just delaying the inevitable? That $800 fan job on a $2,000 car might not make financial sense in the long run. Be honest with yourself about the car’s overall condition.
Keeping Your New Fan Healthy
Once you’ve got that new fan in, protect your investment. The biggest enemy of the fan module is heat – and the best defense against heat is good airflow.
My Tips to Prevent a Recurrence
-
Keep the front of the radiator and condenser clean. Bugs, leaves, and road grime clog those delicate fins, forcing the fan to work harder and run longer. I recommend rinsing the front of the radiator every few months, especially after highway drives. Use low pressure – high pressure can bend the fins, and that’s just another problem.
-
During routine maintenance – oil changes, fluid checks – take five seconds to listen. After shutting off a hot engine, the fan might run for 30 seconds to a minute; that’s normal. But if you hear a new buzz, hum, or grinding, investigate it early. Also, visually inspect the motor housing. Look for melted plastic, cracked connectors, or any discoloration – those are all signs of overheating.
-
And don’t ignore warning signs from other systems. A failing thermostat or a partially clogged radiator can cause the fan to run constantly, shortening its life. You’ve got to address cooling system health holistically. It’s all connected.
