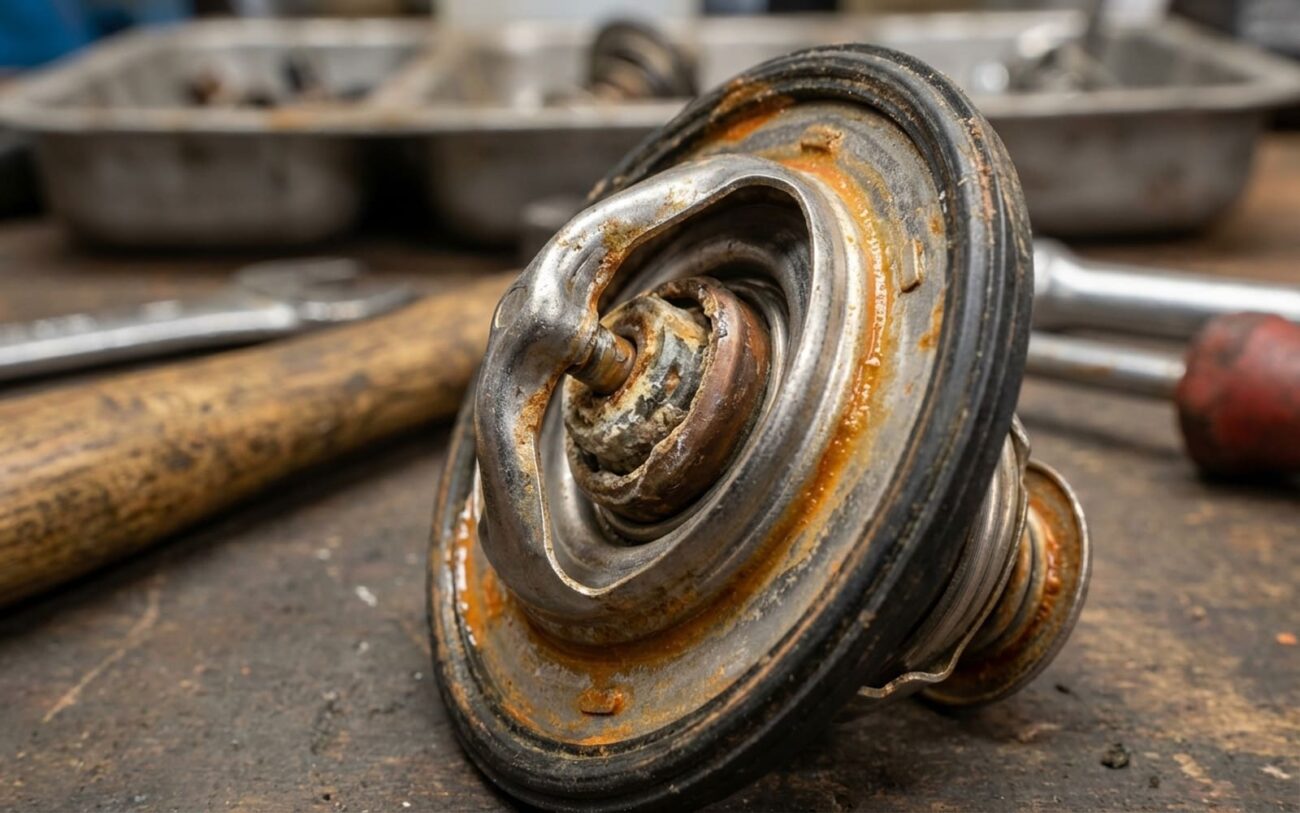
A thermostat stuck open isn’t the kind of breakdown that leaves you on the side of the road, but don’t let that fool you. In my 25+ years in the shop, I’ve seen plenty of engines slowly chew themselves up because of a thermostat that just wouldn’t close. It’s a common problem, and while it’s not an emergency like one stuck closed (which causes overheating), ignoring an engine that runs too cold will absolutely cost you in the long run.
What You’ll Notice: The Cold Truth About a Stuck-Open Thermostat
When a thermostat decides to stay open, it means your engine’s coolant is constantly flowing through the radiator, even when it should be warming up. Think of it like trying to heat your house with all the windows open. You’ll definitely notice a few things:
First off, your engine will struggle to get up to temperature. That temperature gauge on your dash? It’ll sit stubbornly low, often around the 160°F (71°C) mark or even lower, even after you’ve been driving for a while. A healthy engine usually runs between 195-220°F (90-104°C), with the gauge typically sitting right in the middle. If it’s always hugging the cold side, that’s a big red flag.
And because the engine isn’t getting hot, neither is your heater. You can crank the fan all the way up, but you’ll only get lukewarm air, if that. The heater core needs hot coolant to do its job. Now, sometimes a blend door actuator can act up and give you similar symptoms (especially on some Mercedes C-Class and E-Class models, I’ve seen that a lot), but if your engine temp is consistently low, the thermostat is the prime suspect.
You’ll also likely see your fuel economy take a hit, sometimes by 10-15%. Here’s why: your engine’s computer (ECM) uses the coolant temperature to figure out how much fuel to inject. If it thinks the engine is always cold, it’ll stay in “open-loop” mode, dumping in extra fuel like it’s a cold start, all the time. That rich mixture burns more gas. Sure, a bad oxygen sensor can also cause over-fueling, but when I see high fuel trims and low coolant temps, I’m looking at the thermostat first.
While this issue won’t typically leave you stranded, don’t ignore it. Running too cold causes long-term damage. That extra fuel washes the oil off your cylinder walls, leading to accelerated wear on piston rings and bores. It also promotes acid buildup in your oil and can cause carbon deposits on intake valves and in the combustion chambers because the fuel isn’t burning completely. Over time, that means reduced performance and a shorter engine life. It’s a slow killer.
How I Diagnose It: Separating Fact from Fiction
Before you start throwing parts at it, you need to confirm the problem. A pressure test is great for finding leaks, but it won’t tell you if your thermostat is opening too soon or not closing at all. For that, you need to talk to the engine’s computer. That’s where an OBD2 scanner with live data comes in – it’s an essential tool in my box.
The key here is to verify that the coolant temperature is actually low, not just that a faulty sensor is sending bad data. I’ve seen that trick people more than once. Here’s my typical approach:
1. Read Live ECT Data: Connect your scan tool and look at the Engine Coolant Temperature (ECT) sensor reading. This tells you what the computer thinks the temperature is. If it’s showing 160°F (71°C) or lower after 10-15 minutes of driving, you’re on the right track.
2. Verify with an Infrared Thermometer: This is crucial. While the engine is warming up, use an infrared (IR) thermometer to measure the temperature of the upper radiator hose right where it connects to the thermostat housing. Compare that physical reading to what your scan tool is showing for the ECT. If the outlet hose is significantly cooler (I’m talking more than a 20°F/11°C difference) than the ECT reading, or if the upper hose warms up very quickly from a cold start, it’s a strong indicator the thermostat is stuck open, allowing coolant to flow prematurely.
3. Check Heater Hoses: With the engine running and hopefully trying to warm up, feel both heater core hoses where they go through the firewall. If the thermostat is stuck open, both hoses will likely be lukewarm because the entire system is running cold. If your inlet hose is hot and the outlet hose is cold, then you’ve got a clogged heater core, not a thermostat problem.
4. Monitor Fuel Trims: If you’re seeing poor fuel economy, pull up your Long Term Fuel Trim (LTFT) data on the scanner. If LTFT is consistently +10% or higher during steady cruising, and your ECT is still below 160°F (71°C), that thermostat is almost certainly the culprit. The ECM is trying to compensate for what it thinks is a cold engine.
5. Look for DTCs: Always check for pending or stored diagnostic trouble codes. A common one for this issue is P0128 – “Coolant Thermostat Rationality.” This code means the ECM has detected that the engine is taking too long to warm up to its optimal operating temperature. While it’s not definitive on its own, it really strengthens the case for a stuck-open thermostat when you combine it with those low ECT readings.
Why They Give Up: The Guts of Thermostat Failure
Thermostats don’t usually just quit cold turkey. It’s typically a slow degradation from wear, chemical exposure, or sometimes just a design flaw. The main components are a wax pellet, a return spring, and the valve mechanism itself. Each has its own way of failing.
The wax pellet is the heart of the thermostat. It’s a sealed chamber with a special wax that expands when heated, pushing the valve open. Over years of constant heating and cooling cycles, that wax can degrade. It loses its ability to expand fully, which means the valve never completely closes. I’ve seen this happen faster with poor coolant quality or if the engine has been severely overheated a few times, essentially “baking” the wax prematurely.
Then there’s the return spring. Its job is to pull the valve closed as the engine cools down. Like any spring, it can weaken over time from fatigue or corrosion, especially if contaminated coolant gets into the housing. A weak spring might not have enough oomph to overcome a sticky valve or that degraded wax, leaving the thermostat perpetually open.
Debris is another big one. I’ve pulled thermostats out that had visible grit, corrosion particles, or even tiny fragments from a failed water pump impeller jammed right in the valve seat. This prevents a full seal, and boom, stuck open. This is often a sign of neglected coolant flushes or mixing incompatible coolants that form sludge.
Physical binding can also be an issue. If someone over-torqued the thermostat housing during a previous repair, it can warp the housing or the valve stem, especially with aluminum components. Severe overheating can also distort things enough to cause the valve to bind. And yes, sometimes it’s just a manufacturing defect. I won’t go into specific TSBs without verifying them, but there are documented cases where certain engines had higher thermostat failure rates due to a batch of wax pellets or a specific design.
It’s important to remember that low coolant levels or air pockets in the system can mimic a stuck-open thermostat by preventing proper operation. But that’s a system issue, not a failed thermostat. Likewise, a faulty ECT sensor sending bad data isn’t a thermostat problem. You’ve got to isolate the component with good diagnostic work.
The Fix: Getting That Engine Up to Temp
There’s no fixing a failed thermostat; you just replace it. How tough the job is depends entirely on where it’s located, and that varies wildly from one vehicle to another.
The DIY-Friendly Thermostat
On most older vehicles, and many newer ones, the thermostat lives in a housing where the upper radiator hose connects to the engine. This is generally a DIY-feasible job if you’re comfortable turning a wrench. Here’s what you’ll need and how I’d approach it:
- Parts: Get the correct replacement thermostat (pay attention to the opening temperature – usually 192°F, 195°F, or 88-90°C), a new gasket or O-ring, and the OEM-specified coolant. Don’t skimp on these.
- Tools: A drain pan, basic sockets and wrenches, a good scraper for gasket surfaces, and critically, a torque wrench.
Start by draining enough coolant to get below the thermostat’s level. Remove the housing, then thoroughly clean both mating surfaces. Any old gasket material left behind is an invitation for a leak. Install the new thermostat with the spring side facing the engine. Most have a small bleed hole or a jiggle pin; make sure this is positioned at the highest point to allow air to escape. Reinstall the housing, using the manufacturer’s specified torque. For example, many Toyota engines are around 15 ft-lbs – overtighten an aluminum housing, and you’ll crack it, turning a simple job into a headache.
Critical Step: Refilling and Bleeding! This is where most DIYers mess up. Follow your car’s manufacturer’s bleeding procedure to the letter. Some systems need a vacuum fill, others have specific bleeder screws, or you might need to elevate the front of the car. Air pockets in the cooling system can cause false overheating, poor heat, and even damage to your water pump. Do NOT skip this step.
The Professional-Only Thermostat
On some modern engines – especially certain V6s or turbocharged four-cylinders – the thermostat is integrated into the water outlet, tucked deep under the intake manifold, or even behind the timing cover. This is absolutely a professional-only repair. It often requires major disassembly, like removing the intake manifold, dealing with multiple gaskets, and sometimes even timing belt or chain work.
On interference engines, where the valves and pistons can collide if the timing is off, improper reassembly can lead to catastrophic engine damage – a mistake that will cost you thousands. If your thermostat is in one of these locations, save yourself the grief and potential disaster; take it to a qualified shop. They have the specialized tools and experience to do it right.
Verifying the Repair: Don’t Just Assume It’s Fixed
Once you’ve got the new thermostat in, don’t just assume the job’s done. Validation is key to making sure everything is working as it should. I always do a few checks:
1. Monitor Warm-Up: Start the engine cold and keep your scan tool hooked up. Watch the live ECT data. The temperature should rise steadily and reach its normal operating range (typically 195–220°F / 90-104°C) within 10–15 minutes of idling, or faster with some light driving. The dash gauge should reflect this, but always trust the scan tool; it’s more accurate.
2. Physical Hose Check: Once the engine is hot and has reached operating temperature, use your infrared thermometer again. The upper radiator hose should be hot, close to your ECT reading. The lower radiator hose, however, should remain significantly cooler until the thermostat fully opens and allows flow through the radiator. As the engine continues to run and the thermostat cycles open, that lower hose should gradually warm up. This confirms the thermostat is closing and opening correctly.
3. Leak Check: After a full heat cycle (engine hot, then cooled completely), give the thermostat housing a good visual inspection for any seepage. The best way to confirm a good seal before you drive it is with a cooling system pressure tester. Hook it up to the radiator cap neck (engine off, cold, and system filled) and pump it up to the system’s rated pressure, usually 16–18 psi. Let it sit for 15-20 minutes. If the pressure holds steady, you’re good to go.
The Bottom Line: Cost, Risk, and When to Walk Away
Here’s a realistic breakdown of what you’re looking at, based on what I see in the field:
| Repair Type | DIY Cost | Shop Cost | Success Rate | Secondary Risk if Failed |
|---|---|---|---|---|
| Accessible Thermostat | $30–$80 (for parts: thermostat, gasket, coolant) | $200–$400 | >95% (if proper bleeding is followed) | Air pockets causing overheating; coolant leaks from overtightened or misaligned housing. |
| Integrated Thermostat | N/A (not recommended for DIY) | $500–$1,500+ (can be much higher on complex engines) | >90% (in professional hands) | Incorrect timing alignment leading to severe engine damage; coolant leaking into oil due to mis-seated gaskets or cracked housings. |
When you start getting shop quotes north of a thousand bucks, you really need to take a hard look at the vehicle’s overall value. My rule of thumb is this: if the repair bill is going to be more than 40% of what the car is actually worth (check Kelley Blue Book or Edmunds for a realistic private-party value), it might not make financial sense to fix it. Consider the car’s general condition, its reliability history, and your long-term plans for it before you commit to a costly repair.
Keeping It Healthy: Prevention and Early Warnings
You can’t completely stop a thermostat from eventually wearing out, but you can definitely extend its life significantly. The biggest mistake I see, hands down, is using the wrong coolant. Always, always follow the manufacturer’s specifications – whether it’s OAT, HOAT, or whatever specific blend they call for. Mixing incompatible coolants is a recipe for disaster; it can form gel or sludge that clogs not just the thermostat, but your entire cooling system. When in doubt, stick to what’s in the owner’s manual or on the OEM coolant bottle.
I also recommend treating the thermostat as a maintenance item. Many manufacturers suggest replacing it during major coolant flush intervals, typically every 5 years or 100,000 miles. Even if it hasn’t failed yet, replacing it proactively ensures a fresh component and a new, leak-free seal.
For early detection, just pay attention to how your car warms up. A healthy, modern engine should reach its operating temperature within about 3–5 minutes of driving in moderate conditions. If it’s taking noticeably longer, grab a basic OBD2 scanner and check for that P0128 code or consistently low ECT readings. Catching a failing thermostat early prevents prolonged cold operation and all the damage that comes with it. A little vigilance goes a long way in saving your engine.
