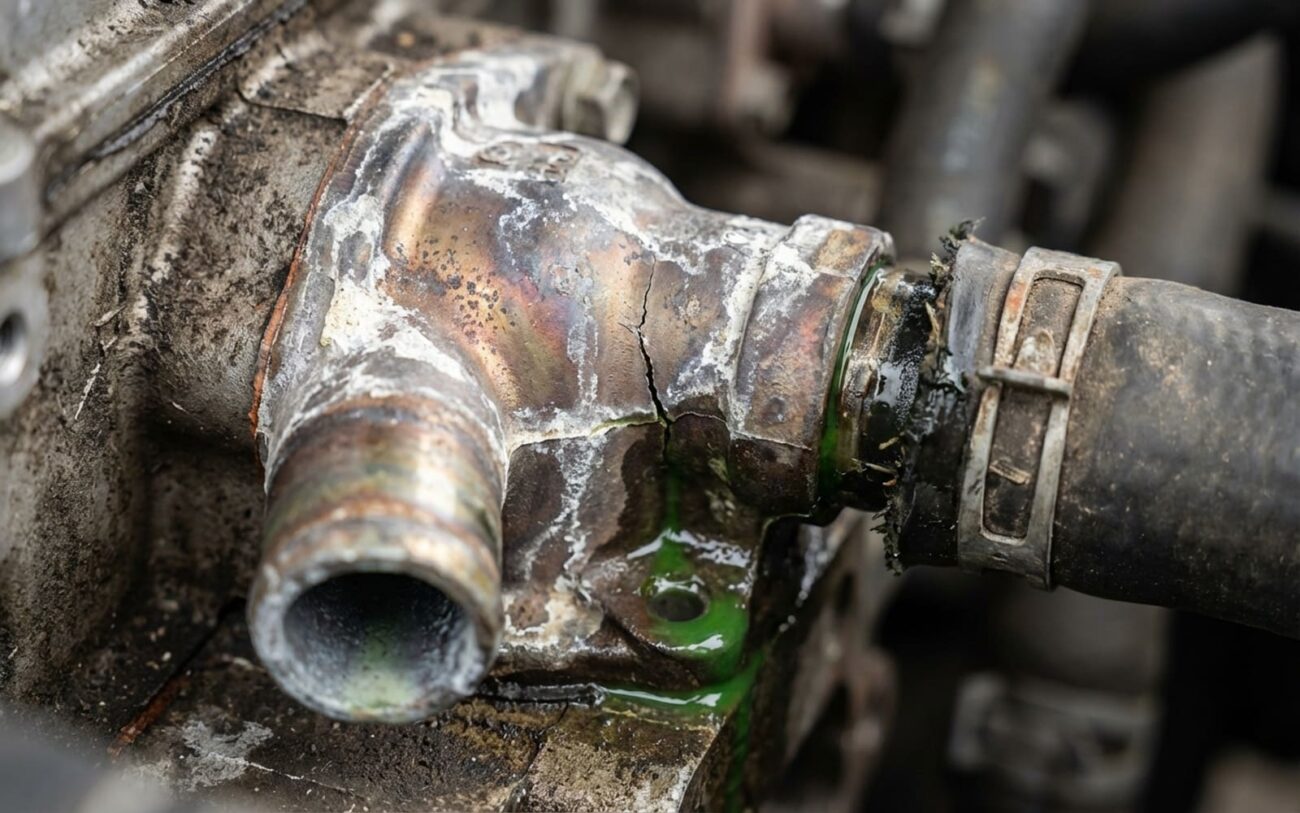
Alright, let’s talk about overheating. When a car rolls into my shop with the temperature gauge buried in the red, or that angry little warning light screaming for attention, my first thought, after making sure there isn’t a river of coolant under the car, is almost always the same: a thermostat stuck closed. It’s a common issue, and honestly, it’s one of the easier ones to diagnose and fix – if you catch it early enough.
The Classic Signs: What I Look For
You see, the thermostat is a pretty simple but critical little valve. When your engine is cold, it stays shut, letting the engine warm up quickly to its optimal operating temperature—usually somewhere between 180°F and 195°F (82°C–91°C). Once it hits that sweet spot, the thermostat opens up, allowing hot coolant to flow out of the engine, through the radiator to cool down, and then back into the engine. It’s a constant cycle. But when that thermostat gets stuck closed, that cycle stops dead. Hot coolant gets trapped in the engine block, and the heat builds fast. Pressure spikes, boiling starts, and you might not even see the gauge move before things are really cooking.
My absolute go-to field test, something you can do with just your hands (carefully!), is checking the radiator hoses. Once the engine is hot and showing signs of overheating (and I mean hot, so use extreme caution – everything’s under pressure and scalding), feel those hoses. The upper radiator hose, the one coming out of the engine and going into the radiator, will be rock-hard and screaming hot. That’s because it’s full of superheated, trapped coolant. Now, feel the lower hose, the one coming out of the radiator and going back to the engine. If the thermostat is stuck closed, that lower hose will be cool, or at best, only slightly warm. That temperature difference is your smoking gun. It tells me, clear as day, that coolant isn’t circulating through the radiator to get cooled down.
You might also see other tell-tale signs: coolant boiling in the overflow reservoir, or even steam billowing from under the hood. Those are all indicators of localized boiling, too much heat trapped where it shouldn’t be.
A Quick Word of Caution: Never, ever open a hot, pressurized cooling system. The steam and scalding coolant can cause severe burns. Let the engine cool completely before attempting any work or even opening the radiator cap.
Is It Really the Thermostat? Ruling Out Other Culprits
While that hot upper hose/cold lower hose test is pretty reliable, I’ve learned over 25 years that nothing is 100% in this business. Jumping to conclusions can cost you time and money, and nobody wants that. So, let’s talk about what else could be going on.
When Both Hoses Are Hot…
Here’s a critical distinction: if your engine is overheating, but both the upper and lower radiator hoses are hot, then your thermostat is likely doing its job – it’s open, or maybe it’s even been removed entirely. In this scenario, the problem isn’t a lack of circulation through the radiator. Instead, I’d start looking at:
- A Failed Water Pump: If the impeller inside the pump is corroded or broken, it won’t move coolant effectively, even if the thermostat is open.
- A Clogged Radiator: Internal blockages, often from old, neglected coolant, can prevent heat transfer. Coolant flows through, but it doesn’t cool down.
- An Inoperative Cooling Fan: If your electric fan isn’t kicking on when it should, or if the fan clutch on a mechanical fan is bad, there’s not enough airflow to cool the radiator.
- Low Coolant Level: This sounds obvious, but sometimes it’s overlooked. If there isn’t enough coolant, the system can’t transfer heat.
- A Faulty Radiator Cap: This is a big one. A weak or bad radiator cap can’t hold the proper pressure in the system. Lower pressure means the coolant boils at a lower temperature, causing overheating even if everything else is working. I’ve seen this catch plenty of folks off guard.
Other Things That Can Mimic a Stuck Thermostat:
Even with the classic hot upper/cold lower hose symptom, there are a few other possibilities:
- A Collapsed Upper Radiator Hose: Sometimes, especially on older hoses, the internal spring (if it has one) can fail, or the hose itself can soften and collapse under the suction of the water pump, restricting flow.
- A Clogged Radiator Inlet: Debris can sometimes block the very entrance to the radiator, effectively acting like a closed thermostat.
- A Seized Water Pump: While less common, if the water pump impeller is completely seized, it won’t circulate anything.
The Really Bad News: Head Gasket Issues
If you see continuous bubbling in the overflow tank (and I mean continuous, not just a little air burping), or if your coolant looks milky, frothy, or like a chocolate milkshake, you might have combustion gases entering the cooling system. That’s usually a blown head gasket, and that’s a whole different ballgame. It requires much more involved diagnostics and repair.
The Definitive Test: Bench Testing the Thermostat
Once you’ve narrowed it down and you’re pretty sure it’s the thermostat, there’s one definitive test I always recommend before you bolt a new one in. And honestly, even for a brand-new part, I do this. I’ve seen too many new parts fail right out of the box.
After you’ve removed the old thermostat (and before installing the new one), get yourself a pot of water on the stove and a digital thermometer. Put both the old and the new thermostat in the water. Heat the water slowly. Watch the thermostats. A properly functioning thermostat should begin to open at its marked temperature (e.g., a 195°F thermostat should start cracking open around 195°F). It should be fully open by about 20–25°F above that. If the old one doesn’t open at all, or the new one doesn’t open correctly, you’ve just saved yourself a lot of headaches. Better to catch a bad part now than after you’ve reassembled everything.
The Fix: Replacing That Thermostat
Replacing a thermostat is, for most engines, a pretty straightforward job. But like anything in automotive repair, there are right ways and wrong ways to do it. Do it wrong, and you’re looking at leaks, air pockets, or even repeat overheating.
- Cool Down First: I cannot stress this enough – let the engine cool completely. Seriously. Opening a pressurized, hot cooling system is a recipe for severe burns.
- Drain the Coolant: Once it’s cool, place a clean drain pan under the radiator petcock (if your radiator has one) or under the lower radiator hose. Drain enough coolant so the level is below the thermostat housing. If your coolant looks clean and isn’t old or rusty, you can reuse it. Otherwise, this is a good time for a flush.
- Locate and Remove: The thermostat housing is usually where the upper radiator hose connects to the engine, often bolted to the intake manifold or cylinder head. Remove the hose clamp and the hose, then unbolt the housing. Carefully pull out the old thermostat.
- Orientation is Key: This is where a lot of DIYers go wrong. Take note of how the old thermostat was oriented. The spring-loaded or wax-pellet end (that’s the sensing element) must face into the engine. Installing it backward means it won’t sense engine temperature correctly, and it won’t open.
- Clean Those Surfaces: Before you put anything back, thoroughly clean both the thermostat housing and the engine mating surface. Any old gasket material, corrosion, or debris will cause a leak. I use a plastic scraper or a Scotch-Brite pad – never a wire brush on aluminum, it can score the surface.
- New Gasket, Always: Always, always use a new thermostat gasket or O-ring. Don’t even think about reusing the old one. Even slight compression or distortion will compromise the seal.
- Install the New Thermostat: Place the new thermostat in its proper orientation. Then, install the new gasket/O-ring.
- Reassemble and Torque: Reinstall the housing, making sure to torque the bolts evenly and to specification. Overtightening can crack the housing or strip threads. Reconnect the radiator hose securely.
- Refill and Bleed: Refill the cooling system with the correct coolant-to-water ratio. This is the crucial part: you need to purge air from the system. Every manufacturer has a slightly different procedure – some require the heater to be on full blast, some need the front end of the car raised, others have specific bleed screws. Follow your vehicle’s service manual. Air pockets can cause false overheating, hot spots, and poor heater performance.
- Monitor and Test Drive: Start the engine with the radiator cap off (or the overflow tank accessible). Let it warm up. You’ll see coolant start to circulate when the thermostat opens, and the upper hose will get hot. As the system burps out any remaining air, top off the coolant to the proper level. Once the level is stable, reinstall the cap and take it for a test drive, keeping a close eye on that temperature gauge.
WARNING: Don’t Drive It! The Real Cost of Ignoring Overheating
Look, I’m going to be blunt here: if your engine is overheating because of a stuck thermostat, continuing to drive it is one of the fastest, most guaranteed ways to absolutely destroy an otherwise perfectly good engine. I’ve seen it countless times. The damage isn’t gradual; it can happen in a matter of minutes.
Modern engines, especially those with aluminum cylinder heads, are incredibly vulnerable to excessive heat. That heat will cause the cylinder head to warp, which in turn breaks the seal of the head gasket. Once that head gasket is compromised, coolant can leak into the combustion chambers, or worse, into the oil passages. Coolant in your oil creates a milky, frothy emulsion that pretty much instantly destroys engine bearings. If enough coolant gets into a cylinder, you’re looking at hydrolock – where the piston tries to compress an incompressible liquid, leading to bent connecting rods or cracked pistons. That’s a full engine rebuild, or a new engine entirely.
Even if you avoid a catastrophic failure, chronic overheating accelerates wear on every single engine component. Pistons expand too much and scuff cylinder walls. Valve guides and seals degrade rapidly. Your engine oil breaks down under extreme heat, losing its lubrication properties, which leads to premature bearing wear. What starts as a relatively cheap fix – maybe $150 for a thermostat, gasket, and some coolant – can very quickly spiral into a multi-thousand-dollar engine rebuild or replacement. There is absolutely no scenario where “limping it home” is worth that risk. If that gauge hits red, shut the engine off immediately and call for a tow. Period.
Beyond the Repair: Keeping Your Cooling System Healthy
In a true emergency, say you’re stranded miles from anywhere and only a mile from a shop, some folks might consider removing the thermostat entirely to get some coolant flow. I’ll admit, I’ve done it in a genuine pinch, but it’s a desperate last-resort gamble, not a fix. Without a thermostat, your engine may never reach its proper operating temperature, especially in cooler weather. That leads to poor fuel economy, increased emissions, and accelerated cylinder wear because cold engines run rich, washing down cylinder walls and contaminating the oil. Plus, you still have to safely drain hot, pressurized coolant to get to the housing, which is dangerous.
The bigger lesson here, in my experience, is that a failed thermostat often points to a deeper issue: neglect. Old, degraded coolant loses its anti-corrosion properties over time. This leads to rust, scale, and gunk building up in the system, which can seize thermostats, clog radiators, and wear out water pumps. When you’re replacing a thermostat, it’s the perfect opportunity to give the entire cooling system a thorough once-over. Check all your hoses for softness, cracks, or swelling. Test your radiator cap to make sure it’s holding pressure. And if your coolant hasn’t been changed in five years or 100,000 miles, seriously consider a full coolant flush. Preventive maintenance—regular coolant changes, inspecting hoses, and addressing any signs of trouble early—is what keeps engines running strong for 200,000 miles and beyond. Don’t wait for that warning light to come on; stay ahead of it.
