That Steering Wheel Shake: What It Really Means
That rhythmic shake in your steering wheel, especially when you hit the brakes? Yeah, I hear it all the time. Most folks immediately jump to “warped rotors,” and honestly, it feels like that’s what it is. That pulsation, getting worse the harder you brake or the faster you’re going—it screams “rotor problem.” And usually, that direct mechanical feedback right through the steering system does point to an issue with the front brake rotors. It’s the pads clamping down on a surface that isn’t perfectly flat or uniform, creating that shudder.
You’ll notice it scales with speed and brake pressure. A light tap at 20 mph might be a faint shudder, but a firm stop from 65 mph can make the whole wheel oscillate pretty aggressively. It’s not random noise; it’s your car telling you something’s off.
BRAKE SYSTEM FEEDBACK
TIR: 0.006″
But hold on a second. After 25 years in the shop, I can tell you: it’s not always just the rotors. That’s the easy answer, and it’s where a lot of people—and even some less experienced techs—go wrong. I’ve had countless customers come back after a “rotor swap” with the exact same shake. Why? Because the real problem was something else entirely, just mimicking a bad rotor.
How I Diagnose It: No Guessing
So, how do you actually figure out what’s going on? You gotta test it. No guessing. To fix this correctly, you need to confirm whether the rotor is truly at fault or if something else is throwing it off. The key is understanding how symptoms differ based on root cause.
| Symptom | Usually Points To | Common Mimics | My Go-To Test |
|---|---|---|---|
| Steering wheel vibration during braking | Rotor thickness variation or lateral runout (what people call “warp”). | Sticking caliper, uneven pad deposits, loose wheel bearing, or even worn ball joints. |
Measure lateral runout (>0.002″) and thickness variation (>0.0005″) right on the car with a dial indicator and micrometer. |
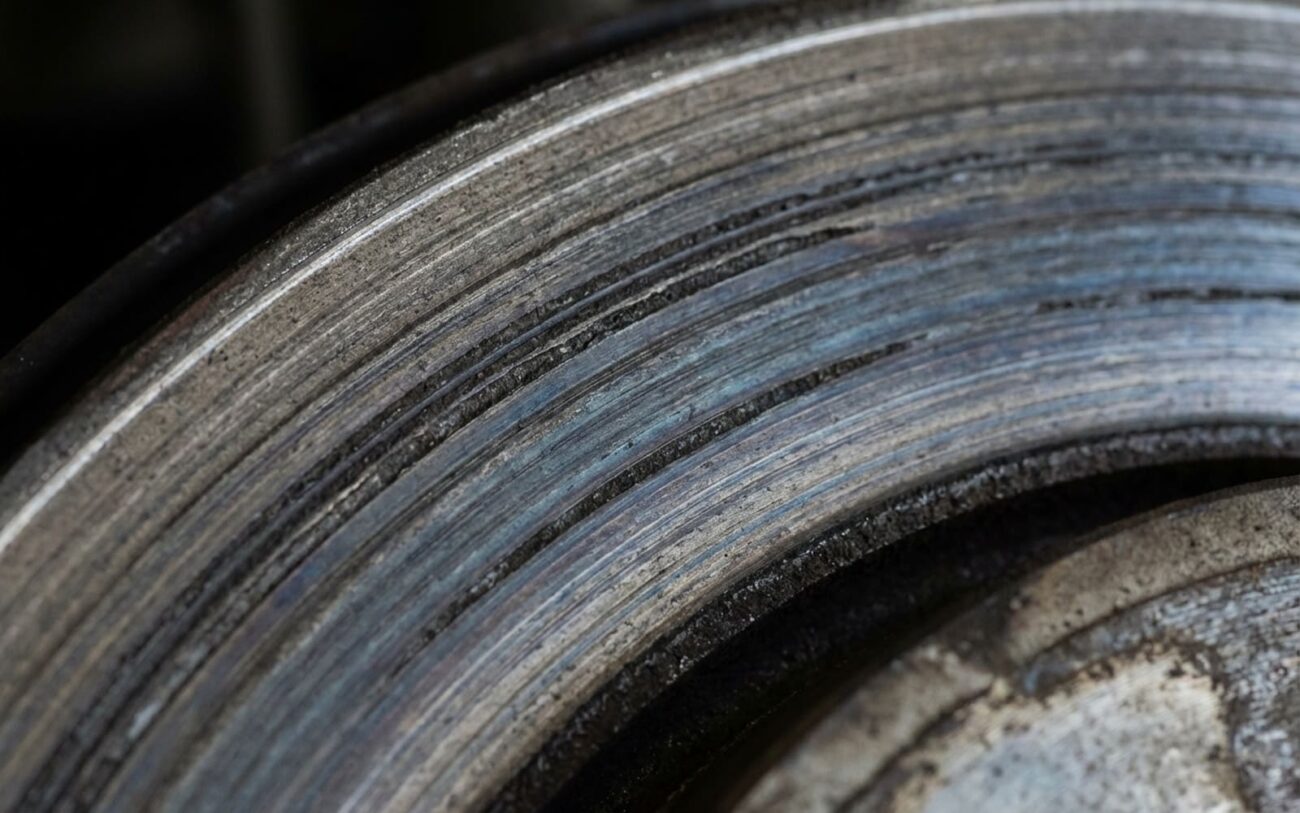
First, a good visual inspection. Take the wheel off, look at the rotor face. See any deep grooves, hairline cracks, or those tell-tale “blue spotting”? Those bluish patches are a dead giveaway for overheating, which is often the precursor to rotor issues.
But the real diagnostic gold standard? That’s a dial indicator and a micrometer. These measurements are crucial. Lateral runout tells you how much the rotor wobbles side-to-side as it spins. You mount the indicator to a solid point on the suspension, put the tip on the rotor’s friction surface, and slowly rotate the rotor. We’re talking tiny tolerances here—anything over 0.002 inches of runout is usually enough to cause a noticeable pulsation. On some high-performance cars, even less. Thickness variation (also called parallelism or TIR) is just as important. You use a digital micrometer to measure the rotor thickness at multiple points around its circumference. If one spot is thinner than another, even by a tiny amount (like 0.0005 inches), the caliper piston has to move in and out with each rotation, and that’s what you feel as a pulsation.
And remember, a tire imbalance will shake your steering wheel at a steady speed, not just when you’re braking. So if it’s only under braking, you can usually rule out the tires. For more on distinguishing steering noises, see: Steering Wheel Knocking When Turning.
Why Rotors Go Bad (The Real Root Causes)
Okay, so you’ve confirmed the rotor is the problem. But why did it go bad? It’s usually a combination of heat, stress, and plain old wear. When you hit the brakes, especially hard, those rotors get hot. Really hot. They expand, and then they cool. If that cooling happens unevenly—maybe a caliper’s dragging, or there’s not enough airflow—the rotor can actually retain a slight warp. I’ve also seen extreme heat change the metal itself, creating super-hard spots (called martensite) that wear differently than the rest of the rotor, leading to uneven surfaces.
The “MIN THK” Rule:
And don’t forget the “Min Thk” rule. Every rotor has a minimum thickness stamped right on it. Once it wears past that, it just doesn’t have enough mass to absorb and dissipate heat properly. Thin rotors overheat faster, warp easier, and are a lot more prone to cracking. I’ve measured rotors that were 0.020 inches below spec—no wonder they were shaking like a leaf!
Sometimes, though, it’s just a bad part. I’ve pulled brand-new, budget aftermarket rotors right out of the box that had runout. It’s rare, but it happens. Even OEMs like GM have put out service bulletins about steering vibration from rotor runout, often specifying that 0.002 inches is the absolute maximum allowable.
The Fix: What Works and What Doesn’t
Precision Matters
If you’re going to machine rotors, it has to be done on the car. Mounting a rotor on a bench lathe doesn’t fix a misaligned or corroded hub, and that hub runout will just transfer to your “flat” rotor. This requires specialized tooling and strict adherence to torque specs.
Rotor Machining (Resurfacing) Professional Only
Rotor & Pad Replacement DIY Feasible
Controlled Bedding Cycle Temporary Only
Post-Repair Validation: Don’t Skip This
You’ve done the work, but the job isn’t done until you’ve confirmed it. Never assume the job is done once the parts are installed.
For machined rotors, take the car for a test drive and replicate the original conditions—braking from highway speeds. The vibration should be completely gone. For replacements, inspect the rotor surface after bedding; you should see a uniform, matte-gray transfer layer across the entire friction face.
Pro Tip: Thermal Check
This is one of my go-to post-repair checks. After a good test drive, pull the car back in and immediately grab your infrared pyrometer. Measure the temperature of both front rotors. They should be within 50°F (28°C) of each other. If one is significantly hotter, you’ve got a problem—likely a dragging caliper—and that vibration will come back.
Cost & The Hard Truth About Repairs
| Repair Type | DIY Cost (Parts) | Shop Cost (Est.) | My Success Rate | Secondary Risk |
|---|---|---|---|---|
| Rotor Machining (On-Car) | N/A (Specialized Tool) | $100–$200 per axle | High (If rotors are thick enough) | Vibration returns if rotors were too thin or hub wasn’t cleaned. |
| Rotor & Pad Replacement | $150–$400 | $300–$600 per axle | Very High | Low, but only if bedded correctly. |
Let’s talk money, because that’s always a factor. In my book, replacement is almost always the better long-term call, especially with how thin and lightweight modern rotors are designed. They just don’t have the meat to be machined multiple times. And here’s a gut check: if the total cost of the brake job starts creeping up to 40% or more of what your car is actually worth, it’s time to seriously consider if you’re throwing good money after bad.
Prevention & Keeping Your Brakes Happy
My Maintenance Checklist
-
Flush Brake Fluid: This is huge and often overlooked. Brake fluid absorbs moisture over time, which lowers its boiling point. When it boils, you lose braking efficiency, and that extra heat can lead to rotor warpage. I recommend flushing with DOT 4 or 5.1 fluid every 2–3 years.
-
Routine Visual Checks: Every time you rotate your tires (which should be every 5,000–7,500 miles), take a good look at your rotors. Are there deep grooves? Any hairline cracks? Heavy rust? Catching these early can save you headaches later.
-
Track Thickness: If you’re handy, grab a digital micrometer and measure your rotors periodically. Most rotors wear about 0.001–0.003 inches per 10,000 miles. Knowing where you stand relative to that “Min Thk” stamp helps you plan for replacement before you ever feel a pulsation.
