That Pulsing Brake Pedal: What It’s Really Telling You
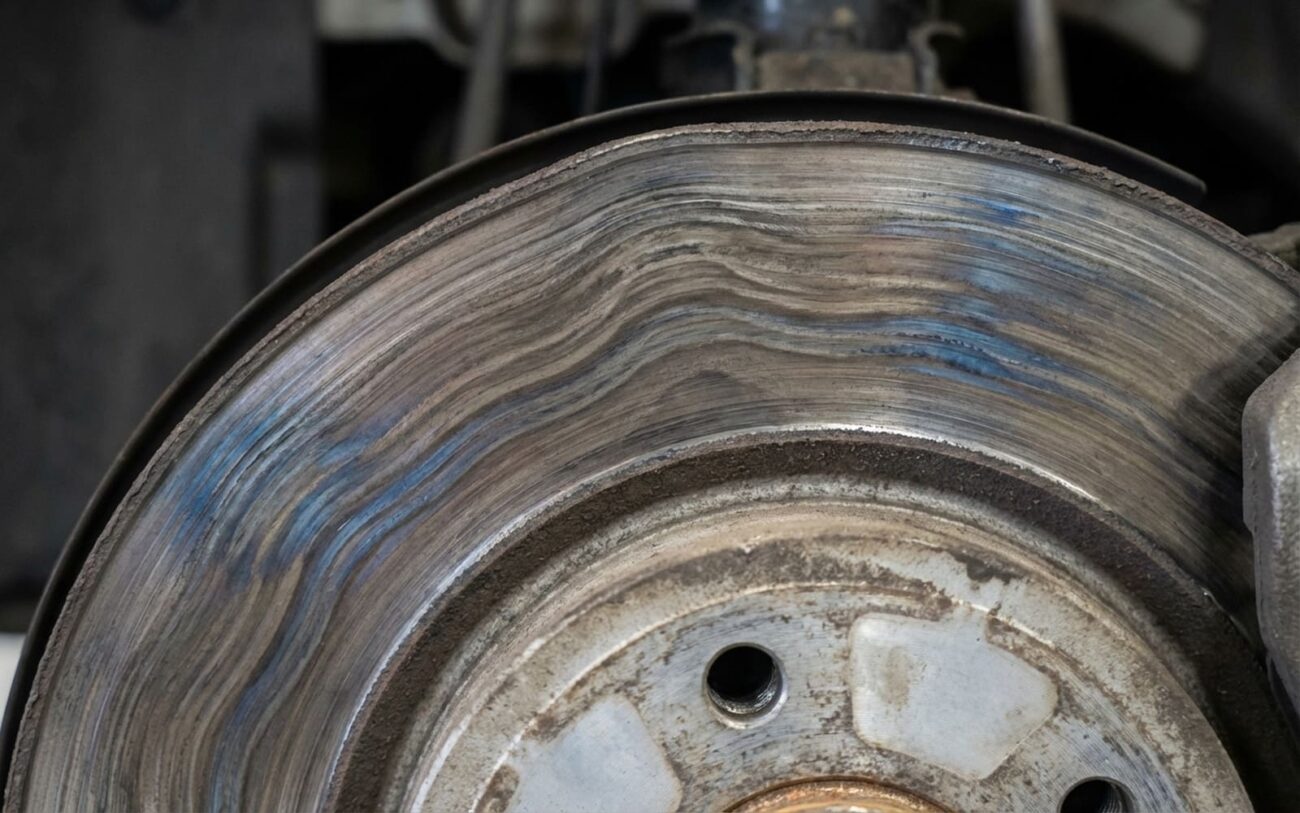
When a customer rolls into my shop complaining about a pulsing brake pedal, my first thought usually goes to the rotors. After 25 years under the hood, I’ve seen it enough times to know the drill. That rhythmic thump, thump, thump you feel through the pedal when you’re slowing down? That’s the classic sign your rotors aren’t perfectly flat anymore.
If it’s up front, you’ll often feel the steering wheel start to shimmy and shake, almost like it’s got a mind of its own, but only when you’re on the brakes. Rear rotor issues are a bit more subtle – you might feel a low-frequency vibration through the floorboards or the seat of your pants. It’s not just annoying; it’s your car telling you something’s off, and it’s usually a sign that the brake pads are fighting against an uneven surface.
The Concept
I’ve always told folks to think of it like a record player with a warped vinyl: the needle just can’t track smoothly, right? It jumps and skips. That’s pretty much what your brake pads are doing on an uneven rotor.
See, what we’re really talking about here isn’t necessarily “warped” in the sense of a pretzel. It’s usually one of two things: either the rotor is wobbling a bit as it spins (we call that lateral runout), or it’s got thick and thin spots around its circumference (that’s disc thickness variation, or DTV). Both cause the same headache: the caliper clamps down, hits a high spot, pushes the pad back, and that hydraulic feedback goes straight to your foot. Left alone, this just grinds down your pads unevenly, kills your stopping power, and puts extra stress on your whole brake system.
Is It Really a Warped Rotor, or Something Else?
Now, here’s where experience really kicks in. I can’t tell you how many times a customer has walked into my shop, convinced their rotors are “warped,” only for us to find something else entirely. It’s easy to jump to conclusions because a lot of brake issues feel similar. And believe me, guessing can cost you a lot of time and money.
The most common imposter? We call it pad material transfer, or sometimes “glazing.” This happens when friction material from the brake pad gets deposited unevenly onto the rotor surface. It creates high spots that feel exactly like a warped rotor, but the metal itself is perfectly flat. It’s just got gunk stuck to it.
So, how do we tell the difference? We don’t guess. We measure. Here’s a quick breakdown of what symptoms point where, and how we actually confirm it:
| Symptom | Likely Rotor Issue | Common External Mimics | How I Confirm It |
|---|---|---|---|
| Brake Pedal Pulsation | Excessive lateral runout or DTV in the rotor. That’s the real deal. | But don’t rule out uneven pad deposits (glazing), caliper slide pins that are seized up, or just pads that are worn unevenly. |
Grab a dial indicator for runout, and a micrometer for DTV. Check at 8-12 points around the rotor. We’re looking for specs, usually under 0.002 inches for runout, but always check your service manual. |
| Steering Wheel Shimmy during braking | Classic sign of front rotor lateral runout being way out of spec. | Could also be a wheel/tire imbalance, worn ball joints, shot control arm bushings, or even a tire with conicity (a fancy word for a tire that’s not perfectly round). |
Runout test, but here’s the kicker: do it with the wheel mounted and the lug nuts torqued to spec. I’ve seen runout disappear once the wheel is off, only to come back when it’s bolted down wrong. |
| Vehicle Vibration in seat/floor during braking | Usually rear rotor runout or DTV. It’s the same principle, just further back. | For rear-wheel drive vehicles, don’t forget driveshaft imbalance or worn U-joints. And a failing rear wheel bearing can mimic this too. |
Check rear rotor runout and DTV, just like the front. If it’s a RWD, I’ll always give the driveshaft and U-joints a good look-over. |
Why Rotors Go Bad (It’s Not Always “Warping”)
Alright, so if it’s not just pad transfer, what actually causes a rotor to go bad? True rotor warping – where the metal itself deforms – almost always comes down to thermal stress. I see this a lot on trucks that tow heavy loads, or cars driven hard in hilly country, or even just aggressive drivers who are always slamming on the brakes.
When you’re constantly making hard stops, those rotors absorb a tremendous amount of heat. They glow red sometimes. The real problem starts if you then come to a complete stop and just sit there with your foot on the brake pedal. Those hot pads are clamping down in one spot, trapping all that heat, and it can’t dissipate evenly. That localized overheating makes the metal expand unevenly, and over time, it just can’t spring back to its original flat shape.
The Lug Nut Factor:
And here’s a silent killer that most people overlook: lug nut torque. I’ve measured brand-new rotors, perfectly flat from the factory, get distorted to 0.006 inches of runout just because someone hit the lug nuts with an impact gun in the wrong sequence or over-torqued them like crazy. It pulls the rotor off its true seating surface on the hub. So, always, always use a torque wrench and follow the correct star pattern when putting wheels back on. It’s not just for safety; it’s for your brake longevity.
How I Fix It: Machine, Replace, or a Quick Trick
So, you’ve diagnosed the problem. Now what? You’ve got a few options, depending on how bad things are.
On-Car Lathe is Critical
First, let’s talk about machining, or “turning” the rotors. This isn’t a DIY job for most folks. You need an on-car lathe. And I mean on-car. Why? Because an on-car lathe cuts the rotor true to its actual axis of rotation, right there on the vehicle. If you take the rotor off and put it on an off-car lathe, you might get it perfectly flat on the machine, but then when you bolt it back onto the hub, if the hub itself has any runout, you’re right back where you started. I’ve seen it happen too many times.
Machining (Resurfacing) Professional Only
Full Rotor Replacement
Controlled Burnishing (The Trick)
Making Sure the Job Is Done Right (and How to Keep It That Way)
Alright, you’ve done the repair. But the job isn’t done until you verify it. This is where a lot of shops cut corners, and it drives me nuts. If you’ve machined the rotors, you must remeasure both lateral runout and DTV. Just because it looks smooth doesn’t mean it’s true. I’ve seen perfectly shiny rotors still be out of spec. And then, the road test. Take it out and make 5 to 10 moderate stops from around 35 mph, and then another few from 60 mph. The pedal should feel solid, smooth, and consistent. No pulsation, no shimmy.
How to Keep Your Rotors Straight for the Long Haul
-
Don’t ride the brakes downhill. Use engine braking or downshift on long descents. Save your brakes for when you really need them.
-
After you’ve been driving aggressively or doing a lot of heavy braking, try to avoid sitting with your foot on the brake pedal at a stoplight. Let the rotors cool down evenly. That trapped heat is what causes a lot of the issues.
-
Match your brake pads to your driving style. If you’re just a daily commuter, you don’t need track-rated pads that might glaze up easily. And if you are driving hard, get pads designed for it.
-
Always, always perform a proper pad bed-in procedure after installing new pads or rotors. This transfers a uniform layer of friction material to the rotor, which is critical for smooth braking and preventing material transfer issues.
The Cost of Getting It Smooth Again
So, what’s this going to cost you to get things smooth again?
| Repair Type | DIY Cost (Parts Only) | Shop Cost (Parts & Labor) | Success Rate | Secondary Risk if Failed |
|---|---|---|---|---|
| Machine Rotors | $0 – $100 (if you can borrow or rent an on-car lathe, which is rare) | $25 – $50 per rotor (plus labor for R&R) | 85–95% (depends on initial condition and tech skill) | Machining below minimum thickness, which means you’ll need new rotors anyway, and it’s dangerous. |
| Replace Rotors (Front) | $150 – $400 (for parts only, per axle) | $300 – $700 (parts and labor, per axle) | ~98% (if done correctly with proper bed-in) | Recurrence if you don’t address things like over-torqued lug nuts, seized caliper slide pins, or bad driving habits. |
Just a quick note: if you’re hearing a whining noise when turning or seeing fluid leaks, that’s a power steering issue, not a brake rotor problem. But worn suspension components can definitely affect how your brakes feel, so don’t skip a thorough inspection of those too.
Reality Check
And here’s a reality check I give to a lot of my customers: if the total cost of replacing your rotors and pads is starting to creep up towards 40% of what your car is actually worth on the private market, it’s time to seriously weigh this repair against other potential problems. Are your suspension components shot? Is the water pump about to go? Sometimes, it just makes more financial sense to put that money towards a newer, more reliable vehicle.
