That Annoying Brake Pedal Pulse: Let’s Figure Out What’s Really Going On
Alright, let’s talk about that rhythmic thumping or sharp buzzing you feel in your brake pedal when you slow down. I’ve been turning wrenches for over 25 years, and this is one of the most common complaints I hear in the shop. The kicker? It’s also one of the most commonly misdiagnosed issues out there.
See, the pedal pulse can come from two completely different places: your mechanical brake components – think rotors and calipers – or your electronic Anti-lock Braking System (ABS). You mix those up, and you’ll be replacing perfectly good rotors when the real problem is a faulty sensor. I’m going to walk you through how I diagnose this, so you can get it right the first time, every time.
The trick is understanding the frequency and correlation. Mechanical issues usually follow wheel speed directly. ABS issues? They’re often high-frequency, rapid-fire pulses that can happen independently, triggered by the electronic control module.
Reading the Pedal: Mechanical vs. Electronic
I always tell my apprentices, “The brake pedal is your stethoscope.” The rhythm and feel tell you exactly what’s going on. This isn’t guesswork; it’s pattern recognition you build up over years.
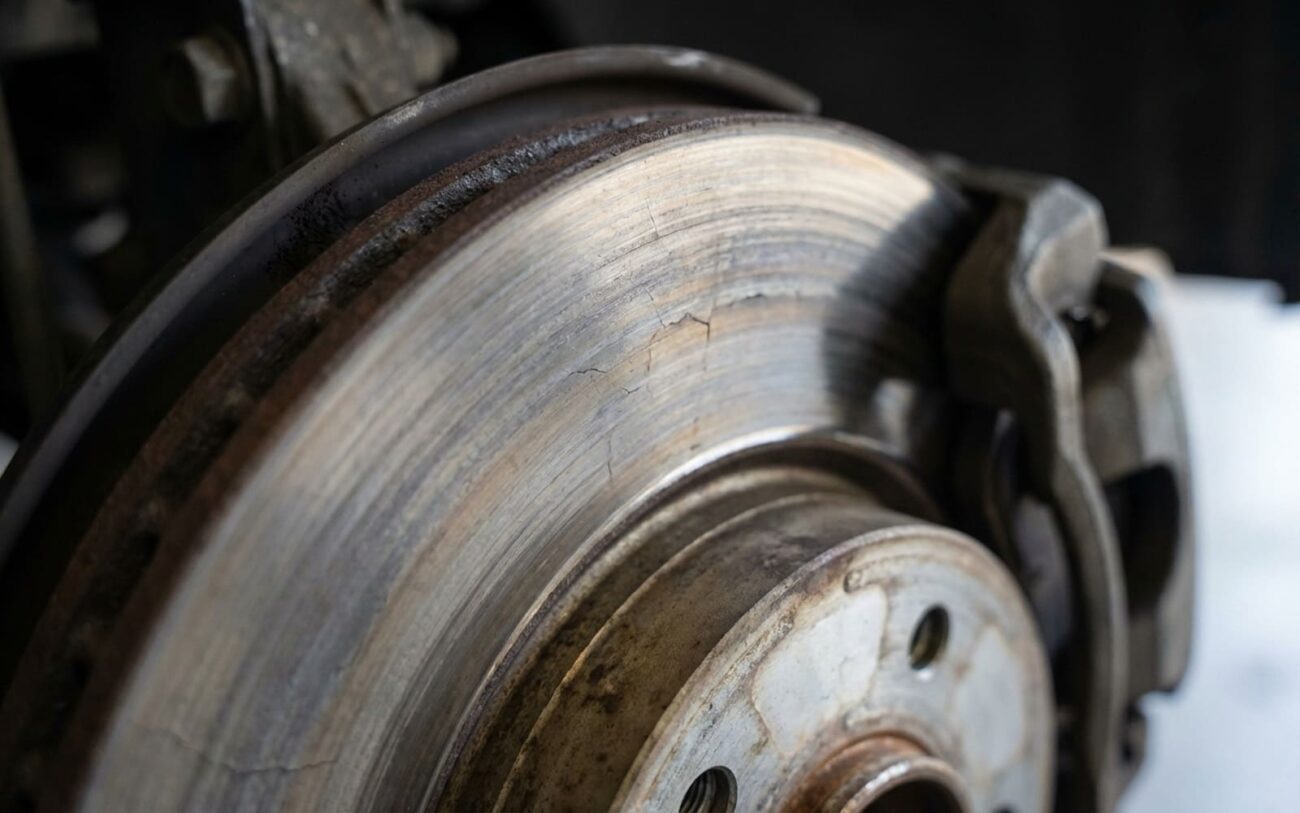
If you’ve got a slow, steady thumping that gets stronger the harder you press the pedal, and it fades as you come to a complete stop – especially if you also feel it shaking the steering wheel – you’re almost certainly looking at a mechanical issue. We call this lateral runout or disc thickness variation (DTV). What’s happening is the uneven surface of the rotor is pushing back against the brake caliper every time it passes under the pad. That force travels right up the hydraulic line and into your foot. It’s the classic “warped rotor” feeling, though as we’ll discuss, “warped” isn’t quite the right word.
Now, if the pedal feels like it’s vibrating rapidly, almost like a jackhammer, sometimes with a groaning or clicking noise from the wheel well or under the dash, that’s typically the ABS module cycling. This is normal if you’re on ice, gravel, or making a hard stop that actually locks up a wheel. But if it’s happening on dry pavement at low speeds, or even moderate speeds, that’s a problem. That’s a system fault, a false activation. The key difference here? Rotor pulsation follows wheel speed; ABS chatter is an electronic event, controlled by the brake control module, and usually much faster and more aggressive.
Differential Diagnosis: Cutting Through the Noise
Before you start pulling wheels or hooking up a scan tool, you’ve got to rule out the mimics. I’ve seen plenty of folks chase brake issues only to find out it was something else entirely. A severely out-of-balance tire, for instance, can cause vibrations that feel a lot like brake pulsation, especially at highway speeds. And a failing wheel bearing? That introduces axial play that can exaggerate rotor runout or even trick an ABS sensor into thinking a wheel is slipping.
Here’s how I break it down in the shop to avoid chasing ghosts:
| Symptom | Likely Culprit | Common Mimics | My Definitive Test |
|---|---|---|---|
| Rotational-speed pedal pulse during all braking | Brake rotor lateral runout or DTV | Severely unbalanced tire/wheel; worn wheel bearing with axial play |
Measure rotor lateral runout with a dial indicator (spec is usually ≤ 0.005″). Check DTV with a micrometer (spec is ≤ 0.0005″). |
| High-frequency pedal buzz/kickback, especially on dry pavement | ABS malfunction (false activation) | Faulty wheel speed sensor; damaged tone ring; wiring damage; air in ABS unit |
Use a good scan tool to read live wheel speed data. All wheels should report within 1–2 mph of each other at steady speeds. |
Getting to the Root Cause
When you’ve pinpointed the rotors, it’s rarely about getting a “bad” part. I’ve seen perfectly new rotors “warp” within days because of one simple mistake: incorrect lug nut torque. Rotors don’t usually bend like potato chips; what happens is they develop hard spots from uneven heat transfer or micro-distortions from improper lug nut sequence. This creates thickness variation (DTV) that you feel as a pulse. It’s all about how the heat is managed and how the rotor is mounted.
For ABS issues, the root cause is almost always signal corruption. The most common culprit I see is the wheel speed sensor. These are pretty simple magnetic pickups, but road grime, metal shavings, or impact damage can change the air gap or mess up the internal coil. A cracked or chipped tone ring – which is often part of a CV axle or hub assembly – can cause intermittent signal loss. And in some older vehicles, moisture getting into the ABS module can lead to solder joint fatigue or pump motor failure. Those module failures are usually a bigger headache, and a bigger bill.
Fixing It Right: Resolution Pathways
Once you know what’s wrong, you need to know how to fix it without creating new problems. Some of these jobs are DIY-friendly, but others really need specialized tools and knowledge.
Professional Territory Only
Things like on-car machining or ABS module programming require specialized precision lathes and factory-level scan tools. These aren’t your typical garage DIY projects.
On-Car Rotor Machining Professional Only
Rotor & Pad Replacement DIY Friendly
ABS Component Repair Mixed Difficulty
Post-Repair Validation: Don’t Skip This!
You’ve done the work, now you need to prove it. After replacing or machining rotors, you need to road test properly. I like to accelerate to about 50 mph and make five firm, but not panic, stops down to 10 mph. Make sure you allow the rotors to cool a bit between stops. The pedal should feel smooth as silk throughout. If you still feel a pulse, check for a sticking caliper or residual runout. You can also use an infrared thermometer after a moderate stop; the surface temperature should be consistent across the rotor face, usually within 50°F.
For ABS repairs, a simple test drive isn’t enough. First, clear any codes, then use your scan tool to verify no pending faults return. Monitor live data: all four wheel speeds must match within 1–2 mph at steady cruising speed. Then, if you can find a safe, low-traction surface – like a wet, empty parking lot – perform a controlled panic stop to actually trigger the ABS. You need to feel that familiar chatter to confirm it’s working as designed, not falsely activating.
Cost, Risk & Making the Right Call
Understanding the potential costs and risks helps you make an informed decision, especially when you’re deciding between DIY and the shop. Here’s a general idea of what I see:
| Repair Type | DIY Cost (Parts) | Shop Cost (Parts & Labor) | Typical Success Rate | Secondary Risk |
|---|---|---|---|---|
| Front Rotors & Pads | $250–$400 | $500–$800 | 98% | Pulsation returns if lug torque is incorrect. |
| Wheel Speed Sensor | $80–$150 | $250–$400 | 95% | Misdiagnosis (could be tone ring vs sensor). |
| ABS Control Module | $800–$1500 | $1200–$2200 | 90% | Improper coding can disable the system. |
Prevention & Monitoring: Keep It Smooth
An ounce of prevention is worth a pound of cure, especially with brakes. Here are a few things I always recommend to keep that pedal feeling smooth:
My Proactive Maintenance Checklist
-
Manage Heat: After a hard stop, don’t sit there with your foot on the brake. Shift to Park and use your parking brake. This prevents localized heating that can cause those hard spots on the rotor.
-
Torque Correctly: I can’t stress this enough. Never use an impact gun without a torque stick, and always, always finish with a calibrated torque wrench in a star pattern. This is probably the biggest cause of repeat pulsation I see.
-
Clean Sensors: Any time you’re doing a brake job, take a moment to wipe down the wheel speed sensor tips. Metal debris can stick to them and mess with the signal.
-
Inspect Tone Rings: Give those tone rings a good look for missing teeth or cracks, especially if you’ve recently replaced a CV axle or hub assembly. They’re fragile sometimes.
Early Warning Signs
A slight steering wheel shimmy during light braking at highway speeds is often the first hint that DTV is developing. Catch it early – a $120 sensor is a lot cheaper than a $1,500 ABS module replacement.
