Alright, let’s talk about that dreaded ABS or ESP light. You know the one—either the “ABS” text or that little icon of a car doing a skid. When it pops up, most folks figure it’s just some flaky electrical thing, maybe a sensor acting up. And yeah, sometimes it is. But after twenty-five years wrenching on cars, I can tell you that light is often screaming about something a lot more fundamental: a bad wheel hub bearing.
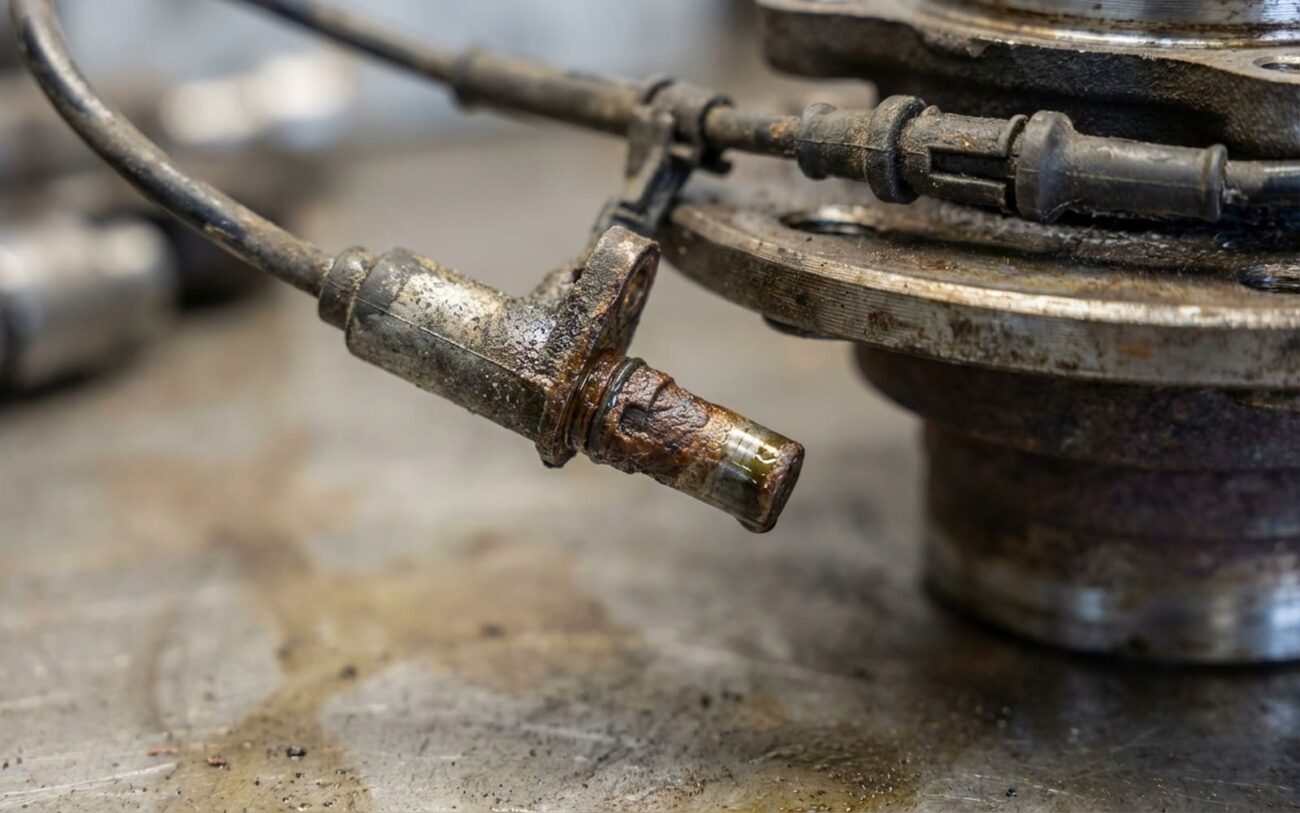
See, your vehicle’s ABS and traction control systems are super smart, but they’re also super sensitive. They rely on constant, precise data from wheel speed sensors at each corner. These sensors read a special magnetic ring, called a reluctor or tone ring, that’s built right into the wheel hub. It’s like a speedometer for each wheel, updating dozens of times a second. If that signal gets wonky, the computer throws its hands up, disables the system, and lights up your dash.
You’ll typically pull a diagnostic trouble code (DTC) like C0035 (right front wheel speed sensor circuit malfunction) or C0040 (left front), which points directly to a specific wheel speed sensor circuit. Now, these codes can mean a bad sensor or wiring, but what I’ve found time and again is that the sensor itself is fine; it’s the bearing that’s causing the trouble.
ABS SYSTEM MONITOR
Status: C0035 / C0040
When a wheel bearing starts to wear out, it develops internal play. This tiny bit of wobble in the hub directly affects the air gap between the sensor and that reluctor ring. The sensor can’t get a clean, consistent signal—it sees erratic spikes or even complete dropouts. The computer interprets this as a sensor malfunction, but the real issue is the mechanical integrity of the hub.
My Take
“It’s not just a mechanical part anymore; in modern vehicles, it’s an integrated system component. When it wears, it doesn’t just make noise—it directly interferes with the sensor’s ability to read the road. Think of it like a wobbly record player trying to play a perfect song.”
Beyond the warning light, a failing wheel bearing often gives itself away with noise. Most drivers report a low-frequency growling or humming sound that gets louder as you speed up. You might also notice it intensifies when you turn—for example, a right-side bearing often gets louder when you turn left, because that shifts the vehicle’s weight onto the outer wheel. This noise comes from the internal rollers grinding over pitted or worn raceways inside the bearing. But here’s the kicker: not all failing bearings make noise. Some can be quiet as a mouse while still having enough internal play to mess with the ABS signal. So, you can’t rely on sound alone.
My Diagnostic Approach: Pinpointing the Problem
So, you’ve got an ABS or ESP light, maybe a code, and potentially that tell-tale hum. Your first step, always, is to confirm which wheel is acting up. The DTC will usually point you right to the corner, like “Right Front Wheel Speed Sensor Malfunction.” That’s your starting point. From there, I follow a pretty consistent process to rule things out and confirm it’s the bearing.
Step 1: The “12 and 6” Rock Test (The Gold Standard)
This is my go-to physical check. Jack up the vehicle so the affected wheel is off the ground. Grab the wheel firmly at the 12 o’clock and 6 o’clock positions (top and bottom). Now, try to rock it in and out. If you feel any detectable play—even a tiny bit—that bearing is bad. Period. That movement directly translates to the sensor losing its signal. This test is often more definitive than listening for noise, especially for those quiet failures.
Step 2: Live Data Monitoring (The Electronic Confirmation)
If the rock test is inconclusive or you want more data, hook up a good scan tool. Go into the ABS module’s live data and look at the wheel speed readings for all four corners. Drive the vehicle slowly, in a straight line, around 10-15 mph. All four readings should be nearly identical and stable. If the suspect wheel’s speed sensor reading is erratic, jumping around, or dropping out while the others are steady, you’ve found your electronic proof. This erratic signal is exactly what the ABS module sees, triggering the light.
Sometimes, I’ll even lift the vehicle and spin the wheel by hand while watching live data. You might see the signal drop out or become choppy as the wheel spins, confirming the issue is at the hub.
Step 3: Ruling Out Mimics (What Else Could It Be?)
Now, if you don’t find any play in the bearing and the live data looks good, then you start looking at other possibilities. These are less common culprits for an ABS light and noise together, but they can mimic parts of the symptoms:
- Failed Sensor or Damaged Wiring: A truly bad sensor or a broken wire in the harness will also cause erratic signals or no signal at all. But usually, you won’t have mechanical play or a growling noise accompanying it. Check the sensor connector for corrosion and the wiring for any visible damage.
- Corroded Encoder Ring (The Sneaky One): This is where it gets tricky. In some vehicles, particularly certain GM trucks and SUVs (I’ve seen service bulletins on 2007-2014 Silverado/Sierra models, for instance), the magnetic encoder ring inside the hub can corrode and fail even if the bearing itself feels smooth. The sensor can’t read it, but there’s no play. If you’ve got no play but erratic live data, and the sensor checks out, this is a strong possibility. You’ll need a new hub bearing to fix it, not just a sensor.
- Tire Issues: Cupped tires or an out-of-balance tire can cause humming or droning noises, but they won’t trigger an ABS light or show play in the wheel bearing.
- Driveline/Differential Noise: A humming noise, especially one that changes during turns, can come from the differential, particularly in AWD vehicles. This is a different beast entirely and usually won’t be accompanied by an ABS light or bearing play. If you suspect this, you’ll need to isolate the noise with chassis ears or a stethoscope to confirm its origin. (Here’s more on that specific issue.)
Fixing It Right: Repair Pathways and What to Watch For
Safety First, Always.
Let me be clear: there is NO temporary fix for a failing wheel bearing. Driving on it is a gamble. You risk sudden seizure, complete wheel separation (yes, it happens), or a catastrophic loss of control. How you replace it depends entirely on your vehicle’s design, so know what you’re getting into.
Normal wear over high mileage is the most common cause of bearing failure, but I’ve also seen plenty of bearings instantly damaged by severe impacts—think hitting a monster pothole or curb. That kind of sudden shock can disrupt the internal components or even the press-fit between the bearing and the steering knuckle, causing play right away, even on a low-mileage car.
Bolt-On Hub Assembly DIY Feasible
Press-In Hub Bearing Professional Only
Serviceable Tapered Bearings Professional Only
Post-Repair Validation: Don’t Skip This Step
Replacing the hub bearing is only half the battle. You absolutely have to confirm the repair was successful, both mechanically and electronically. If you don’t, you’re just asking for the light to come back on, or worse, for another failure.
Mechanical Check: Re-Test for Play
Once the vehicle is back on its wheels, or even better, before you set it down, repeat that 12-and-6 o’clock rock test. There should be absolutely no detectable movement whatsoever. If you feel any play, something went wrong during installation. Maybe the hub isn’t seated fully, or the mounting bolts weren’t torqued correctly. Don’t proceed until this is solid.
Electronic Check: Clear Codes & Test Drive
Next, grab your scan tool and clear all stored ABS and ESP fault codes. Then, take the car for a test drive. The warning light must remain off. For full confidence, I always use the scan tool in live data mode during this drive. Monitor the wheel speed readings from all four corners. Drive in a straight line at low speed (10–15 mph). All readings should be identical and stable. Any fluctuation in the wheel you just repaired indicates a lingering issue—it could be a damaged sensor, an incorrect air gap (maybe the new bearing wasn’t quite right), or an installation error. Don’t assume “it’ll clear itself.”
Road Test: Listen and Feel
Finally, conduct a full road test, including some highway speeds. The previous growling or humming noise should be completely gone. You shouldn’t feel any new vibrations, pulling, or, of course, see any warning lights reappear. If everything feels and sounds right, and the lights stay off, then you’ve done the job correctly.
Cost, Risk, and Making the Call
When it comes to a wheel bearing, you’re looking at a repair that’s necessary for safety and the functionality of your vehicle’s critical driver aids. Here’s a general breakdown of what you can expect, keeping in mind that prices vary wildly by vehicle and region.
Bolt-On Hub
This is your typical shop cost, including parts and labor. If you’re tackling it yourself, parts alone usually run $150–$400. Success rate is high if you follow those torque specs religiously.
Press-In Bearing
Expect higher labor costs here because of the specialized press work. There’s also a significant risk of damaging the steering knuckle if the job isn’t done correctly, which can really drive up the bill.
Serviceable Repack
Parts for these (just the bearings and seals) are cheap, maybe $50. But the labor is intensive, and that precision preload setting requires a lot of skill and specialized tools. It’s not a quick job.
As a general rule of thumb, if the total repair cost starts creeping up to 40% or more of your vehicle’s current private-party value, you’re entering a gray area where you might consider if it’s worth the investment. However, if your vehicle is otherwise solid and reliable, fixing a wheel bearing is a non-negotiable safety necessity. It’s not just about the noise; it’s about preserving the functionality of critical driver aids like ABS, Traction Control, and Electronic Stability Program. These systems depend entirely on clean, reliable data from those wheel speed sensors.
Prevention & What to Listen For
My Maintenance Advice
Here’s a couple of things I tell my customers: First, try to avoid hitting deep potholes or curbs like they’re going out of style. Sudden impacts are a quick way to kill a bearing. Second, when you’re rotating your tires, always take an extra minute to perform that quick “12 and 6” rock test on each wheel. Catching play early, before the ABS light even triggers, can save you a lot of headache and potential danger down the road. And finally, be mindful of high-pressure car washes directly aimed at the center of your wheels; forcing water past the seals can lead to internal corrosion and premature failure.
Most importantly, listen to your car. A new humming noise, especially one that changes with speed or when you turn, is a red flag you shouldn’t ignore. And an ABS or ESP light? That’s not a suggestion; it’s a critical warning that your safety systems are compromised. Addressing a wheel bearing issue early typically costs a few hundred bucks. Waiting until it seizes can easily cost thousands in towing, extensive repairs, or, God forbid, accident-related expenses. Trust me, it’s not worth the risk.
