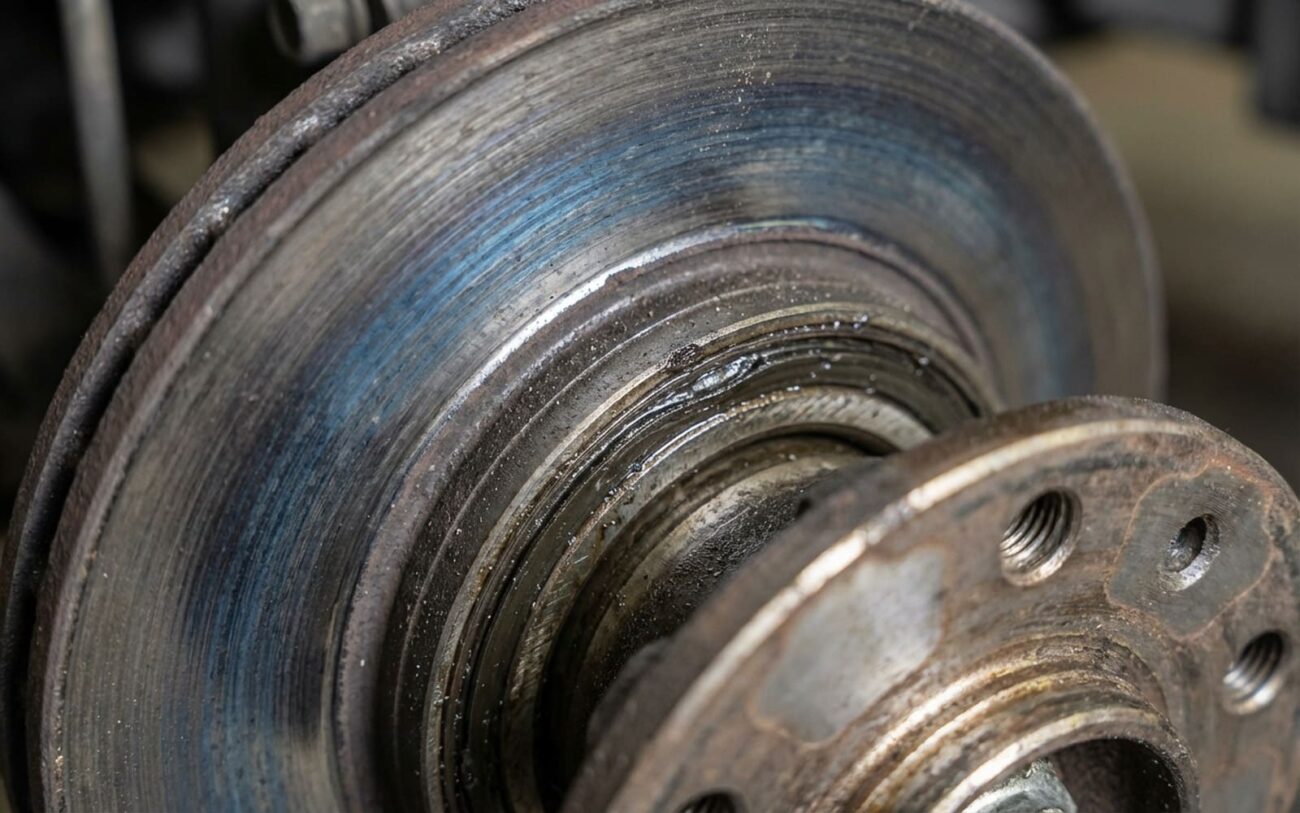
Alright, let’s talk wheel bearings. After more than two decades wrenching on cars, I’ve seen my fair share of these things go bad. It’s one of those problems that starts subtle and can quickly turn into a serious safety issue if you ignore it. So, if your car’s making a new noise, especially one that’s got you scratching your head, pay attention. This is how I usually track down a failing wheel bearing in my shop.
The Tell-Tale Signs: What to Listen and Feel For
The number one symptom, the one I hear most often, is a low-pitched humming or growling sound. It’s not like engine noise, and it’s definitely not wind noise. This sound comes from a specific wheel, and it’s pretty consistent. You’ll hear it whether you’re accelerating, coasting, or even just lightly touching the brakes. The key here is that it almost always gets louder as you pick up speed.
I’ve had customers describe it as sounding like a small plane, or sometimes like driving on knobby tires, even when they’ve got street tires on. It usually seems to emanate from one corner of the vehicle, and that’s your first clue as to which one might be failing.
Pitch: LOW GROWL
Another big clue is how the noise reacts when you turn. If, say, your left front bearing is on its way out, turning right will put more weight on that left side. You’ll often hear the hum get noticeably louder. Conversely, turning left might actually make it quieter for a moment. This “load test” while driving is a classic diagnostic trick.
Beyond the sound, you might also feel something. A rhythmic vibration in the steering wheel, the floorboard, or even the seat can point to a bad bearing. This isn’t just random shaking; it’s a distinct pulse that’s directly tied to your road speed, almost like a heartbeat.
My Diagnostic Process: Ruling Out the Imposters
Now, just because you hear a hum doesn’t automatically mean it’s a wheel bearing. I see misdiagnoses all the time. Aggressive tires, a worn differential, or even a bad CV joint can all make similar noises. My approach is always to eliminate the easy stuff first.
Step 1: The Tire Check
First thing I do is rotate the tires, front to back. If that hum or growl moves with the tires, then you’ve likely got a tire issue – maybe cupping, uneven wear, or a belt separation. That’s a much cheaper fix than a bearing, so it’s always worth checking.
Step 2: The Driving Load Test
This is where my experience really comes in handy. While driving, I’ll gently sway the car side-to-side, just enough to shift the vehicle’s weight. If the noise “loads up” and gets louder when I lean on a specific wheel, that’s a huge indicator. For example, if the noise gets louder when I turn right (loading the left side), I’m looking at a left-side bearing.
The Load Test in Action
Think of it like this: you’re trying to put more stress on the suspected bearing. If the noise reacts, you’re on the right track. This is often the quickest way to pinpoint the exact wheel.
Step 3: Distinguishing Vibration Sources
If you’re feeling a vibration, you need to figure out if it’s brake-related or not. A warped brake rotor will usually cause a pulsation that you feel in the pedal or steering wheel, but it will diminish or even disappear when you lightly apply the brakes. A bad wheel bearing, though? That shake stays consistent, because it’s a rotational issue, not a contact issue between the pads and rotor.
For overheating hubs, which can happen with severely worn bearings, I’ll use an infrared thermometer. If the hub center is significantly hotter than the rotor edge, that’s a strong sign the bearing is generating excessive friction. Of course, I’ll also check for a seized brake caliper or a dragging parking brake, as those can cause similar heat.
| Symptom | Why It’s a Bearing | Common Imposters | How I Confirm It |
|---|---|---|---|
| Humming/Growling | Worn rollers or races, often from fatigue or contamination. | Aggressive tires, differential noise, tire cupping. |
Noise stays put after tire rotation; gets louder when loading that wheel (turning).
|
| Rhythmic Vibration | Pitted bearing races causing uneven rotation. | Unbalanced tire, bent wheel, worn CV joint, warped brake rotor. |
Vibration continues even with light braking. On the lift, I’ll check for hub runout with a dial indicator; anything over 0.005″ is suspect.
|
| Overheating Hub | Lack of grease or excessive preload creating friction. | Seized brake caliper, dragging parking brake, collapsed brake hose. |
Using an infrared thermometer, I’ll find localized heat at the hub center, significantly hotter than the brake rotor’s edge.
|
Why Bearings Give Up the Ghost
Sure, mileage plays a role, but in my experience, it’s rarely the only reason a bearing fails. Most of the time, I trace bearing failures back to one of three things: contamination, impact damage, or just plain improper installation.
The Contamination Factor:
Modern hub assemblies are sealed units, designed to keep the grease in and the bad stuff out. But those seals aren’t indestructible. Road salt, moisture, even a stray rock can nick or degrade a seal. Once water or grit gets in, it mixes with the grease, turning it into an abrasive paste. That paste then grinds away at the rollers and races, and the bearing is toast in no time.
Impact damage is another huge culprit. Hit a big pothole? Clip a curb? That sudden shock can dent the hardened races inside the bearing or deform the cage that holds the rollers. Even if the bearing seems fine immediately afterward, that damage creates stress points. It’s like a tiny crack in a windshield – it’ll eventually spread and lead to premature failure. I’ve seen bearings with only 30,000 miles on them fail because of one bad hit.
And then there’s improper installation. This is a big one, especially for DIYers or less experienced shops. Using an impact wrench on the axle nut, for example, can put way too much preload on the bearing, damaging it before the car even leaves the garage. Or, if you’re pressing in a bearing, hammering it into place or misaligning the press can “brinell” the races, leaving permanent dents that guarantee an early death for the new part.
The Fix: What a Bearing Replacement Really Means
Precision is Not Optional
There’s no such thing as a “band-aid” fix for a bad wheel bearing. You can’t just inject more grease into a sealed unit. Replacement is the only safe and reliable option. And when you do replace it, following factory torque specifications is absolutely critical. That’s the difference between a repair that lasts 100,000 miles and one that fails in 1,000.
Two Main Types of Repair:
Bolt-On Hub Assembly Replacement
Press-In Bearing Service Advanced DIY / Pro Territory
Critical Details for Any Bearing Job:
Torque Specs and Fresh Hardware
If you’re tackling a front bearing on a front-wheel-drive car, you’ll have to disconnect the CV joint. This is a perfect opportunity to inspect the CV boot for tears or damage. A worn CV joint can sometimes make noises that get mistaken for a bad bearing, so it’s smart to rule that out while you’re already in there.
Making Sure the Job’s Done Right: Post-Repair Validation
Replacing the bearing is only half the battle. The real test comes after everything’s back together. Torque those lug nuts to spec, and then take the car for a proper test drive. Don’t just go around the block. Start slow, then gradually build up to highway speeds. Listen carefully for any hint of that old hum or growl. Pay close attention to how the noise (or lack thereof) changes during gentle turns, just like you did during diagnosis.
My Post-Repair Checklist:
-
Zero Play: With the wheel back on the ground and the brakes applied, grab the tire at 12 and 6 o’clock and try to rock it. There should be absolutely no movement or clunking.
-
Runout Check (Pro Level): If I’m being super thorough, I’ll put a dial indicator on the hub face. I’m looking for less than 0.002 inches of runout. Anything more can lead to vibration or brake pulsation down the road.
-
Thermal Test: After a good 10-mile drive, I’ll use my infrared thermometer again. The new hub should be within 20°F of the hub on the opposite side. If it’s significantly hotter, something’s still wrong – usually too much preload or a defect in the new part.
Cost, Risk, and Making the Call
Let’s be honest, a wheel bearing replacement isn’t usually a cheap fix. The cost can vary quite a bit depending on your vehicle, whether it’s a bolt-on or press-in type, and what labor rates are like in your area. But it’s a predictable repair, and the alternative (a catastrophic failure) is far more expensive and dangerous.
| Repair Type | DIY Part Cost (Approx.) | Shop Total Cost (Approx.) | My Biggest Concern (Risk) |
|---|---|---|---|
| Bolt-On Hub Assembly | $150 – $400 | $350 – $600 | Improper torque on the axle nut or hub bolts leading to early failure or even wheel separation. |
| Press-In Bearing | $80 – $150 | $250 – $450 | Damage to the new bearing or the steering knuckle itself if not pressed correctly. |
Pro Tip from the Shop Floor
If you’re replacing one bearing on a high-mileage vehicle, especially if it’s got over 100,000 miles, it’s a good idea to at least check the other bearings on that axle, or even all four. They often wear out around the same time, and you’re already halfway there with the car lifted and tools out. It’s like checking your other shocks when you replace one – just smart maintenance.
Keeping Your Bearings Rolling Longer
Preventing early bearing failure is pretty straightforward. First, be mindful of how you wash your car. Don’t blast high-pressure water directly at the center of your wheels. That can force water past the seals and lead to contamination. A gentle rinse from the side is usually fine.
During routine maintenance, like brake jobs or tire rotations, always ask your mechanic to check for bearing play and listen for any early signs of noise. If you’re a DIYer, make it a habit: lift the car, support it safely on jack stands, and grab each wheel at the top and bottom (12 and 6 o’clock). Rock it gently. Any clunking or noticeable movement means you’ve got play, and that bearing needs attention.
And of course, try to avoid those monster potholes and curbs. I know, easier said than done sometimes, but impacts are a huge killer of bearings.
