One Tire Wearing Out Fast? Here’s What Your Car is Telling You.
In my 25+ years turning wrenches, I’ve heard this concern countless times: “Doc, one of my tires is wearing out way faster than the others.” And usually, they’re right – it’s not just a bad tire. When you see a single tire wearing unevenly, especially on the inside or outside edge, it’s a clear signal. Something is mechanically wrong with that corner of your vehicle.
It’s tempting to blame a defective tire, but almost always, the real problem is mechanical. We’re talking about either an alignment issue from a bent or damaged component, or a failing wheel bearing. Both can cause similar symptoms, and sometimes, they even happen together. That’s why proper diagnosis is critical. Otherwise, you’re just throwing money at new tires that will wear out just as fast.
WHEEL GEOMETRY MONITOR
Delta: 1.2° Out
What You’ll See, Hear, and Feel (And What It Means)
Uneven tire wear is the most obvious sign. If you see the inner or outer shoulder of a tire wearing down much faster than the rest, that’s a classic red flag for an alignment problem. Try running your hand across the tread. If it feels smooth in one direction but rough or “feathered” in the other, you’re likely dealing with excessive toe angle. That means the tire isn’t rolling straight; it’s constantly scrubbing sideways down the road, wearing itself out fast. Think of it like a runner dragging one foot—eventually, that shoe is going to be toast.
In more severe cases, you might see “cupping” or “scalloping”—small, scooped-out dips in the tread pattern. This usually points to the wheel bouncing as it rotates, which can be caused by worn shocks, a bent hub, or a failing wheel bearing. It’s not just bad alignment at that point; it’s a component that’s causing the tire to lose consistent contact with the road.
And trust me, left unchecked, this kind of wear can lead to serious issues like cord exposure or even tread separation at highway speeds. I’ve seen it happen, and it’s not theoretical—it’s dangerous.
A quick check: if you’re seeing inner/outer shoulder wear, especially if it’s non-adjustable camber, that often points to a bent hub flange, spindle, or knuckle. These parts don’t usually “wear out” like a bushing; they get bent from an impact, like a nasty pothole or curb strike. That bend permanently changes the wheel’s angle.
The noise side of things is just as telling, especially for wheel bearings. A worn wheel bearing doesn’t typically click like a CV joint. Instead, it creates a deep, consistent hum or growl that gets louder the faster you go. Here’s a trick I use: find a smooth road and gently weave the car. If the noise increases when you turn right, that means the left bearing is under load and likely failing. The opposite is true when turning left. You’re shifting weight, loading that outer wheel, and making the bad bearing work harder.
Another definitive sign of a bad bearing or worn suspension component is wheel play. With the vehicle safely jacked up and on stands, grab the tire firmly at 12 and 6 o’clock and rock it in and out. Any clunking or noticeable movement means you’ve got play somewhere—most commonly in the bearing itself, but sometimes in a ball joint or steering component.
My Approach to Diagnosing the Real Problem
Diagnosing the root cause means isolating the symptoms. Inner or outer tire wear can come from worn bushings, ball joints, or even collapsed springs, not just the hub. A growling noise could be a bad tire, a CV axle, or even a differential. You need to systematically rule things out.
Step 1: Inspect Tire Wear and Alignment
If you’re seeing inner/outer shoulder wear, the first thing I do is put it on the alignment rack. A four-wheel alignment will tell us if your camber or toe angles are out of spec. If the camber is off and it’s not adjustable—which is common on many modern vehicles where camber is set by the knuckle or spindle—then we need to dig deeper.
In those cases, I’ll measure the hub flange runout with a magnetic-base dial indicator. If that flange is bent, even by a small amount, it’s permanently throwing off your camber, and no alignment adjustment will fix it. This is often the culprit for persistent inner/outer wear that alignment shops can’t seem to correct.
Step 2: Address Cupped or Scalloped Wear
Cupped wear usually means the wheel is bouncing. Start by checking your shock absorbers—a worn shock is a common cause. But if the shocks are good, I’d still measure hub mounting surface runout. Excessive lateral runout in the hub or rotor can cause vertical oscillation, leading to that telltale cupping. Don’t forget to check tire balance too, though that usually causes vibration more than cupping.
Step 3: Pinpoint Noise and Play
First, rule out the tires. Swap the front tires side-to-side. If the noise follows the tire, it’s likely a tire issue—tread pattern noise or an imbalance. If the noise stays at the same corner, then the fault is definitely in the hub, bearing, or CV axle.
For a speed-proportional hum or growl, especially if it changes with turning, a mechanic’s stethoscope is your best friend. With the vehicle safely lifted and the wheel spinning slowly (carefully!), place the stethoscope on the knuckle near the hub. The noise will peak right at the source of the bad bearing. This is how I differentiate it from a CV joint or differential whine.
If you’ve got wheel play when rocking the tire at 12 and 6 o’clock, that’s usually a bearing. On older vehicles with adjustable bearings, I’ll try to retorque the spindle nut to spec first. But on most modern, unitized hub assemblies, if there’s play, the bearing is shot. Just make sure to also check for play in ball joints and tie rod ends, as they can mimic bearing play.
Why These Parts Fail – The Real Story
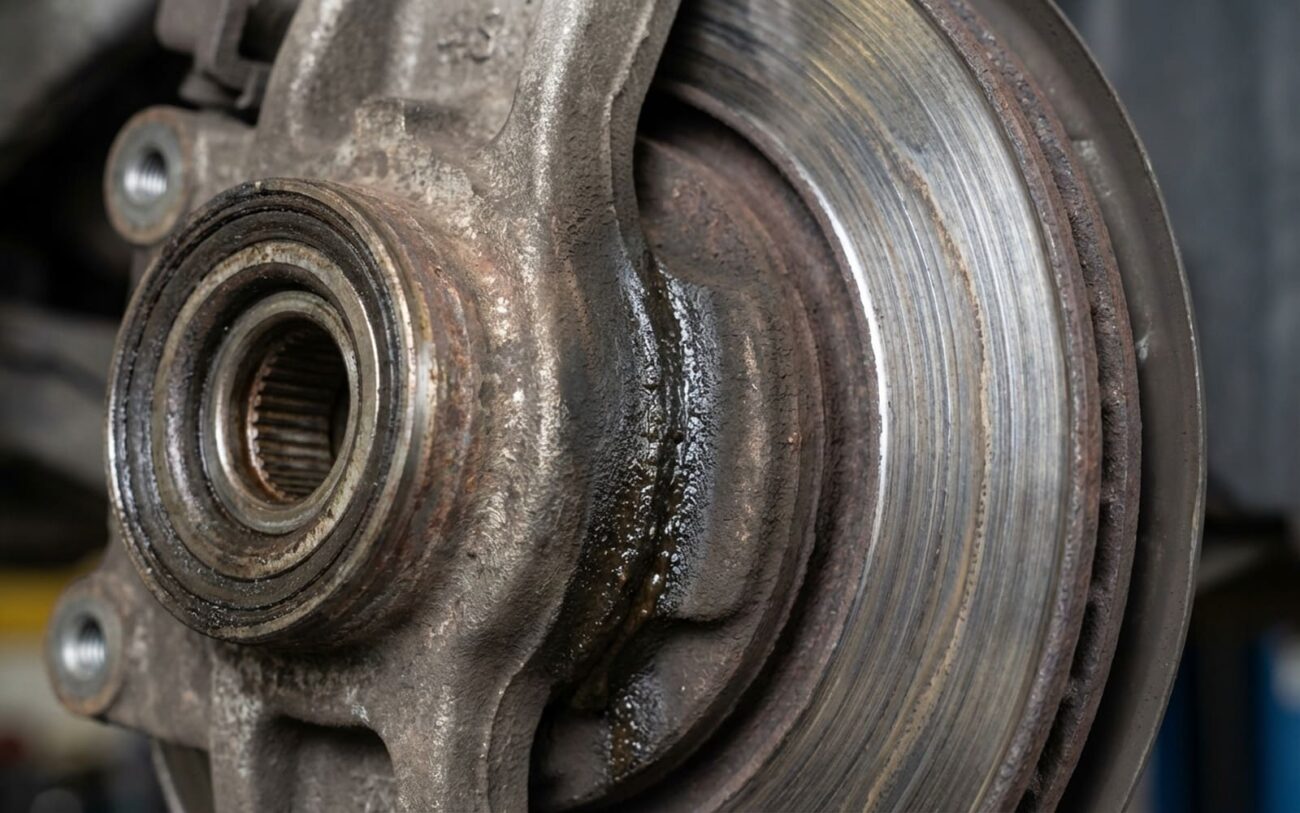
Bent hub flanges almost always come from impact. Think a really nasty pothole, hitting a curb, or even a minor accident. The hub flange is part of the knuckle or spindle, and even a small bend changes the camber angle permanently. Unlike a bushing or a spring, it doesn’t “wear out”—it bends. I’ve also seen severe corrosion around the hubcentric ring, especially in areas that use road salt, prevent the wheel from seating concentrically. That can mimic a bent hub and cause uneven tire wear, too.
Wheel bearings fail for a few main reasons. Contamination is huge. The rubber seal fails, letting in water, salt, and road grit. Once that grease washes out, the bearing runs dry, heats up, and starts to pit and wear. Normal wear from high mileage and constant load cycles also plays a big role. And while it’s not common, a dragging brake caliper can sometimes overheat the hub and cook the bearing. I’ve seen that once or twice.
A critical note on installation:
That spindle nut, especially on unitized hub assemblies, has a precise torque spec—often well over 200 ft-lbs. If it’s too loose, the bearing develops play and wears prematurely. But if it’s too tight, you crush the rollers, creating excessive preload and heat. I’ve seen brand new bearings fail in under 5,000 miles because someone used an impact wrench to “snug it up” instead of a proper torque wrench. Don’t cheap out on this step; it’ll cost you dearly later.
How I Fix It (and What You Need to Know)
Safety First, Always.
If that hub flange is bent, replacement is the only real fix. You can’t safely bend it back, and even if you could, you’d never get the precision needed for proper alignment. Most modern vehicles use a hub bearing assembly that bolts right to the knuckle. This is a complete unit—bearing, seal, hub, and often the ABS tone ring all in one. It’s designed to be replaced as a whole.
Unitized Hub Assembly Replacement DIY-FEASIBLE
Press-In Bearing Service Professional Only
Making Sure the Repair Actually Worked (Don’t Skip This!)
Don’t ever skip the validation step. After a bearing or hub replacement, the shop should always do a road test with you. That hum or growl should be completely gone during acceleration, coasting, and especially when turning. And when you check the wheel at 12 and 6 o’clock, there should be absolutely zero play.
Post-Repair Checklist: My Must-Dos
-
Always perform a four-wheel alignment. Even if the new hub is perfectly straight, other angles might have been affected or were already out of spec. This is non-negotiable to prevent future tire wear.
-
Check hub temperature after the test drive. An over-torqued bearing will generate excessive heat, indicating an imminent failure. It should be warm, not hot to the touch.
-
Inspect shock absorbers at the same time. Worn shocks contribute significantly to cupping and can mask other issues, so address them if they’re failing.
What’s This Going to Cost You?
Alright, let’s talk money. These aren’t usually the cheapest repairs, but ignoring them will cost you more in tires and potential safety hazards down the road.
Press-In Bearing
This includes parts and labor for pressing the new bearing into the knuckle. If the knuckle itself isn’t damaged, the success rate is high.
Unitized Hub Assembly
This is a shop cost estimate for parts and labor. If you’re doing it yourself, parts typically run $150–$400. This is usually a very straightforward and successful repair.
Hub Replacement for Camber
This is essentially replacing the entire hub assembly to correct bent geometry. Just be sure to also check for bent struts, as that would mean the wear will return.
My Pro Tip for Older Cars:
If the total repair cost starts to exceed about 60% of your car’s private-party value, you really need to consider if the investment makes sense. For older vehicles, sometimes the better move is to manage the issue as best you can until it’s time for a replacement vehicle. I hate to say it, but sometimes it’s just not worth pouring money into a losing battle.
Keeping It From Happening Again
Prevention comes down to awareness and proper service. For wheel bearings, correct installation is everything. Always use a new spindle nut and torque it precisely to spec—never just “snug it up” with an impact gun. When you’re doing brake jobs, take an extra minute to inspect the bearing seal for grease leaks or damage. And try to avoid aiming high-pressure washers directly at the wheel center; they can force water past the seal and start the contamination process.
To catch uneven tire wear early, make it part of your monthly maintenance routine. Check your tire pressure, then run your hand over the tread. Feel for feathering, cupping, or any excessive shoulder wear. Rotate your tires every 5,000–7,000 miles; this is crucial for promoting even wear and extending tire life. After any major impact—like a deep pothole or curb strike—get an alignment check. It’s a small cost compared to replacing a hub, a tire, or even a control arm. And remember: worn shocks don’t just affect your ride; they contribute significantly to tire wear and poor handling. Keep the whole system in mind, because it all works together.
