When an EV rolls into my shop complaining about slow charging, and I mean really slow – like stuck at 2 or 3 kW on a Level 2 charger that should be pushing 6.6 kW or more – my internal alarm bells immediately start ringing for the on-board charger (OBC). I’ve seen this pattern countless times over the years. This isn’t just a weak EVSE or a cold battery; this is usually a system-wide limitation, and it points straight back to the car itself, specifically that little box responsible for turning AC wall power into DC battery juice.
My Diagnostic Approach: Don’t Guess, Test.
Before you even think about condemning an OBC, you’ve got to eliminate everything else. I’ve seen too many good parts get swapped because someone jumped to conclusions. A slow charge can be caused by a dozen things: the battery, the EVSE (charger unit), the grid power coming into your house, or even a simple communication glitch. The key here is methodical testing, not assumptions.
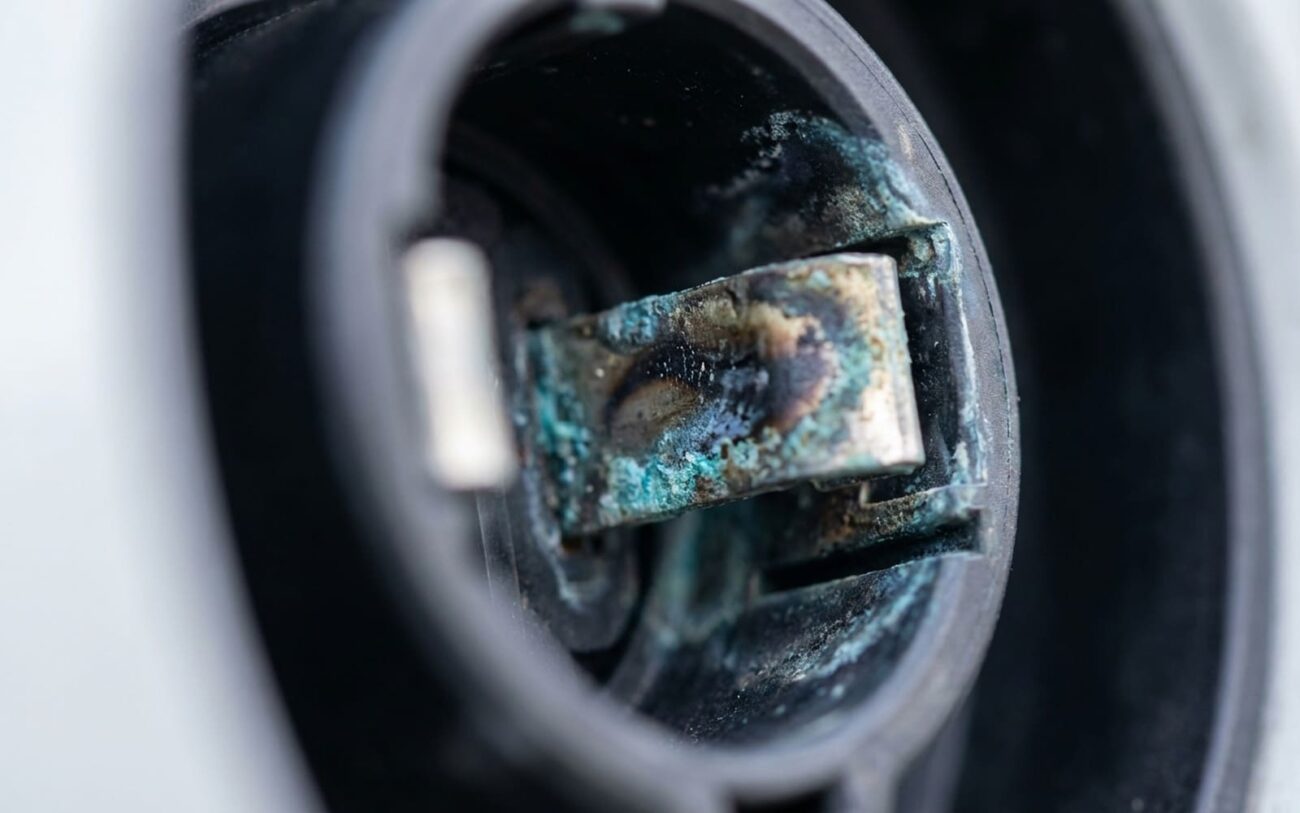
First, I always check the basics. Is the battery cold? The Battery Management System (BMS) will deliberately limit charge rates for safety when it’s chilly, and that can look exactly like an OBC fault. Is the J1772 connector or the car’s charging port damaged or corroded? High resistance there means voltage drop and amperage limits, which again, mimics an OBC issue. Even a faulty pilot signal from the EVSE can trick the car into thinking it only has 12 amps available.
The car’s dashboard or mobile app might tell you it’s charging slow, and that’s a good starting point. But remember, that’s just the car’s network reporting what it thinks is happening. Sometimes that data is flat-out wrong due to a bad sensor or a communication hiccup. You need to verify what’s actually going on.
Here’s a trick I’ve found incredibly useful: listen closely when charging begins. A healthy OBC usually has a low hum, maybe a fan noise. But if you start hearing a new, high-pitched whine, a distinct buzz, or even a rattle, especially coming from where the OBC is located (often under the hood or the rear seat), that’s a huge red flag. That noise is often mechanical or electrical breakdown inside the unit – think failing transformers or loose inductor cores. I’ve had customers tell me the noise started weeks, even months, before the charge rate dropped. That’s your early warning system right there. Ignore it, and you’re just pushing a partially failed OBC towards total failure, which means no charging at all.
My goal with any slow-charge complaint is to confirm three things: Is the OBC getting proper input power? Does the BMS and vehicle network want it to charge at full rate? And is the OBC actually limiting power due to an internal failure? This takes more than just looking at the dash.
| Symptom I See | Often Points to OBC | Common External Mimics | My Go-To Test to Confirm |
|---|---|---|---|
| Stuck at 2–3 kW AC charge, no matter the charger. | Internal AC-DC conversion failure (e.g., failed PFC circuit, stuck precharge relay, degraded DC link capacitor). | Cold battery (BMS derating); faulty EVSE pilot signal; bad house wiring; high resistance in cable/inlet. |
Hook up a professional scan tool. Monitor OBC live data: AC input voltage/current, DC output, internal temps, and BMS charge enable signals. Look for “Charger Performance Below Expected” DTCs. |
| Dash shows low charge rate, but the car actually charges fast. | Failed internal current/voltage sensor on the OBC control board, sending bad data to the vehicle network. | Instrument cluster fault, gateway module communication error, or a CAN bus problem. |
Measure actual AC input with a calibrated clamp meter at the EVSE. If your meter reads 6.6 kW but the dash says 3 kW, then the OBC’s reporting circuit or the OBC itself is lying to you. |
| New buzzing, whining, or rattling during charging. | Failing inductor or transformer (delaminated core), or PWM control circuit instability causing magnetics to resonate. | Coolant pump cavitation, HVAC compressor noise, or an auxiliary fan vibrating. |
Grab a mechanic’s stethoscope and pinpoint the sound. You can also use an oscilloscope on the AC input to detect harmonic distortion, which often points to switching circuit problems. |
Why These Chargers Fail: The Common Culprits
So, you’ve narrowed it down, and it’s definitely the OBC. Why do these things kick the bucket? Usually, it comes down to a few common culprits I’ve seen over the years, mostly related to how they’re built and how they operate.
Thermal cycling is a big one. Think about it: the OBC gets hot when it’s charging, then cools down. This happens every time you plug in. That constant expansion and contraction puts stress on the solder joints, especially on those high-power semiconductors like IGBTs or MOSFETs. Over time, tiny cracks form, resistance goes up, and eventually, you get an open circuit or intermittent fault. I’ve opened up units where a single cracked joint on a heatsink-mounted component brought the whole system to its knees.
Then there’s capacitor degradation. The DC link capacitors are crucial for smoothing out the current. As they age, their internal resistance (ESR) goes up, making them less efficient and causing them to heat up. That heat triggers thermal protection, and boom, your charge rate drops. Sometimes you can see them bulging or venting if you open the unit, but often the damage is internal, requiring an ESR meter to find. For liquid-cooled OBCs, I’ve seen cooling system neglect cause just as much damage. Using the wrong coolant or skipping service intervals leads to internal corrosion or clogged passages, causing localized overheating even if the ambient temperature seems fine.
Less common, but still a factor, are firmware issues. A corrupted control algorithm or a calibration error can force the OBC into a low-power “safe” state. The symptom is identical to a hardware failure, but it’s software. Always check for OBC software updates before you assume you need a whole new unit. And remember, if the BMS limits charging because the battery is too cold or there’s an isolation fault, that’s the system working as designed, not a bad OBC. Same goes for a PHEV that won’t charge due to an EVSE communication timeout or a CCS combo handshake failure – those are external issues, not the OBC itself.
Okay, It’s the OBC. Now What? (Safety First!)
HIGH-VOLTAGE SAFETY WARNING: LISTEN UP!
Once you’ve confirmed the OBC is the problem, your repair path depends on the specific failure and your technical chops. Let me be absolutely clear: this is high-voltage territory. Working on an OBC without proper training, specialized tools, and strict adherence to safety protocols is asking for severe injury or a fire. If you’re not certified for high-voltage system safety, this is NOT a DIY job. Period.
Component-Level Repair PROFESSIONAL-ONLY WITH HV CERTIFICATION
Replace or Exchange the Unit MOST COMMON / NON-REPAIRABLE
Cooling System Cleaning PROFESSIONAL-ONLY
Interim Charging TEMPORARY / LAST-RESORT
The Proof is in the Charging: Post-Repair Validation
Replacing or repairing an OBC isn’t the finish line; it’s just the start of the verification process. For a component-level repair, bench-testing the unit under load (if you’ve got the specialized equipment) is the gold standard. But for most shops, myself included, we install it and test it in the vehicle. This validation process has to be thorough.
I always use a professional scan tool to command a full-power AC charge session. The OBC must reach and sustain its rated capacity – whether that’s 6.6 kW, 11 kW, or whatever it’s designed for – for at least 15 minutes. While it’s charging, I’m glued to the live data: input current, DC output, internal temperatures, and any diagnostic trouble codes. A healthy OBC shouldn’t derate unexpectedly or show abnormal thermal spikes (anything more than 10°C above ambient at steady state is a red flag in my book). And don’t just trust the car’s display; verify the actual power draw with a calibrated AC power meter at the EVSE. If the OBC throws a code during this test, or if it can’t maintain full power, the repair wasn’t successful, or there’s another underlying issue we haven’t found yet.
The Hard Truth: Cost, Risk, and Making the Call
Look, nobody wants to hear this, but OBC repairs are often among the most expensive non-battery electrical jobs on an EV. The cost isn’t just the part; it’s the specialized labor, the extensive diagnostics, and the programming tools required. You really need to weigh that investment against the vehicle’s remaining value and, critically, its battery health.
| Repair Type | DIY Cost (Part Only) | Shop Cost (Parts & Labor) | Success Rate (My Experience) | Secondary Risk if It Fails |
|---|---|---|---|---|
| OBC Exchange/Replacement | $800–$2,500 (DIY NOT RECOMMENDED) | $1,200–$3,500 | 95% | Incorrect coding or installation can mess up vehicle communication, damage the battery management system, or even cause grid-side faults. |
| Professional Component-Level Repair | N/A | $500–$1,500 | 60–80% | Undetected secondary faults can lead to repeat failure; these repaired units often lack OEM warranty coverage. |
My Mechanic’s Advice:
Here’s how I talk to my customers about this: if the OBC replacement cost starts to creep above 40% of the car’s current market value, and the battery state of health is below 80%, it’s time to seriously evaluate if the repair makes financial sense. For example, dropping three grand into a 10-year-old EV with degraded range might not be the smartest move. On the flip side, a newer Hyundai Kona Electric or a GM Volt that’s otherwise solid, but has a known OBC reliability issue, could absolutely be worth fixing. It’s all about the bigger picture.
Keeping It Healthy: Prevention and Early Warning Signs
You can’t stop time, and you can’t stop parts from aging, but you can definitely slow it down. For liquid-cooled OBCs, staying on top of your cooling system maintenance is absolutely critical. Follow the OEM schedule for coolant replacement, and only use the specified type. Mixing coolants or skipping service intervals is a recipe for internal deposits and corrosion. For air-cooled units, just make sure the intake and exhaust paths are clear of debris, especially if you drive in dusty or salty environments. Simple stuff, but it makes a difference.
My Best Advice: Early Detection is Key
Make it a habit to glance at your charging power display every time you plug in, especially at your regular Level 2 station. Know what “normal” looks like for your car. A sudden or even gradual drop – say, from 7.2 kW down to 3 kW – is a massive red flag. And don’t forget to listen. If you hear a new, unusual noise coming from the OBC area during charging, investigate it immediately. That’s not just an annoyance; it’s the system telling you something is going wrong. Catching a failing OBC early can literally be the difference between a $1,200 repair and a $3,000 replacement – or worse, being completely stranded with a dead charger.
