Alright, let’s talk about the DC-DC converter in your hybrid or electric vehicle. After 25+ years in the bay, I’ve seen these things cause more head-scratching than almost any other component. Why? Because when they go south, the symptoms often scream “dead battery” or “blown fuse,” but the real problem is usually buried a lot deeper. Think of the DC-DC converter as the modern equivalent of your old-school alternator. Instead of a belt spinning it, it pulls juice from the big high-voltage traction battery to keep your smaller 12-volt auxiliary system charged up. When it quits, that 12-volt battery drains faster than a leaky bucket, even if your main HV battery is showing full bars.
Spotting the Trouble: Symptoms & Initial Checks
The most common red flag I see? A complete blackout of 12-volt power. No dashboard lights, no radio, the start button does nothing – all while the big high-voltage battery is clearly active or showing plenty of charge. The car just sits there, looking “asleep” or stuck in accessory mode, refusing to go into READY. This is where most folks (and even some less experienced techs) jump straight to a failed 12-volt battery or a Body Control Module (BCM) issue. But here’s the kicker: that 12-volt battery often tests perfectly fine once you pull it out and charge it externally. That’s your first big clue.
Another classic scenario: the 12-volt battery keeps dying overnight. You jump it, it runs for a bit, but within hours or a day, it’s flat again. If you’ve already checked the battery, confirmed it’s healthy, and made sure all your connections are clean and tight, then the DC-DC converter isn’t doing its job. It’s supposed to be topping off that 12-volt system while the vehicle is running, and if it’s not, you’ve found your problem.
Sometimes the symptoms are less dramatic, more like “brown-outs.” Interior lights might dim when you shift between READY and OFF, the instrument cluster flickers under load, or accessories reboot for no reason. This usually means the converter is struggling to keep a stable voltage as the electrical load changes. Now, before you condemn the converter, always rule out the basics: poor grounds, corroded terminals, or failing battery cables can cause similar headaches. Check those first, every time.
And then there are the diagnostic trouble codes (DTCs). These often point you right to the issue. Codes like P0A78 (Hybrid/EV Auxiliary Battery Charging System) or communication errors like U0140 (Lost Communication with DC-DC Converter) are strong indicators. But don’t just assume the converter is toast because a code popped up. Loose connectors, damaged wiring, or even a glitch in the CAN bus can trigger the same codes. Always verify.
My Diagnostic Process: Confirming the DC-DC Converter
Before you even think about ordering parts, you absolutely need to confirm the DC-DC converter is the actual problem. I’ve seen too many shops (and even made the mistake myself early in my career) replace an expensive converter only to find it was a cheap, corroded ground wire or a simple blown fuse. You can’t just throw parts at these vehicles. Here’s how I break it down, including the definitive tests that cut through the noise.
| Symptom | Likely Converter Fault | Common Mimics | My Go-To Test to Confirm |
|---|---|---|---|
| 12V Battery Constantly Draining | The converter isn’t putting out the right voltage or current to keep the 12-volt battery charged when the car is running. | Parasitic draw, a truly bad 12-volt battery, loose/dirty terminals, faulty battery sensor. |
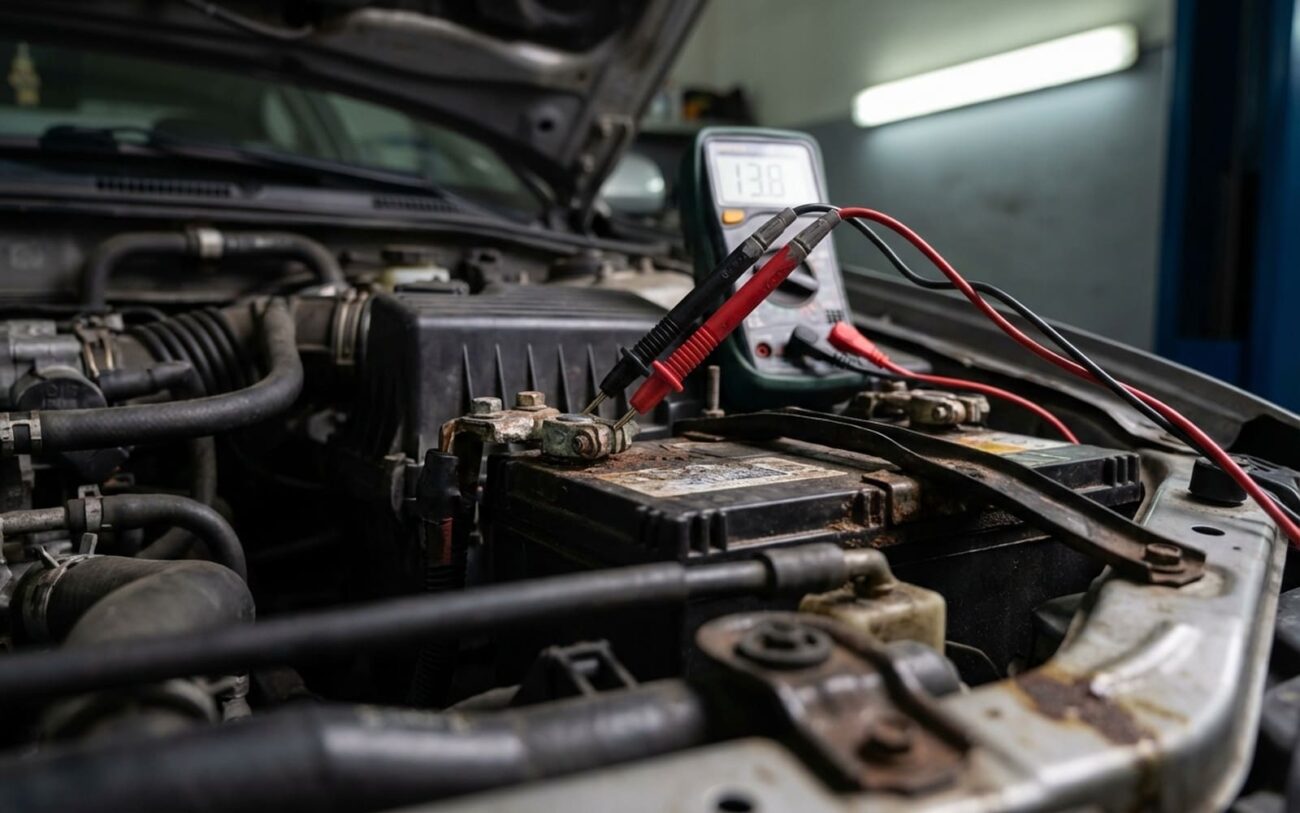
With the vehicle in READY mode, measure the voltage directly at the 12V battery terminals. A healthy converter will hold it steady between 13.8V and 15.0V. If you see anything below 13.2V or spiking above 15.5V, especially under load, the converter is likely failing. |
| No 12V Power at All | The converter has completely failed internally and isn’t putting out any voltage. | Blown main 12V fuse, BCM fault, an open circuit in the main power path, or a missing enable signal from the PCM. |
Back-probe the converter’s 12V output terminal. If you read 0V, it’s either the converter or something upstream. Before you condemn the unit, make sure it’s getting its high-voltage input and the enable signal from the vehicle’s computer. |
| Specific DC-DC Converter DTCs | The converter’s internal logic has detected a problem, like an overcurrent condition or it’s running too hot. | A loose or corroded connector, a bad ground, a communication fault on the CAN/LIN bus, or damaged wiring. |
Hook up a factory-level scan tool and monitor live data. Look at the commanded voltage versus the actual output voltage from the DC-DC converter. If there’s a consistent difference (more than 0.5V), that’s a strong sign of an internal failure. |
My Quick Field Test
The fastest, most effective test I use in my shop is simple: measure the voltage at the 12V battery while the vehicle is in READY mode. If you see 12.6V or lower, the converter isn’t engaging. If it’s holding steady around 14.2V, it’s probably doing its job. But if it’s fluctuating wildly or spiking above 15.5V, you’ve got a regulation failure. This simple DC-DC converter voltage test with a basic multimeter can save you hours of chasing ghosts. And remember, a failing converter won’t drain the battery when the car is off – it just won’t recharge it when running. That’s a key distinction that helps rule out a parasitic draw as the main culprit.
What Actually Fails Inside: Root Causes
When the DC-DC converter itself is truly the problem, it’s almost always due to internal electronic degradation. These units are sealed, often epoxy-potted modules, meaning there are no user-serviceable parts inside. You’re not dealing with mechanical wear here; it’s typically thermal or electrical stress breaking down components over time.
The most frequent culprits? The power semiconductors – we’re talking MOSFETs or IGBTs – that handle all the heavy current switching. These generate a lot of heat. If the cooling system isn’t up to snuff – whether it’s blocked airflow on an air-cooled unit or low/contaminated coolant in a liquid-cooled system – these components will overheat, short out, or just degrade. Once they fail, the converter loses its ability to regulate voltage properly.
Electrolytic capacitors are another common weak link. They’re there to smooth out the output voltage and filter ripple, but they’re highly susceptible to heat and age. As they dry out, their capacitance drops, leading to increased voltage ripple and poor regulation. Sometimes, you might even hear a faint, high-pitched whine under load – that’s often audible switching noise from unstable operation. An oscilloscope can confirm excessive output ripple, which is a dead giveaway for capacitor failure.
Less common, but still possible, are failures in inductors and transformers. This usually happens from insulation breaking down due to chronic overheating. And while rare, moisture intrusion from a compromised seal can happen, especially if the unit is mounted low on the chassis where it’s exposed to road spray.
One issue I’ve seen more often than you’d expect: cracked solder joints on the circuit board. The converter cycles between hot and cold during operation, and those high-current paths expand and contract. Over time, this thermal cycling can fatigue the solder, leading to intermittent connections. This is where you might see flickering symptoms or codes that come and go. For example, certain model-year Toyota and Hyundai hybrids have well-documented issues with cracked joints or faulty control ICs in their DC-DC assemblies – some even have technical service bulletins (TSBs) out for them. Always check those TSBs!
Crucial Point:
Not every “converter failure” actually means the converter itself is bad. If the powertrain control module (PCM) isn’t sending the “enable” signal to turn it on, or if there’s a break in the high-voltage input circuit, the converter simply won’t operate. That’s a control or wiring issue, not a fault with the converter module. Similarly, if a short circuit downstream blows the output fuse, replacing the converter without finding and fixing that short will just fry the new unit. The converter is a slave to the system; it only works when commanded and within its safe operating parameters.
Repair Options: What You Can (and Can’t) Do
This is Professional Territory, Period.
Let’s get one thing straight: there is no DIY fix for a failed DC-DC converter. It’s a sealed, epoxy-potted module. You can’t open it without destroying it, and even if you could, repairing the tiny surface-mount components inside requires specialized lab-grade tools and detailed schematics. Don’t waste your time trying to resolder anything on your workbench. This isn’t a weekend project.
So, your actual options are pretty limited:
OEM Replacement Recommended
Specialized Depot Repair
Temporary Bypass Emergency Only
Before you commit to any costly repairs, always check for open recalls. Some vehicles, particularly certain Hyundai/Kia hybrids, have had recalls specifically for DC-DC converter failures that caused sudden power loss. A quick VIN check can save you a bundle.
After the Fix: Post-Repair Validation
Just replacing the converter isn’t the finish line; it’s the start of the verification process. You’ve got to prove that the new (or repaired) unit is actually working correctly under real-world conditions. Don’t skip this step.
First, clear all those pesky DTCs and make sure the vehicle can enter READY mode without any fault codes immediately returning. Then, with the high-voltage system active, grab your multimeter and monitor the 12V system voltage. It should stabilize somewhere between 13.8V and 15.0V, depending on the specific OEM’s spec for that vehicle.
Next, I always do a thorough load test. Turn on every electrical load you can: high beams, A/C on max, rear defroster, heated seats, stereo cranked up. The voltage needs to remain stable – no dips below 13.2V and no spikes above 15.5V. Use a multimeter with Min/Max recording to catch any transient drops that might be missed otherwise.
For the most rigorous validation, especially after a depot repair, I’ll perform a loaded output test. This involves using a carbon pile load tester or a resistive load bank to apply about 80% of the converter’s rated output (for example, 120A for a 150A unit) for at least 10 minutes. During this time, I’m constantly monitoring the output voltage and the converter’s case temperature with an infrared thermometer. The converter should maintain voltage within spec and absolutely not exceed any thermal shutdown thresholds. If it gets too hot, too fast, you’ve got a problem.
Tools I Can’t Live Without for This:
-
A good digital multimeter with Min/Max and data logging capabilities.
-
A DC clamp ammeter to verify actual current delivery.
-
A factory scan tool – you need to see live DC-DC converter data (commanded vs. actual voltage, temperature, status).
-
An oscilloscope (optional, but invaluable) to check for excessive output ripple, especially after a depot repair.
If the converter passes all these tests under load and stays within its normal operating temperature, then you can be confident you’ve actually fixed the issue. If the voltage sags, or those codes creep back, you’re not done yet – recheck all your connections, grounds, and the high-voltage input circuit.
The Bottom Line: Cost, Risk & Making the Call
This isn’t a cheap repair, and it carries real financial weight. Here’s a quick look at typical costs and the risks involved, which should help you decide if it’s worth it for your vehicle.
| Repair Type | DIY Cost (Part Only) | Shop Cost (Parts & Labor) | My Observed Success Rate | Secondary Risk |
|---|---|---|---|---|
| New OEM Unit | $800–$2,000 | $1,200–$3,000 | >98% | Very low; most come with a solid 12-month or longer warranty. |
| Specialized Depot Repair | Not applicable | $400–$1,000 | 70–90% | Moderate; there’s always a chance of repeat failure or other components failing shortly after. |
Here’s the hard truth I tell my customers: if the repair cost is pushing 40% or more of your vehicle’s current market value, especially on an older hybrid or EV with high mileage, it might not be the smartest financial move. You need to consider the age and health of the high-voltage battery, any remaining warranty coverage, and the overall long-term reliability of the car. A $3,000 repair on a $7,000 car with 150,000 miles might make sense if you’re keeping it forever, but probably not if you’re planning to sell or upgrade soon.
Always weigh the immediate cost against potential future headaches. A failing DC-DC converter can sometimes be a symptom of deeper electrical issues – maybe a degrading HV battery or a struggling BMS. If other systems are showing signs of age, a full vehicle replacement might actually be the smarter long-term choice for your wallet and peace of mind.
Keeping It Healthy: Prevention & Monitoring
DC-DC converters are generally designed to be maintenance-free, but “maintenance-free” doesn’t mean “invincible.” Heat is their absolute worst enemy, so protecting their cooling system is paramount.
For air-cooled units: keep those cooling fins clean. I’ve seen countless failures traced back to converters packed solid with leaves, dirt, or even mud after some off-road adventures. Blocked airflow means overheating, and overheating means premature failure.
For liquid-cooled units: you’ve got to maintain the proper coolant level and condition in that dedicated (or sometimes shared) cooling loop. Use the exact coolant type specified by the manufacturer, and stick to the recommended change intervals. Low coolant or air pockets in the system will drastically reduce heat transfer and lead to thermal stress on the converter.
The best preventive habit you can adopt? Regularly monitor your 12V system voltage. Many hybrids and EVs display this right on the instrument cluster or infotainment screen when the car is in READY mode. Make it a habit to glance at it. A stable reading between 13.8V and 15.0V is perfectly normal. If you consistently see readings dipping below 13.5V or erratic spikes above 15.0V, that’s your cue that it’s time for a deeper look, before you end up stranded.
And grab an affordable OBD2 scanner. Use it to check for any pending codes related to the auxiliary battery or charging system. Catching a voltage regulation issue early – before it escalates and sets a hard DTC – can save you a roadside breakdown and a tow bill. If you notice your OBD2 port losing power or accessories randomly resetting, that’s another big clue that your 12V system is unstable and needs attention.
