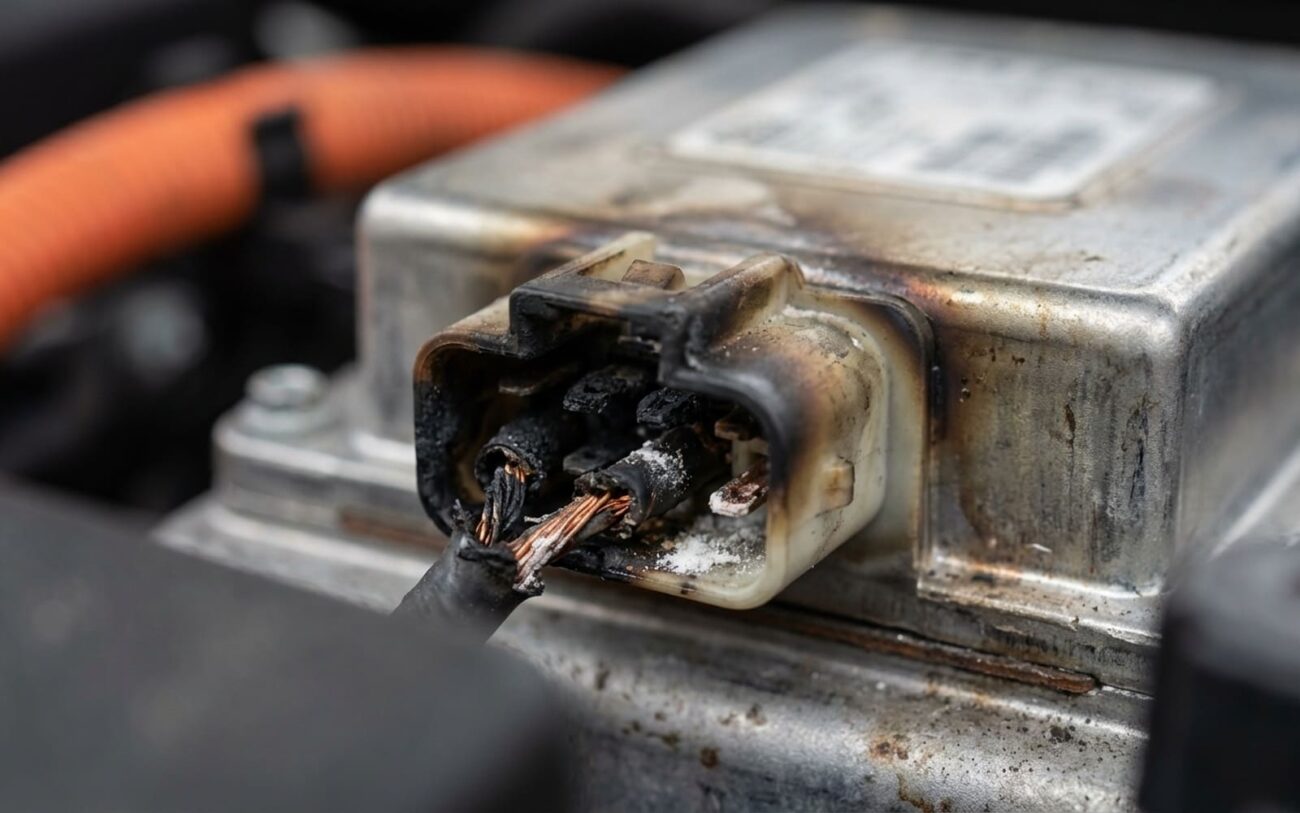
DC-DC Converter Failure: What I See in Hybrids and EVs
Alright, let’s talk about the DC-DC converter. If you’re seeing warnings like “12V Battery Low” or your hybrid or EV has dropped into a reduced-power mode, your first thought might be the 12-volt battery. And that’s fair, it’s the obvious culprit in a traditional car. But in these modern electrified vehicles, I’ve found it’s often something else entirely: the DC-DC converter. This component is the unsung hero, really — it’s the life-support system for your car’s low-voltage electronics.
Think of it this way: in a gas car, the alternator charges the 12V battery and runs all your accessories. In an EV or hybrid, the main high-voltage (HV) traction battery (we’re talking 200V-400V, sometimes more) powers the drive motors. But you still need a standard 12V system for everything else — the headlights, infotainment, power steering, even the computer that tells the big battery what to do. That’s where the DC-DC converter comes in. It steps down that massive HV power to a stable 13.5V to 15V to keep the 12V auxiliary battery charged and all those low-voltage systems humming.
When this thing fails, the entire vehicle is at risk. I’ve seen cars lose power steering and braking assist, even shut down completely while driving. It’s a serious issue, and getting the diagnosis right is critical.
CONVERTER STATUS
Target: 14.2V
Symptoms: What Your Car Will Tell You
The first thing you’ll almost always see is a Christmas tree of dashboard lights. Messages like “Check Charging System,” “12V Battery Voltage Low,” or “Propulsion Power Reduced” are common. Now, in a conventional car, those messages scream “alternator!” but here, they’re pointing to a failure in the 12V power supply chain. And more often than not, that’s the DC-DC converter.
As the 12V system voltage starts to drop, things get weird. The instrument cluster might flicker, the infotainment system could reboot randomly, or your power windows might move at a snail’s pace. Eventually, the car’s computers will try to save themselves by entering a “limp home” or emergency mode. This is the vehicle’s last-ditch effort to keep critical systems alive. If you ignore it, you’re looking at a complete shutdown: no power steering, no braking assist, and you won’t even be able to shift out of park.
My Approach to Diagnosing DC-DC Converter Issues
Look, jumping straight to replacing the converter is a rookie mistake, and a costly one at that. Many of these symptoms can mimic other electrical problems, and sometimes the converter is just a victim, not the actual cause. My key is always systematic testing to figure out if the problem is inside the converter itself, or somewhere else in the 12V system.
| Symptom I See | What It Usually Means | Common Misdiagnoses | How I Confirm It |
|---|---|---|---|
| Low or Unstable 12V System Voltage | Could be internal failure of power transistors, control circuitry, or output diodes within the converter. | A failing 12V battery, loose battery terminals, or a faulty battery current sensor. |
With the car in “Ready” mode, I’ll measure the voltage directly at the converter’s 12V output terminals. It should be a steady 13.5V–15.0V, even when I put a load on it (like turning on the headlights and defroster). If it’s low or fluctuating, that’s a big red flag. |
| Diagnostic Trouble Codes (DTCs) Specific to the Converter | Internal controller fault, a damaged CAN chip, or even a firmware error. | A broken CAN bus wire somewhere else in the vehicle, or a failed Body Control Module (BCM) that’s not communicating properly. |
I’ll use my advanced scan tool to run active tests. I’ll try to command the converter ON and OFF, and then monitor its live data PIDs (Parameter IDs) for a response. If it doesn’t respond or the data is illogical, that points to an internal fault. I’ll also check for communication codes like U0293 or U0294, which can indicate a problem with the converter’s internal network chip. |
| No 12V Output at All | A catastrophic internal short, a blown internal fuse (if applicable), or a thermal shutdown. | A blown external fuse, a missing “enable” signal from another module, or even a failure of the main HV contactors that supply power to the converter. |
First, I verify that the high-voltage input (usually 200V+) is present at the converter’s terminals. This requires specialized HV tools and safety procedures, obviously. Then, I check for the “enable” signal — the low-voltage signal that tells the converter to turn on. If both are present but there’s still no 12V output, then I’m pretty confident the converter itself is dead. |
The Silent Killer: 12V Short Circuits
This is a big one, and it’s something a lot of folks miss. Yes, a short circuit on the 12V side of the vehicle can absolutely destroy a DC-DC converter. In fact, it’s one of the most common reasons I see these units fail. The converter is a precision voltage regulator. When a short happens downstream — say, a pinched wire, a faulty accessory, or a module that’s gone bad and is drawing excessive current — it creates a massive, uncontrolled current draw.
So, it’s not always a dramatic, immediate failure. Sometimes it’s a slow burn, caused by a component drawing just a little too much current over time. That’s why it’s crucial to differentiate between a converter problem and a drained 12V battery from, say, leaving a light on, or a parasitic draw. If you don’t find and fix that root-cause short before you swap out the converter, I guarantee you’ll be replacing the new unit just as quickly.
Repairing a Failed Converter: Safety & Procedure
HIGH-VOLTAGE DANGER IS REAL
If the DC-DC converter has failed internally, there’s no fixing it — you have to replace it. These units are sealed, complex electronics. And let me be clear: this job involves working around lethal high-voltage systems. If you’re not properly trained and equipped, do NOT attempt this. Take it to a qualified hybrid/EV technician.
Assuming you’re qualified, here’s the general process I follow:
HV Disconnect Procedure
Insulated Tooling & PPE
Torque Specifications
Validating the Repair: Don’t Skip This Step
Just swapping out the converter isn’t the end of the job, not by a long shot. A proper repair includes thorough validation to make sure the system is stable and, crucially, that the root cause of the original failure was actually addressed. Otherwise, you’re just waiting for the next breakdown.
My Post-Repair Checklist:
Once everything’s reconnected and safe, I’ll put the car in “Ready” mode and measure the 12V system voltage right at the battery. I want to see a solid 13.5V–15.0V. Then, I’ll apply a heavy load — headlights on high, heater blasting, rear defroster, maybe even the heated seats. The voltage should hold steady, ideally above 13.0V. Finally, I clear all DTCs and perform a full drive cycle. I’m looking for any communication codes (like those U0293, U0294 I mentioned) or any other charging system warnings to return. If everything stays clear, then I’m confident in the repair.
Cost: What to Expect
Let’s talk money. Replacing a DC-DC converter isn’t cheap, mainly because it’s a critical, complex high-voltage component. Here’s a general breakdown of what I usually see:
Used/Refurbished Part
This is the lowest cost option for the part itself, but it comes with a higher risk. You don’t know the history, and internal degradation might mean it won’t last long.
New OEM Replacement
This includes a brand new OEM part. When you factor in 2–4 hours of specialized labor and the necessary HV diagnostic fees, this is the most reliable, albeit most expensive, choice. It’s what I recommend for peace of mind.
Labor Only
This is the typical labor cost for all the HV safety procedures, the physical component swap, and any necessary system calibration or programming. It can vary quite a bit depending on the vehicle and shop rates.
Preventing Future Failures: My Best Advice
After 25 years in this business, I can tell you that prevention is always cheaper than repair. Most DC-DC converter failures I see could have been avoided with a little proactive maintenance on the 12V system. Here’s what I tell my customers:
Maintenance Best Practices
-
Inspect 12V battery terminals regularly: Corrosion and loose connections create resistance, which means heat and voltage drop. Clean them up and make sure they’re tight. It’s a simple check that can save you a lot of grief.
-
Use the correct battery type: Most hybrids and EVs require AGM or EFB (Enhanced Flooded Battery) batteries. Don’t cheap out and put a standard flooded lead-acid battery in there. It can mess with the charging algorithms and stress the converter.
-
Monitor system voltage: If you have a way to check your 12V system voltage, do it occasionally. Consistently low readings (below 13.0V in “Ready” mode) or consistently high readings (above 15.5V) are early warnings that your converter is under stress or misbehaving.
-
Address parasitic draws immediately: If you’ve got a module that’s failing and creating an overcurrent condition, or any other parasitic draw, get it fixed. That constant strain will eventually kill your converter.
Technician’s Bottom Line
The DC-DC converter is a robust piece of equipment when the 12V system it supports is healthy. But it’s not indestructible. Most of the failures I’ve seen stem from avoidable electrical issues downstream. By keeping an eye on your 12V system and addressing small problems early, you can almost certainly avoid a costly and potentially dangerous converter failure down the road.
