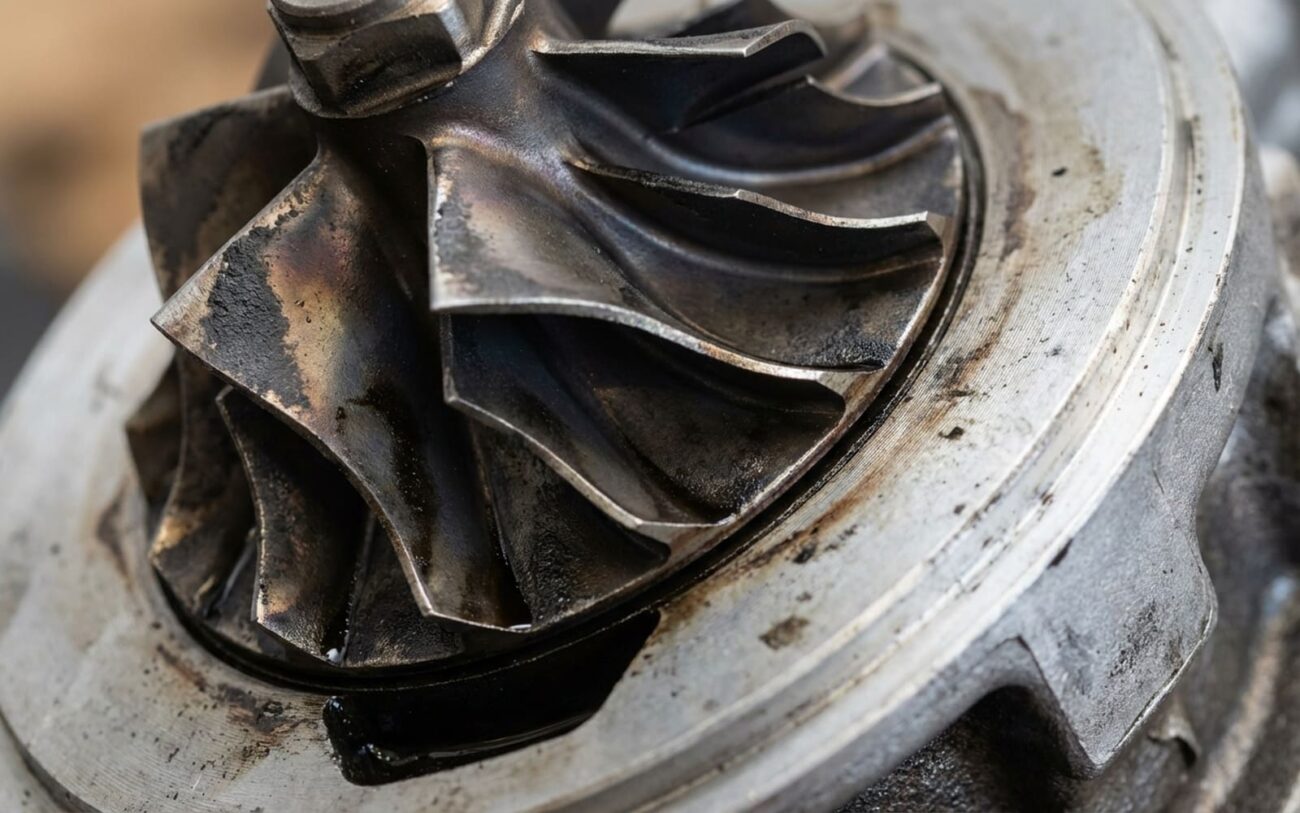
If your Volvo’s Drive-E T5 or T6 engine feels like it’s lost its edge – maybe it’s hesitant off the line, blowing a little smoke, or just idling rough – you’re probably not imagining things. These are great engines, efficient and powerful, but after 80,000 to 120,000 miles, I consistently see a couple of common culprits in my shop. More often than not, it comes down to either the direct fuel injectors or the turbocharger.
Now, here’s the kicker: both of these can make your car feel sluggish or even smoke, but the reasons they fail are completely different. And let me tell you, misdiagnosing one for the other is a surefire way to waste a lot of time and a lot of money. I’ve seen it happen too many times. So, let’s break down what you’re likely experiencing, how to figure out what’s really going on, and what steps you need to take next.
What You’re Likely Feeling and Hearing
When something’s off with your engine, it usually tells you pretty clearly. Here’s what I typically hear and feel from customers when these two components are failing.
Direct Fuel Injector Problems
These injectors live a tough life, spraying fuel at over 2,000 psi directly into the cylinder head. When they start to go, the first thing I often hear about is a really long crank before the engine fires up, especially when it’s cold. You know the drill: turn the key, it cranks for five or six seconds, then finally catches with a puff of white or blue-tinged smoke out the tailpipe. That smoke is unburned fuel, by the way, slipping past the piston rings and into your crankcase or exhaust.
Once it’s running, you’ll probably notice a misfire. It might be constant, or it might show up more under load or when you’re just sitting at idle. The check engine light will almost certainly be on, usually throwing cylinder-specific codes like P0301, P0302, and so on. A rough idle is common, and you might smell raw gasoline, especially near the exhaust. But here’s the critical part most folks don’t realize: a leaking injector isn’t just a misfire problem; it can absolutely destroy your engine.
Turbocharger Problems
The turbocharger is what gives these Drive-E engines their punch, that strong low-end torque and quick response. When it starts to fail, your car will feel really sluggish, like it’s “out of breath” no matter how hard you push the pedal. You might see a P0299 code (underboost) or P2263 (turbocharger boost sensor A circuit range/performance). These codes are a big red flag, but they don’t always mean the turbo itself is dead; sometimes it’s just a boost leak or a solenoid acting up. Still, it’s where I start looking.
Another major sign is blue or grey smoke from the exhaust, especially when you accelerate. This usually means the internal oil seals in the turbo have failed, letting engine oil get sucked into the intake and burned in the combustion chambers. If you ignore this, you’ll burn through oil like crazy, and you’ll get a lot of carbon buildup inside the engine.
And listen to your turbo. A healthy one makes a smooth, rising whine as it spools up. But a failing turbo with worn bearings? That’ll develop a high-pitched scream, a metallic grinding, or even a fluttering noise under load. The noise will definitely increase with engine RPM. I see this misdiagnosed all the time – people think it’s a belt squeal or a transmission issue. But if that tone changes with boost, it’s almost certainly the turbo.
Worst-case scenario here: if those bearings completely fail, the compressor or turbine wheel can break apart. When that happens, metal debris gets flung everywhere – into the intake, the intercooler, and even back into the engine through the oil drain line. At that point, you’re not just replacing a turbo; you’re looking at a full engine flush, a new intercooler, and potentially internal engine repairs. I’ve had customers turn a $3,000 turbo job into a $10,000 engine rebuild because they kept driving with that grinding noise.
Why These Parts Fail in the First Place
Understanding why something breaks is key to preventing it from happening again. These aren’t random failures; they’re almost always tied to operating conditions and how the car’s been maintained.
Direct Fuel Injector Root Causes
For direct injection engines, carbon buildup is the number one enemy. Since the fuel sprays directly into the combustion chamber, the injector tip is constantly exposed to extreme heat and combustion byproducts. Unlike older port injection systems where fuel would wash over the back of the intake valves, direct injection doesn’t clean these areas. This leads to carbon deposits building up on both the valves and the injector tips, especially if you do a lot of short trips where the engine never really gets hot enough to burn off deposits.
Over time, these deposits mess with the precise fuel spray pattern. You get poor atomization, which means misfires and higher emissions. Electrically, the injector’s solenoid is constantly cycling – thousands of high-frequency, high-voltage pulses every minute. That constant work leads to coil fatigue. Mechanically, the needle and seat inside the injector are dealing with massive pressure cycles, which can erode the sealing surfaces over time, leading to those internal leaks.
Volvo has actually acknowledged these issues in some Drive-E models. There are known service bulletins (TSBs) for 2015–2018 VEA engines that specifically address rough idle and misfires linked to injector deposits. These TSBs often recommend checking injector compensation values using Volvo’s Vida DiCE diagnostic system. And while injectors are common, don’t forget about other components like the high-pressure fuel pump or the low-pressure fuel sensor; they can mimic injector symptoms.
Turbocharger Root Causes
When it comes to turbos, it almost always comes down to the oil. The turbo shaft spins at over 100,000 RPM on a super thin film of oil. Any disruption to that oil flow or any degradation in its quality will lead to rapid failure. The most common cause I see? Oil coking from poor maintenance. If you stretch your oil change intervals, use the wrong type of oil, or just skip changes altogether, sludge builds up in that tiny oil feed line. Once that line gets restricted, the turbo bearings starve for lubrication.
Another big killer is what we call “hot shutdowns.” After you’ve been driving aggressively, that turbo housing can get incredibly hot, sometimes over 900°F. If you just shut the engine off immediately, the oil flow stops, and any residual oil in those hot bearings bakes into carbon. This carbon then breaks loose and damages the bearings. I always tell my customers to let the engine idle for 30–60 seconds after a hard drive; it gives the turbo a chance to cool down gradually.
Physical damage is less common, but it happens. Say, a damaged air filter lets debris get sucked into the compressor wheel. That’s a quick way to kill a turbo. And remember, while a leaking intercooler or a split boost pipe will cause low power, that’s a boost system issue, not a turbo failure. Don’t confuse the two.
How I Pinpoint the Problem
Look, both injector and turbo problems can cause power loss and smoke, so guessing is just not an option. You need a systematic approach. Throwing parts at the problem – like replacing a turbo when it’s really an injector issue – gets expensive fast. Let’s walk through how I isolate each problem correctly.
Diagnosing a Direct Fuel Injector Problem
Just because you have a misfire or a hard start doesn’t automatically mean a bad injector. Weak ignition coils, worn spark plugs, or even low compression can mimic those exact same symptoms. The key here is to test, not assume.
One of the most reliable methods I use is swapping the suspect injector to a different cylinder. If that misfire code (P030X) follows the injector to its new cylinder, then you’ve found your culprit. Another definitive check is a leak-off test. This measures exactly how much fuel leaks past the injector’s internal seals under pressure. Volvo specifies a maximum allowable flow rate – usually in milliliters per minute – and if an injector exceeds that, it’s failing internally.
I also use a good scan tool (like Vida DiCE) to command each injector individually while I monitor the high-pressure fuel rail pressure. A healthy injector will hold pressure when it’s closed. A bad one, especially one that’s leaking, will show a rapid drop in pressure. For electrical faults, like coil opens or shorts, an oscilloscope test of the injector’s current waveform can reveal issues that a basic code reader would never catch.
Here’s a quick reference for injector diagnostics:
| Symptom | Likely Culprit | Common Mimics | Definitive Test |
|---|---|---|---|
| Hard cold start, misfire | Injector internal leak or clogged nozzle | Low-pressure fuel pump, High-Pressure Fuel Pump (HPFP) |
Leak-off test; Bidirectional control monitoring fuel rail pressure drop. |
| Cylinder-specific misfire | Injector electrical fault or mechanical seizure | Ignition coil, spark plug, low compression |
Swap injector to another cylinder; Oscilloscope current waveform check. |
Diagnosing a Turbocharger Problem
Before I condemn a turbo, I always rule out the simpler, cheaper boost system issues. A sticky boost control solenoid, a disconnected wastegate actuator arm, or even a split intercooler hose can all cause underboost codes. Those are much easier and cheaper to fix than a full turbo replacement.
The best way to confirm a turbo failure is a physical inspection. I’ll use a borescope to look inside the intake pipe and check the compressor wheel for any blade damage or signs of it rubbing against the housing. I also inspect the oil drain line for oil pooling or, worse, metal shavings. Shaft play is a huge indicator: any more than about 0.5 mm of axial or radial movement means those bearings are worn out and the turbo is on its way out.
Another test is to apply vacuum to the wastegate actuator with a hand pump. It should move smoothly and hold vacuum. If it’s stiff, sticky, or leaks, that could be your actual problem. A boost leak test using a smoke machine can also reveal any cracks or loose clamps in the intercooler system. If all those checks come back clean, and you’re still getting low boost, then the turbo itself is most likely the issue.
Here’s a quick reference for turbo diagnostics:
| Symptom | Likely Culprit | Common Mimics | Definitive Test |
|---|---|---|---|
| Underboost, no power | Turbocharger turbine/compressor wheel damage, seized shaft | Boost control solenoid, wastegate, intercooler leak |
Manual wastegate actuator test; Borescope inspection for wheel contact. |
| Oil consumption/smoke | Turbocharger center housing oil seal failure | Piston rings, valve stem seals, PCV system |
Boost leak test; Borescope check for oil pooling in intercooler. |
Getting It Fixed Right
This Is Professional Territory
Let me be clear: these aren’t DIY jobs for the average weekend mechanic. These repairs require specialized tools like Volvo’s Vida DiCE system, specific injector seal installation tools, and exact torque procedures. Trying to do this without the right equipment is a recipe for catastrophic engine failure. I’ve seen it happen.
Direct Fuel Injector Replacement
If the testing confirms you have a faulty injector, replacement is the only reliable fix. You can try cleaning for minor coking, but internal mechanical or electrical failures simply won’t be fixed by solvents. This isn’t a DIY-friendly job at all. On most Drive-E engines, that injector is buried under the intake manifold, meaning you’ve got to remove several components just to get to it.
When you reinstall, torque specs are absolutely critical. The injector hold-down bolt is usually around 10 Nm (7.5 ft-lbs), and the fuel rail bolts are typically around 25 Nm (18 ft-lbs). Overtightening can easily crack the aluminum cylinder head – and trust me, replacing that is a whole different level of repair. Always use new OEM injectors with the latest part number, new copper sealing washers, and fresh O-rings. An injector seal installation tool is essential to avoid damaging those delicate seals during assembly.
And here’s the most overlooked step, the one that trips up a lot of people: programming. Each new injector has a unique calibration code (it’s usually printed right on the injector itself) that must be entered into the engine control module using Volvo’s Vida DiCE system. Without this, the engine won’t run properly. The ECU uses these values to fine-tune fuel delivery for each cylinder. Skip this step, and you’ll still be chasing misfires or a rough idle.
One more thing: there’s no safe workaround for a leaking injector. Fuel additives might help with light deposits, but they won’t stop fuel from diluting your oil. Driving with a known leak is, quite frankly, playing Russian roulette with your engine.
Turbocharger Replacement
If the turbo itself is confirmed bad, replacement is your only real option. Rebuilding is technically possible, but it’s not practical for most shops or individuals; balancing the shaft and wheels requires highly specialized equipment. In my shop, we use new or high-quality remanufactured units.
Here’s the critical step many shops miss: you must replace the oil feed line. The old line is almost certainly clogged with metal debris or carbon from the failed turbo. Reusing it is just asking for the new turbo to starve for oil on its very first startup – guaranteeing a repeat failure. You should also replace all new gaskets, coolant lines, and the oil drain hose at the same time.
Torque specs matter here too. The oil feed line banjo bolt is typically around 30 Nm (22 ft-lbs), and those turbo-to-exhaust manifold nuts need to be tightened in sequence to about 35 Nm (26 ft-lbs) to prevent warping. Before you even start the engine, you need to prime the turbo. I do this by cranking the engine with the fuel pump disabled for a few seconds – it fills the bearings with oil before the turbo starts spinning at high speed.
Making Sure the Fix Worked
Don’t just start it up and drive off. After a repair like this, you need to verify everything thoroughly. Skipping this step is asking for trouble down the road.
For injectors, the engine should idle smoothly, within about 20 RPM of its target, with zero misfire counts. I always use Vida DiCE to check the injector compensation values; they should all be within a very tight range, usually ±2.0 mg per stroke. If one cylinder is still way off, you’ve got another problem. You can also use an infrared thermometer to check the exhaust manifold runner temperatures. If one runner is significantly cooler than the others, that cylinder isn’t firing properly.
For the turbo, take it on a full test drive. Monitor live data: your actual boost should match the requested boost under wide-open throttle – typically 16–18 psi. Listen carefully for any abnormal noises. After the drive, check for any smoke from the exhaust, and if you’re really thorough, inspect the intake system with a borescope again to confirm no oil or debris has returned.
What This Is Going to Cost You
These are major repairs, and the price tag reflects that. The labor is intensive, and the parts aren’t cheap – especially if you’re using genuine OEM components, which I always recommend for critical parts like these. Here’s what you can generally expect:
| Repair Type | DIY Parts Cost | Professional Cost | Success Rate | Risk if Incorrect |
|---|---|---|---|---|
| Single Injector R&R | $400+ | $800 – $1,200 | 95%+ | Fuel leak/fire; engine damage from coding. |
| Full Set (4) Injectors | $1,600+ | $2,500 – $3,500 | 95%+ | High cost of misdiagnosis. |
| Turbo Assembly R&R | $1,500 – $2,500 | $3,000 – $5,000 | 90%+ | Oil starvation destroys new turbo. |
Here’s the financial reality check: if the repair cost starts to approach or exceed half of your car’s market value – especially on a high-mileage vehicle (I’d say over 120,000 miles) – you really need to weigh your options carefully. I’ve seen too many people pour $4,000 into a car that’s only worth $6,000. Sometimes, selling it as-is or moving on to a different vehicle is just the smarter move in the long run.
Keeping It From Happening Again
Prevention is always cheaper than repair, especially with these components. Here’s what I recommend to keep your Drive-E running strong.
My Maintenance Best Practices
For Injectors: Always use Top Tier detergent gasoline. This isn’t marketing fluff; it actually has more detergents to keep deposits at bay. Also, make sure you take regular long drives to get the engine to full operating temperature. Short trips are a killer for carbon buildup. If you have a scan tool, keep an eye on your long-term fuel trims; a trim over +10% can be an early warning sign of clogging.
For the Turbo: This is non-negotiable: use only Volvo-specified full-synthetic 0W-20 oil (VCC RBS0-2AE). And change it every 5,000–7,500 miles, not just when the car tells you. That extra protection is cheap insurance. As I mentioned earlier, make it a habit to let the engine idle for 30–60 seconds after any hard driving to prevent oil coking in the turbo bearings.
One last piece of advice: if you’re chasing a P0087 code (fuel rail/system pressure too low), don’t automatically assume it’s the low-pressure fuel pump. It could be a clogged fuel strainer, a failing high-pressure pump, or even just a bad pressure sensor. Diagnose it properly before you start throwing parts at it. And remember, sometimes a simple software update through Vida DiCE can resolve minor drivability issues before they escalate into expensive hardware failures.
