Alright, let’s talk water pumps. After more than two decades wrenching on engines, I’ve seen my share of cooling system meltdowns. A failing water pump is one of those issues that starts subtle but can quickly turn into a major headache, or worse, a blown engine. The trick isn’t just knowing that something’s wrong, but knowing what it is and how to prove it before you start throwing parts at it. That’s what we’ll get into here.
The Early Warning Signs: What Your Car’s Telling You
Diagnosing a water pump often starts with just listening and observing. You don’t always need to tear into the engine right away. The car usually gives you clues if you know what to look (and listen) for.
The most obvious sign, of course, is overheating. But not all overheating is the same. If your temperature gauge starts climbing when you’re stuck in traffic, idling, or pulling a hill, but then settles back down when you hit the highway, that’s a classic symptom of reduced coolant flow. What’s happening there is the pump’s impeller isn’t pushing enough coolant when the engine’s working hard or airflow is minimal. It’s struggling to keep up with demand.
Now, a stuck thermostat or a clogged radiator can act similarly, so don’t jump to conclusions just yet. But if you’re also hearing some unusual noises from the front of the engine—a steady whine that gets louder as the RPMs climb—that’s when my ears perk up for a bad water pump bearing. It’s different from a belt squeal, which tends to be more rhythmic or chirpy. A failing water pump bearing usually makes a constant, high-pitched whine or a low growl. If it’s grinding, well, you’ve probably been ignoring it for a while, and it’s on its last legs.
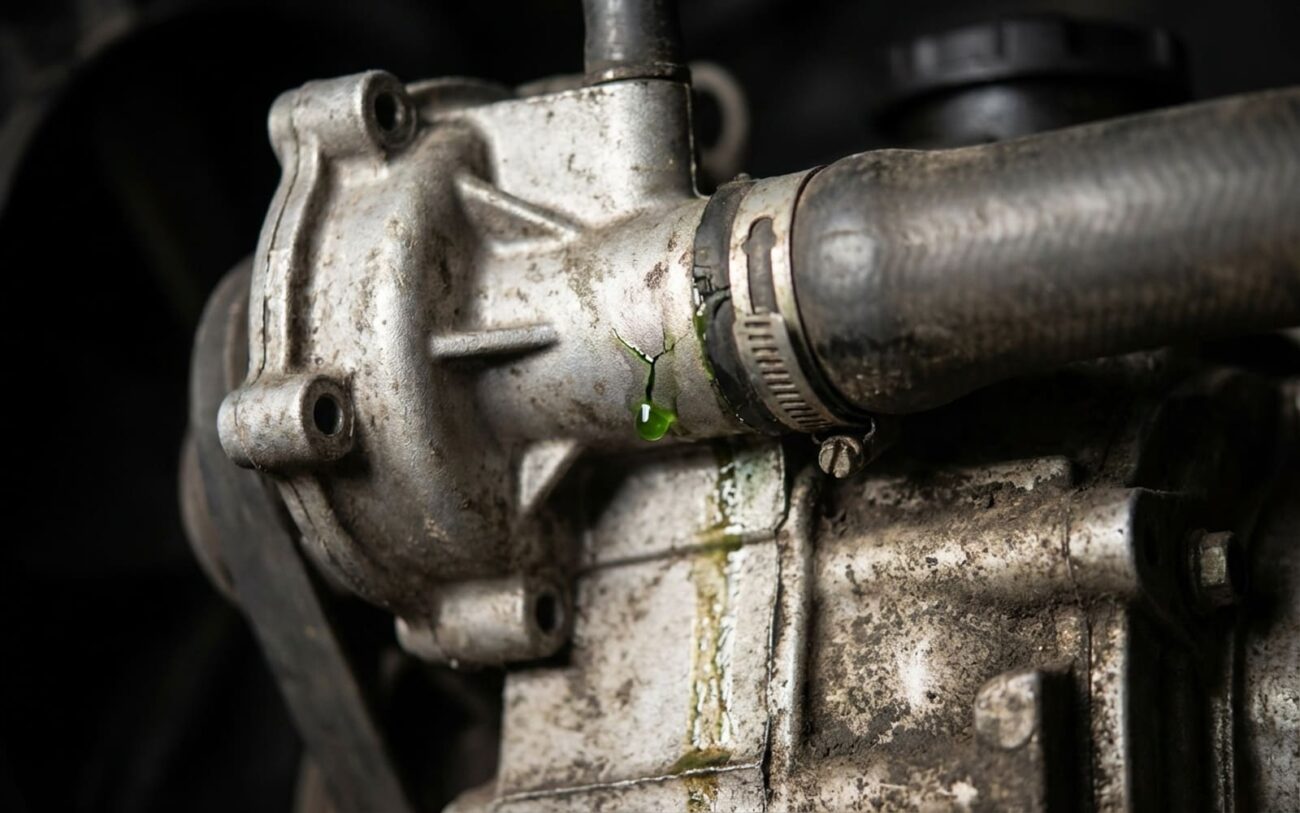
One of the most reliable indicators, and one I always check first, is coolant leaking from the weep hole. This isn’t a design flaw; it’s a built-in warning system. It’s a small port on the bottom of the pump housing, and its job is to let coolant escape when the internal shaft seal starts to fail. This gives you a heads-up before the bearing completely seizes. If you see any dried crusty residue—could be green, orange, pink, or even just rust-colored—or fresh drips coming from that spot, the pump’s seal is compromised, and it’s only a matter of time.
Another subtle clue, especially on older vehicles, is inconsistent heater performance. If your heat fades when you rev the engine, or if it’s fine at idle but drops off under load, that can point to an impeller issue. It might be slipping on the shaft, or the blades could be eroded or damaged. Either way, it disrupts proper coolant flow and circulation, and it’s not going to fix itself.
And let me be clear: ignoring these symptoms is a gamble you don’t want to take. Without proper coolant circulation, you’re looking at hot spots in the cylinder head, which can warp it or blow a head gasket. If your water pump is driven by the timing belt and that bearing seizes, it can snap the belt. On an interference engine, that means bent valves and piston damage—a $500 repair can easily become a $3,000+ engine rebuild. If you see these warning signs, park the car until you figure out what’s going on.
Confirming the Culprit: How to Know It’s the Pump
Before you grab your wrenches or hit “add to cart,” you absolutely need to confirm the water pump is the problem. A lot of other cooling system issues can mimic a bad pump, and misdiagnosis just wastes your time and money. Here’s how I break it down in the shop to pinpoint the actual source.
| Symptom | Likely Water Pump Cause | Common Mimics | My Go-To Test to Confirm |
|---|---|---|---|
| Overheating under load (idle/hills) | Impeller blades are either eroded, corroded, or the impeller itself is slipping on the shaft, reducing coolant flow. | A restricted radiator, a thermostat stuck closed, low coolant, a failed electric cooling fan, or even debris blocking the radiator fins. |
I always start with an infrared temperature gun. With the engine hot and running around 2500 RPM, shoot the upper and lower radiator hoses. The upper hose should be significantly hotter than the lower—I’m looking for at least a 10-degree Fahrenheit difference. Less than that points to poor circulation. For a more direct, but messier, flow check (only on a cold engine): briefly disconnect the upper radiator hose at the radiator, start the engine for 2-3 seconds, and watch the coolant flow. You should see a strong gush. Just be ready to deal with coolant spillage and air pockets afterward.
|
| Coolant leak from the front of the engine | A failed shaft seal (leaking from the weep hole), a cracked pump housing (rare, but happens), or a bad gasket/O-ring at the mounting surface. | Leaks from the thermostat housing, water outlet, a heater hose connection, or a radiator seam. |
First, clean the area thoroughly. Then, use a cooling system pressure tester—you can rent one from most auto parts stores. Pressurize the system to the radiator cap’s rating (usually 16-18 psi) and let it sit for at least 30 minutes. Use a bright flashlight or an inspection mirror to look for drips. A leak directly from the weep hole or around the pump’s mounting surface tells you it’s the pump. If it’s a slow leak, I’ll sometimes add UV dye to the coolant, drive it for a day, and then check with a black light.
|
| Bearing noise from the front of the engine | A worn or failing water pump bearing. | A failing idler pulley, tensioner bearing, alternator, power steering pump, or A/C compressor bearing. |
A mechanic’s stethoscope is your best friend here. If you don’t have one, a long screwdriver works in a pinch. Touch the metal end to the pump housing (engine running, but be extremely careful to stay clear of moving belts and fans!) and listen through the handle. Compare the noise to other accessories. If it’s loudest at the water pump, that’s a strong indicator. Once the engine is off and cool, remove the drive belt. Spin the water pump pulley by hand. You’re feeling for roughness, grinding, or any side-to-side wobble. Any play or gritty feel means the bearing is shot.
|
Why They Give Up the Ghost: Inside a Failing Pump
Water pumps don’t just “get tired.” They fail for specific reasons, and understanding those reasons helps you prevent future issues and properly diagnose current ones. It’s usually a breakdown of one of these internal components.
The impeller is the heart of the pump, pushing coolant through the system. I’ve pulled out pumps where the plastic fins were completely gone, or metal ones were severely pitted. This is often due to cavitation. When coolant levels are low, or there’s air trapped in the system, tiny vapor bubbles form and then violently collapse against the impeller blades. Over time, this erosion eats away at the material. Using plain water or incorrect coolant mixtures—which lack the right corrosion inhibitors and lubricants—accelerates this process significantly.
Most bearing failures start with the shaft seal. Once that seal starts to leak, coolant seeps past it and washes out the critical grease from the bearing. Without lubrication, the bearing wears out rapidly. That small leak from the weep hole? That’s your early warning that the seal is compromised. High mileage, excessive heat, and even improper belt tension can contribute, but once that sealed bearing unit is compromised, it’s not serviceable—it needs replacement.
You also have the pump housing and gasket. While less common, aluminum pump housings can sometimes develop porosity from manufacturing defects or corrode from old, acidic coolant. More often, a leak at the mounting surface is just a failed gasket or O-ring, not the housing itself. When you install a new pump, always use a new gasket or seal. Never try to reuse the old one; it’s just asking for a comeback.
Important Distinction:
It’s crucial not to confuse water pump failure with other cooling system problems. A stuck thermostat, a clogged radiator, or even a blown head gasket can cause similar overheating and pressure issues. For example, if you’re finding combustion gases in the cooling system (which you can test for with a block tester), that’s a head gasket, not your water pump. While some engines, like certain V6 models, are known for premature pump seal issues, you still need to verify the fault before you start replacing parts. Don’t just guess.
Your Options: DIY or Call a Pro?
Once you’ve nailed down that the water pump is indeed the problem, your next step depends heavily on how that pump is driven and where it’s located. This dictates the complexity, the cost, and whether it’s a job you should tackle yourself.
Accessory-Belt-Driven Pumps DIY-FEASIBLE
Timing-Belt/Chain-Driven Pumps Professional Only
Internal Failures (No Visible Leak)
Did It Actually Work? Validating Your Repair
Replacing the water pump is only half the battle. If you don’t properly validate the repair and bleed the system, you’re just asking for another problem, or worse, a comeback to the shop. I’ve seen it too many times. Here’s my process to make sure the job’s done right:
To Validate the Repair
-
Pressure Test: After refilling the system, the very first thing I do is pressure test it again. Use your coolant pressure tester and hold the system at the radiator cap’s rated pressure (e.g., 16 psi) for at least 30 minutes. A steady gauge with no drop means you’ve got a sealed system, no leaks.
-
Thermal Cycles & Leak Check: Drive the vehicle through at least three full thermal cycles. That means cold start, warm-up to operating temperature, shut down, and let it cool completely. Each time, recheck for any leaks, especially around the weep hole and mounting surface. If you used UV dye during diagnosis, a black light makes this super easy to spot any remaining issues.
-
Verify Flow: Once the engine is at operating temperature, hold the RPMs at around 2500 for a few minutes. Use your infrared thermometer to measure the upper and lower radiator tanks. A healthy system with a new pump should show a temperature drop of at least 20°F from top to bottom. This confirms the new impeller is doing its job and moving coolant effectively. Also, check your heater: it should be blowing consistent, hot air at idle and under load. If it fades when you rev the engine, you might still have an air pocket or a thermostat that’s not fully opening.
-
Don’t Skip This: The same tools you used for diagnosis—the pressure tester and the IR gun—are your best allies in confirming the repair. Skipping these validation steps is a shortcut to future problems.
The Bottom Line: Cost, Warranty, and When to Walk Away
Let’s talk brass tacks about what this repair will cost you. It’s not just the part; it’s heavily driven by how much labor it takes to get to that pump. Here’s a realistic breakdown based on what I see in my shop:
| Repair Type | DIY Cost (Parts Only) | Shop Cost (Est. Labor + Parts) | Success Rate (If Done Right) | Major Risk if It Goes Wrong |
|---|---|---|---|---|
| Accessory-belt-driven pump | $80 – $200 | $350 – $600 | 95% – assuming proper bleeding and torque specs are followed. | Overheating from air pockets, leaks from incorrect torque, or damage during reassembly. |
| Timing-chain/belt-driven pump | $300 – $500 (this usually includes a full timing kit) | $900 – $1,800 | 98% – when a qualified technician with the right tools performs the job. | Catastrophic engine damage (bent valves, piston damage) from incorrect cam or crank timing. |
I’ll be honest with you: sometimes the repair cost can exceed the car’s actual value. If you’re looking at a $1,500 repair bill on a car that’s only worth $3,000 in good condition—and it’s already got worn brakes, a shaky transmission, or rust issues—it might not make financial sense. This isn’t just a mechanical decision; it’s an economic one. I’ve had plenty of customers choose to replace the vehicle instead, and in many cases, it was absolutely the smarter long-term move. Don’t be afraid to consider that option.
Keeping Your New Pump Alive for the Long Haul
After you’ve gone through the trouble of replacing the pump, protect your investment. The single biggest factor in water pump longevity, in my experience, is coolant quality. Modern coolants aren’t just antifreeze; they contain specific additive packages that lubricate the pump seal, prevent corrosion, and protect aluminum housings from electrolytic damage. Using the wrong type—like mixing an OAT coolant with a HOAT coolant—can cause sludge or gel to form, restricting flow and damaging that new impeller.
Don’t just go by how the coolant looks; follow the manufacturer’s replacement interval. Those protective additives degrade over time, long before the coolant itself looks “bad.” Most vehicles need a flush and fill every 5-7 years or 60,000-100,000 miles, but always check your owner’s manual. And never, ever just top off with plain water—always use the correct premix or concentrate.
For early detection, make routine checks a habit. When you’re doing an oil change, take a quick look at the water pump housing and weep hole. Any fresh wetness or white, crusty deposits are red flags. On cold starts, listen for a brief bearing whine that disappears once the engine warms up—that’s often an early sign of bearing wear. Catching a small issue early can save you from a major breakdown on the side of the road. And if you’re working on a vehicle with a history of cooling problems, I often recommend monitoring OBD2 live data for coolant temperature stability. It’s a subtle but effective diagnostic window that can show you if things are getting out of whack before the gauge even moves.
