Look, if you’ve got a BMW from the last 20 years – whether it’s an E39, E90, F30, or even an F10 – and you’re feeling that weird front-end clunk or a steering wheel shimmy, I can tell you right now what it probably is. After 25 years turning wrenches, mostly on these cars, I’ve seen it a thousand times: it’s almost always the thrust arm bushing. Don’t let anyone tell you “that’s just how BMWs drive” – that’s nonsense. It’s a worn part, and it needs fixing.
Why These Bushings Fail So Often
Why does this happen so often on BMWs? It’s not a design flaw, really. It’s just physics. These thrust arms – sometimes called lower control arms or wishbones – take a beating. Every time you hit the brakes, especially hard, that arm wants to push backward, and the bushing is the only thing resisting that force. It’s a high-stress component in a precision suspension system.
My Take on the Design:
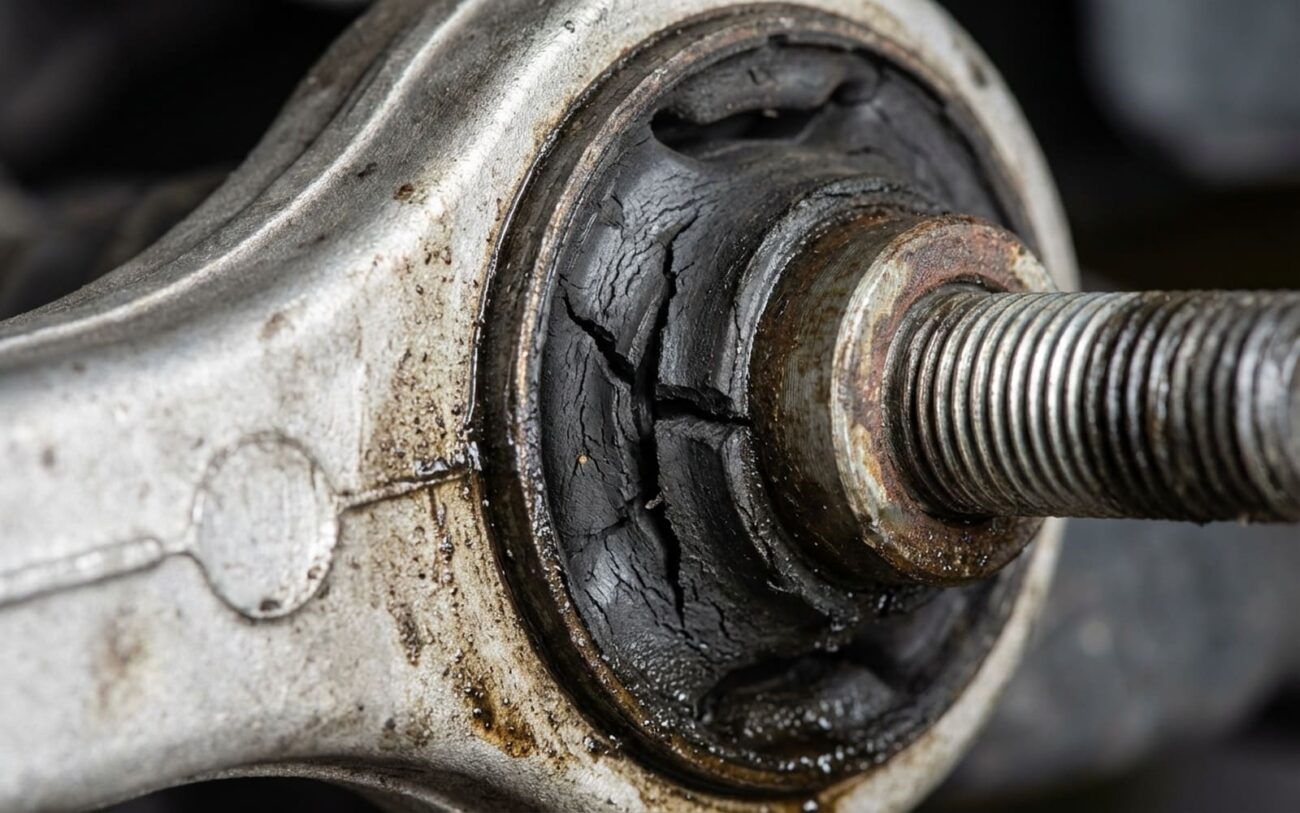
Most BMWs from the E46 through F30 generations use hydraulic bushings. These are filled with a special damping fluid to reduce noise, vibration, and harshness (NVH). The problem is, that fluid eventually leaks out through micro-cracks in the rubber, or the rubber itself just gives up and separates. Once that fluid is gone, or the rubber is compromised, you lose all that critical damping, and that’s when the clunks and shimmies start. BMW even has service bulletins recommending inspection intervals around 40,000 miles for fluid seepage or visible cracks on platforms like the E90, F30, and X3/X5. It’s just a wear item, pure and simple.
Just a quick note: don’t confuse this with a bad ball joint on the same arm, or if the arm itself is bent from hitting a curb. Those are different problems, though a bad bushing can certainly accelerate ball joint wear.
What a Failing Thrust Arm Bushing Feels and Sounds Like
So, what does a bad thrust arm bushing actually feel like? The most common complaint I get in the shop is a distinct, hollow clunk when you hit a sharp bump – think potholes, driveway lips, even manhole covers. It’s not a gentle rattle; it’s a solid thud. That’s metal hitting metal because the rubber inside the bushing is shot, or the fluid has leaked out, and it’s not damping anything anymore.
Then there’s the steering wheel shimmy. You’ll usually feel this between 45 and 60 mph, especially when you lightly apply the brakes. A lot of folks think “warped rotors” or “unbalanced wheels,” but if it only happens under light braking and sometimes goes away when you let off the pedal or pop it into neutral, that’s a classic thrust arm bushing symptom. The wheel assembly is literally shifting forward and backward under braking force because that bushing isn’t holding it tight.
How I Confirm the Diagnosis — No Guessing
Alright, so you’ve heard the symptoms, but how do you know it’s the thrust arm bushing and not something else? This is where a lot of DIYers, and even some less experienced techs, go wrong. You don’t want to just throw parts at it. Here’s how I confirm it in the shop:
-
The Pry Bar Test (for Clunks): Get the car safely on a lift or sturdy jack stands. Grab a good, sturdy pry bar. You’re going to put it between the thrust arm and the front subframe, right at that bushing. Now, gently but firmly, pry. You’re looking for any visible movement – and I mean any movement – more than about 3mm. If you see it shift, or if you hear a distinct clunk when you pry, that bushing is toast. It’s lost its internal integrity.
-
The Brake Shimmy Test (for Vibrations): This one you do on the road. Find a safe stretch of highway, get up to about 50 mph, and then gently apply the brakes. If you feel that steering wheel shimmy, keep the brakes lightly applied and then, if it’s safe to do so, pop the car into neutral. If the shimmy immediately disappears or significantly reduces, it’s likely your thrust arm bushings causing the fore-aft deflection. If it persists while coasting in neutral, then you’re probably looking at unbalanced wheels or warped rotors. This simple test saves a lot of headaches, trust me.
-
Dry-Park Test & Alignment Check (for Vague Steering/Tramlining): For vague steering, first do a “dry-park” test. With the car on the ground, engine off, have someone slowly turn the steering wheel back and forth a few inches while you look at the tie rod ends and the thrust arm bushings. Any excessive play in the tie rods will show up here. If that looks good, then it’s time for an alignment check. A good shop can give you a printout. If your caster angle difference between the left and right side is more than 0.5 degrees, that’s a strong indicator your bushings are worn out and allowing too much movement.
The Repair – Doing It Right
Okay, so you’ve confirmed it’s the bushings. Now, how do you fix it? This isn’t a job you want to rush, and there’s one golden rule I always tell my guys:
Critical Installation Note
Always, always tighten all suspension bolts with the vehicle at normal ride height – meaning the wheels are on the ground and the suspension is loaded. If you tighten these bolts with the suspension hanging, you’re pre-loading the bushing, and it’ll fail prematurely. I’ve seen it happen too many times in my career.
Now, the repair approach depends a bit on your BMW generation:
And while you’re in there, take a moment to inspect the front subframe mounts. On high-mileage E90s especially, those can sag or crack, leading to alignment drift and persistent vibrations that even new thrust arms won’t fix. It’s a common hidden culprit I’ve found.
How to Know the Repair Was Successful
After all that work, how do you know you nailed it? Simple. The clunk over bumps should be completely gone – even on the roughest roads. Do the pry bar test again: there should be absolutely no movement or noise. On your test drive, that braking-induced shimmy should be a thing of the past. The car should track straight and feel much more precise, not vague.
Mandatory Step: Alignment
And here’s the non-negotiable step: get a professional alignment immediately. Replacing these arms directly affects your caster and camber. Without a proper alignment, you’re just going to chew up the inner edges of your new front tires in a hurry. Ask for a printed report and make sure the caster balance between sides is within 0.5 degrees. This is critical.
If you’re still feeling some vibration after all this, and you’ve ruled out wheel balance, don’t forget to check for tire size mismatch, especially on xDrive models. I’ve seen that cause persistent driveline vibrations that get mistaken for suspension issues.
Staying Ahead of Future Failures & The Cost of Doing Nothing
You can’t stop wear, but you can definitely catch it early. This is a critical item on any BMW 40,000-mile suspension check. Every time your car is on the lift for an oil change or tire rotation, grab a flashlight and take a quick look at those thrust arm bushings. Here’s what I look for:
-
Any visible cracks radiating out from the center of the bushing.
-
Swelling, bulging, or obvious deformation of the rubber.
-
Dark, oily residue around the bushing or on the subframe – that’s leaked hydraulic fluid.
-
A visible gap between the rubber and the metal sleeve.
Always check both sides, even if only one feels bad. They usually wear out together, and replacing both at the same time ensures balanced handling and saves you repeat labor down the road. Brands like Lemforder or TRW are my go-to for OE-quality replacements; they offer that perfect balance of durability and ride comfort.
As for cost, doing nothing is always more expensive in the long run. You’re looking at anywhere from $150-$400 for a pair of good quality arms or bushings if you DIY, plus the alignment. If you take it to a shop, expect to pay $600-$1500, depending on the model and whether you replace just bushings or the whole arm. That might sound like a lot, but it’s a lot less than buying new tires every year or dealing with potential ball joint failures later on.
