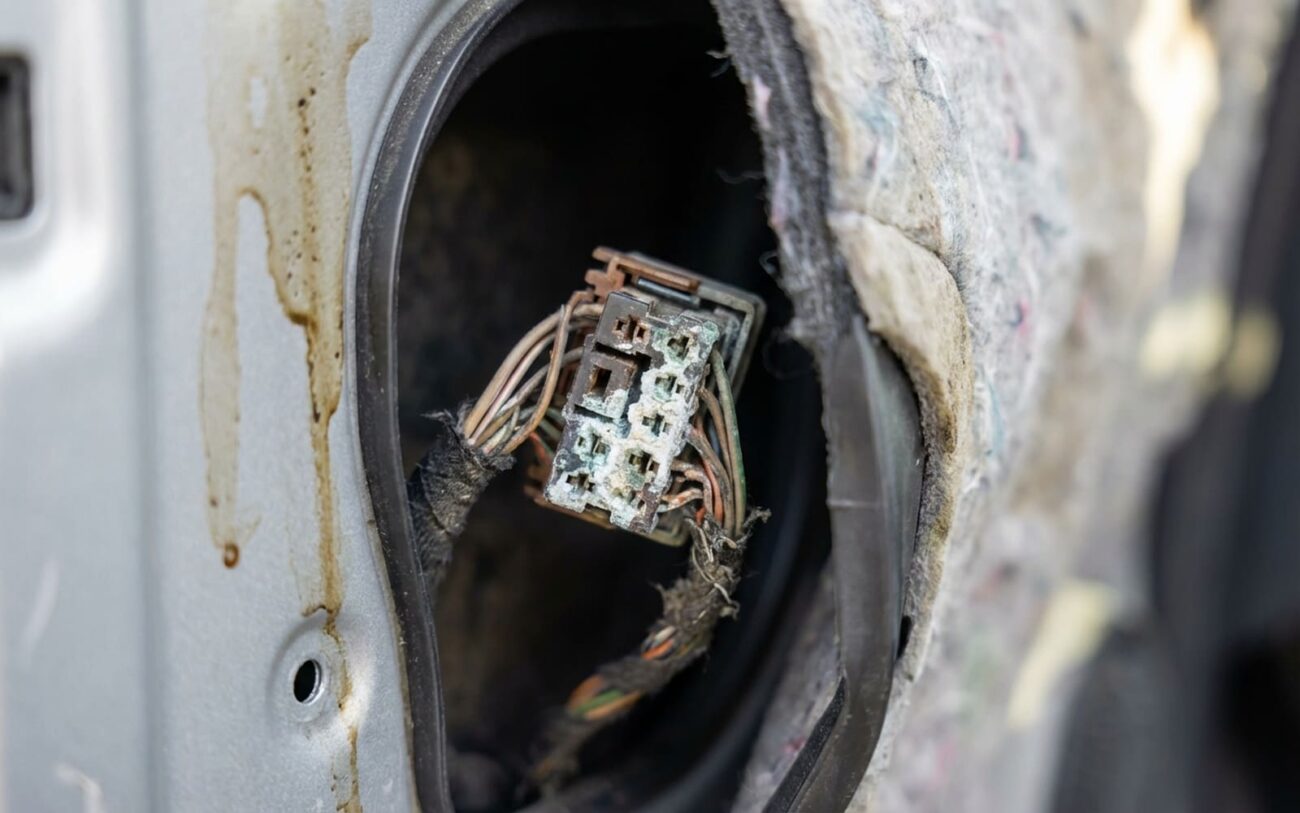
Alright, let’s talk power windows. Specifically, those stubborn ones on your Renault or Dacia that worked fine last fall but now, after a cold snap or a wet spring, they either won’t budge or they’re fighting you every inch of the way. I’ve seen this a thousand times in my bay, and almost always, it’s not what most folks think.
The Real Culprit: Water, Ice, and Rust
When you hit that window switch and all you hear is a faint click or a low hum from inside the door, but the glass stays put? That hum tells me the motor’s getting power. It’s trying to turn, but something mechanical is locked up. On these Renault and Dacia models—think Clio, Megane, Kadjar, Sandero, Logan—that “something” is almost always moisture-related. It’s the silent killer.
Over winter, water inevitably seeps into the door cavity. The drain holes at the bottom of these doors are often too small or get clogged with leaves and road grime. So, water pools. If temperatures drop, that water freezes solid, locking up the window regulator’s moving parts—the cables, the pulleys, the guide channels. Even if it doesn’t freeze, constant condensation and splash water cause corrosion over time. That rust creates drag, making the motor work overtime.
You’ll often hear this as a grinding, popping, or cracking noise the first time you try the window after it’s been sitting. That’s usually ice breaking apart between the regulator’s scissor arms, or a corroded cable finally shifting in its housing. If the window still moves but goes up crooked, binds partway, or needs a helping hand, the problem has progressed. That means the guide channels are likely warped from rust, or a plastic cable guide has cracked due to ice expansion. Either way, it’s mechanical resistance, not an electrical fault.
Diagnosing the Real Problem: Mechanical or Electrical?
Before you start tearing anything apart, you need to know: is this really a frozen or corroded mechanism, or is it an electrical issue like a bad switch, wiring fault, or a truly failed motor? The symptoms can overlap, but the root cause determines your next move. The table below outlines how I tell them apart. In most cases, the definitive step is removing the door panel—don’t panic, it’s a routine job once you’ve done it a few times.
| Symptom | Likely Mechanical Cause (Regulator/Linkage) | Common Electrical/Electronic Mimics | How I Confirm It |
|---|---|---|---|
| Motor hums or clicks, but no window movement. | Frozen cables in housing, ice in guide channels, or heavy corrosion on rails. | Failed motor, faulty window switch, wiring break, or LIN bus communication issue. |
First thing I do: Pull the door trim panel. Then, I use fused jumper wires to apply direct 12V power to the motor terminals. If that motor runs freely, the bind is mechanical. I’ll then inspect for ice or rust. If it doesn’t run, then I start checking the switch circuit with a multimeter for continuity and voltage.
|
| Grinding, popping, or cracking noise during operation. | Ice between scissor arms, cracked plastic pulley, or seized cable drum. | Worn motor gear, foreign object inside door, or broken regulator mounting point. |
Door panel off again. I try moving the regulator by hand with the motor disconnected. If it’s binding or feels gritty, that confirms a mechanical issue. I’ll shine a bright light inside to check for ice or broken components. Sometimes, I’ll even listen to the motor itself with the regulator disconnected to rule out internal motor gear issues.
|
| Slow, labored window movement. | Corrosion on guide rails, water-contaminated grease, or misaligned channels. | Weak motor, high resistance in wiring, or failing power supply from fuse box. |
This is where a clamp meter really shines. I measure the motor’s current draw. A healthy motor pulls about 5–8 amps under load. If I see it pulling over 15 amps, that’s a dead giveaway for a mechanical bind. Then I’ll clean and relubricate the mechanism. If the speed improves, I know I’ve got the fix.
|
This pattern is well-documented. There are known service bulletins for certain model years indicating increased susceptibility to moisture ingress in the door cavity. Models like the Dacia Sandero, Logan, and Renault Clio IV (2012–2019) are particularly prone. But remember, if the motor hums, the switch is sending signal, the wiring is intact, and the LIN bus isn’t throwing codes like B1D—then you’re dealing with a mechanical bind, not a communication or fuse issue.
My Approach to Fixing It
Once I’ve confirmed it’s a mechanical issue, here’s how I usually tackle it, starting with the easiest and moving to the more involved.
DIY-FEASIBLE: Clean and Lubricate the Mechanism
PROFESSIONAL-ONLY / DIY-ADVANCED: Replace the Regulator Assembly Professional Only
NON-REPAIRABLE: Replace the Whole Assembly
TEMPORARY / LAST-RESORT: Thaw with Controlled Heat
Post-Repair Validation: Don’t Skip This Step
Just putting the door panel back on isn’t enough. You need to verify the repair actually worked and that you haven’t created new problems.
If you cleaned and lubricated the mechanism, run the window through at least 10 full up-and-down cycles using the switch. It should move smoothly, without hesitation, groaning, or grinding. If you have a clamp meter, monitor the motor current. A healthy draw is under 12 amps. Spikes above that mean you’ve got residual binding somewhere.
If you replaced the regulator, the test is more thorough. Operation should be silent and smooth. If your car has auto-up/down, you’ll need to reinitialize that function—usually by holding the switch up for 2–3 seconds after the window fully closes. Then, step outside the vehicle and check the alignment. The glass should sit perfectly flush with the rubber door seals along its entire length. Any gap or tilt means misalignment, which leads to wind noise, water leaks, and unnecessary stress on your new regulator. A misaligned window can also falsely trigger the anti-pinch sensor, which is a real pain.
Cost, Risk, and When to Walk Away
Let’s be realistic about cost and risk—because that’s what guides the decision on whether to repair or just live with it. I tell my customers, don’t throw good money after bad.
| Repair Type | DIY Cost | Shop Cost | Success Rate | Secondary Risk if Failed |
|---|---|---|---|---|
| Clean & Lubricate Mechanism | $15–$25 (lubricant, tools if not owned) | $100–$150 (1 hour labor) | 70% (effective only if corrosion is superficial) | Progressive failure—continued use may lead to complete regulator seizure or motor burnout. |
| Replace Regulator Assembly | $150–$300 (OEM or quality aftermarket part) | $400–$600 (part + 1.5–2 hours labor) | 95% (with correct installation) | Improper installation risks glass breakage, water leaks, or motor damage. Misalignment may trigger anti-pinch faults. |
That 70% success rate for cleaning should tell you something: it’s often a temporary fix if the corrosion is advanced. On older Dacia or Renault models—especially those with high mileage or repeated exposure to winter conditions—the cost of a proper repair can be hard to justify. My rule of thumb: if the repair cost exceeds 50% of the car’s market value, you need to seriously consider if it’s worth it. Is this the driver’s window in a winter climate? Then yes, it’s a safety and usability issue, you probably need to fix it. A rear passenger window in a car you’re not keeping much longer? Maybe you can live with manual assistance or just leaving it closed.
Also, factor in the “Dacia Sandero window repair cost” in your specific region—labor rates vary wildly. In some areas, shops charge more for labor than the part itself. If you’re handy, even a regulator replacement can be a DIY win with the right tools and patience, saving you a chunk of change.
Keeping It From Happening Again: Prevention
Once you’ve fixed it, you want to keep it fixed. Prevention comes down to one thing: managing moisture in that door cavity. This is what I tell all my customers.
My Prevention Checklist
-
Inspect Regularly: Twice a year—ideally in the fall before winter hits and again in the spring—take those door panels off. It’s a quick job once you know how. Look for new rust, degraded lubricant, or any signs of water pooling.
-
Clean and Relube: While you’re in there, clean up any gunk and reapply a thin coat of that silicone-based lubricant to the rails and cables. It’s cheap insurance.
-
Clear the Drains: This is huge. The drain plugs at the bottom of the door are the number one reason water sits in there. Use a small screwdriver or a piece of wire to poke out any leaves, dirt, or ice. Clogged drains lead directly to “condensation in door” issues.
-
Check the Moisture Barrier: If you’ve had issues before, take a good look at the plastic sealing membrane behind the door panel. If it’s torn or improperly seated, it’s letting moisture in. Replace it with fresh butyl tape—it’s cheap and critical.
For early detection, use your ears. On cold, damp mornings, listen closely when you operate the window. A slightly slower motor, a new hum, or any hesitation can be the first sign of binding. Catch it early, and a quick re-lube might save you a full replacement down the road.
